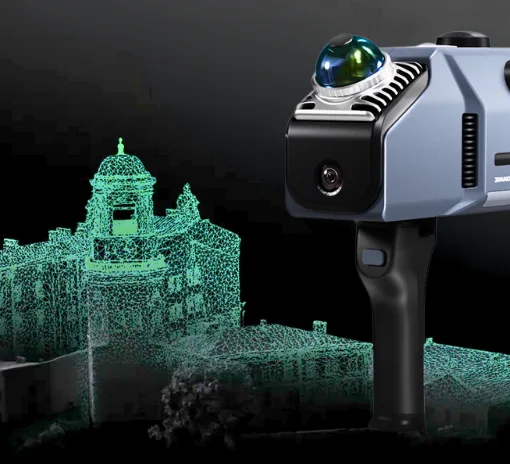
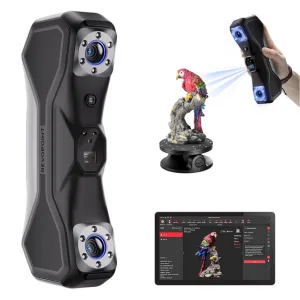
Launched via Kickstarter, the MetroX by Revopoint marks a significant milestone as metrological grade 3D scanning technology becomes noticeably accessible under a thousand-dollar price tag. The device offers multiple scanning modes in both Marker Scan and Feature Scan options. Now, it’s possible to scan metallic and shiny objects in specific modes. The sophisticated and highly customizable automatic turntable aids in various projects, including color scans. In this review, we will test a variety of objects across different modes. As usual, we’ll wrap up with final thoughts and a list of pros and cons.
Table Of Contents (Jump to a Section):
- Specifications
- What’s Included – Accessories
- Setup and Design
- Revo Scan 5 MetroX
- Calibration
- Testing and Results
- Compare to Other 3D Scanners
- Conclusion and Pros & Cons
Where to Buy the MetroX
Price: $899-$1,187
Compare the Prices & Bundles:
Amazon | AliExpress | Official Website
Revopoint MetroX Specifications:
Scanning Type: Handheld and Desktop
Built-in Chip Computing: Depth Map Computing
Technology: Multi-line Laser Scan and Full-field Structured Light Scan
Scannable Object Size: Small to Medium
Outdoor Scanning: No
Single-frame Precision, up to: 0.01 mm
Output File Formats: PLY, OBJ, STL, ASC, 3MF, GLTF, FBX
Single-frame Accuracy, up to: 0.03 mm
Ready to Print 3D Models: Yes
Working Distance: 200 ~ 400 mm
Supported Accessories: Dual-axis Turntable, Marker Block Kit
Color Scanning: Only in Auto Turntable Mode
Compatible Operating Systems: Windows 10/11 (64-bit), macOS 11.0 or better
Minimum PC Requirements:
macOS:
CPU: M1 Pro/Max/Ultra
RAM: ≥ 16GB
Windows:
CPU: Intel i7 10th Gen 10700 or AMD Ryzen 7 5800
RAM: ≥ 32GB
GPU (Optional): NVIDIA GeForce RTX 3050 (8GB)
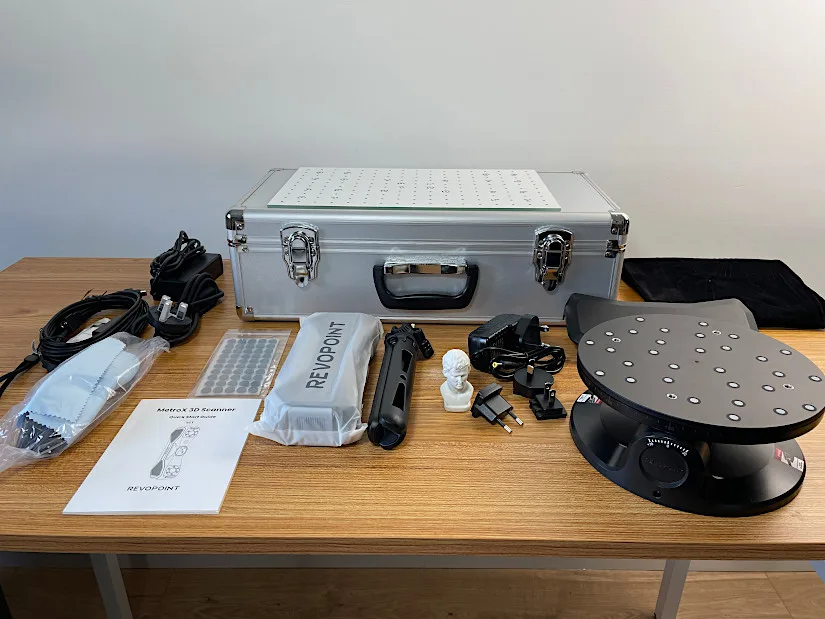
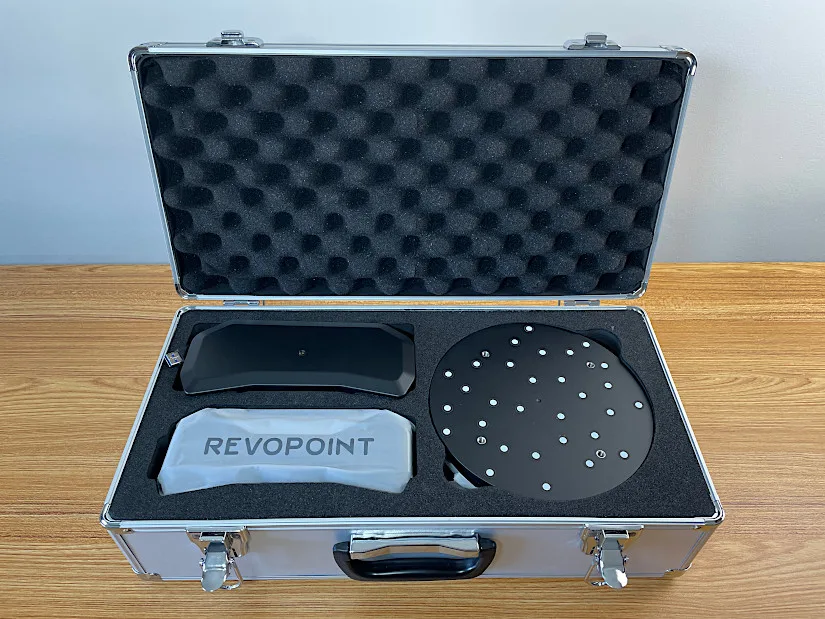
What’s in the Box
• MetroX 3D Scanner • Wrist Strap • Tripod • Scanner Cradle • Power Adapter • Dual-axis Turntable • Calibration Board • Markers (6 mm) × 500 • USB Type-A to Type-C Cable • USB Type-C to Type-A Adapter • Carrying Case • Sample Bust • Quick Start Guide • Certificate & Warranty Card
©3DWithUs – Photo: Max Funkner
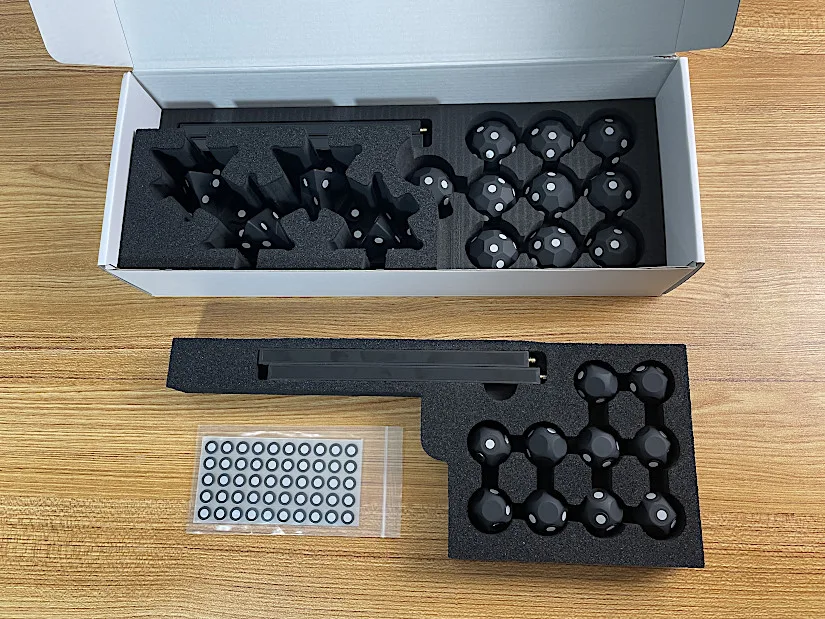
The MetroX Advanced Edition comes with the Marker Block Kit which include: • Ball Marker × 10 (Magnetic) • Dome Marker × 10 (Magnetic) • Pyramid Marker × 4 (Magnetic) • Bar Marker × 4 • Markers (6 mm) × 500.
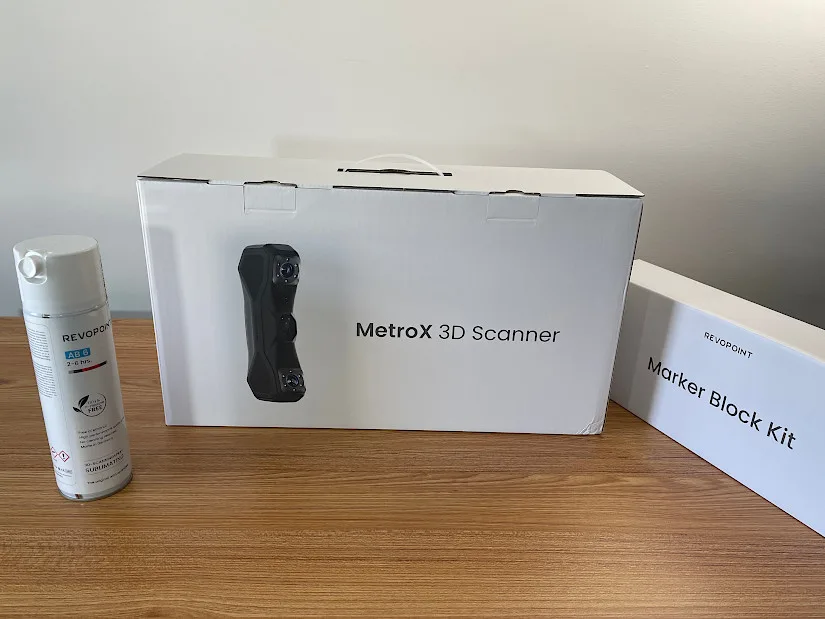
Another optional product that is important to mention and important to have is Scanning Spray. This spray helps to scan shiny or black objects in certain scanning modes. It can be purchased via the official website and on Amazon.
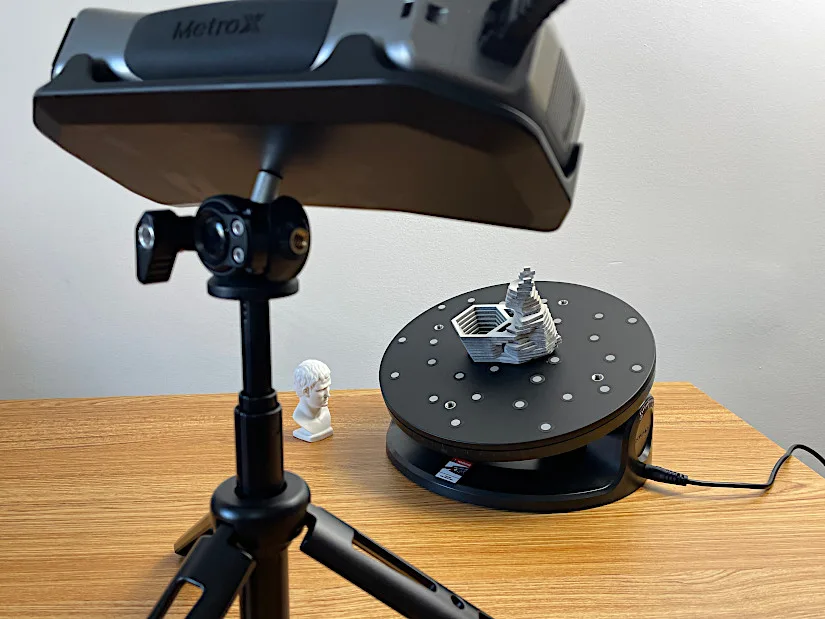
Setup and Design
The MetroX Advanced Edition, apart from spray, comes in one box. To protect the MetroX, it has a separate metal case. This sturdy case does look very nice and should do the protecting job very well.
©3DWithUs – Photo: Max Funkner
The MetroX, designed for indoor use only, must always be connected to a power supply and computer. It is suitable for operation in mechanical workshops and car garages. Although the included dual-axis turntable is primarily intended for use in Auto-Turntable mode, I also found it useful as a platform in Cross Lines mode.
2,798 backers contributed $2,304,941 to help make this project a reality.
The powerful blue light line 3D scanning is a standout feature of this scanner, marking the increased accessibility of such technology at a relatively low price, making it available to a wider audience. Just a few years ago, this technology would have cost more than ten thousand dollars, but now it’s available for under a thousand dollars.
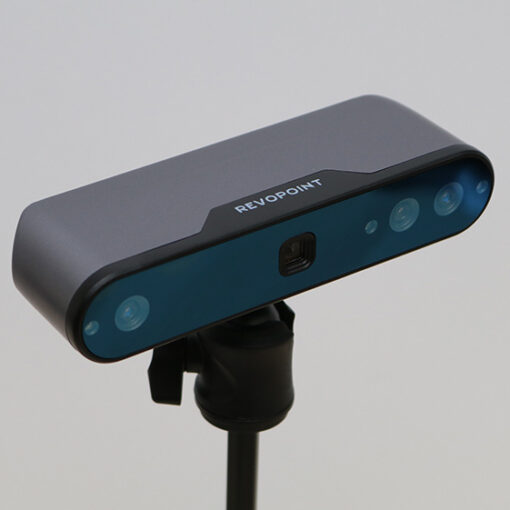
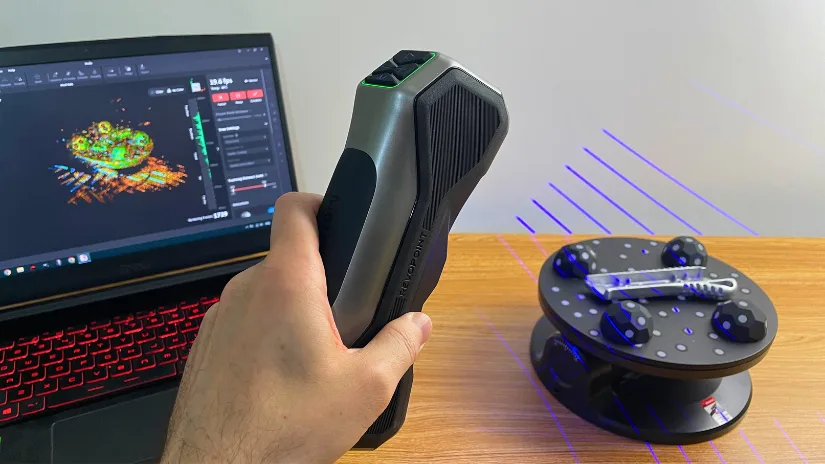
Revo Scan 5 MetroX
The well-known Revopoint Revo Scan 5 software now features a special MetroX-only edition. The most recent update, focusing on GPU acceleration, boosts speeds up to 60 FPS; at the time of writing this article, this update was available only for Windows users. My testing coincided with the announcement, allowing me to evaluate the software both before and after the update. I observed that 3D scanning on my laptop became more stable and faster.
Requirements: Unfortunately, most 3D scanning and modeling software generally require powerful computers. I experienced difficulties with a few scans because my laptop wasn’t powerful enough. The scanning speed was the most affected, with micro lags delaying the process. In several instances, my laptop couldn’t process the scanned results, forcing me to avoid using the One-click Edit option and reduce the points count in the Fusion and Simplify tab beforehand. Update: with the new laptop, both the scanning and scan processing experience greatly improved.
– Tip. With an underperforming PC, remove marking and make the RAW file lighter in Fusion before processing in Mesh.
Calibration
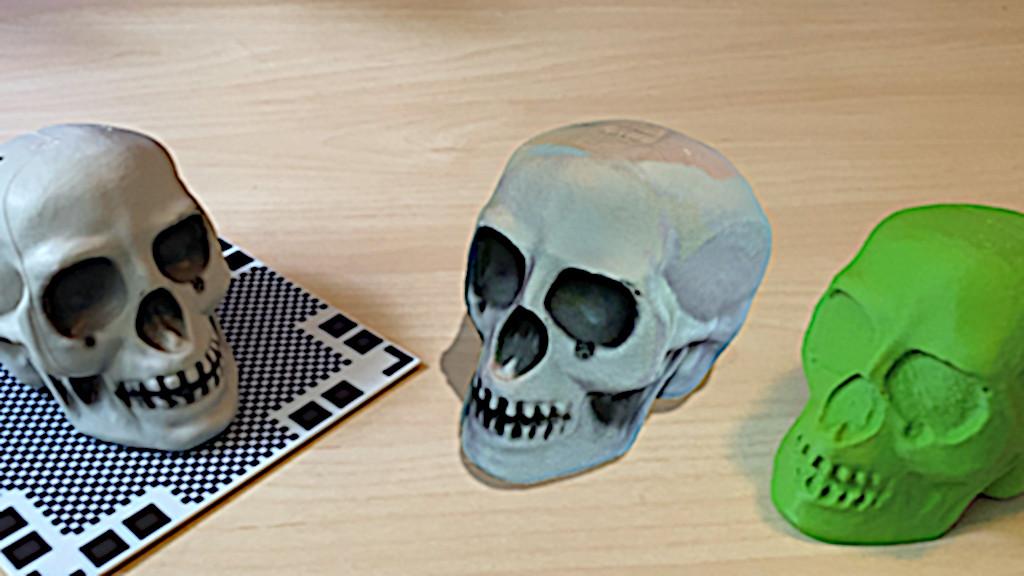
Initially, I skipped calibration and started scanning straight away. However, while using Auto Turntable Color Mode, I noticed that the textures weren’t aligning properly, so I decided to run the calibration. The process was straightforward, with all instructions provided in the Revo Scan 5 software. I must admit, some patience and skill are required to calibrate it, as the device is heavy and holding it in a certain position takes time. I was pleased to find that the calibration fixed the texture mapping issues.
I thoroughly tested the MetroX by scanning various models in different modes. Here are my results, along with 3D prints produced from these scans.
Testing and Results
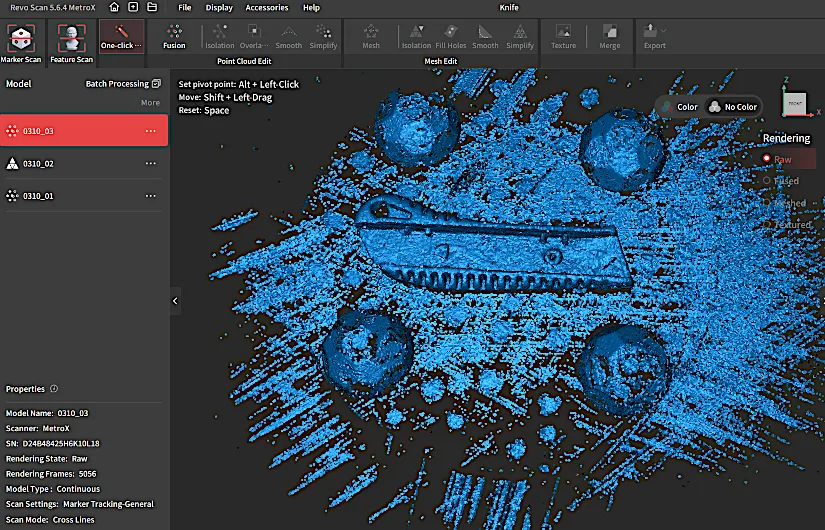
Marker Scan – Cross Lines Mode
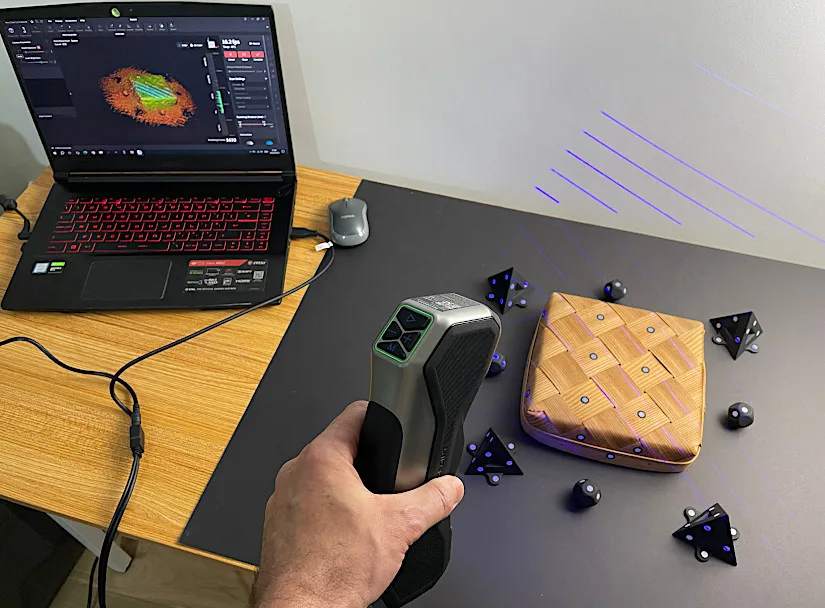
This is the mode that worked the best for me and I feel it deserves high praise. It is a high precision mode where shiny metallic objects (not mirror shiny) can be effortlessly scanned with accurate precision. I would say engineering grade precision. Therefore, here and on social media, it is possible to find examples of scans of complicated designs effortlessly scanned in this mode.
©3DWithUs – Photo: Max Funkner
– Pause, check, continue. Even with my slow and laggy laptop, I was able to scan my objects. Although I was short on time and my scans didn’t exceed 8k frames, I could see the potential nevertheless. Indeed, there are scans online with 80k frames. I found it a useful feature to be able to pause and check the scan before continuing, as it gives an idea if the scanning will work or not, saving time as a result.
– Merge Feature. After scanning both sides of the Snap-Off Blade Knife Handle, I managed to merge them using the Merge feature. I have to admit it took me a few attempts to get it right as alignment was tricky to master. It is important that both sides had overlays so the software could recognize the items’ positions. In the end, it worked for me, and I am super happy with the result.
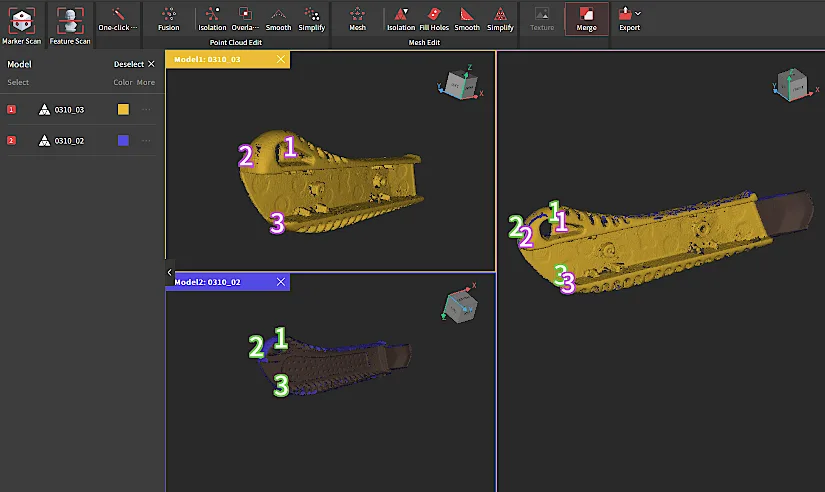
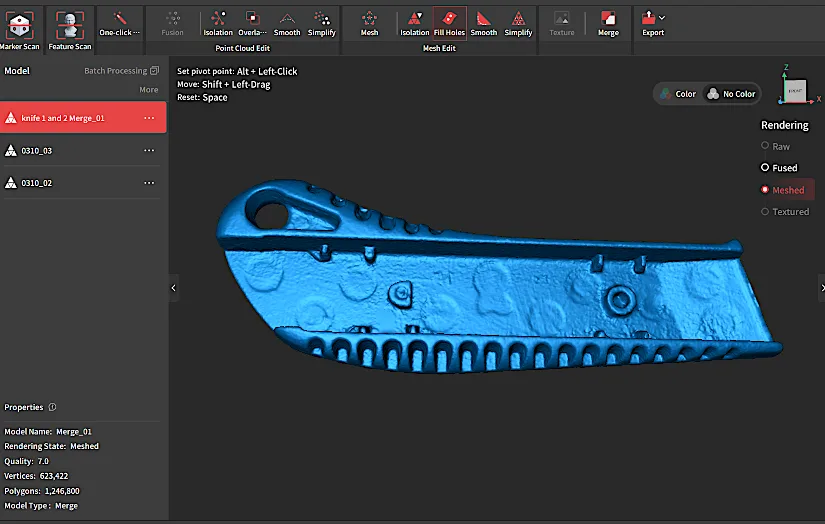
As my Snap-Off Blade Knife Handle was 3D scanned, scans merged, and holes filled, the next step will be to 3D print it. Coming soon…
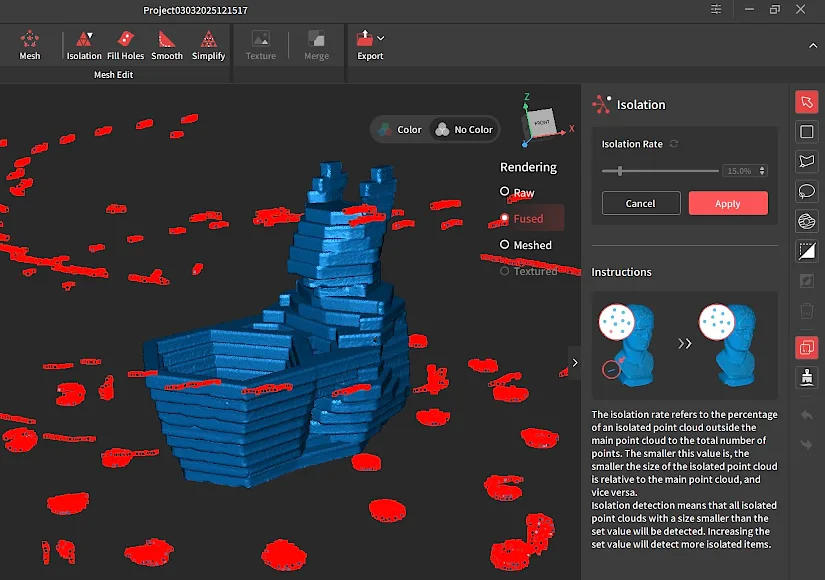
– Markers. Another scan I did using Cross Lines Mode is the Handcrafted Basket Lid. Unlike with the knife handle, where I didn’t use markers on top of the object, in the lid’s case, I placed many of them on flat surfaces. ‘More Markers Required’ is a frequent message when scanning in Marker Scan Mode. More markers are better, but clearing the holes after them can be laborious, especially if they are placed on curved surfaces.
Marker Scan – Full Field
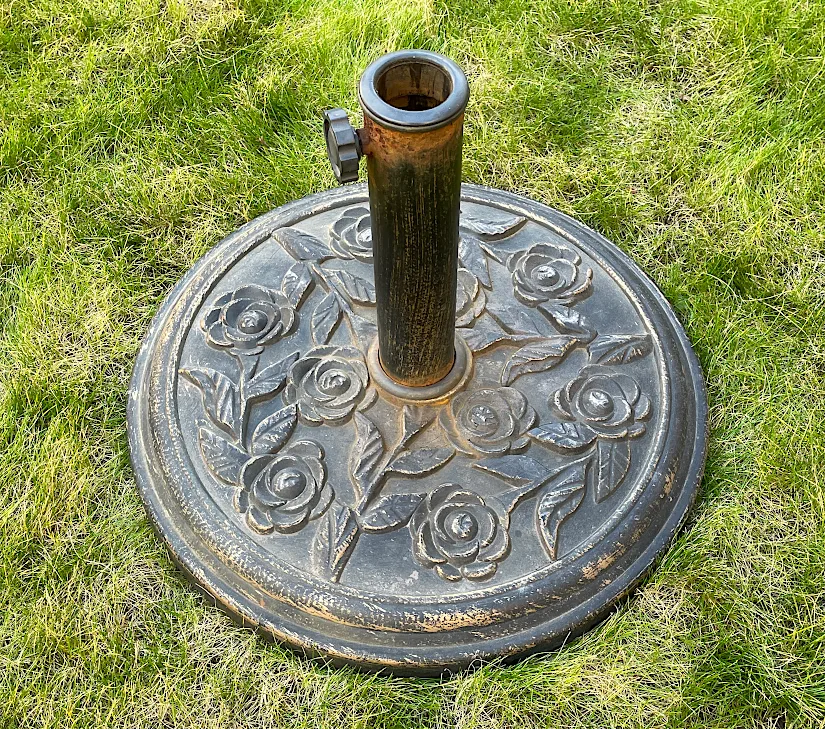
– Big Iron Cast Parasol Base. This is a tricky object. It is generally black with rusty orange spots, and the cylinder has no distinctive features. It took me a few attempts to get it right, one of which was in Marker Scan – Full Field Mode.
©3DWithUs – Photo: Max Funkner
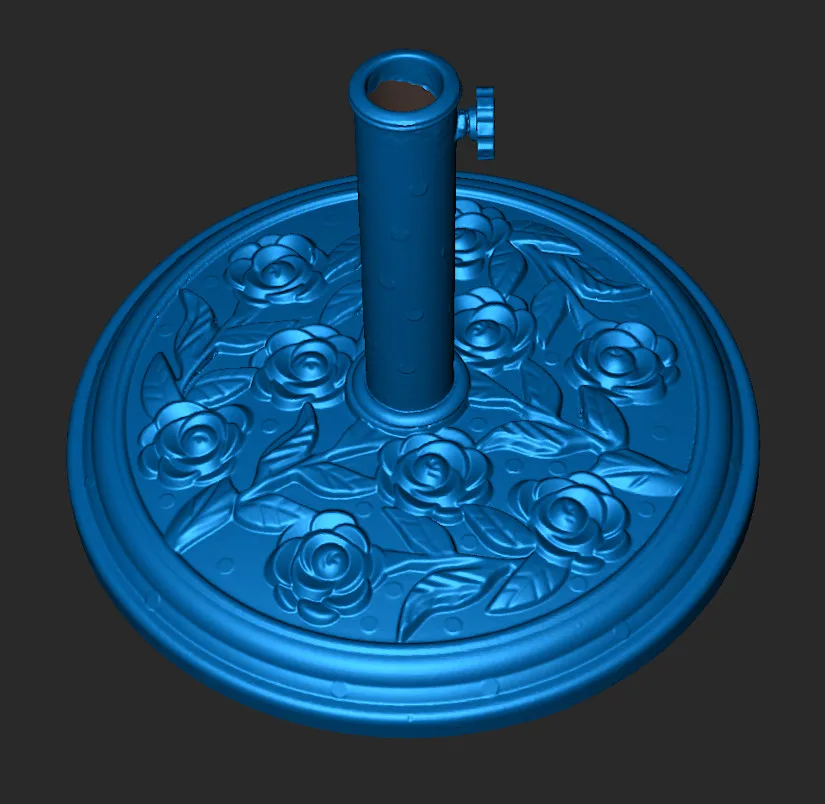
The scan was pretty quick. Applying the markers took me longer than doing a 3D scan. This generally gives the impression that even large objects, with enough markers, can be scanned precisely with intricate details. However, scanning the same object in Feature Scan – Full Field Mode didn’t work. When scanning the base, the ‘Lost Tracking’ error appears on the screen, and scanning the cylinder feature also didn’t work.
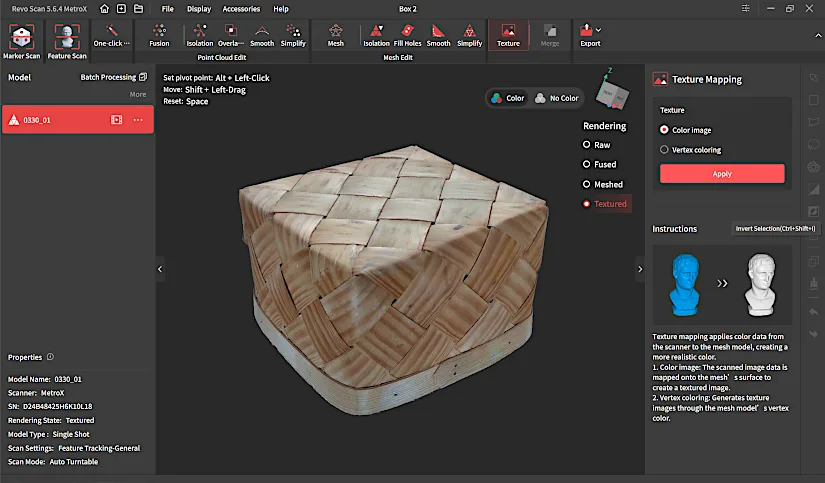
– Artisan Wooden Basket. We’ve had this basket for more than ten years now, and it seems like we will have to throw it away soon. Thanks to 3D scanning, I managed to preserve it in digital form and 3D print it as well.
©3DWithUs – Photo: Max Funkner
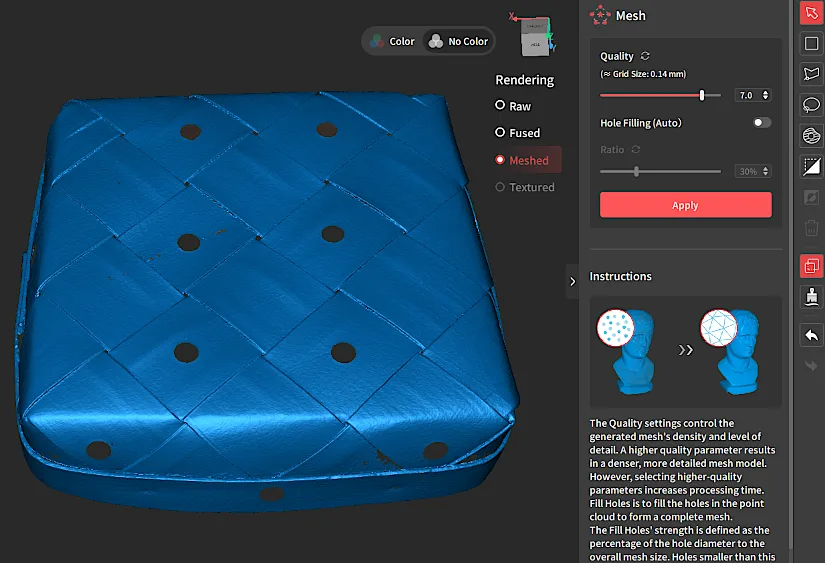
It took me about 8K rendering frames to complete the scan. The One-click Edit feature did its trick, and I cleaned up the scan right in Revo Scan 5. Automatic marker removal and hole filling were straightforward using the tools on the right side of the software.
To 3D print such an object, I still needed Blender. There, I cut the base evenly and used the Solidify Modifier to make the wall 1mm thick. It worked very well. In the 3D printing Creality Print slicer, the object was additionally repaired and positioned for 3D printing.
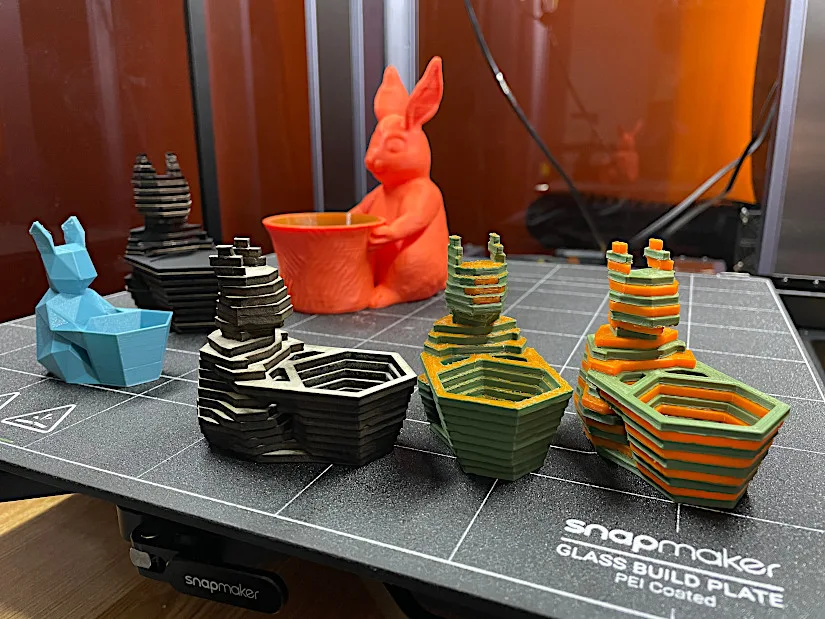
©3DWithUs – Photo: Max Funkner
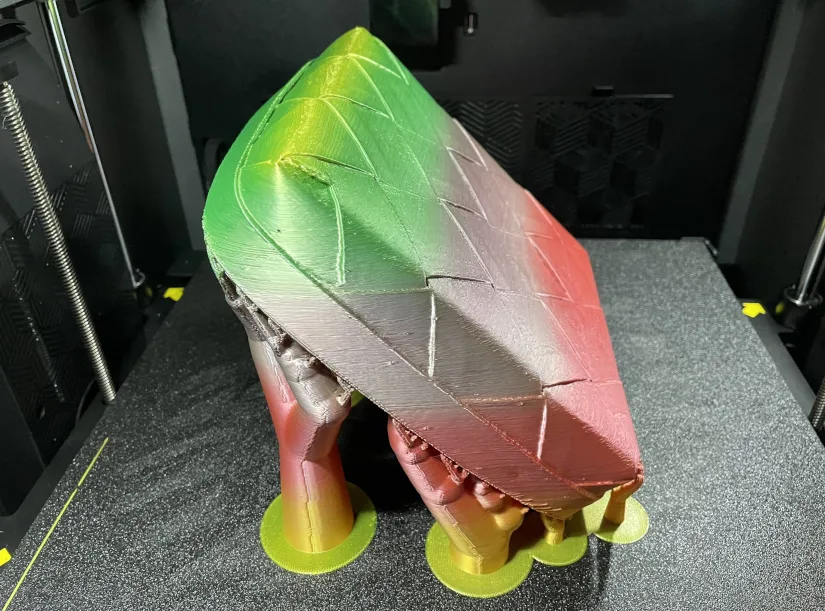
To preserve certain features on the lid, I had to position the lid at 45 degrees and activate the Organic Support feature. The Creality K2 Plus did a good job printing such a volumetric object very quickly. It took only 9 hours to print it.

©3DWithUs – Photo: Max Funkner
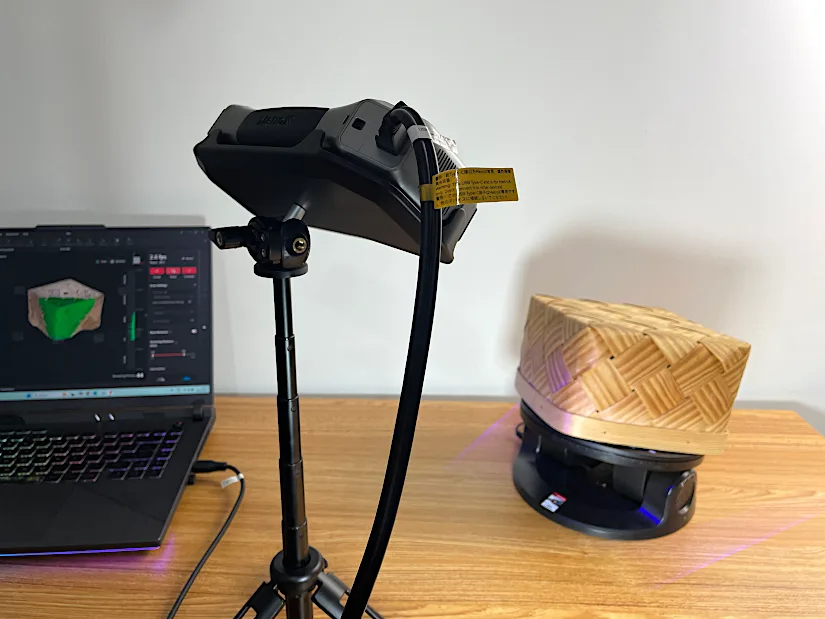
I scanned the basket base using Feature Scan – Auto Turntable – Color Mode.
Auto Turntable Mode
– Basket – Color Mode. Even though my basket looked too big for this turntable, scanning worked anyway. I fixed it with sticky dots to hold it on the turntable when it was at a 15-degree angle.
©3DWithUs – Photo: Max Funkner
I haven’t proceeded with this scan for 3D printing just yet, but the result looks promising. Color Texture Mapping also worked well, making this basket suitable even as a 3D asset for virtual worlds, etc.
– Dual-Axis Turntable. The Revopoint Dual-Axis Turntable is a spectacular piece of hardware. It requires a Bluetooth connection to the laptop to set the desired turning angle and sequence, but it can also be used without a connection. It was straightforward to use, and slightly modified default settings worked well for me.

©3DWithUs – Photo: Max Funkner
The main 3D scan cleaning was effortlessly completed using Revo Scan 5 MetroX. After exporting the model in .STL format and uploading it to the Orca slicer for 3D printing, it automatically detected and repaired common manifold issues. Then, with the addition of color painting and some support structures, the model was successfully 3D printed in multiple colors.
©3DWithUs – Photo: Max Funkner
Featured above is our Easter Bunny model, which we use for various testing and concept designs. It was initially created as a high-poly model, then decimated into low-poly art, sliced for laser cutting, glued back together, 3D scanned using MetroX, and finally 3D printed in dual color on the Snapmaker Artisan 3-in-1.
– Color 3D Scanning. It is important to note that color 3D scanning works only in Feature – Auto Turntable Mode. I was able to successfully scan the matte colored wooden handcrafted basket, but could not scan models with a shiny glossy finish such as miniature car models.
Previously, Andrew Sink wrote in detail about Dual-Axis turntable 3D scanning using Revopoint POP 3. Read his review and see more scan results in his article.
Compare to Other 3D Scanners
Compare to the Revopoint other 3D scanners series:
The Revopoint MetroX is a different grade laser system compared to other Revopoint products. It is not portable and does not have a power bank. Designed for indoor use, it is more suitable for professionals who scan machinery parts, such as car parts, or other engineering-grade designs.
As 3D scanning technology becomes accessible, there is also competition with offerings from brands like 3DMakerPro, Creality, and Einstar. Read more about other 3D scanners on our website.
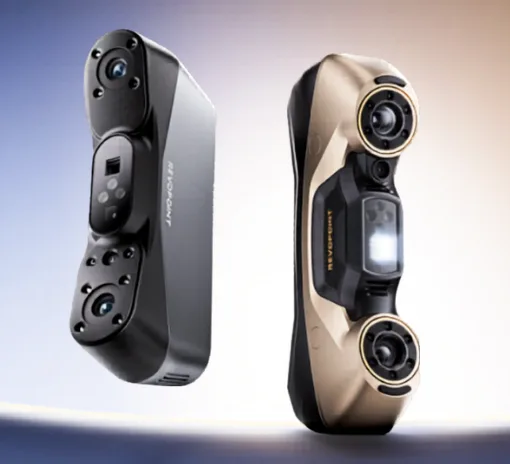
Within this category, some of the closest alternatives to the MetroX are the EINSTAR 2 and the newer EINSTAR Rockit. Both combine infrared and blue laser technologies, giving users a balance between faster large-area capture and more precise detail scanning. I tested the EINSTAR Rockit a year later, and the overall difference is quite clear: MetroX feels heavier and generally comes in at a lower price point, while Rockit offers a smaller and lighter design, wireless operation, and more sophisticated hybrid scanning features.
Have questions? Feel free to ask in the comment section below.
For a wider discussion or to share your own MetroX scans, join us in the forum:
Conclusion and Pros & Cons
Compare the Prices & Bundles:
Amazon | AliExpress | Official Website
Revopoint MetroX Review
Review Summary
We celebrate the accessibility of such sophisticated technology to broader markets. 3D scanning technology, previously priced at tens of thousands of dollars, is now available for under $1,000.
In our evaluation, we scanned various objects, including challenging ones like black and shiny metallic objects, and the scanner delivered good results. The Revo Scan 5 MetroX software is user-friendly, providing clear guidance through the scanning process, including scanner movements. Not all objects could be scanned in the preferred modes. Nevertheless, the availability of various modes allowed us to experiment and achieve satisfactory results in other modes.
The Revopoint team continues to bring sophisticated yet affordable 3D scanning technology to a wider market and we look forward to seeing them at trade shows to learn more about new product launches.
Pros
-Low price
-Multiple modes
-Sophisticated turntable
-Precise scanning
Cons
-Not all objects are 3D scannable
-Learning curve, patience required
-High PC requirements