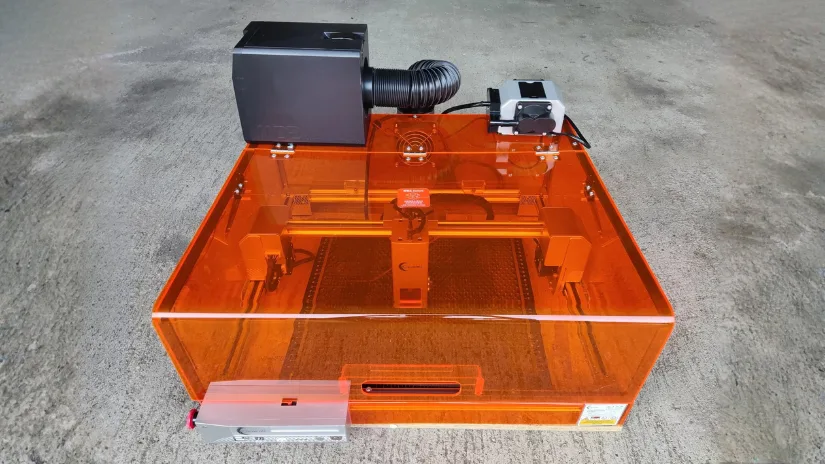
Headquartered in Hong Kong, Carverall produces an extensive range of laser engravers and cutting machines, serving creators, small studios, educators, and entrepreneurs worldwide. The Carverall X1Pro (model JL9) is a 20W diode laser engraver and cutter. It’s a mid-range machine that supports a wide range of materials and can be upgraded with multiple optional accessories. In this review, I will test the machine with materials including wood, cork, acrylic, anodized aluminum, leather, and slate stone. As usual, the article concludes with a review summary and a Pros and Cons section.
Although the X1Pro was provided free of charge for evaluation, this review is based solely on my hands-on experience and personal observations. I won’t hesitate to point out any drawbacks and issues encountered during testing.
Disclaimer: Laser cutting and engraving can be hazardous if operated improperly. Please follow the safety guidelines, such as wearing eye-protective goggles and using the machine enclosure while operating.
Table of Contents
Where to Buy the Carverall X1Pro
Price: $428 – $538
Compare the Prices & Bundles:
Official Store | Amazon | AliExpress
What’s in the Box
The machine and its accessories ship in separate packages. If you order the standalone machine, then you will receive the following:
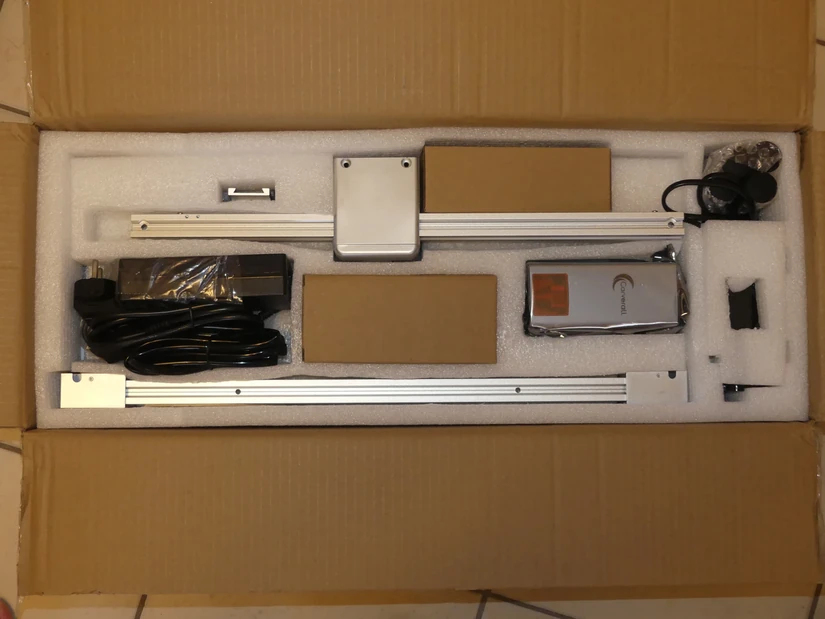
©3DWithUs – Photo: Dimand Marton
All parts were packaged carefully and securely. Everything arrived in perfect condition, with no scratches or dents.
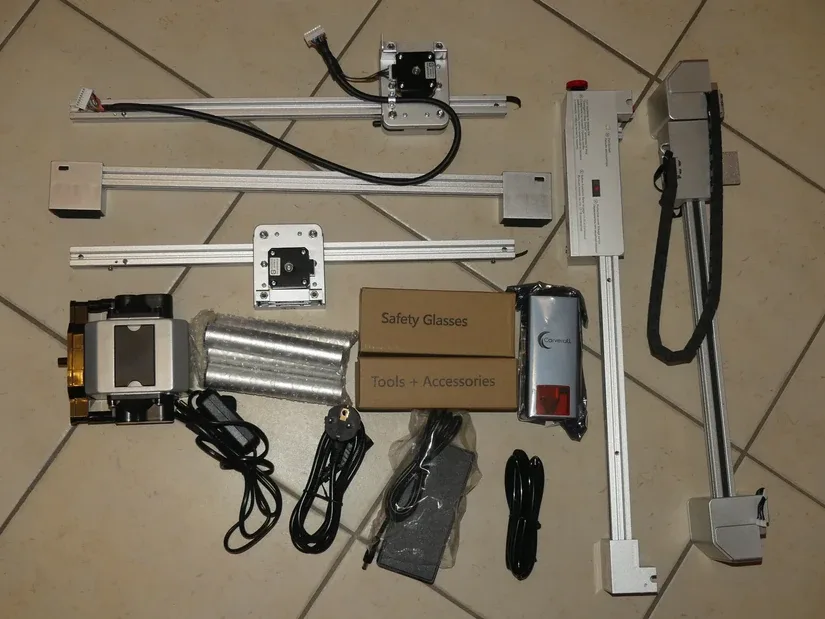
Contents: X1Pro / JL9 core parts, 20W laser module, air assist and air hose, heightening columns, power adapter and cable, safety glasses, USB cable for PC, operating keys, MicroSD card and card reader, hex wrench, Allen keys, screws, marker, brush, cable ties, black cardboard, plank board (2pcs), and Kraft paper (4pcs).
In my case, the product manual was missing, but after reaching out for support, they sent me one. Also, the included sample materials were a little lacking in size and quantity, so make sure to stock up on them at the Carverall store or on Amazon before receiving the machine.
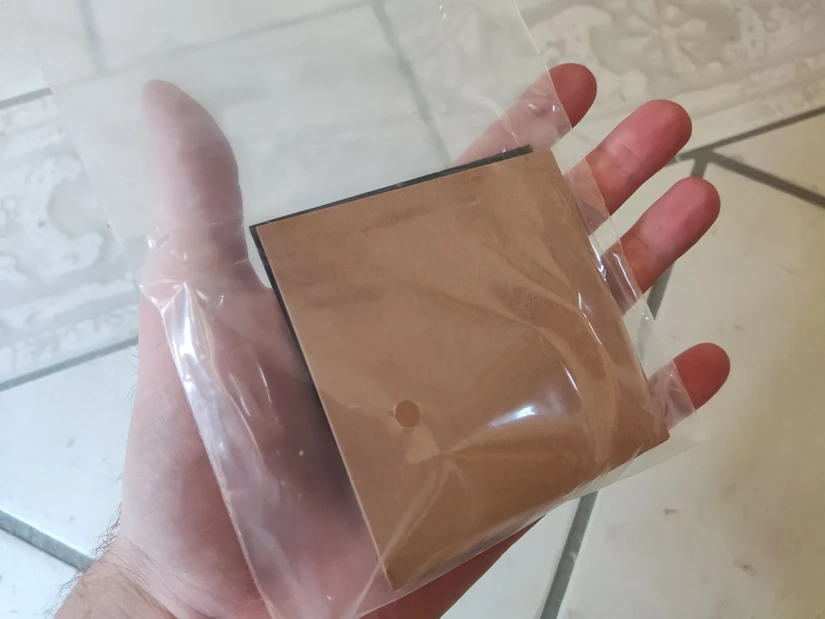
©3DWithUs – Photo: Dimand Marton
Tested Accessories
Carverall was kind enough to provide me with some of their accessories as well: enclosure, MD2 smoke purifier, and honeycomb bed. They are available as separate products and come in their own packaging:
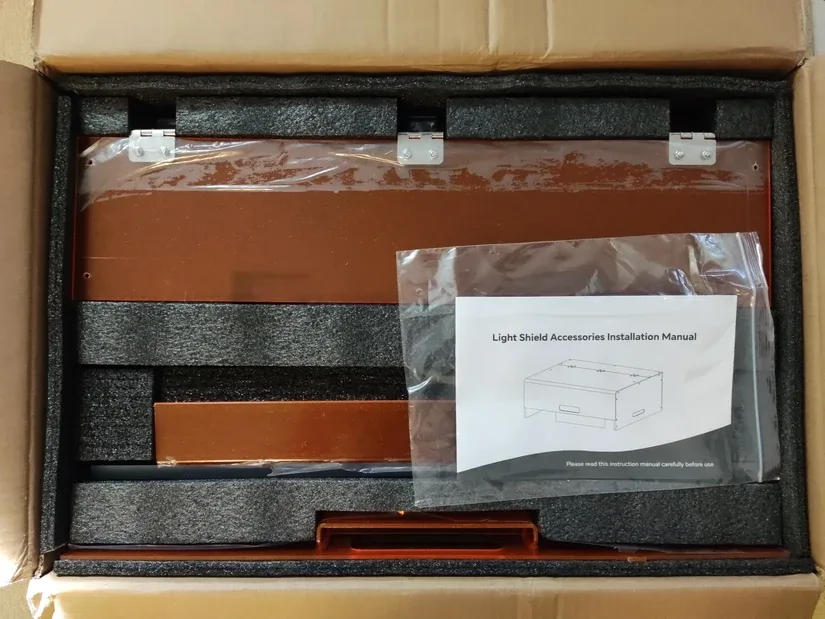
©3DWithUs – Photo: Dimand Marton
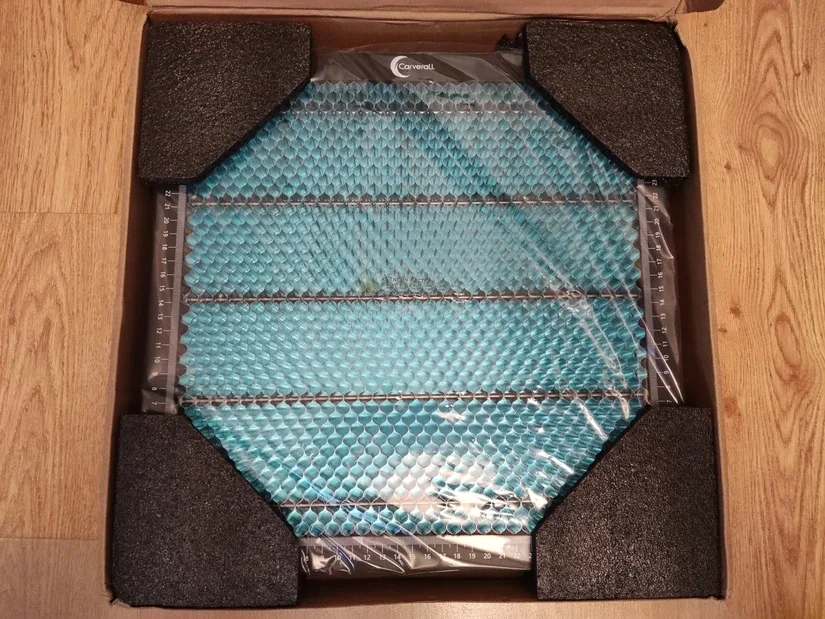
©3DWithUs – Photo: Dimand Marton
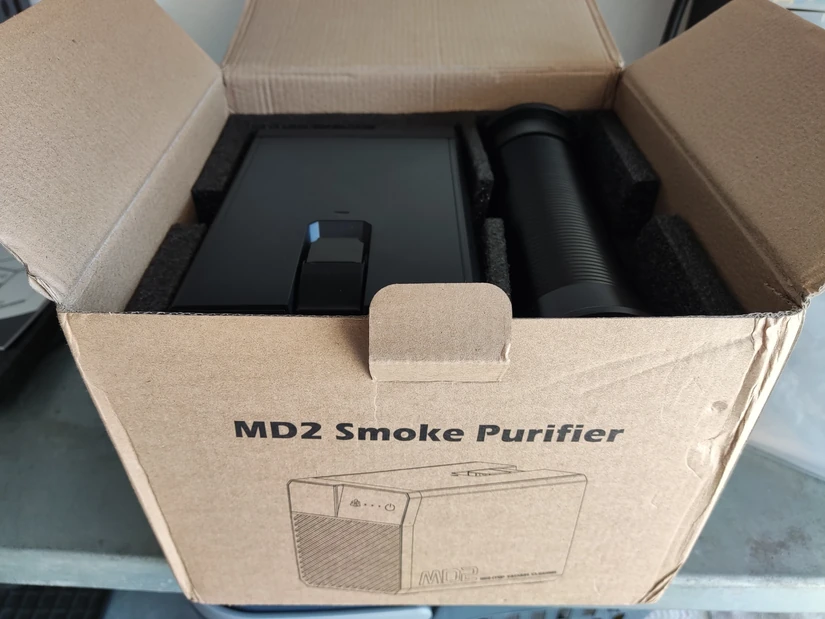
All three accessories arrived safely in mint condition. They come with their own product manual and assembly tools. Please note that the product may be slightly revised over time, with additional items or features introduced. Visit the official product page for the latest product contents and specifications.
Specifications
- Product Name: Carverall X1Pro 20W Diode Laser Engraver | Model JL9
- Product Type: Class 4 laser engraver (Class 1 with enclosure)
- Work Area: 300mm X 300mm (with manual Z-focus adjusting)
- Supported Materials / Modes: 3/5/7 mm focus modes for cutting and engraving plywood, acrylic, aluminium (marked), leather, glass (marked), …
- Connectivity: Serial (cable) and wifi for CutlabX (desktop and app)
- Supported Software: LightBurn, CutlabX, LaserGRBL
- Price: €375 for the standalone machine, €481 with the enclosure
Unboxing and Setup
For assembly, you can follow either the product manual or the online video guide. The manual is straightforward and apart from some problems mentioned below, it was easy to follow. The product can be assembled and set up in ~15 minutes. Also, firmware updates are handled through Carverall’s dedicated app, which can be downloaded from their website or from the supplied MicroSD card that comes with the machine. The update process is well documented in the product manual. Moreover, there is no calibration to be performed; the machine can be operated immediately after powering it up, but there is one issue that the manual doesn’t mention:
Securing the Cables
ATTENTION: If you leave this problem unaddressed, the laser may cut through its own cord, possibly causing an electrical fire!
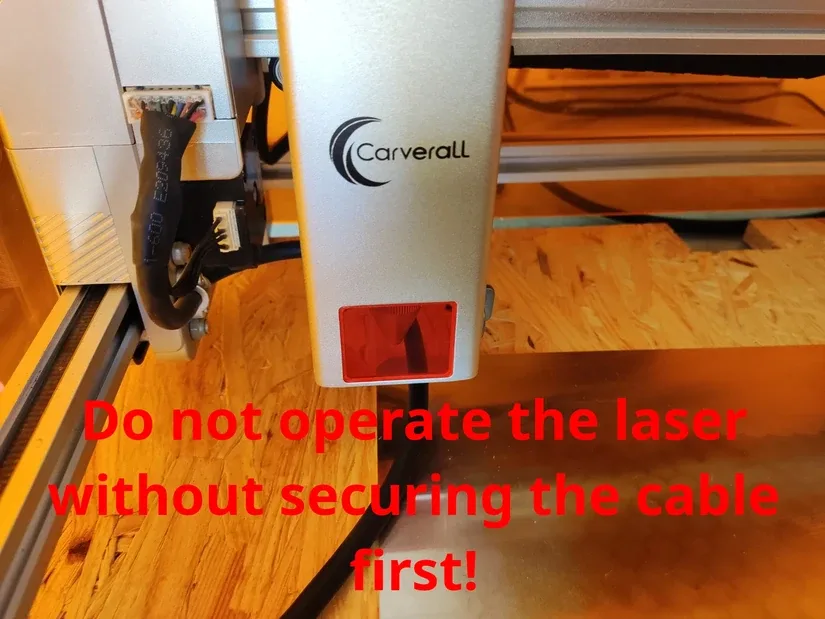
©3DWithUs – Photo: Dimand Marton
If you ordered the enclosure, you can zip-tie the cord to the side panel (See picture below).
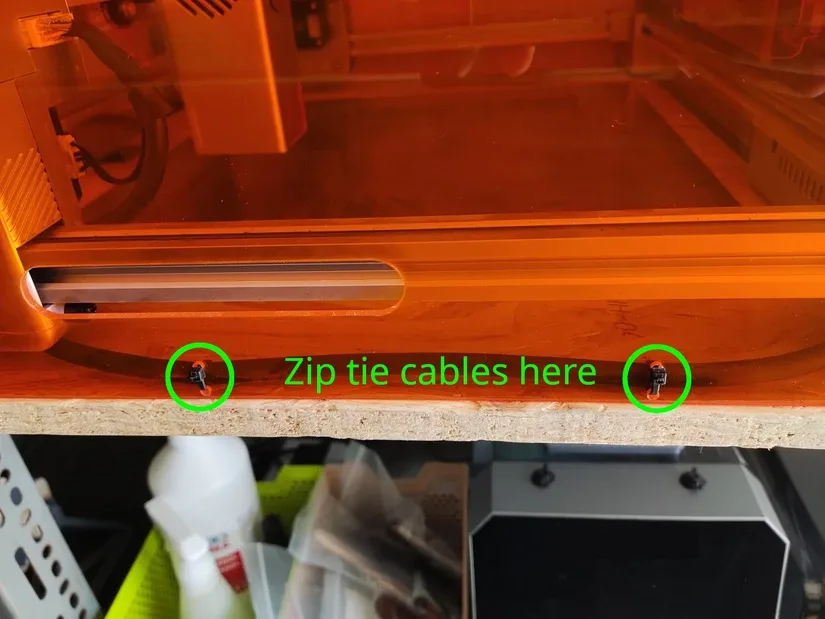
Without the enclosure’s side panel, I found no viable way to secure it.
Another issue with the product manual and the video guide is that there are some discrepancies between the two, like which type of screws to use. The product manual makes no mention of the supplied M5*35mm screws and only advises using the M5*22mm ones, but you would need at least eight of them for the whole assembly, and the product comes with only five. After some testing it seems that some of the assembling steps are compatible with both sets of screws used in the guides.
In my case, I used M5*22mm screws for assembling the XY core and M5*35mm for the riser legs (heightened columns). While installing the legs, I encountered yet another problem: not all the legs could be screwed in. Some of the holes were misaligned with the core. I temporarily resolved the issue by mounting them without screws — though this is not recommended.
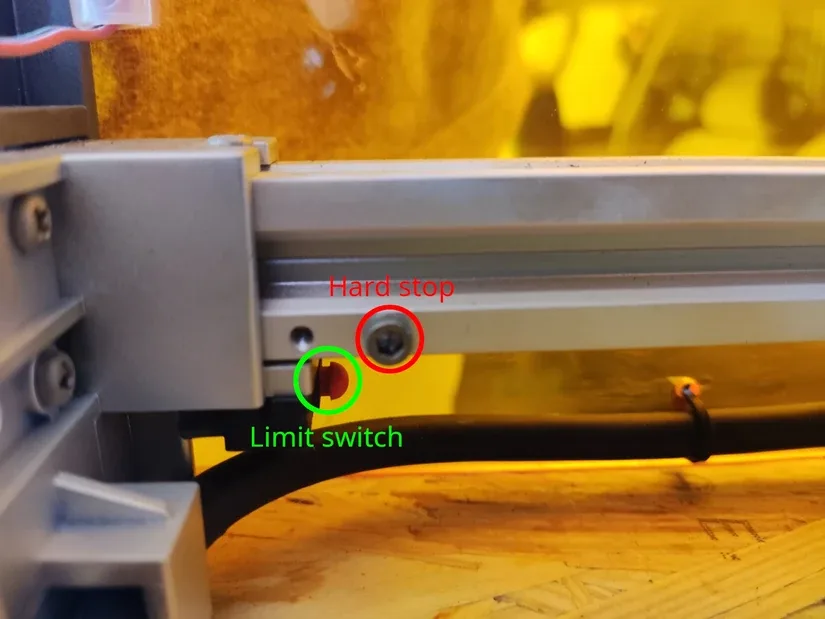
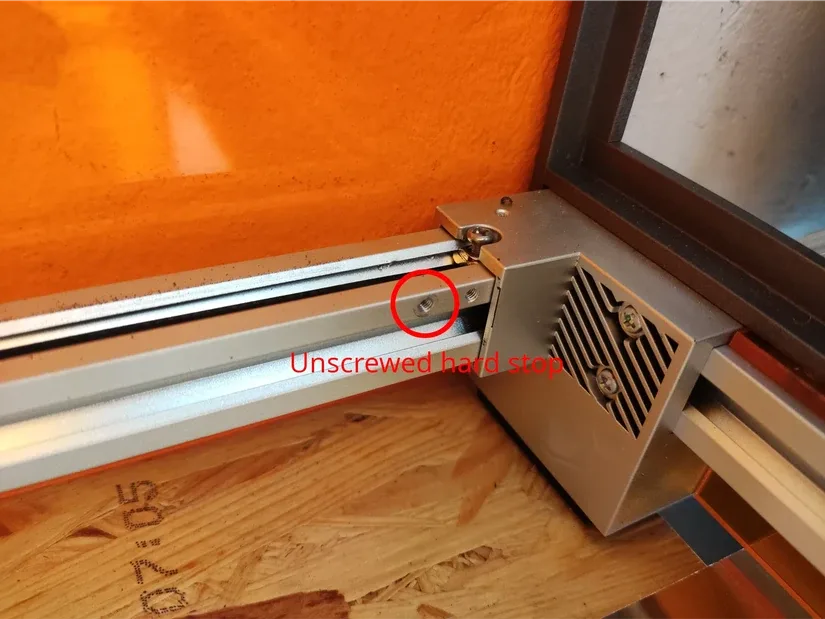
The last issue I encountered was with homing. A hard stop screw prevented the Y-axis from hitting the limit switch on the left side. The manual made no mention of it, so I had to figure it out myself. Luckily, the machine comes with an emergency STOP button, and hitting it quickly shut down the motors, preventing damage to them. After unscrewing the hardstops, the machine worked as expected.
©3DWithUs – Photo: Dimand Marton
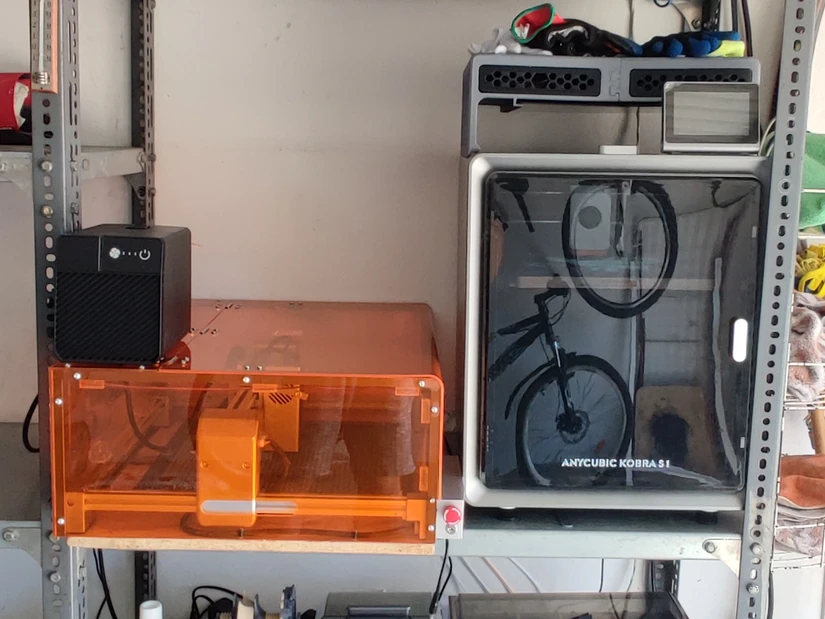
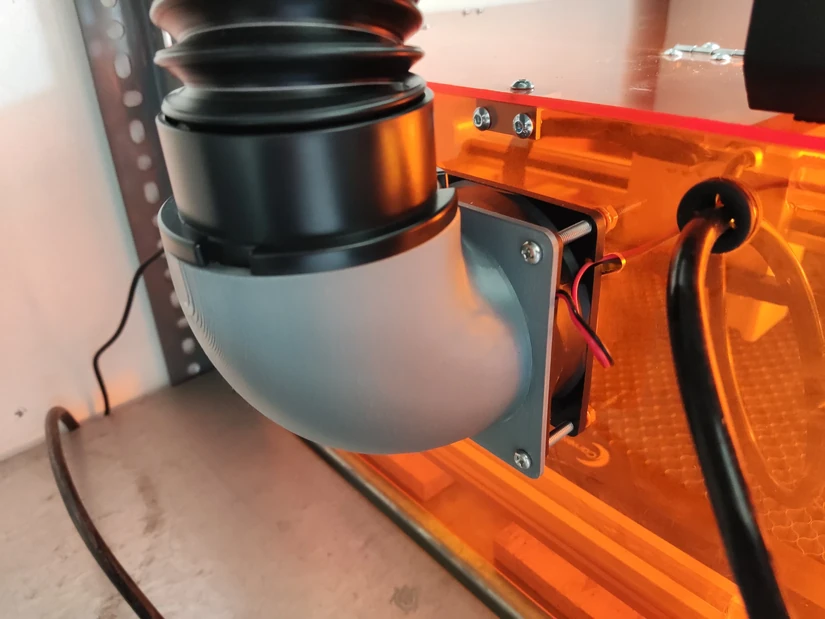
– Exhaust and Purifier. When I was looking for a spot to set up the X1Pro, I noticed I didn’t really have much space for the exhaust. Luckily, I came up with the idea of installing it sideways on one of the garage shelves, next to my 3D printer. It fit perfectly, as if custom-made for the space, leaving just a 1mm gap between the machines. To save even more space, I also designed a 90-degree exhaust port instead of the straight one. I 3D printed it with SUNLU PETG on my Anycubic Kobra S1 and installed it on the X1Pro without a problem. It works flawlessly with the MD2 purifier, and I even added a locking mechanism to further secure the duct. You can download the 3D model for this modification on Printables for free.
©3DWithUs – Photo: Dimand Marton
Design and Features
The machine features a swappable 20W laser module on an XY core with a 300 x 300 mm working area. You can achieve up to 20,000 mm/min speed on the gantry, but since it is a gcode based machine without an input shaper, slower speeds tend to provide better results.
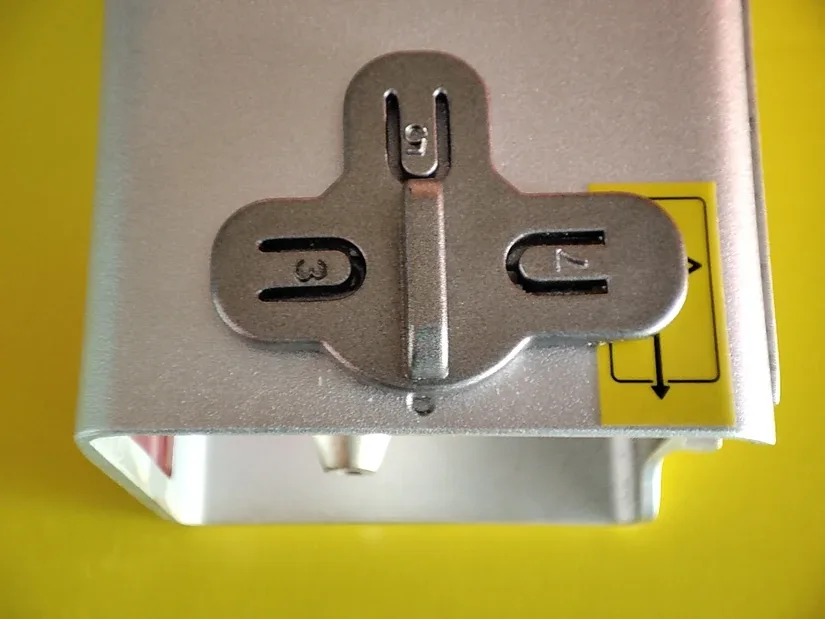
The laser head provides three focus modes: 3 and 5 mm for cutting, and 7 mm for fine engraving. The maximum Z-height of the laser is about ~100 mm (~45 mm with the enclosure). You can engrave taller objects as well if you install the riser legs, which provide about an extra ~130 mm. Also, when using the honeycomb bed, you will sacrifice about ~22 mm in Z-height.
©3DWithUs – Photo: Dimand Marton
– Connectivity. The machine can be operated using a serial connection, Wi-Fi, or a MicroSD card. The best method for me was the serial port, since I could observe the machine logs and adjust any settings on the go in LightBurn.
– Safety. The X1Pro comes with two major safety features: operating keys and an emergency stop button. Without unlocking the machine and setting the emergency button to a ready state, the laser cannot be engaged. Moreover, if the keys are removed during operation, the laser and motors shut off, just as when you press the stop button.
You can read the engraver’s status from the progress bar on the front. Flashes indicate an ongoing laser job, while a bright, steady light signals standby mode. Quick flashes also warn of possible issues (open enclosure, overtilting) or connectivity changes.
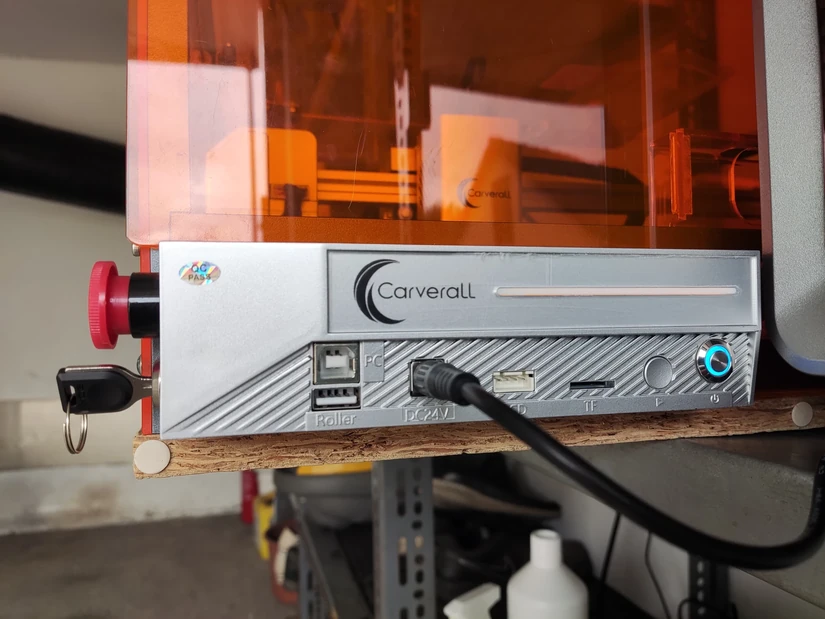
The standalone machine can be upgraded with multiple, optional accessories, like an enclosure, a honeycomb bed, a rotary chuck or kit, 1W infrared module and an air purifier. As of the making of this review, the camera module and LCD display are not yet available.
Software and Workflow
The product works with most popular laser-cutting software, like LightBurn and LaserGRBL. Additionally, it supports Carverall’s own app, CutlabX. Most of the time, I use LightBurn because of its extensive features, but CutlabX works just fine as well for smaller projects. In addition, you can operate the X1Pro using CutlabX’s Android app on a smartphone.
To operate the machine, you will need to unlock it with the safety keys, turn the power button on and set the emergency button to a ready state. When preparing a laser job, you will need to adjust the focus manually. Also, if you don’t have the optional camera add-on, you will need to position the material manually. While the software’s ‘framing’ function simplifies alignment, positioning smaller items like keychains remains a challenge without a camera.
While operating the laser machine, protect your eyes and lungs with the provided accessories or your own, like safety glasses, half-face masks, air purifiers, and so on…
For my setup, I used a half-face mask with carbon filters. Since this was my first laser engraver, I also kept a 2kg carbon dioxide fire extinguisher nearby. I also never left the machine unattended while operating it. For other setups, I would recommend installing smoke alarms as an additional precaution. You can buy all of this safety equipment from local DIY stores or online retailers such as Amazon.
Test Projects and Material Results
Material 1: Plywood (Basswood)
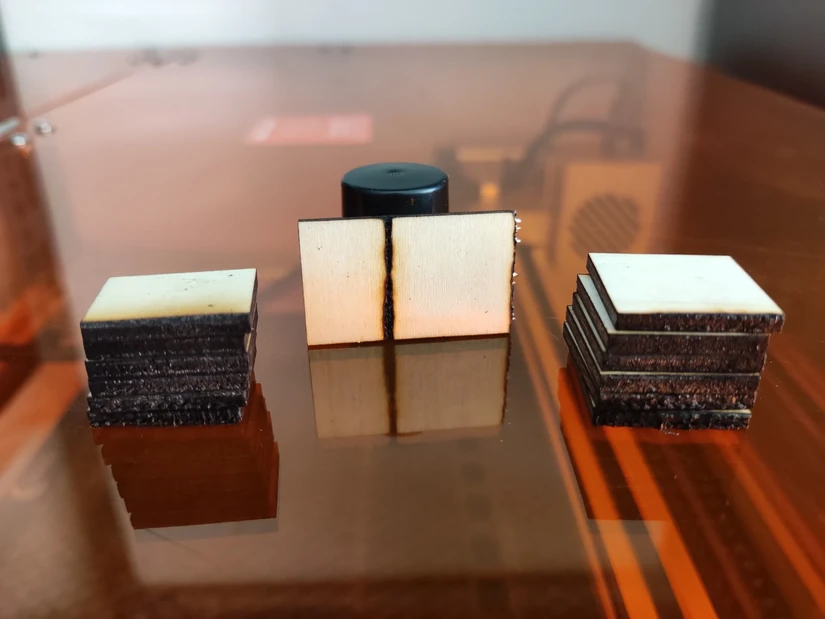
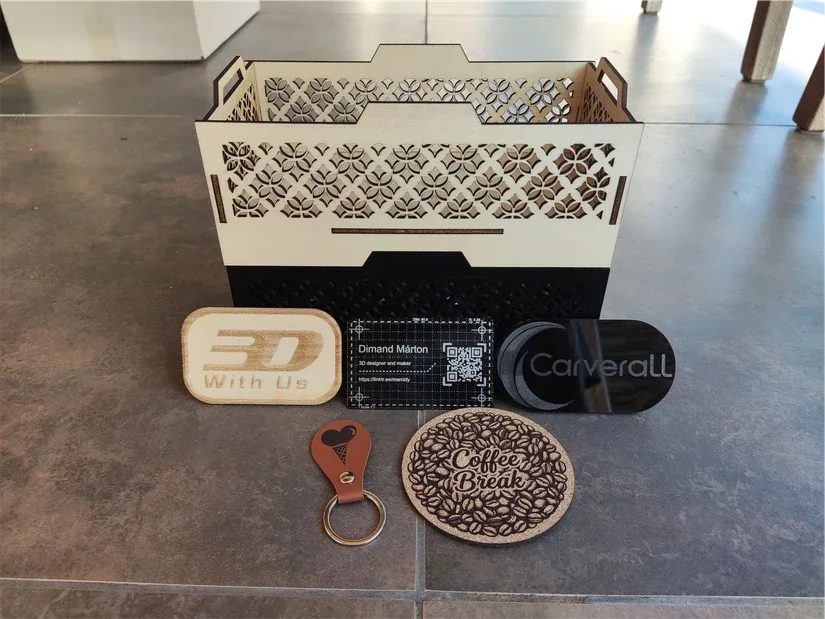
– Cutting 18mm stacked plywood. With the honeycomb bed and the air assist, cutting plywood has never been easier. The laser leaves little to no burn marks on the surface, works fast and provides a flawless result. You can cut up to 18mm plywood with the 20W laser in multiple passes, just be prepared to deal with the intense smoke and heat, when operating the laser for a prolonged time.
©3DWithUs – Laser Job & Photo: Dimand Marton
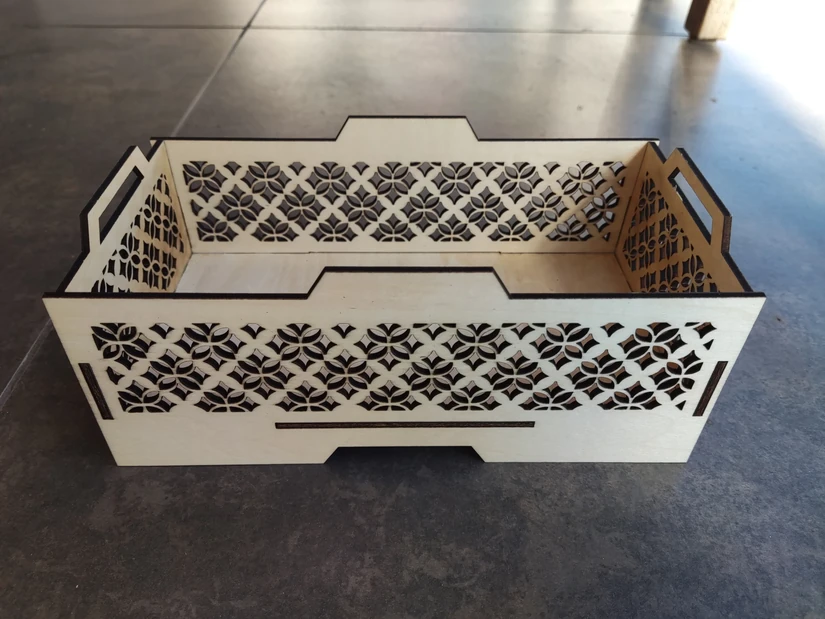
– Cutting and assembling 3mm plywood. The machine also cuts the wood precisely and cleanly. I had no issue assembling the parts together. Moreover, thanks to the honeycomb bed, the laser leaves no burn marks on the edges, even on such small holes.
Design by Digital Idea on Atomm
©3DWithUs – Laser Job & Photo: Dimand Marton
– Engraving 3mm plywood. Using the 7mm focus mode, the X1Pro can perform fine engraving jobs as well. You can engrave shadings and gradients with amazing results. Also, for cutting this thin 3mm piece, I didn’t even have to lower the focus, it handled the cutting with the air-assist just fine.
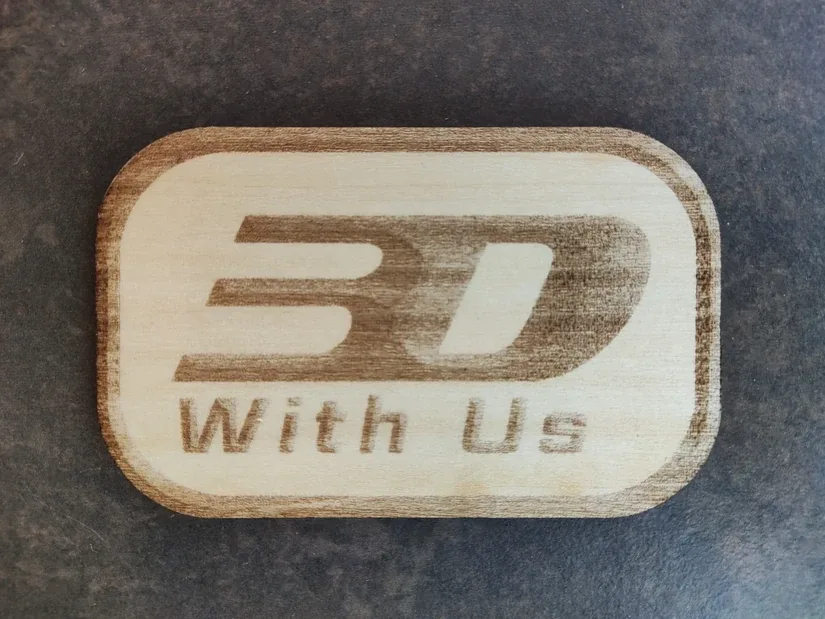
3DWithUs Logo
©3DWithUs – Laser Job & Photo: Dimand Marton
Material 2: Acrylic
– Cutting and assembling 3mm acrylic. Acrylic proved a little bit tougher than plywood, but the X1Pro still handled it with perfect results. By reducing the speed and increasing the power, the laser cuts 3mm opaque black acrylic as effortlessly as plywood. The parts once again fit together fine and both this and the plywood box stack on top of each other perfectly.
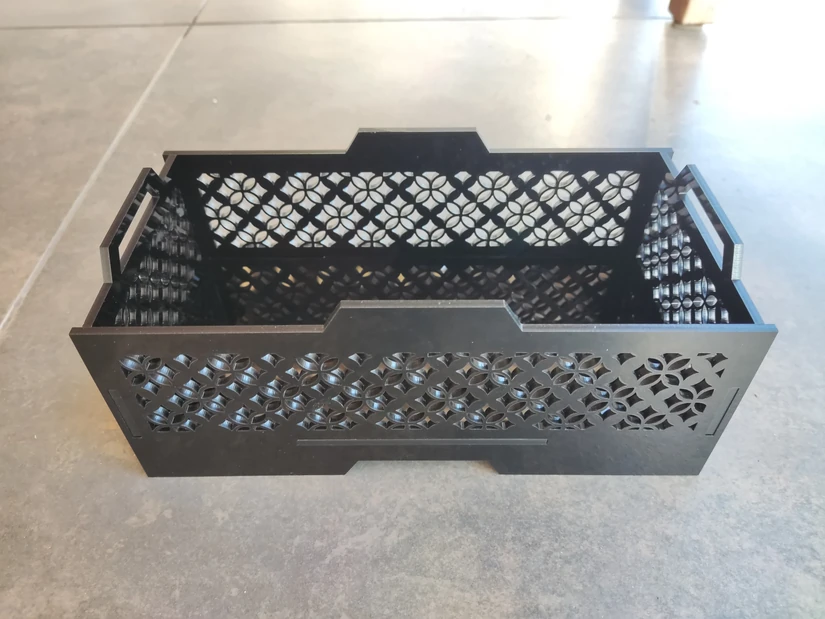
Design by Digital Idea on Atomm
©3DWithUs – Laser Job & Photo: Dimand Marton
– Engraving 3mm acrylic. Engraving the same black acrylic was just as easy as cutting it. It leaves a nice, white frosting effect on the engraved area. The strange bar on the logo was a result of the merged engraving. If I were to separate the logo and text, and engrave them as separate jobs, the “frosting” would have been more uniform. For cutting out the piece, I left the focus at 7mm and used the same settings from the previous box project.
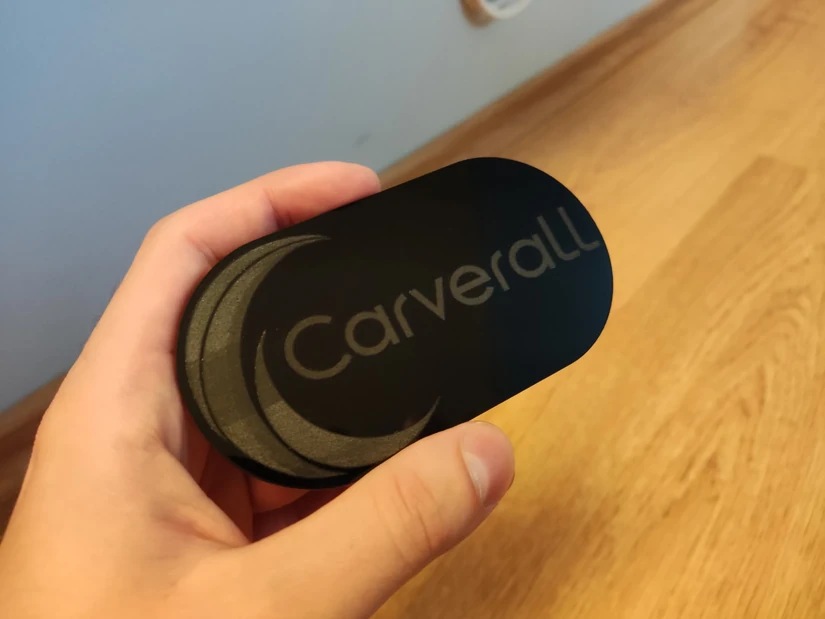
©3DWithUs – Laser Job & Photo: Dimand Marton
Material 3: Cork
– Engraving and cutting 2mm cork. For the fifth test, I tried engraving a coaster, then cutting it out. Cork was slightly different from the others because it scorches and catches fire more easily. However, with the correct settings, the machine handles this material amazingly as well. Using faster speeds with multiple passes makes the cut clean and the engraving sharp.
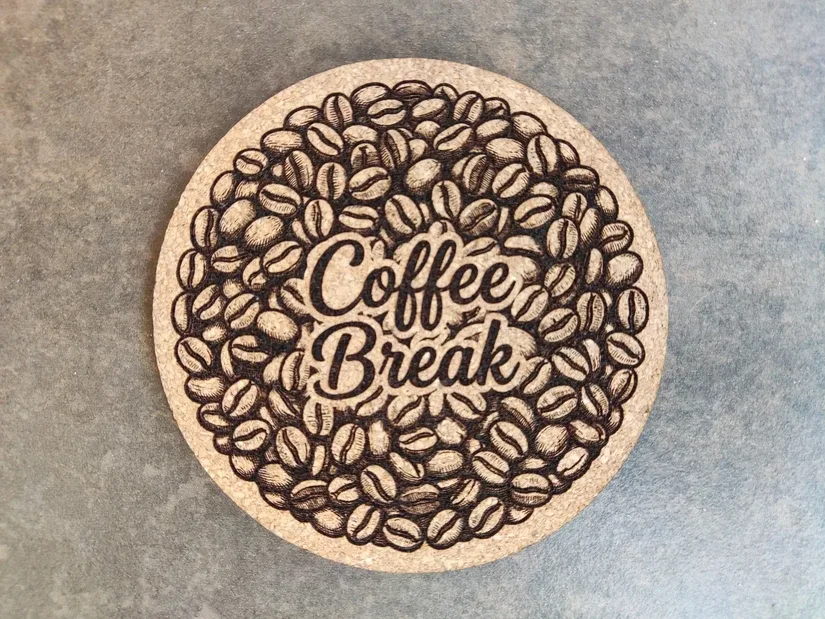
Design by lv on Atomm
©3DWithUs – Laser Job & Photo: Dimand Marton
Material 4: PU Leather
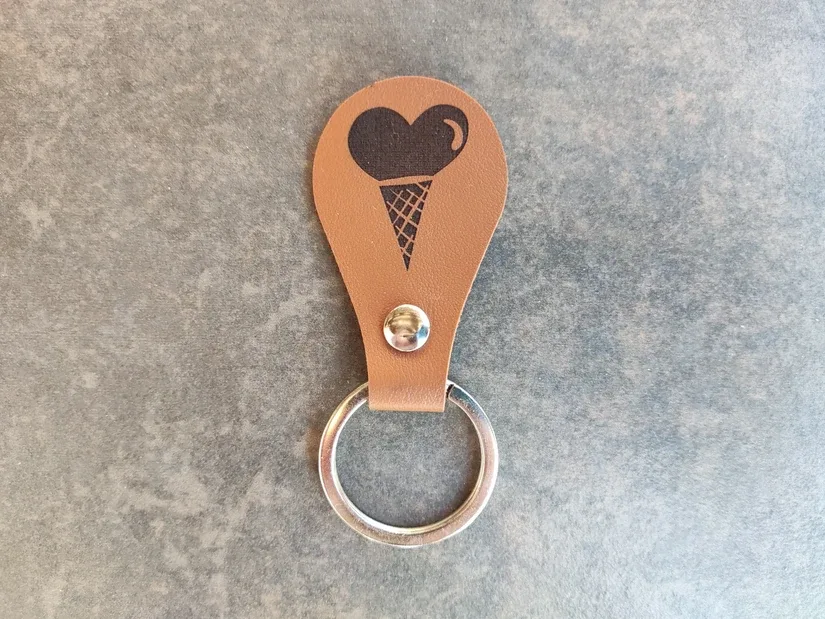
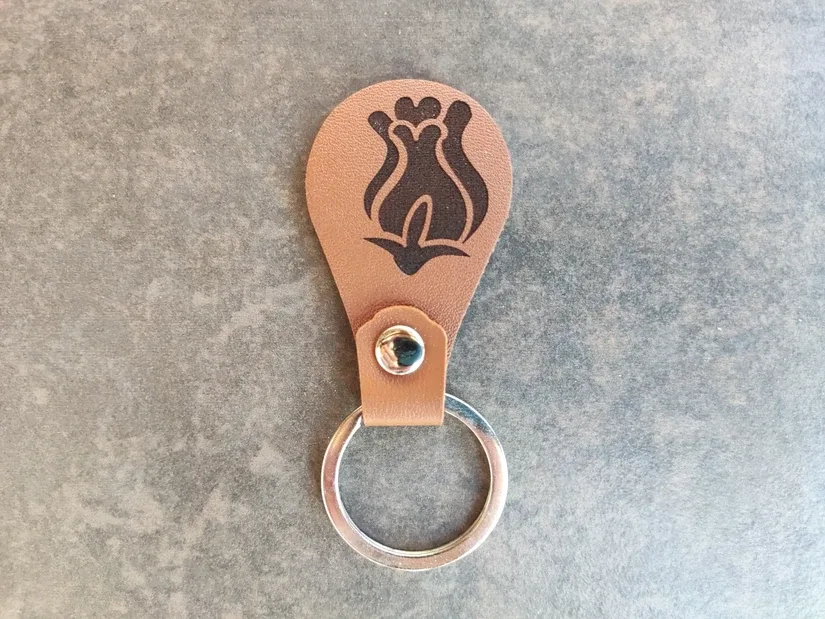
– Small leather keychain. After all the successes, it’s no surprise that this came out perfectly as well. However, manually ‘framing’ such a small item is a difficult task without a preview camera, and as a result, I accidentally misaligned one of the sides, which led to the offset engraving of the flower.
©3DWithUs – Laser Job & Photo: Dimand Marton
Material 5: Anodized Aluminum
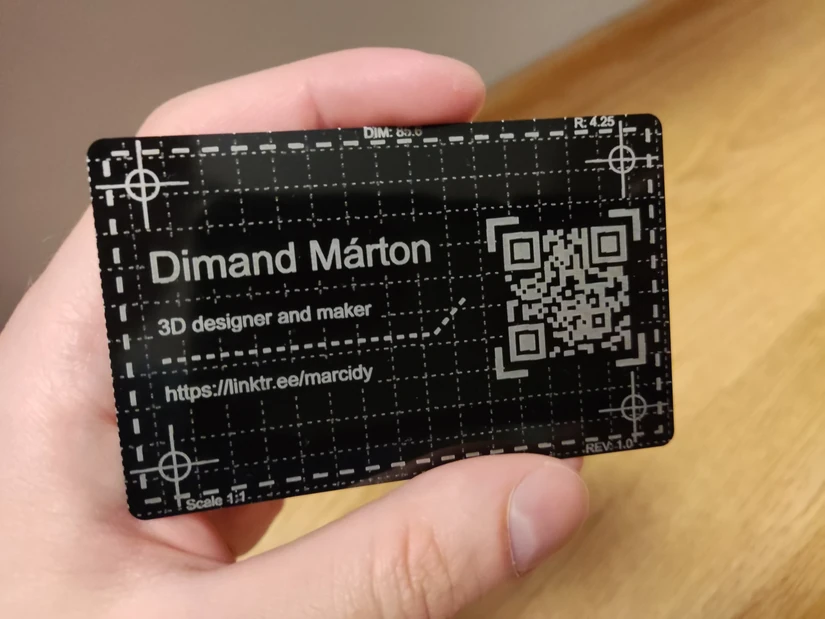
– 0.2mm Black business card. The result came out clean and sharp. The QR code scanned without any problems. The only issue I encountered was warping. Due to its thinness, the material tends to warp at the edges under heat. To prevent this problem, I used double-sided tape to secure it to the aluminum sheet that came with the honeycomb bed.
Design by Marcidy on Atomm
©3DWithUs – Laser Job & Photo: Dimand Marton
Material 6: Slate
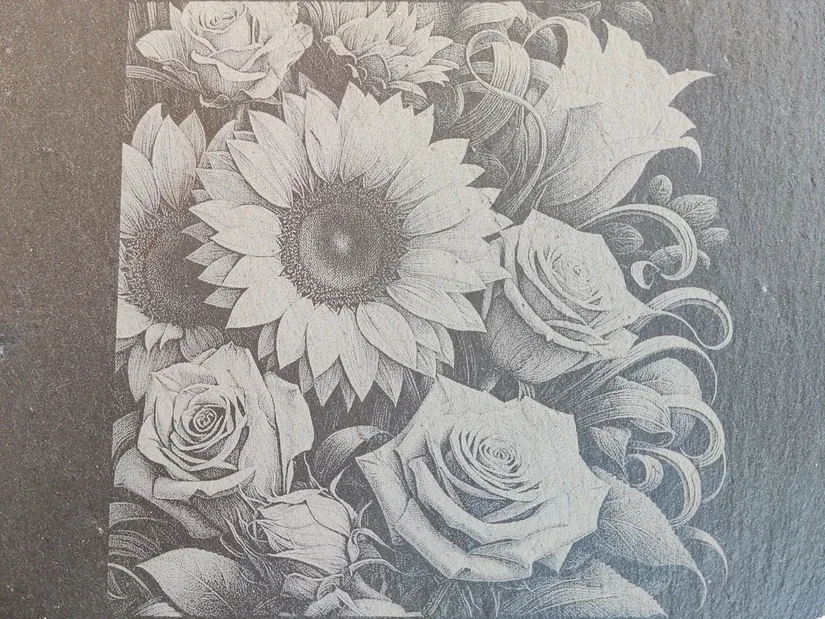
– Untreated slate. For my last project, I tried photo engraving on an untreated slate serving tray. I had good results with the Jarvis method on previous materials, so I tried the same settings with this one as well. The result was great as always. Thanks to the small laser spot size, the image came out very detailed and well shaded.
Design by t.chalmers0511 on Atomm
©3DWithUs – Laser Job & Photo: Dimand Marton
The machine handles all compatible materials well when used properly. The product manual gives good starting points for laser settings, but you will need to find what works best for you. I recommend using LightBurn’s built-in material tests to find the perfect settings for each material.
Comparison with Other Products
Carverall also offers several smaller and more specialized laser engravers alongside the X1Pro. The A1 Pro Mini is a compact, fully enclosed Class 1 machine with a much smaller 110 x 110 mm work area and 7W or 12W diode options, plus an optional 1W infrared module. It is better suited to small desktop projects, gifts, tags and jewellery, especially where portability and enclosure safety are important.
The Z3 Portable takes portability even further with a foldable 5W design intended for mobile use, workshops, markets and small engraving jobs on the go. By comparison, the 20W X1Pro is aimed more at larger cutting and engraving projects where a 300 x 300 mm work area and higher diode power are more useful.
The X1Pro/JL9 shines in its upgradeablity and budget price compared to other similar machines, like the Elegoo Phecda 20W. You can start with the standalone machine, then slowly add features as needed with the available upgrade paths (Rotary chuck, honeycomb bed, Infrared module…).
Diode lasers have long been a popular entry point into laser engraving and cutting, so there is no shortage of competing machines on the market. You can browse our full collection of laser reviews and project guides on 3DWithUs, or check out our Budget Laser Cutters and Engravers article for a broader comparison of affordable options.
©3DWithUs – Laser Job & Photo: Dimand Marton
Have questions? Feel free to ask in the comment section below.
For a wider discussion or to share your own Carverall X1 Pro machine, join us in the forum:
Conclusion and Pros and Cons
Compare the Prices & Bundles:
Official Store | Amazon | AliExpress
Carverall X1Pro | JL9 Review
Review Summary
Overall, the X1Pro performs exceptionally well with all the materials a diode laser can handle. The small spot size allows for fine engraving, and the 20W laser can cut through thicker materials as well.
With its affordable price point, the machine serves as an ideal entry-level laser cutter. You can start with the core machine and buy the upgrades later as you see fit. Additionally, you are not locked into a closed ecosystem; you can operate the laser with most of the popular software, like LightBurn and LaserGRBL.
The build quality is acceptable. Some screw holes are misaligned, and not all riser legs can be installed safely. In addition, the enclosure has wide gaps for ease of transportation and operation, but this design leaks smoke and laser light outside the working area.
The gravest issue with the machine lies in its user manual and official tutorials. There are many discrepancies between them, like using different screw sizes for the same assembly steps. Also, both the standalone product and accessory manuals are missing crucial setup steps and warnings, such as securing one of the cables inside the working area. Although these problems are serious, they are also easy to fix: revise the product manual and make it consistent with the video guides.
Pros
- 0.08 x 0.1mm ultra-fine spot size
- High-power 20W laser head
- Entry-level machine with a budget price
- Wide range of optional upgrades and accessories
- Fast assembly without needing calibration
Cons
- Inconsistencies and missing steps in the product manual
- Misaligned screw holes on the frame
- Gaps in the enclosure, which leak smoke and laser light