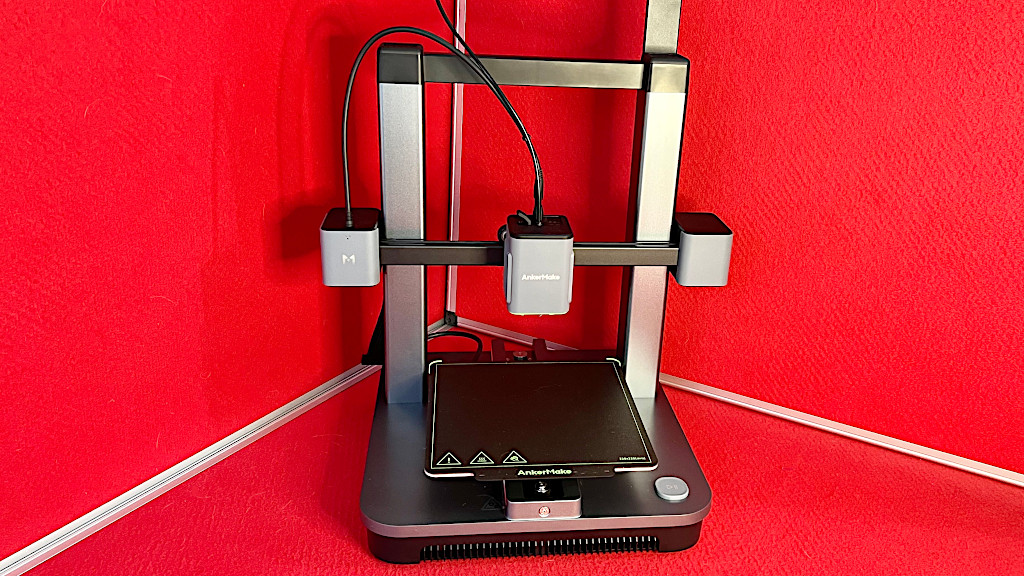
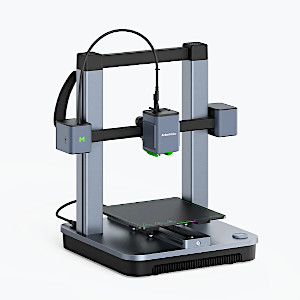
As a dedicated printer reviewer, I have been eagerly exploring different brands and models, and one brand that has caught my attention is AnkerMake. Their printers feature a sleek design that instantly captivated me. Today, I want to introduce you to the budget-friendly AnkerMake M5C printer, which is a simplified version of the M5. Although the M5C lacks a screen or camera, it still possesses all the essential functions found in its predecessor. The limitations intrigued me, and I was curious to see how it would perform and how the absence of a screen would affect its functionality. In this review, I will examine the 3D printer, evaluate the app and slicer software, 3D print some models, and outline the Pros and Cons.
Table Of Contents
- Specifications
- Unboxing and Assembly
- 7×7 Automatic Bed Leveling
- Features and Hardware
- One Button User Experience
- Test Printing Both Demo and Other Models
- Optional Display Screen Kit Add-on NEW
- Compare to Other 3D Printers
- Conclusion and Pros & Cons
AnkerMake M5C Specifications
One-Click Button
Extruder: All-Metal Hotend
Print volume: 225*225*265mm
Max Temp: 300°C
Material: PLA/PETG/ABS/TPU/Nylon
Max Speed: 500m/s
Bed leveling: 7×7 Auto-Leveling
Connectivity WIFI/ USB C/ Mobile App
Software: AnkerMake App, AnkerMake Slicer
Product affiliate links: 3DWithUs is supported by its audience. Purchases via some links may earn us a small commission.
Price: $369-399
Official Website
Amazon
Upon testing the AnkerMake M5C, I was pleased to discover that despite its budget-friendly nature, it offered impressive performance. The printer delivered reliable and consistent results, proving that it can compete with models at higher price points. Its compact design also stood out since it would easily fit into any workspace.
While the absence of a screen may initially seem like a disadvantage, I was pleasantly surprised to find that it did not hinder the printer’s functionality. Through the use of alternative methods such as mobile phone app Wi-Fi connectivity or USB connections with a computer, I found it easy to navigate and control the printer’s settings. It allowed for convenient and hassle-free adjustments, while still maintaining a streamlined experience.
Unboxing and Assembly
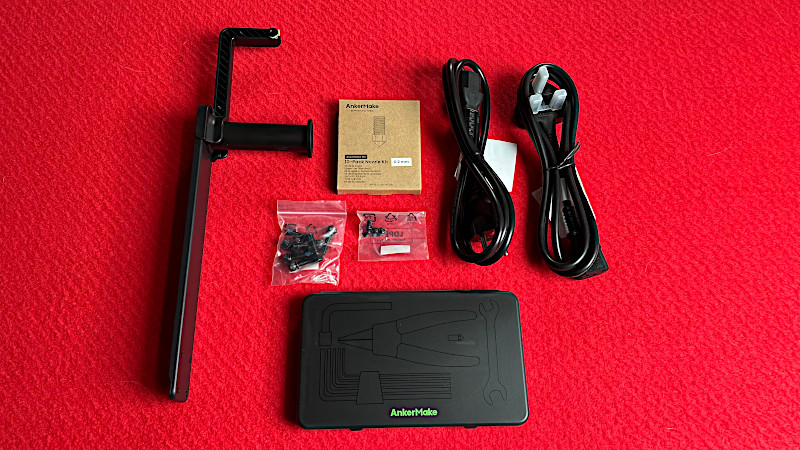
The unboxing and assembly were notably straightforward and efficient. A significant highlight of this printer is its near-complete assembly upon arrival, requiring only a brief period for final setup.
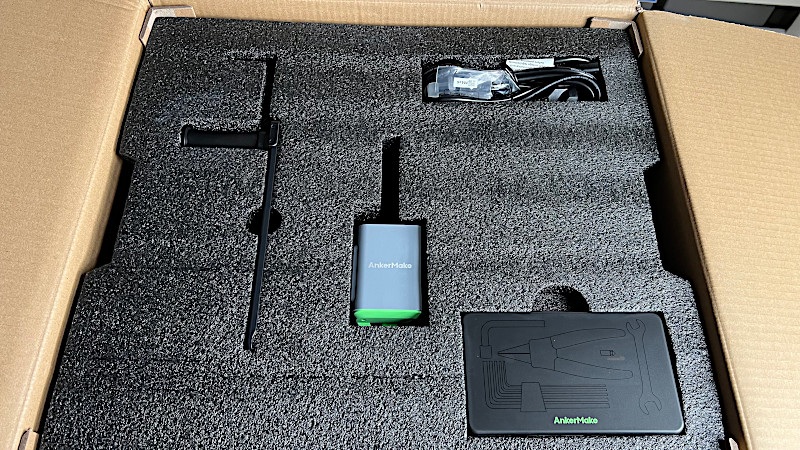
©3DWithUs – Photo: Richard Hirst
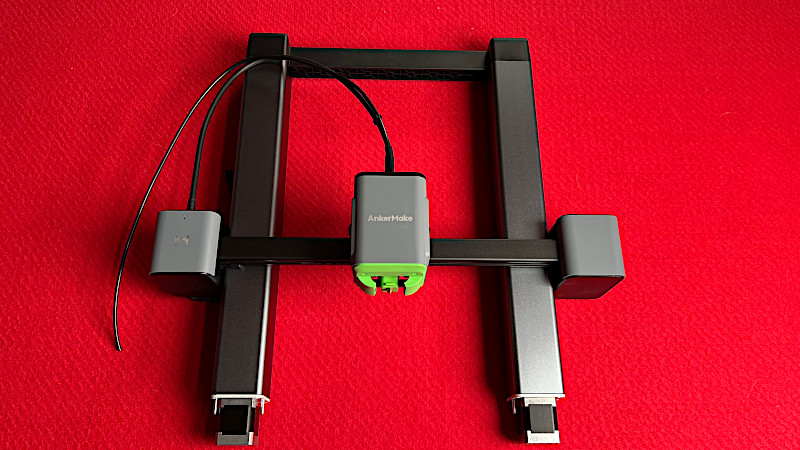
The assembly of the Ankermake M5C involved securing the uprights with just eight screws, followed by attaching the hot end assembly with four additional screws. In total, the entire assembly process took me approximately 10 minutes, showcasing the manufacturer’s commitment to providing a user-friendly experience.
©3DWithUs – Photo: Richard Hirst
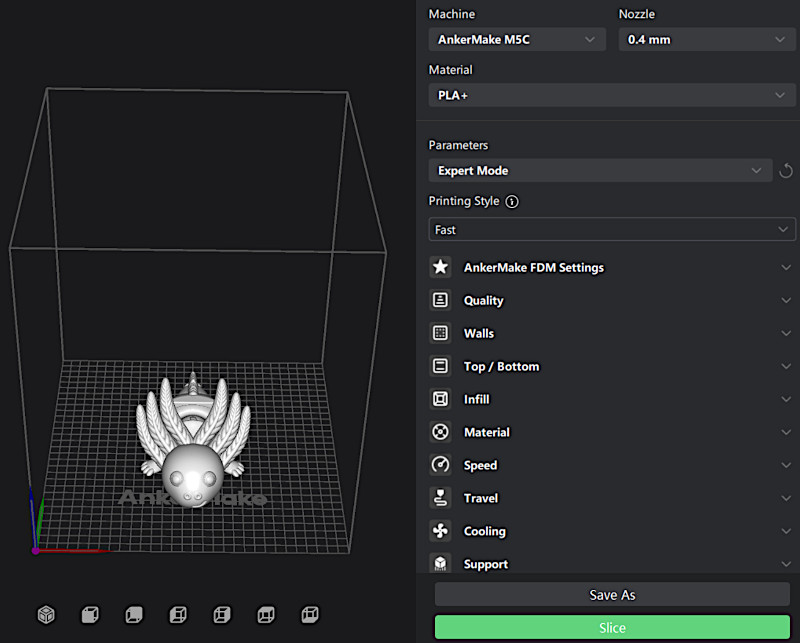
After completing the physical assembly, the next step involved loading the appropriate application on both my PC and smartphone. The availability of an application on multiple platforms added to the convenience of setting up and operating the printer. I found the application to be well-designed and intuitive, making it easy to navigate and control the printer’s functions.
Furthermore, once the application was installed, I began the bed levelling process. Clear instructions were provided on how to achieve optimal bed levelling, which is crucial for ensuring high-quality and accurate prints. The entire bed levelling process was seamless and did not pose any complications.
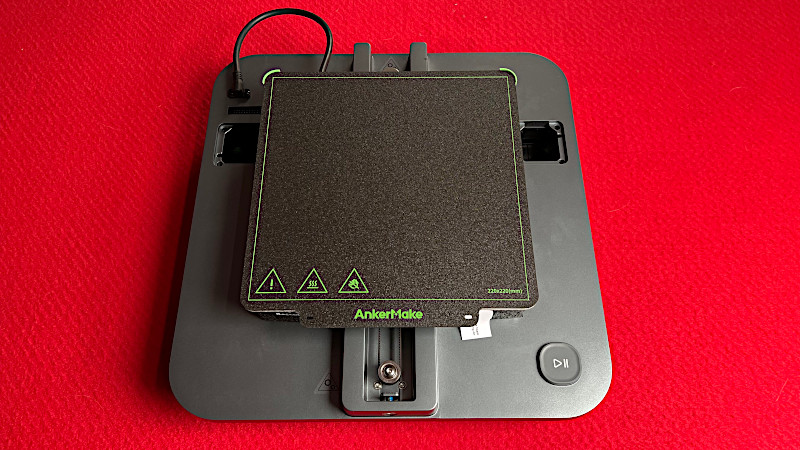
7 X 7 Automatic Bed Leveling
The AnkerMake M5C printer boasts a highly efficient and sophisticated bed levelling system, setting it apart from conventional printers. Featuring a 7×7 bed levelling setup, this printer eliminates the need for manual adjustment, enhancing both convenience and precision.
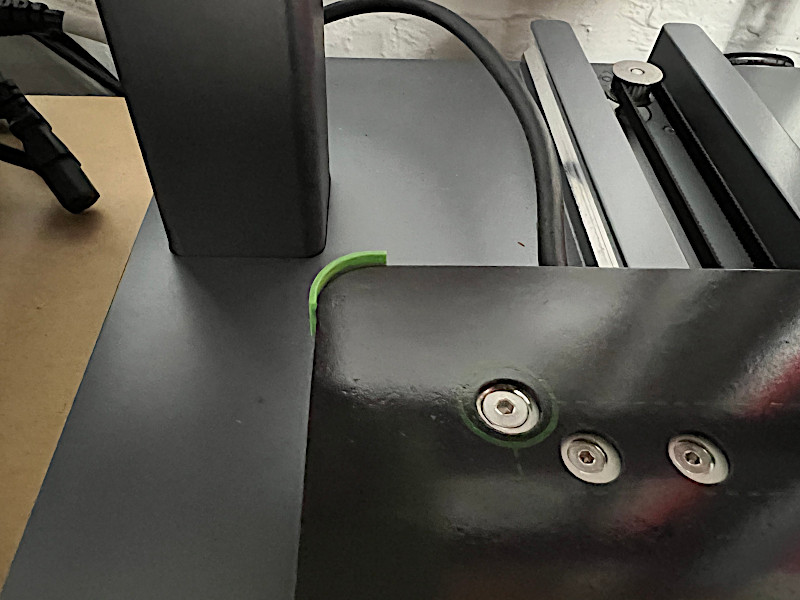
Unlike traditional printers that rely on bed rails, the AnkerMake M5C utilizes a machined all-aluminium base with specially grooved bed runner tracks. This innovative design ensures a solid and stable system, minimizing any potential movement of rails during the printing process. Having personally experienced this unique setup, I can attest to its superior performance and enhanced stability.
Moreover, the inclusion of a bed runner system instead of rails provides additional benefits. The smooth operation of the wheels along the machined grooves significantly reduces friction and movement, resulting in improved printing accuracy and overall print quality.
It is important to note that the AnkerMake M5C is the first printer I have encountered with this particular bed runner setup. However, my experience using this innovative structure has proven its superiority and enhanced functionality compared to conventional rail-based systems.
©3DWithUs – Photo: Richard Hirst
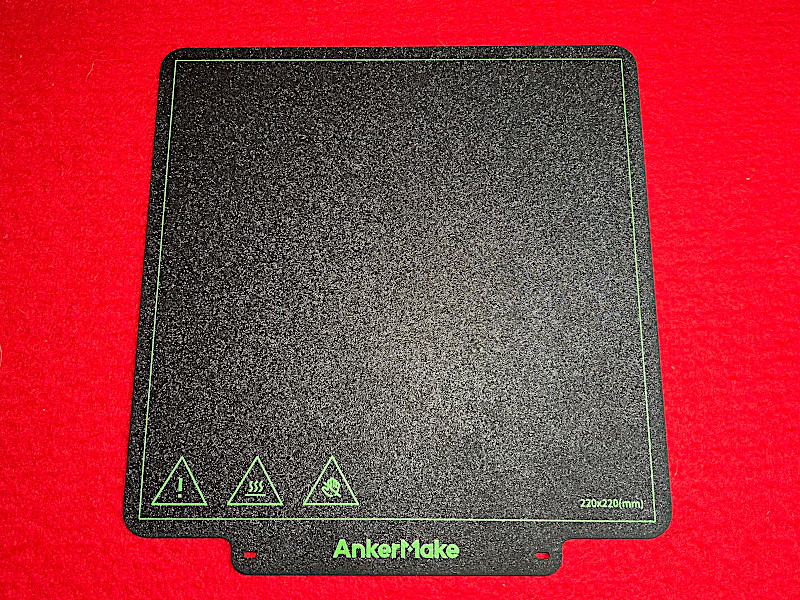
Flexible Dual-Sided Magnetic PEI Sheet. The M5C comes with a dual-sided PEI bed sheet and also has 2 locating points on the rear of the bed for placing the plate in the same place every time.
Features and Hardware
The AnkerMake M5C printer delivers an impressive blend of speed, precision, and sleek design, making it a standout choice for printing applications. Built with emphasis on performance, this printer offers a remarkable printing speed of 500mms, ensuring efficient and timely completion of projects.
At the core of the M5C’s exceptional printing capabilities is its high precision dual gear extruder. This feature enables precise filament control, resulting in superior print accuracy and consistency. Furthermore, the printer’s all-metal hot end is capable of reaching temperatures of up to 300 degrees, allowing for versatile material compatibility and expanding the range of printing options.
Additionally, the AnkerMake M5C boasts a commendable flow rate of 35mm3/s, ensuring a steady and reliable material flow during the printing process. This optimal flow rate contributes to the overall exceptional print quality achieved by this printer.
©3DWithUs – Photo: Richard Hirst
The M5C is also supported by an intuitive software interface that incorporates advanced algorithms such as smoothing algorithm for pressure advance and input shaping. These algorithms ensure smooth and consistent filament flow, reducing the likelihood of surface imperfections and enhancing the overall printing precision.
©3DWithUs – Photo: Richard Hirst
In terms of aesthetics, the AnkerMake M5C’s sleek and modern design adds a touch of professionalism to any workspace. Its visually appealing appearance, combined with its impressive printing capabilities, makes it an excellent choice for those seeking both functionality and style in a printing solution.
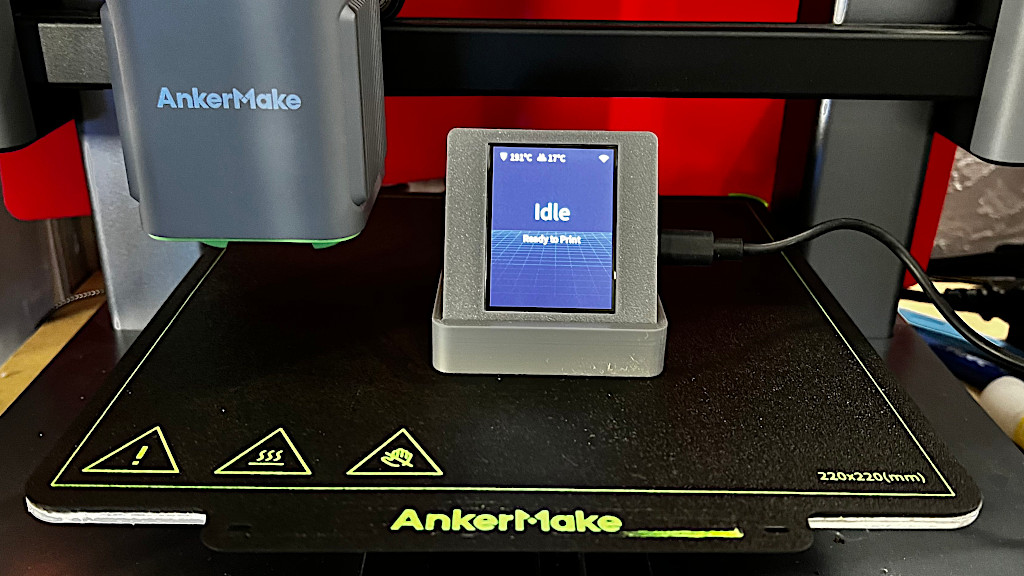
AnkerMake M5C – One Button User Experience
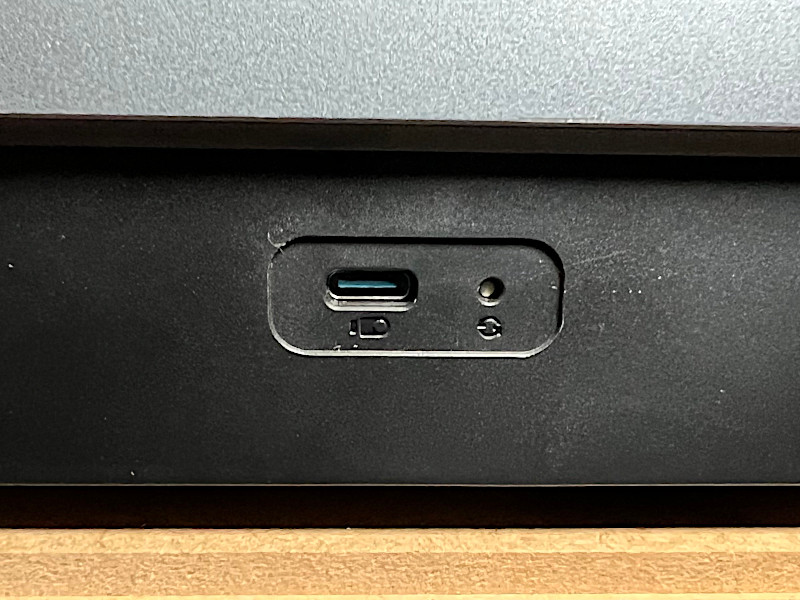
The AnkerMake M5C redefines the user experience with its unique control mechanism. In divergence from traditional printers, the M5C forgoes a built-in screen and only has 1 button on the base plate which can be made to do different tasks on the printer. Instead utilizing a dedicated AnkerMake Mobile App or AnkerMake Slicer for seamless printer management. This innovative approach not only simplifies operation but also affords the convenience of controlling the printer remotely from any location.
Initially, I had reservations about adjusting to this unconventional control method. However, upon using the mobile app, I discovered that operating the M5C was just as intuitive as working with a built-in screen. In fact, the absence of a physical interface enhances flexibility and accessibility. The mobile app provides all the familiar controls found on conventional printers’ displays, including temperature adjustments, speed regulation, bed levelling, and filament loading. This comprehensive range of features ensures that users can effortlessly fine-tune printing parameters to achieve optimal results.
One particular advantage of the M5C’s app-based control is the freedom it grants users in managing the printer. No longer confined to physical proximity, users can remotely monitor and control the printer, regardless of their location. This means that crucial adjustments or oversight can be performed effortlessly while attending to other tasks, boosting productivity and efficiency.
While the AnkerMake M5C may deviate from the norm in terms of control interface, this departure is precisely what makes the printer stand out. By embracing the power of mobile technology, AnkerMake has found an ingenious way to enhance user experience, providing seamless and convenient control over the printing process. Whether it’s adjusting temperatures, regulating speed, or managing filament loading, the M5C’s app-based control offers users an unparalleled level of flexibility, convenience, and freedom. You can also use the USB C port on the side to transfer prints to printer just like a normal printer.
Test Printing Both Demo and Other Models
Exceptional Print Quality and Speed: A Testimonial for the AnkerMake M5C
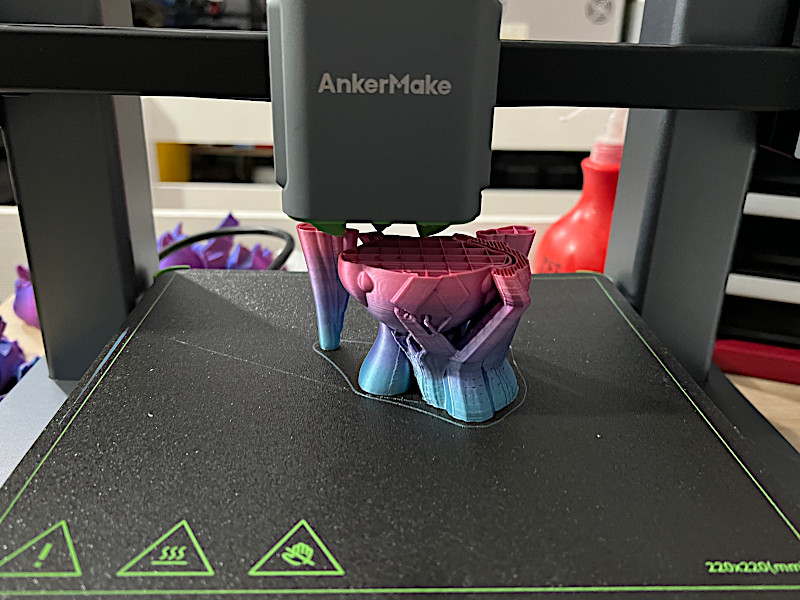
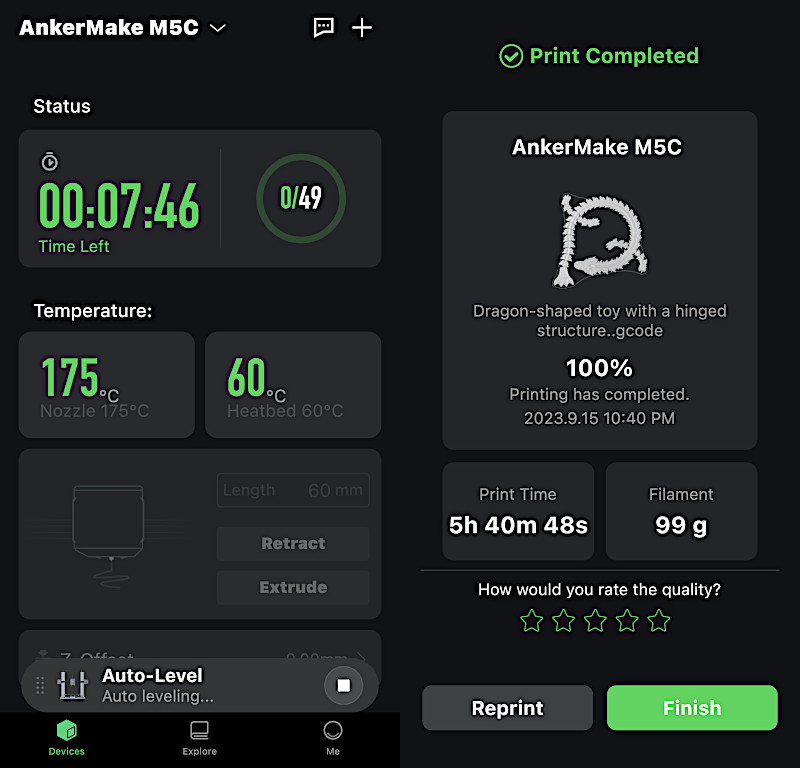
During my extensive evaluation of the AnkerMake M5C, I embarked on a journey to gauge its printing capabilities and performance. To begin, I utilized the test models available in the app’s explore section, aiming to assess the printer’s ability to deliver exceptional results within tight timeframes. The M5C surpassed all expectations, exhibiting impeccable printing quality even at accelerated speeds. This served as a testament to the printer’s advanced engineering and precision.
Test Model from AnkerMake Explore
©3DWithUs – Photo: Richard Hirst
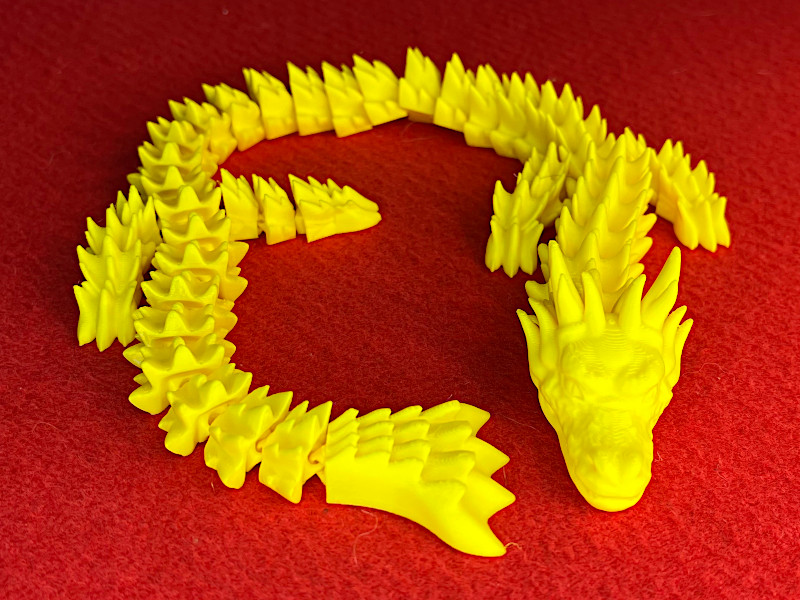
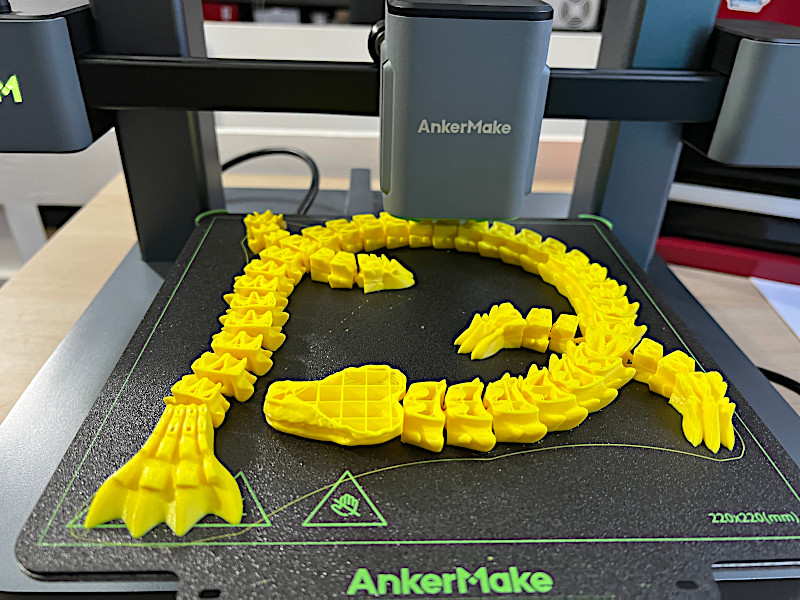
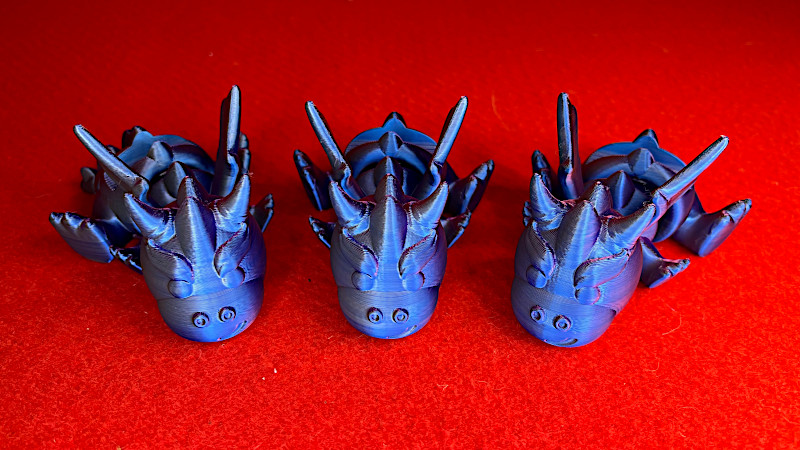
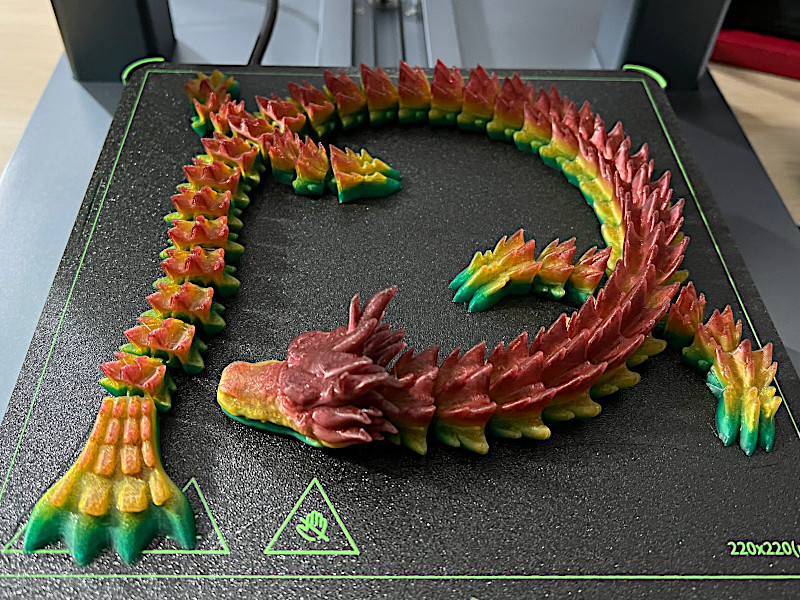
Furthermore, I ventured into exploring the potential of the AnkerMake M5C by printing a range of models from renowned design providers like Koza Design on Patreon. To ensure a comprehensive assessment, I employed filaments from AnkerMake, Eryone, and Amolen. Remarkably, regardless of the filament brand or type, the M5C consistently produced outstanding prints with impeccable detail and accuracy. Even at a remarkable speed of 500mms, the printer demonstrated remarkable control and exhibited minimal artifacts or imperfections.
This resounding success in printing various models and using diverse filament brands underscores the M5C’s versatility and adaptability. The printer’s exceptional performance, coupled with its wide filament compatibility, paves the way for creative freedom and opens numerous possibilities for users seeking top tier print quality.
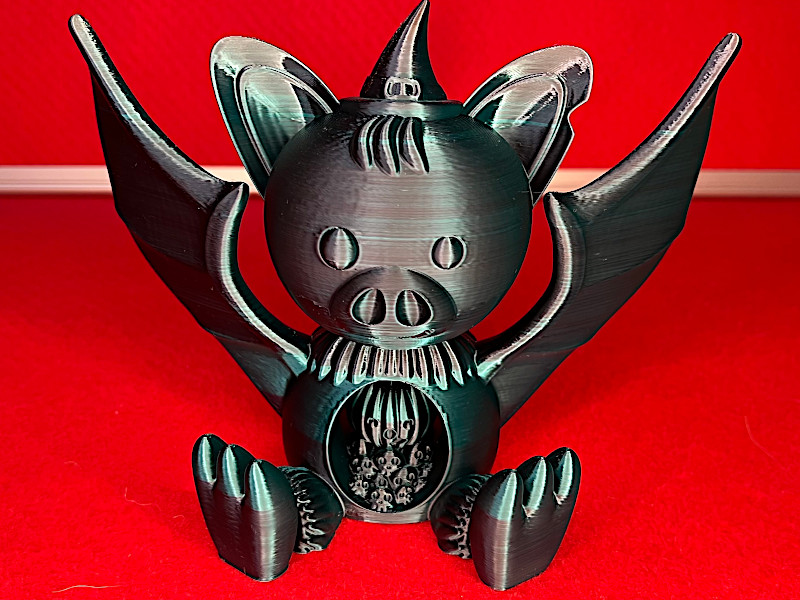
3D Model by Koza Design on Patreon/Cults
©3DWithUs – Print and Photo: Richard Hirst

3D Model by Koza Design on Patreon/Cults
©3DWithUs – Print and Photo: Richard Hirst
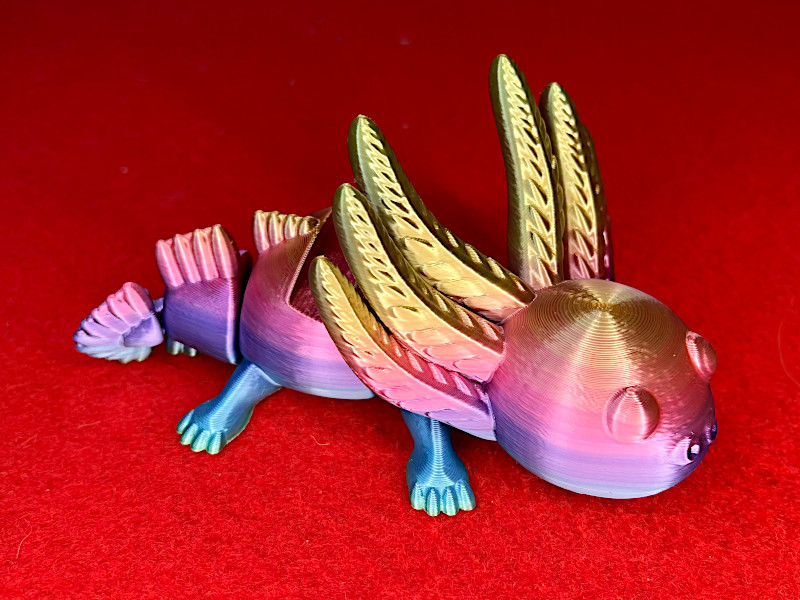
3D Model by Koza Design on Patreon/Cults
©3DWithUs – Print and Photo: Richard Hirst
Apart from Patreon mostly all KOZA design models can be purchased for a small fee on Cults3D.
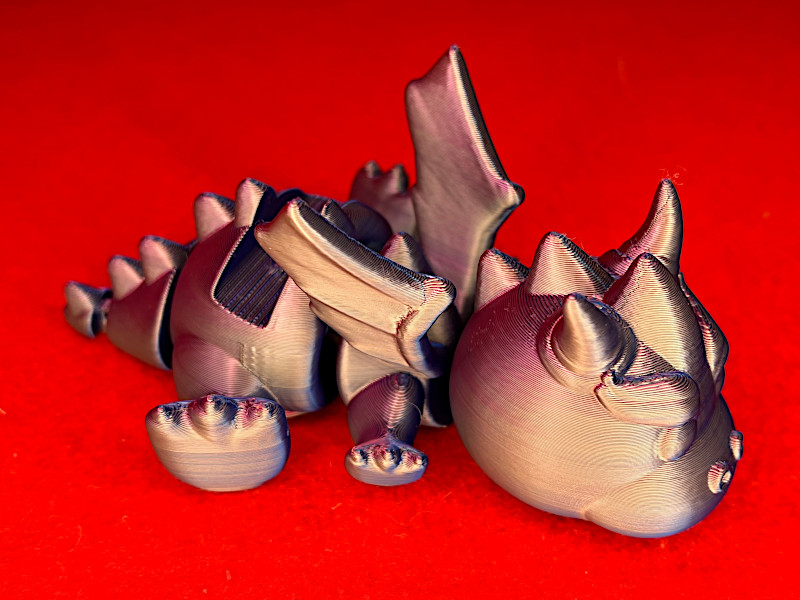
3D Model by Koza Design on Patreon/Cults
©3DWithUs – Print and Photo: Richard Hirst
Test Model from AnkerMake Explore
©3DWithUs – Print and Photo: Richard Hirst

Test Model from AnkerMake Explore
©3DWithUs – Print and Photo: Richard Hirst
Optional Display Screen Kit Add-on NEW
During my review of the Ankermake M5C printer, I was thoroughly impressed with its performance and capabilities. As promised, the ‘One Click’ 3D Printer works well via mobile app or PC software and has only one physical button for certain functions.
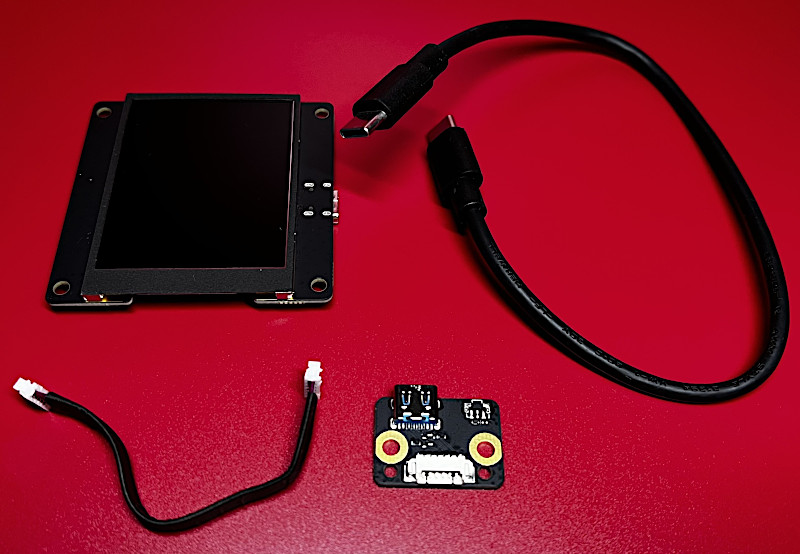
– Optional. Understanding the preferences of their customers, Ankermake introduced an M5C Display Screen Kit Add-on. This clever addition allows users to conveniently monitor and supervise the printer without having to constantly refer to the app or PC. It provides a more traditional and intuitive method of interacting with the printer, enhancing the overall user experience.
©3DWithUs – Print and Photo: Richard Hirst
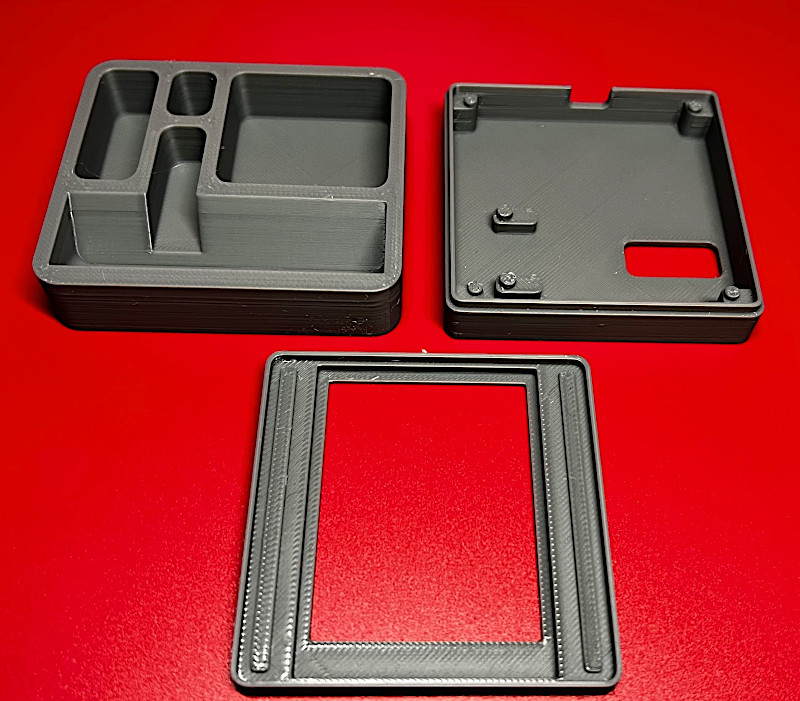
– Assembly. I found the assembly process to be straightforward and hassle-free. The kit comes with four components that seamlessly connect together, resulting in a cohesive unit. The icing on the cake is the 3D-printable screen case, which not only ensures a neat and tidy appearance but also adds a layer of customization. I assembled the screen live on my TikTok channel.
©3DWithUs – Photo: Richard Hirst
– Screen Case Custom Designs. AnkerMake has made the process even more delightful by providing an extensive collection of 3D enclosure designs within their app. This allows users to select a design that resonates with their personal style and preferences. The variety of options ensures that every user can find an enclosure that complements their workspace or adds a touch of individuality to their printer setup.
©3DWithUs – Print and Photo: Richard Hirst
The inclusion of the 3D-printed enclosure demonstrates Ankermake’s commitment to providing a holistic and personalized experience. It reflects the brand’s attention to detail and understanding of their customers’ desire for both functionality and aesthetics.
Overall, the ease of assembly combined with the diverse selection of designs makes the screen kit add-on for the Ankermake M5C printer a standout feature. It not only enhances the functionality of the printer but also adds a personal touch to the user’s printing setup. Whether you prefer a sleek and minimalist design or something more vibrant and unique, Ankermake offers a compelling solution that caters to individual preferences while maintaining a high level of professionalism.
Other AnkerMake Products
The biggest difference is the price. After checking the parameters, it turned out that there are a lot more differences between the two machines, and not just downgrading. For example, the M5C doesn’t have a camera and screen; but it received a full metal extruder in comparison to the M5.
With the major One Click Button simplification and greatly reduced price, AnkerMake tries to reach a different 3D printer user/consumer base. It will be interesting to see how this works out.
Compare to Other FDM 3D Printers
On 3DWithUs, we have a comprehensive comparison guide covering the best budget FDM 3D printers. The AnkerMake M5C is slightly higher in price but we have it there for comparison nevertheless. Compare with other printers in the same price range and build volume:
In the comparison conclusion versus other brands’ similar models, it is important to mention again that AnkerMake M5C has a unique One Button User Experience which proved to be comfortable and convenient in many cases.
Conclusion and Pros & Cons
AnkerMake M5C Review
Review Summary
I had the pleasure of using and reviewing the M5C, and I must say, it exceeded my expectations in terms of both performance and aesthetics. The sleek design of the printer immediately caught my attention, and its high-speed capabilities truly impressed me.
One aspect that stood out to me was the build quality of the M5C. The machined base not only added a touch of elegance to the printer, but it also reflected the overall quality construction. I particularly appreciated how easy it was to maintain and swap nozzles on the hot end, making maintenance a breeze.
The auto-levelling feature of the printer was exceptional. It required very little z offset adjustments, resulting in precise and hassle-free prints. Additionally, the accompanying app was user-friendly and made the printing process even more convenient. I was particularly impressed with the reliable Wi-Fi connection, as it never failed or struggled, even when my router was at a distance.
In conclusion, the M5C left a positive impression on me with its sleek design, high-speed capabilities, and user-friendly features. The outstanding build quality, ease of maintenance, and reliable connectivity make it a top choice for those seeking a personal 3D printer.
Pros
Excellent Build Quality
All Metal Hot End
All Aluminium Construction
High Speed
Cons
No Light on Hot End
USB C not USB 3 Port