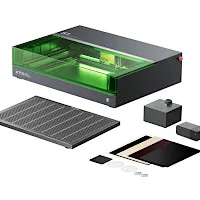
The xTool S1 is the latest fully enclosed laser engraver, offering four options for the laser module. With swappable modules, you can quickly switch between four different options – diod 10W, 20W, 40W, and 2W IR laser modules – to meet any task’s needs. This versatility, along with a large work area, a rotating attachment, and a riser and base with a conveyor system, makes the S1 one of the most complete engraving and cutting systems available. The S1’s powerful capabilities and versatility make it suitable for a variety of projects. In this article, we’ll thoroughly review the xTool S1 together with the optional additions. We will test laser cutting and engraving on materials such as wood, glass, metal, and others, featuring settings and tips. In conclusion, we will list the Pros and Cons.
Disclaimer: Laser cutting and engraving may be hazardous if improperly operated. Please make sure to follow the safety guidelines such as wearing eye-protective goggles and using the machine enclosure while operating.
Table Of Contents
- Specifications
- Unboxing and What’s Included
- Setup and Design
- Included and Optional Laser Modules
- Optional Smart Air Assist Pump
- Optional Riser Base
- Optional RA2 Pro Rotary/Roller
- Optional Conveyor System
- xTool Creative Space Software
- Testing, Materials, Settings and Results
- Compare to other Laser Cutters and Engravers
- Conclusion and Pros & Cons
Price: $799 – $2,549
Product Affiliate Links: 3DWithUs is supported by its audience. Purchases via some links may earn us a small commission at no extra cost to you. This helps us to continue bringing you high-quality content. Our guides and reviews remain unbiased and independent.
xTool S1 Specifications:
• Machine Footprint 765 x 561 x 268mm (30.1 x 22 x 10.6 inches)
• Engraving Size – 498x 319(19.6 x 12.5 inches)
• Material – Cardboard, Wood, Bamboo, Rubber, Leather, Stone, Some acrylic, Painted glass, Plastic
• Laser Type – Diode / IR optional
• Laser Power – 10w Diode, Optional: 20W Diode, 40W Diode, 2W 1064 Infrared Laser
• Laser Wave Length – 455 nm
• Engraving Accuracy – 10W 0.06*0.04mm / 20W 0.08*0.06mm / 40W 0.08* .1mm / 2W 1064 IR 0.03*0.03mm
• Cutting Platform – Metal slats and baseplate included
• Connectivity – USB, Wi-Fi, Ethernet
• Interface – One Button
Unboxing and What’s Included
• xTool S1 • Laser module 10W (Optional: Diode:10w/20w/40w Infrared:2w) • Distance sensor • Smoke exhaust pipe • Power cable and adapter • USB cable • USB Key x2 • Screwdriver • M3*8 Screws x11 • Sample material pack • User manual • Brochure • Air Assist (Optional) • Honeycomb bed with magnetic clamps (Optional)
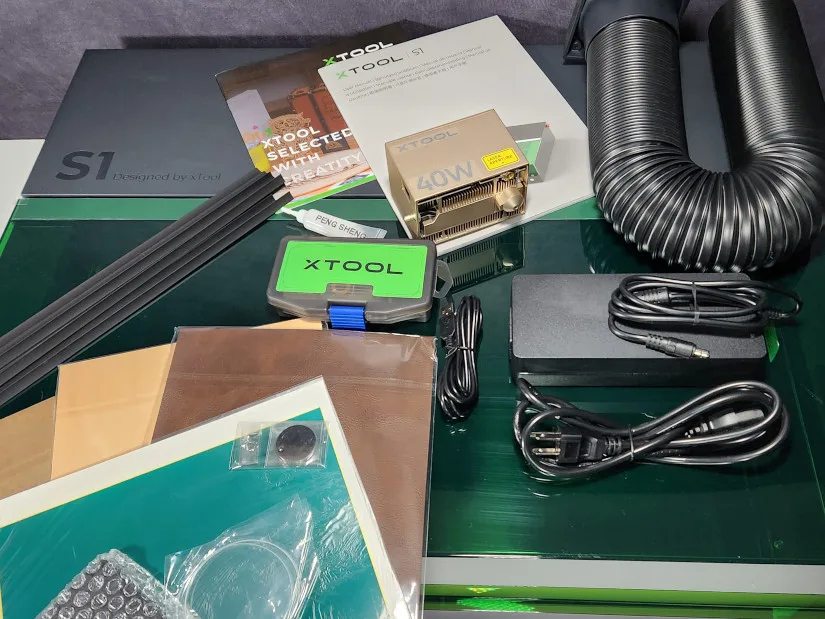
©3DWithUs – Photo: Will Zoobkoff
Setup and Design
To get started with the xTool S1, follow these simple steps. First, remove the shipping stops from the enclosure’s edges. After you’ve removed the two stops, carefully cut and pull the zip ties from the laser module mounting head. You can now connect the laser module. The four modules all attach in the same way: simply slide them into place. The module features magnets on the back to help secure it to the mounting plate while you insert the two provided screws. Connect the cable clip and air assist hose to the side of the module, then attach the measurement gauge to the opposing side. It’s held in place by magnets, so you can feel it lock into place. If it is not locked properly, the measurement will fail and return an error.
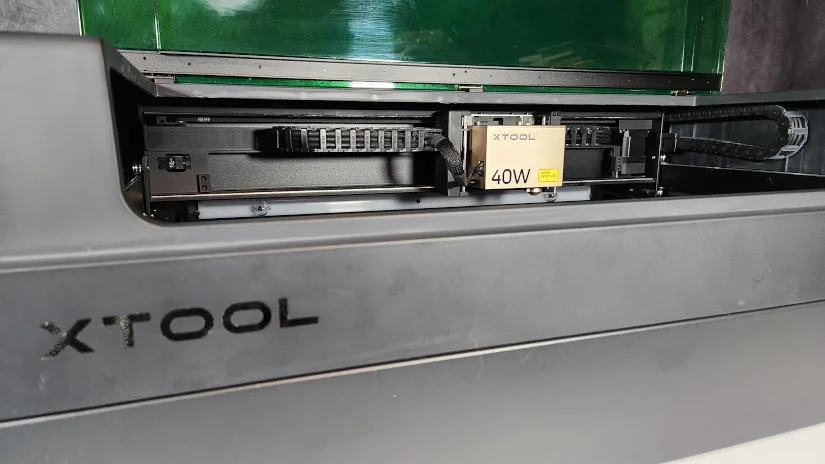
©3DWithUs – Photo: Will Zoobkoff
Remove the four screws from the back of the machine that keep the exhaust vent cover in place. Remember to keep the screws and use them to install the exhaust hose mount. Then, attach the exhaust hose in place and extend it as needed.
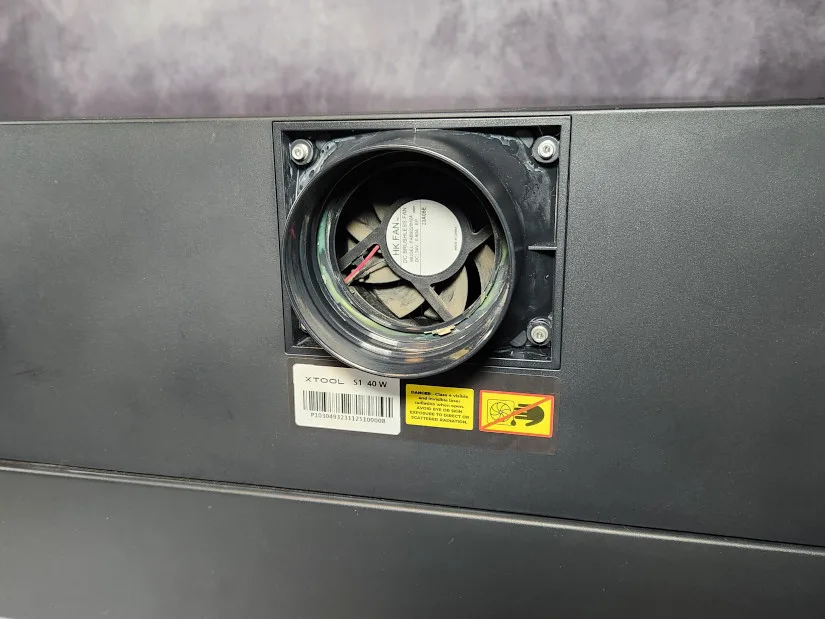
The bottom fitting is for connecting the fire safety kit, if you purchased one. A USB port on the machine’s rear allows you to connect your PC if necessary, and a conventional USB port is located underneath.
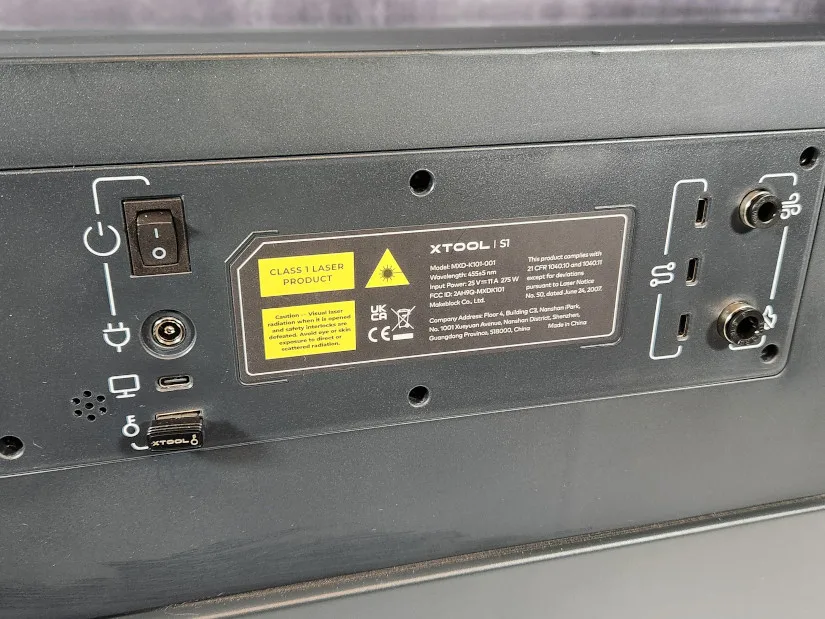
– USB Key. This is the port where you will insert the USB key from your toolkit. The machine cannot function without the USB key. Be careful not to lose the USB key, as the machine will not be usable without it, and you will need to contact xTool for a solution. Luckily, xTool provides two USB keys with the S1, so it’s good practice to always leave one in the provided tool case as a backup. The USB key acts as a security device that ensures only authorized users can operate the machine.
– Wi-Fi Connectivity. All that remains is to power on the machine and follow the connection guide on your PC. You can either connect via USB cable or Wi-Fi. We prefer the Wi-Fi option since it allows us to separate the PC from the machine. Additionally, the Wi-Fi option is ideal if you have an Android or iOS device. The xTool Creative Space is simple to use, especially on mobile devices.
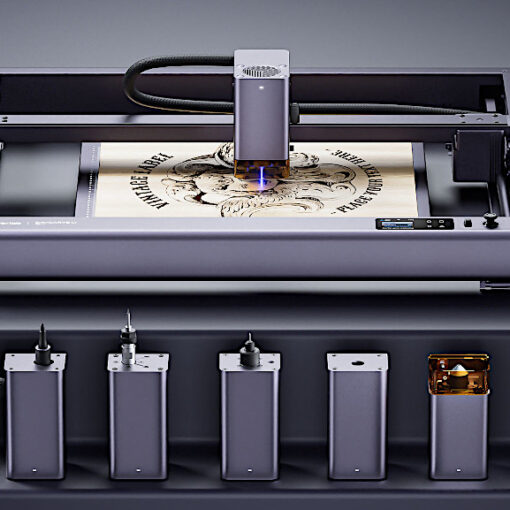
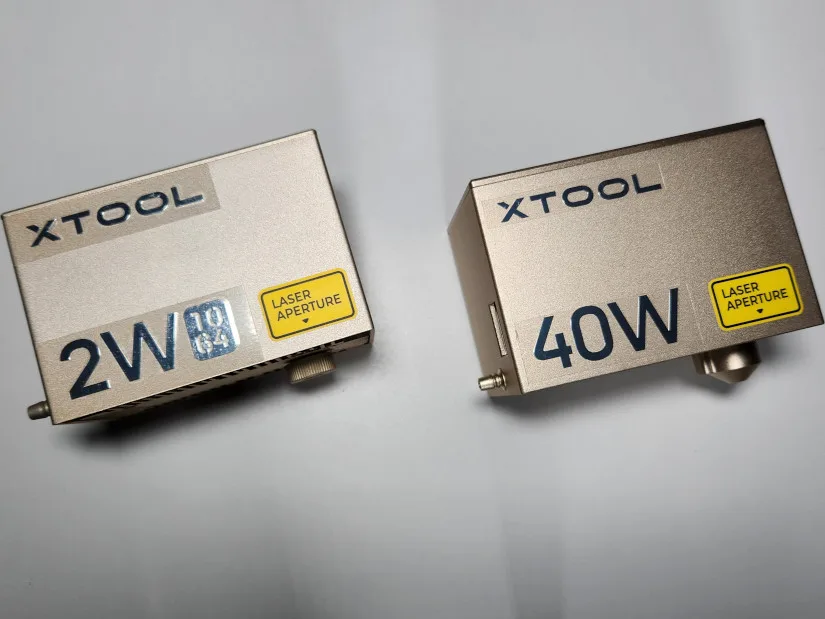
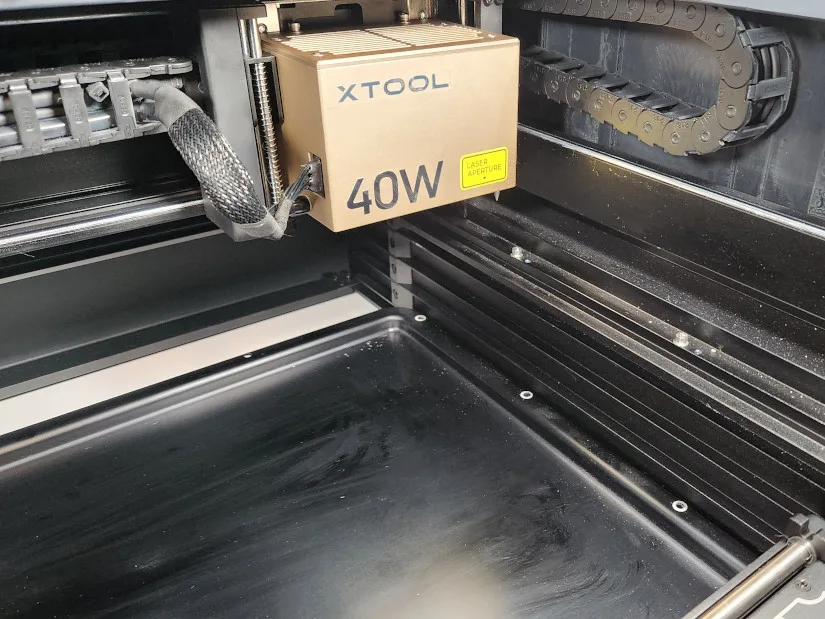
xTool S1 Included and Optional Laser Modules
The basic package laser module is 10W.
One of the S1’s biggest advantages is the flexibility to switch between four different modules depending on your needs. The 40W diode laser is ideal for making thick, rapid cuts and engravings. For finer detail, the 20W has a smaller spot size, while the 10W has the same spot size as the 2W 1064 IR module, which is also available. For our testing, we received the 40W as well as the 2W 1064 IR modules.
©3DWithUs – Photo: Will Zoobkoff
– LED Lights. The S1 also has a very bright workstation light, which allows you to see everything that is going on. The S1’s only shortcoming is the lack of a camera for monitoring and aligning cuts and engravings. This makes batch tasks challenging, but it can be alleviated by constructing a jig for the components to sit in and exporting an SVG of the jig to xTool Creative Space, allowing you to conduct batch operations. While having a camera installed would have been ideal, its lack has no negative impact on the S1, save for batch jobs.
©3DWithUs – Photo: Will Zoobkoff
– Design. Overall the xTool S1 design adheres to the xTool brand’s sleek, clean aesthetic. The S1 has a grey or new white body and a green protective acrylic lid. The conveyor and riser base complement the body of the S1, making the set appear sleek and professional in any workspace.
– Optional Honeycomb Bed. The honeycomb bed is included in the slightly more expensive package, but we would name it as one of the essentials for laser cutting as it provides optimal airflow, efficiently removing smoke and debris to ensure cleaner cuts and engravings. It aids in heat dissipation, reducing the risk of material warping or burning, and offers stable support to keep the material in place during the process. Additionally, the honeycomb pattern minimizes laser reflections, preventing unwanted marks on the material’s backside and enhancing the overall quality of the finished product.
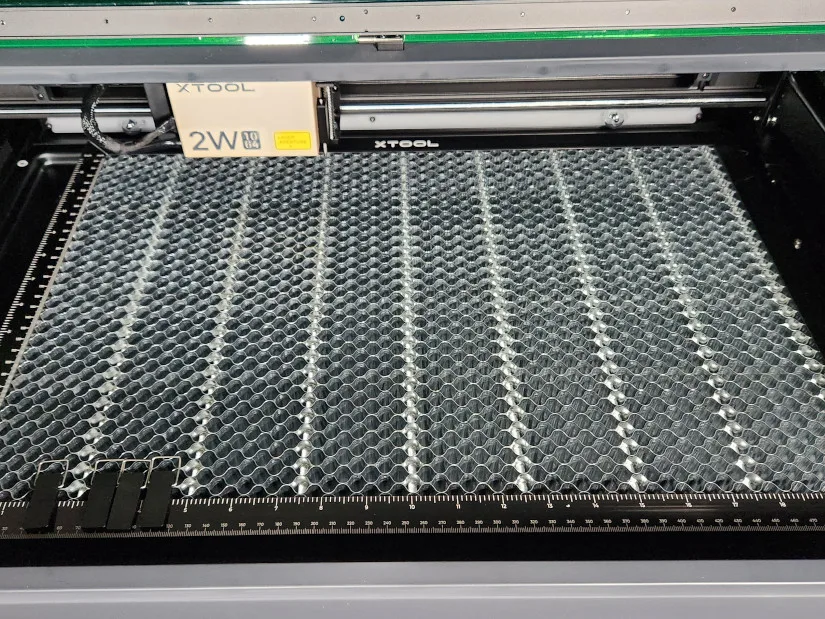
©3DWithUs – Photo: Will Zoobkoff
Optional Smart Air Assist Pump
Comes in packages with 20W and 40W lasers.
An Air Assist Pump is essential for laser cutting with powerfull laser modules as it improves cutting quality by blowing away smoke and debris, resulting in cleaner and more precise cuts. It also increases cutting speed and reduces heat damage by cooling the material, preventing charring and burning. Additionally, it extends the laser’s lifespan by keeping the lens and mirrors clean, and enhances safety by helping to prevent small fires.
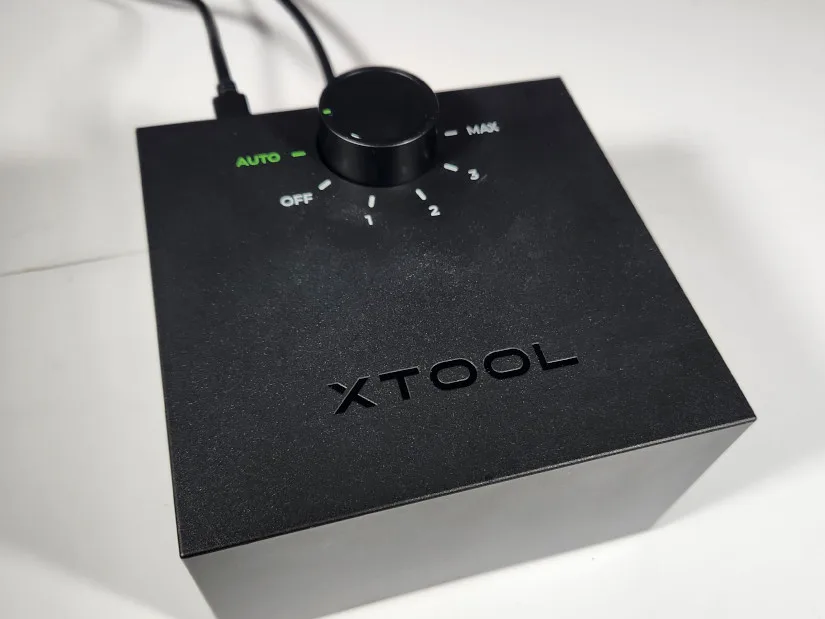
©3DWithUs – Photo: Will Zoobkoff
Setting up an automated air assist is straightforward. There is a power and control cable that plugs into the back of the machine, with three sockets available. Connect the air hose to the top fitting on the back of the machine.
Optional Riser Base
A riser base for laser cutters and engravers is essential for enhancing versatility and efficiency. It elevates the machine, providing additional clearance for working with thicker materials and accommodating rotary attachments for cylindrical objects. This added height improves ventilation and reduces the risk of smoke and debris accumulation, ensuring cleaner cuts and engravings. Furthermore, a riser base helps protect the work surface from heat damage, contributing to a safer and more effective laser cutting and engraving process.
©3DWithUs – Photo: Will Zoobkoff
Riser Base Components
• Left side panel • Right side panel • Front door • Rear door • Light-blocking foam strips • Laser safety glasses • Hex key • Assembly screws • User manual
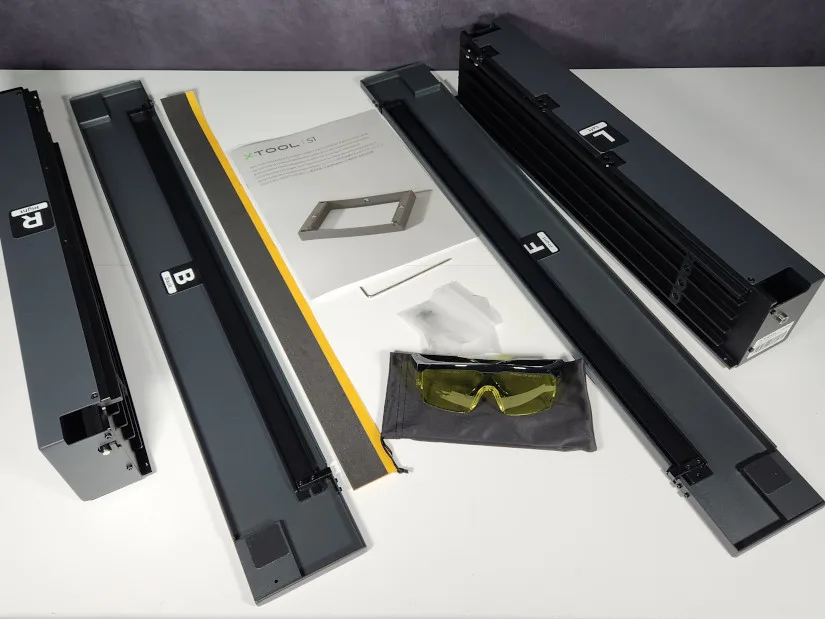
©3DWithUs – Photo: Will Zoobkoff
Setting up the optional riser base is just as straightforward as setting up the S1. Simply attach the sides to the front and rear doors as shown in the guide, and secure them with the screws provided. Next, remove the S1’s base plate by unscrewing the nine screws that hold it in place. Lower the S1 onto the riser base; this step requires assistance due to the S1’s size and weight. Once the S1 is in place, insert the supplied screws into the areas noted in the guide. To aid in smoke and laser containment, place the foam strips on the doors to close the small gap left after mounting the riser base.
Optional xTool RA2 Pro Rotary/Roller
The Rotary/Roller device is an excellent addition for laser engraving as it allows for precise and consistent engraving on cylindrical objects such as bottles, glasses, and pens. Its adjustable rollers and versatile design accommodate various sizes and shapes, ensuring that the object remains stable during the engraving process. This enhances the quality and detail of the engravings, making it ideal for personalized items and professional projects.
RA2 Pro Rotary/Roller Components
• Rotary attachment base • Support module • Jaw chuck components • Tail module • Doube step jaw x3 • Single step jaw x3 • Stud components x3 • Connection cable • Hex screwdriver • Mini level • measuring tape • user manual
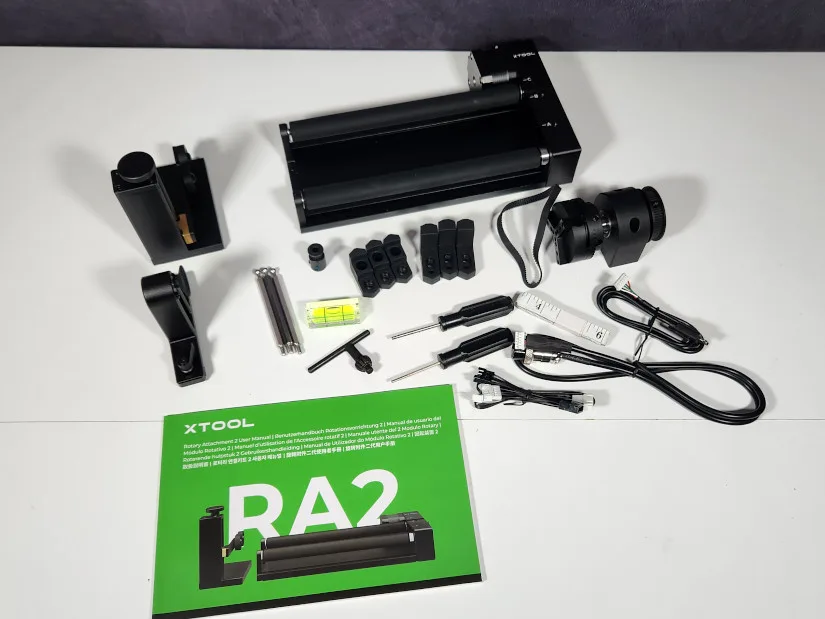
©3DWithUs – Photo: Will Zoobkoff
Optional Conveyor System
A conveyor system can be a valuable addition to laser cutting and engraving operations as it allows for continuous processing of materials, significantly increasing productivity and efficiency. By automatically moving materials through the cutting or engraving area, it reduces manual handling and enables the processing of larger or multiple pieces without interruption. This optional system ensures consistent alignment and quality, making it ideal for high-volume or complex projects.
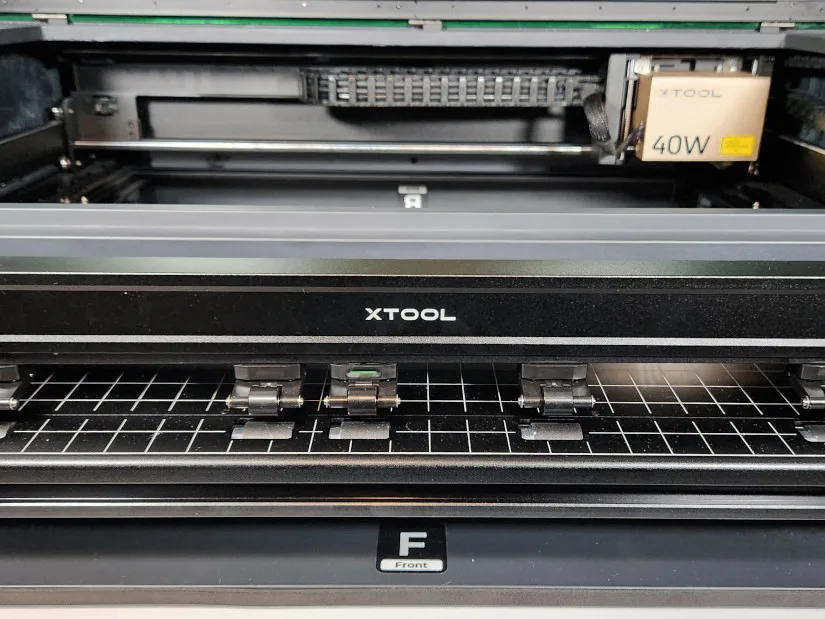
©3DWithUs – Photo: Will Zoobkoff
Conveyor Feeder Components
• Conveyor feeder • Conveyor rail x4 • Conveyor rail riser x4 • Short rail x2 • Cable clamp x2 • Material pressing rod • Cable tie • Cable tie holder • Assembly screws • Hex Key • User manual
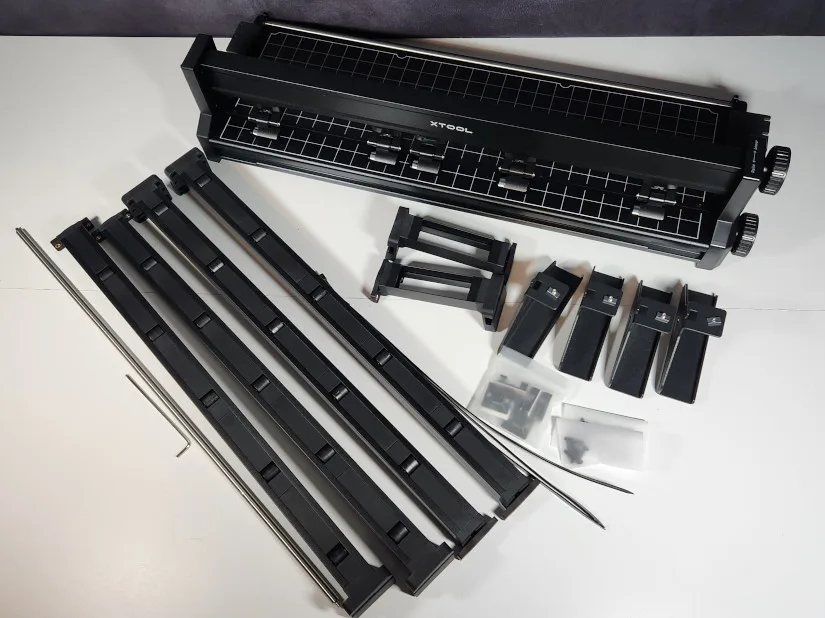
©3DWithUs – Photo: Will Zoobkoff
The conveyor system is similarly simple and quick to install on the S1. Please note that the riser base is required to operate the conveyor accessory. To install the conveyor, set the base plate on the lowest rack of the riser base and push the device into place while the front and rear doors are open. Install the four supplied securing screws, followed by the short rails on the back of the machine and the four larger rails (two in front and two in back). You can buy more rails to increase the length of material you can process.
Install the cable clips on the right side of the machine to keep the conveyor cable out of the way and allow you to access the plug on the inner front right of the machine. To complete the conveyor configuration, use the two included clip tie holders on the machine’s rear to route all hoses and cables up and away from the conveyor.
With a maximum material width of 470 mm and a thickness of 14 mm, the conveyor significantly expands the possibilities for cutting and engraving. By adding more rails, you can increase the amount of material you can process to a maximum of 90 inches!
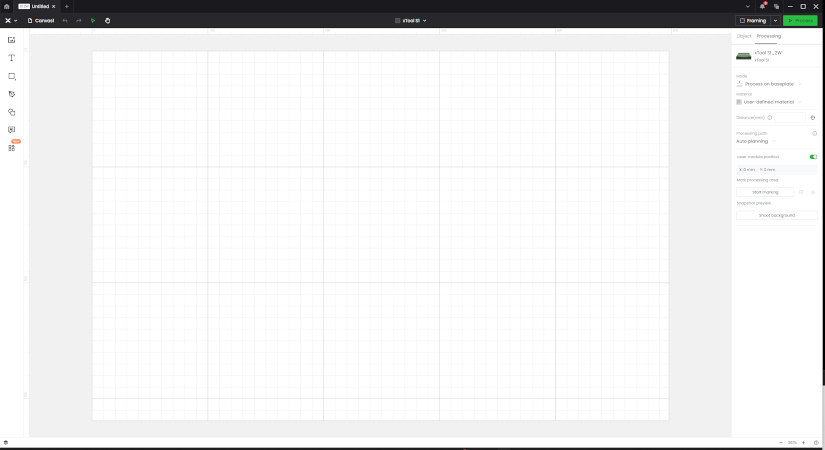
Software – Creative Space
xTool Creative Space remains as straightforward and easy to use as it was when we reviewed the xTool P2 55W CO2 laser station. The biggest difference with the S1 is how you frame and mark your work area.
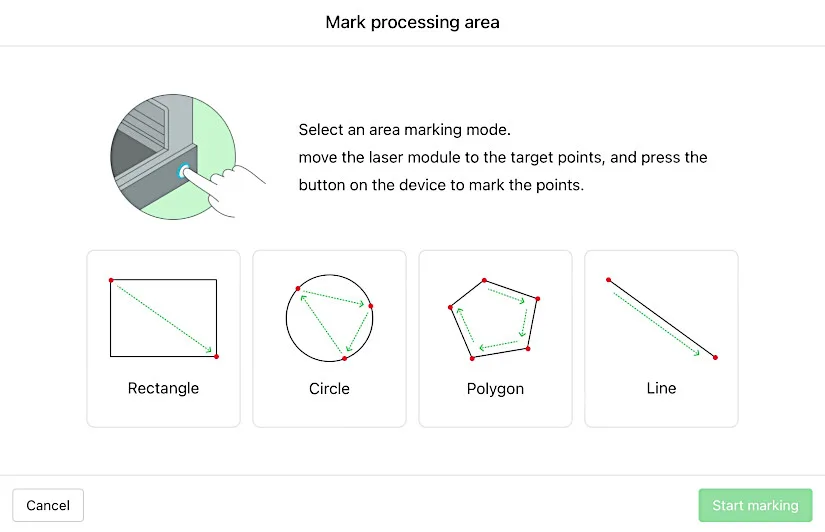
– Marking. There are four ways to mark the area for engraving. First, there’s a plain rectangle. Using two points, move the laser alignment mark to the first corner of the area and click the machine’s front button. Next, navigate to the other diagonal corner of the workspace and push the button again. Back in Creative Space, click “finish marking,” and you’ll see a rectangle of your work area where you can align your projects as needed.
The remaining three processes are carried out similarly but for different shapes. The first is the circle, which involves marking three points on the work surface to create a circle for alignment. The polygon marking comes next, and it uses five points to create a polygon-shaped alignment region. Finally, there is the line, which is essentially a two-spot marking for straight objects, such as when writing text on them.
Screenshot: Creative Space
There is also an automatic distance reading module located on the side of the laser module. Simply set the alignment mark on your material and click the target button under “Distance” to acquire a reading. You can also submit a manual measurement if you measure from the laser aperture lens to the material’s surface. This works best with thin materials like paper or felt, which may rip when the sensor contacts the surface.
Creative Space comes with everything you need for engraving and cutting. It has a project centre where users may access a variety of projects that are compatible with the S1.
On the right side of the interface, there is a drop-down menu that allows you to switch between engraving options: “Laser Flat” to use the base plate and honeycomb bed, “Cylindrical” to use the rotary and chuck attachment, and “Curved Process,” which allows you to map an object’s surface to enable engraving on an uneven or curved surface. The last two alternatives are the conveyor feeder and the xTool screen printing system.
Testing and Results
All of the projects we did while testing used the suggested xTool material settings found in the materials tab. These settings provide numerous options, making engraving and cutting much easier for those new to lasers. The lone exception was glass, which had no material possibilities under the S1 material category.
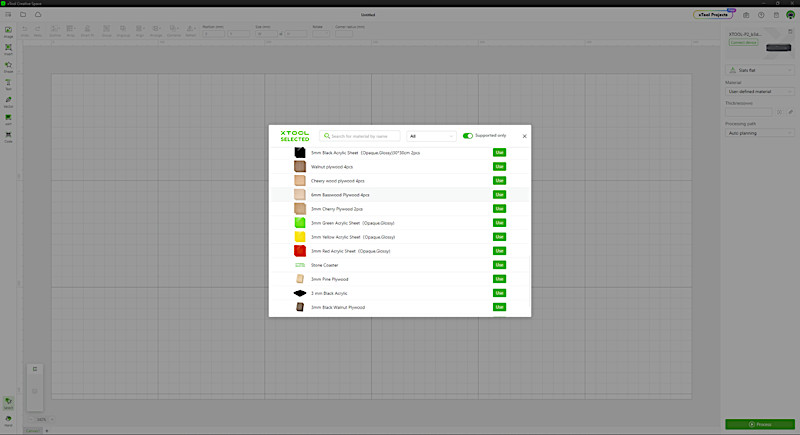
Screenshot: Creative Space
– Engraving on Glass. After further testing, we discovered that the 40W module performed admirably on glass with the power set to 60% and the speed set to 350 mm/s. To engrave the glass, you will need to coat it first. Acrylic paint works well, as does any primer paint that is washable. Results may vary depending on the thickness of the glass.
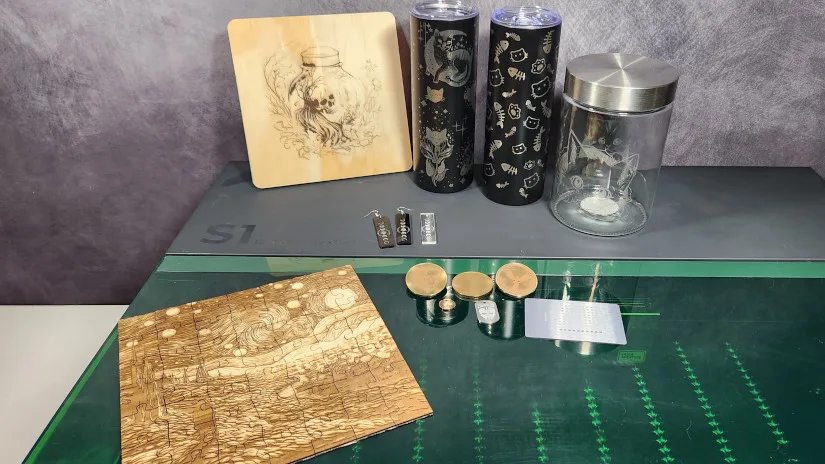
– Stainless Steel Tumblers. For our initial test, we engraved a pair of black-coated stainless tumblers. We used the 40W diode module with the indicated tumbler settings: 200 mm/s speed and 5% power. When operating the RA2 Pro in chuck mode, you must measure the perimeter of the tumbler so that the S1 can determine how much the rotary will revolve for each inch. If you use the RA2 Pro in standard roller mode, you will not have to do this.
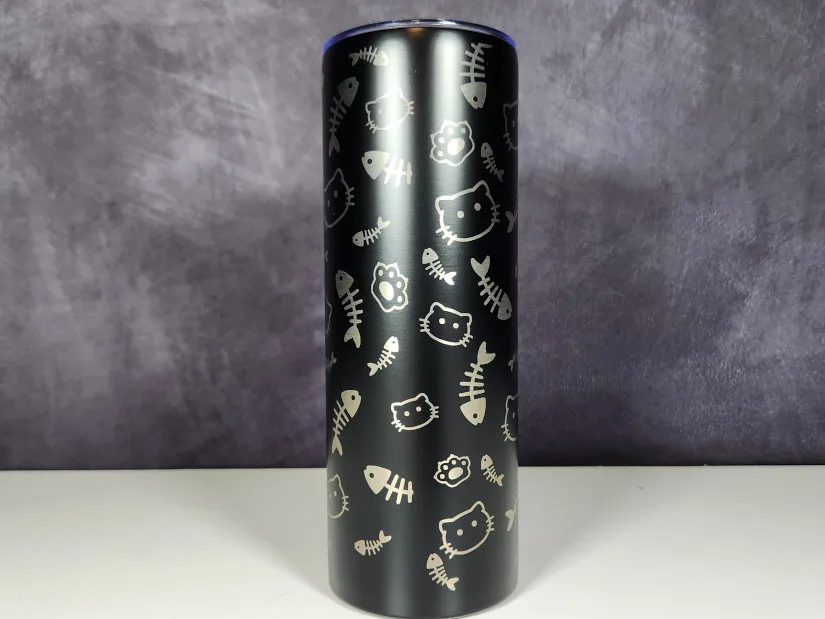
Celestial Cats by DPPDigitalPrintables on Etsy
©3DWithUs – Laser Job & Photo: Will Zoobkoff
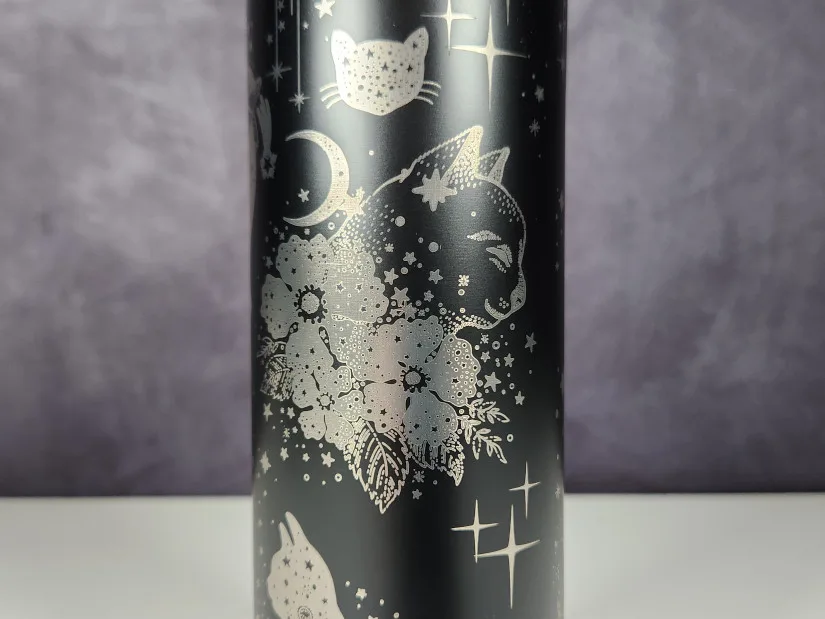
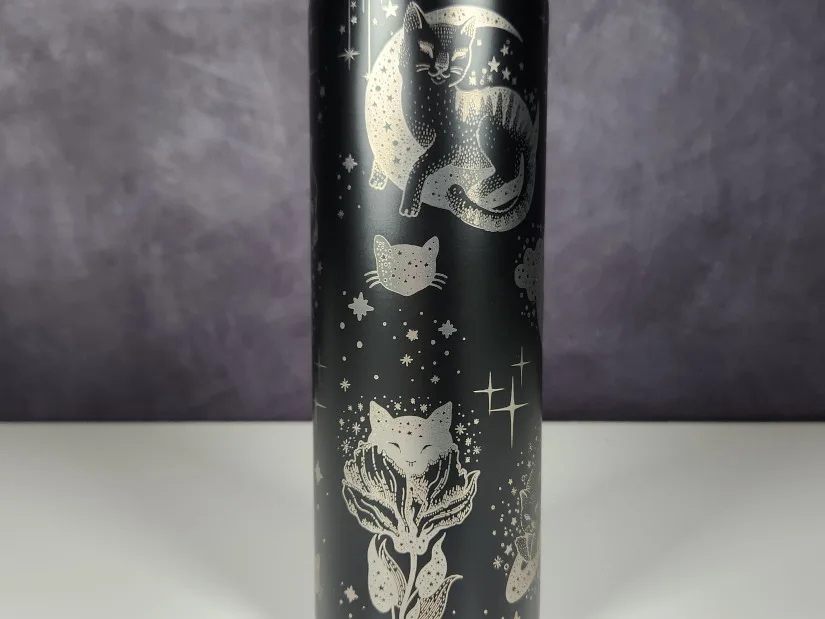
The results are just beautiful. Even the simplistic style of one tumbler is visually appealing, with the intricate cats and stars standing out in excellent detail. The 40W module has the largest spot size of the four, yet the detail remains remarkable. The 20W and 10W modules feature smaller spot sizes, which are suitable for extremely fine engraving details.
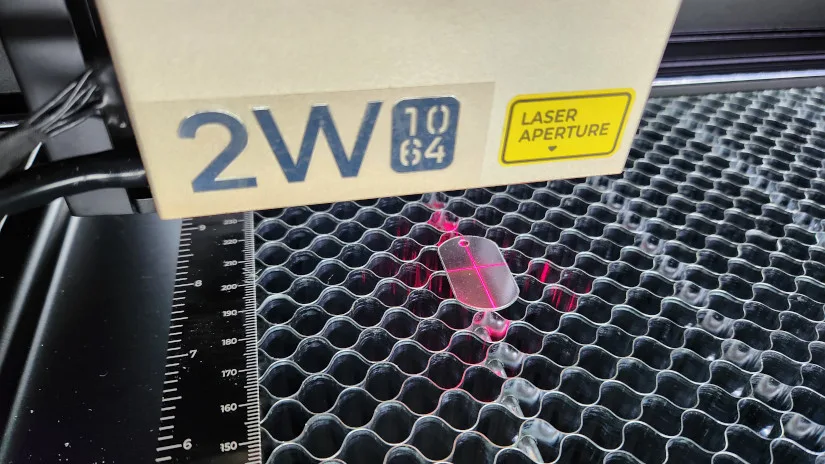
– Etching Metal, 2W IR Module. The 2W 1064 IR module, which works well for engraving most metals and black acrylic, was used in place of the 40W diode module for the upcoming test. We decided to engrave two challenge coins this time. These coins are perfect for testing the IR laser module and etching metal. The designs we chose were from the excellent website laser-pics.com, which provides both high-quality selections available with a subscription and a large selection of free photographs for engraving.
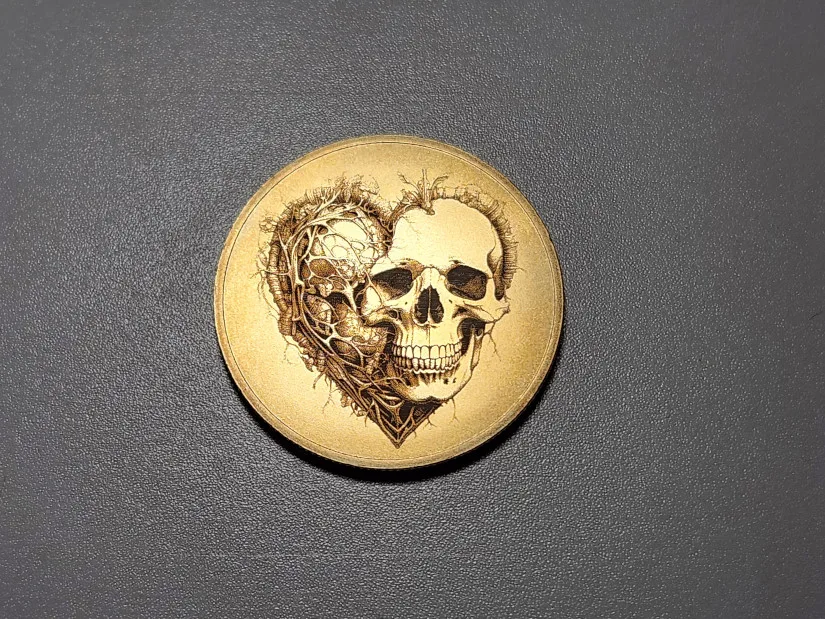
Design by J. Wagner on Laser Pics
©3DWithUs – Laser Job & Photo: Will Zoobkoff
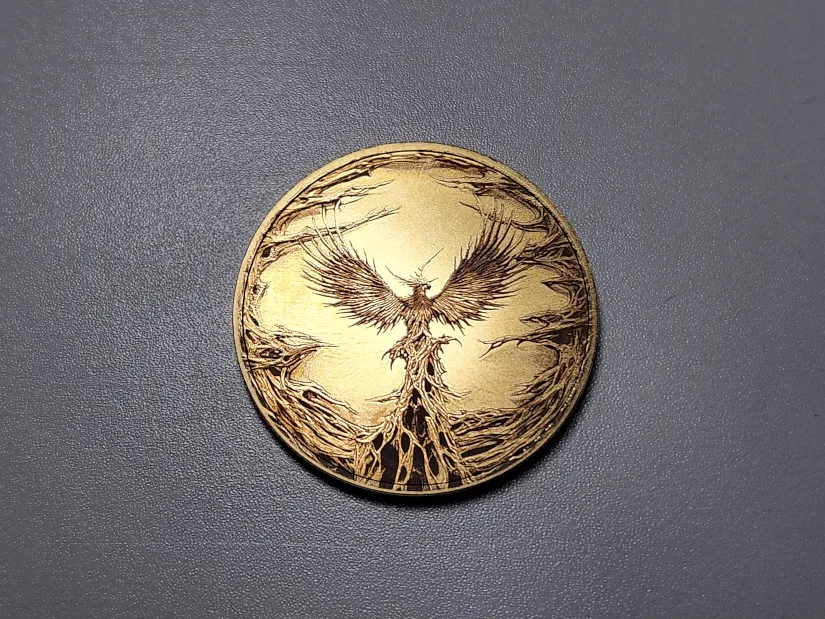
Design by J. Wagner on Laser Pics
©3DWithUs – Laser Job & Photo: Will Zoobkoff
The designs on the coins turned out beautifully when 90% power and 90 mm/s speed were used as recommended. Because of the IR module’s 0.03 x 0.03 mm spot size, which ensures extremely fine engraving, the detail on these coins is truly remarkable. Even the shadows cast by some of the rocks looked amazing, bringing the dragon on the rocks to life. The other coin, which featured a skull and heart pattern, was just as impressive and demonstrated the level of detail that the 2W 1064 IR module could produce.
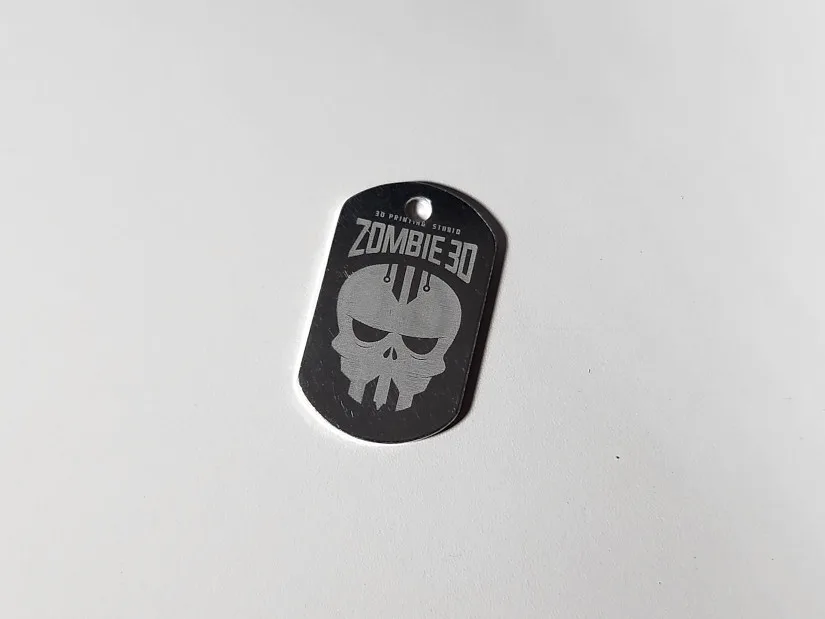
– Metal Tag, 2W IR Module. We quickly engraved a metal tag using the IR module once more, setting the speed to 160 mm/s and 60% power. We decided to use the StudioZombie3D logo for this test. The engraving looks fantastic and is a perfect way to showcase the accuracy and clarity that the IR module can achieve on metal. The module’s capacity to engrave delicate metal was demonstrated by the flawless capture of the logo’s small text. This brief test confirms the module’s dependability and efficiency for high-quality metal engravings.
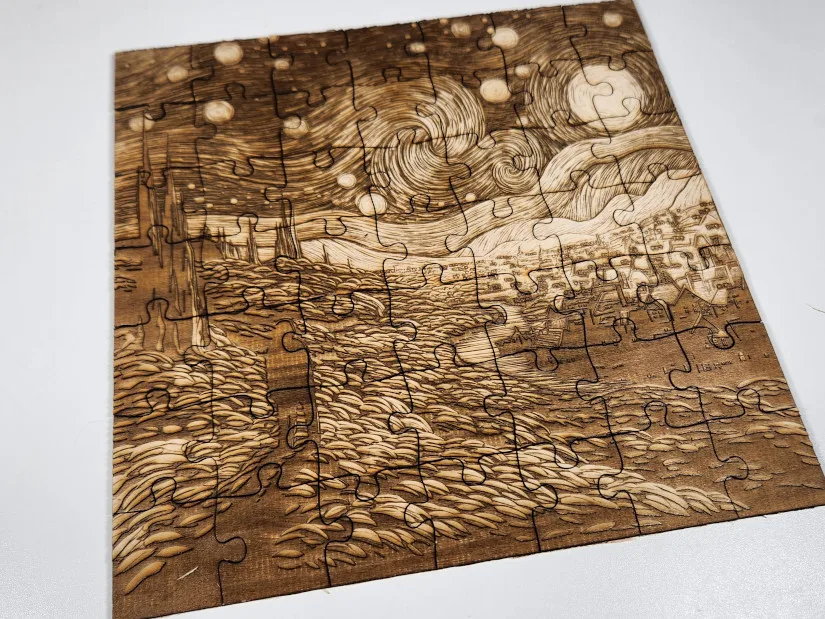
– Wood, 40W Module. After we put the 40W module back in, we chose to attempt an engraved and cut jigsaw puzzle. To make the jigsaw cut pattern, we used an online puzzle generator by Draradech on GitHub. To make the darker portions of the image stand out, we decided to slightly increase the recommended power for this engraving from 25% to 30% while maintaining the recommended speed of 200 mm/s. After importing and sizing the jigsaw pattern to fit over the image, we put the engraving on layer one. We followed the recommended parameters for the cut, which were 100% power and 25 mm/s. After finishing the engraving, the S1 cut the jigsaw out, and the outcome is something we are really pleased with. The image came out clear, and the cuts were clean. This is a great idea for a gift; you can engrave various images, or if you have the ability to do sublimation or DTF, you can create color images and cut them out.
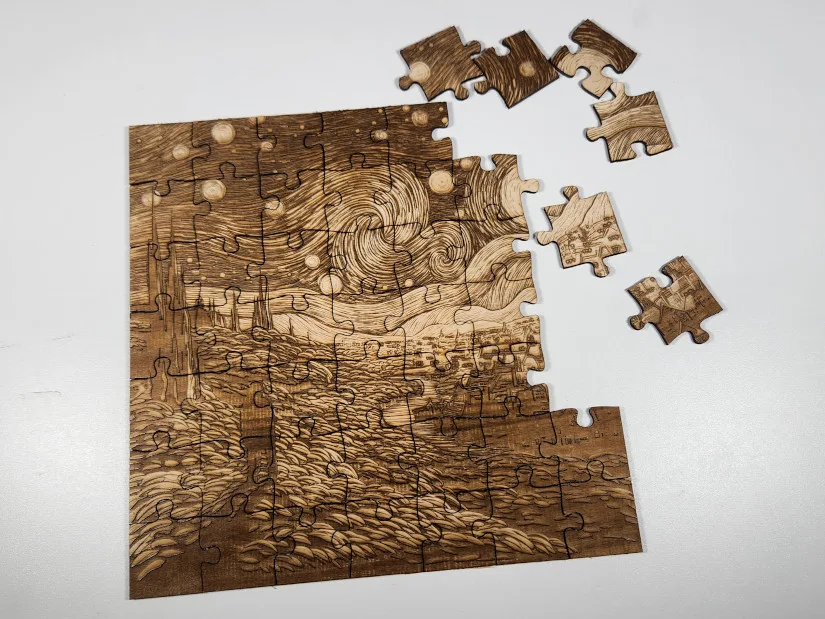
Design by J. Wagner on Laser Pics
©3DWithUs – Laser Job & Photo: Will Zoobkoff
– Wood, 40W Module. Next, we used the recommended settings of 25% power and 200 mm/s to engrave a square piece of wood. With all of its fine intricacies, this potion bottle design turned out well. Though the final product was still excellent, we could have increased the power to 30% to make the lighter wisps stand out more. The exquisitely rendered small lines and shading demonstrated the engraving process’s accuracy. This test proved the machine’s efficacy in handling intricate designs, making it perfect for tasks involving a high degree of detail.
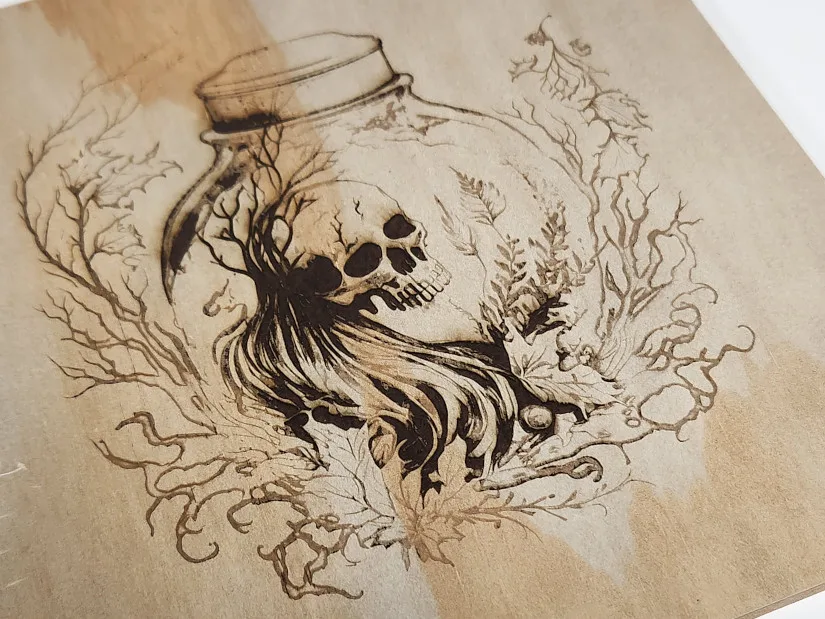
Design by ThursdayPrintsMY on Etsy
©3DWithUs – Laser Job & Photo: Will Zoobkoff
– Glass Jar, 40W. We decided to engrave a glass jar with a few peeking cat designs we found on Etsy as our last test. Glass didn’t have any recommended parameters, so after some trial and error, we discovered that 400 mm/s at 60% power was the ideal speed. You will need to paint over the glass in order to use the diode laser. Any type of washable acrylic or primer paint will work well.
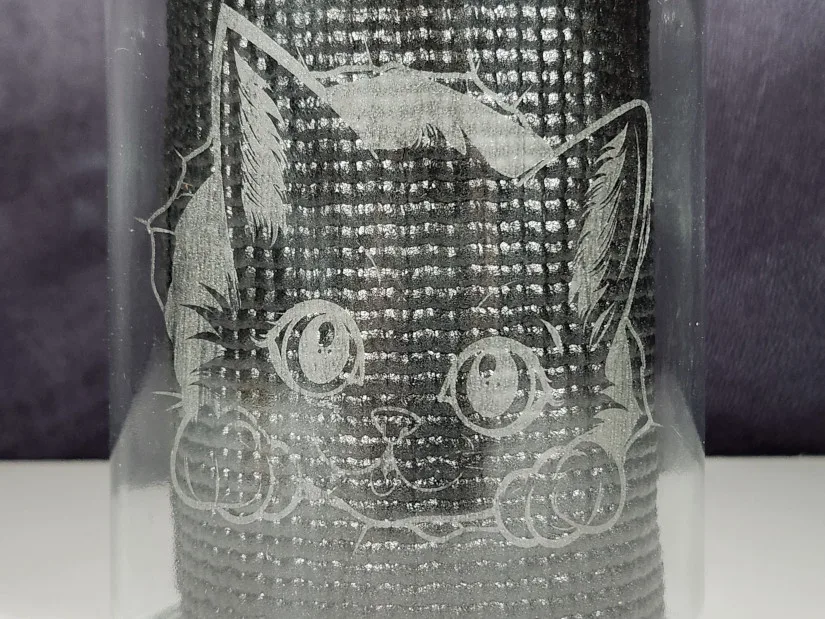
©3DWithUs – Laser Job & Photo: Will Zoobkoff
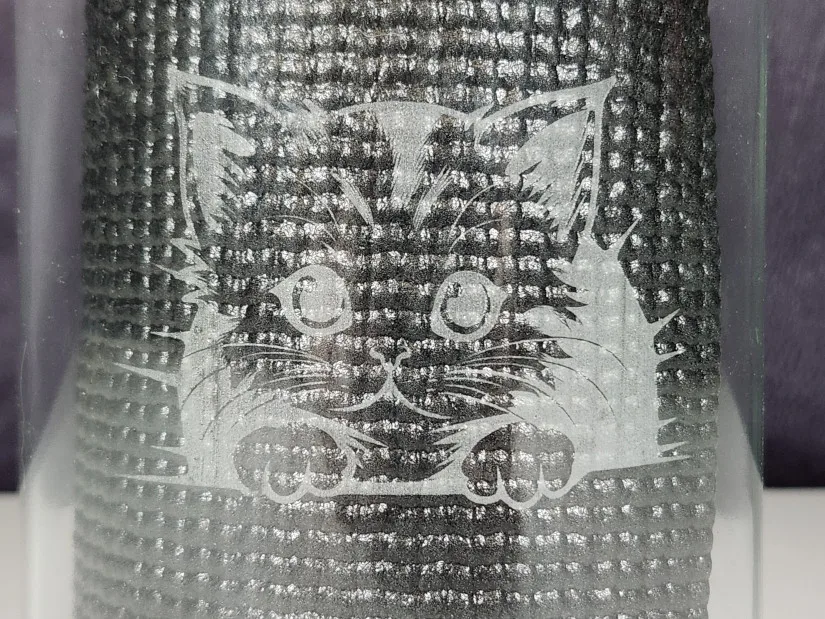
For the smaller cat face, we used airbrush primer, and for the larger cat face, we used black acrylic. With the glass and the diode laser, both techniques performed incredibly well, and the outcomes were excellent. The faces were clear and simple to see.
©3DWithUs – Laser Job & Photo: Will Zoobkoff
Compare to Other Laser Cutters and Engravers
Compare to Other xTool Laser Cutting and Engraving Machines:
xTool has a diverse range of laser systems to cover all needs. Here is a very helpful comparison page where it is possible to compare products and laser types.
On 3DWithUs, we have featured a few laser cutters and engravers that operate with diode lasers.
- Snapmaker 40W Laser Module (Review)
- Creality Falcon2 22W (Review)
- LaserPecker LP2 Laser Engraver (Review)
For a comparison with other laser cutters and engravers, please refer to the detailed Best and Budget Laser Cutters and Engravers Guide.
The xTool S1 system features diode lasers within a fully enclosed design, placing it in the same category as products from Snapmaker and Creality. On our website, you can compare their prices, capabilities, and functionalities. What sets xTool apart is its leading-edge add-on systems, including riser and conveyor options.
Conclusion and Pros & Cons
xTool S1 Review
Review Summary
The xTool S1 demonstrates its versatility and capability as a laser engraver, performing very well in a range of engraving and cutting applications. Its four distinct laser modules (10W, 20W, 40W diode lasers, and a 2W 1064 IR laser) can be switched out, giving customers the versatility to effectively handle a variety of materials and applications. The S1 lacks an alignment camera, but it includes manual framing options that guarantee precise engraving and cutting. Its versatile design, which appeals to both professionals and enthusiasts, is further enhanced by the large work area, RA2 Pro attachment, and conveyor system.
During our testing, the S1 performed brilliantly on various tasks. The engraving of black-coated stainless steel tumblers demonstrated the 40W module’s capacity to create detailed and crisp graphics. When we switched to the 2W 1064 IR module, we got excellent results on challenge coins and metal tags, demonstrating the module’s metal engraving precision. The engraved and cut jigsaw puzzle was another success, with clean cuts and a clear image, demonstrating the S1’s ability to handle complicated tasks. The wood engraving and glass jar tests demonstrated the machine’s versatility, delivering high-quality results on a variety of materials.
Overall, the xTool S1 is one of the most comprehensive engraving and cutting systems available, offering simple setup, a user-friendly interface, and reliable performance across a wide range of materials. The xTool S1 is an excellent choice for anyone wishing to purchase a high-quality, multipurpose laser engraver. Its variety of features and dependable performance make it an excellent addition to any workshop.
Pros
• Large Work Area
• Easy Switch 4 Laser Module Options
• Riser Base and Conveyor System Options
• Rotary / Chuck Option
• Easy Setup
Cons
• No camera for alignment
• Beep is really loud