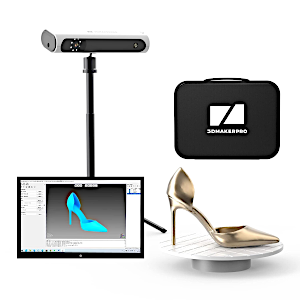
Introducing the 3DMakerPro Lynx, a 3D scanner designed to precisely capture larger items. This cutting-edge technology tool underscores 3DMakerPro’s commitment to providing affordable solutions for both beginners and non-professionals keen to venture into the world of 3D scanning without stretching their budget. In this review, we’ll examine the device, evaluate the software and guide, scan a few models, and outline the Pros and Cons.
Table Of Contents
- Specifications
- What’s in the Box
- Setup and Design
- Software – JMStudio
- 3D Scanning Guide
- 3D Scanning Objects
- Results
- Compare to Other 3D Scanners
- Conclusion and Pros & Cons
3DMakerPro Lynx Specifications:
• Accuracy 0.1mm
• Single Capture Range 400 x 250mm
• Working Distance 400 – 900mm
• Scan Speed 10 fps
• Light Type NIR
• Alignment Visual Tracking
• Color Optional with Luxury Package
• Output Format OBJ, STL, PLY
• Required PC Windows or Mac
• Android/ ios support via connect accessory
Price: $459-649
Product affiliate links: 3DWithUs is supported by its audience. Purchases via some links may earn us a small commission at no extra cost to you. This helps us to continue bringing you high-quality content. Our guides and reviews remain unbiased and independent.
Anyone wishing to get started with 3D scanning without having to pay the typically expensive prices will find it to be an appealing option thanks to its user-friendly features and affordable pricing.
©3DWithUs – Photo: Will Zoobkoff
When looking for a compact 3D scanning solution while on the go, the Lynx is a great option because it includes a handy clamshell carrying case. Although the scanner does need a power source to operate, 3Dmakerpro has cleverly developed a portable accessory just for the Lynx. The 3DMakerpro Connect expands the possibilities of what may be done with this adaptable device by removing the reliance on a fixed power outlet. Users are freed from the restrictions imposed by conventional power sources, allowing them to study and scan a greater variety of topics without being bound to a certain area. With this increased adaptability, users are now free to express their creativity and find new uses for the Lynx in a range of fields, such as engineering, art, and design, among others.
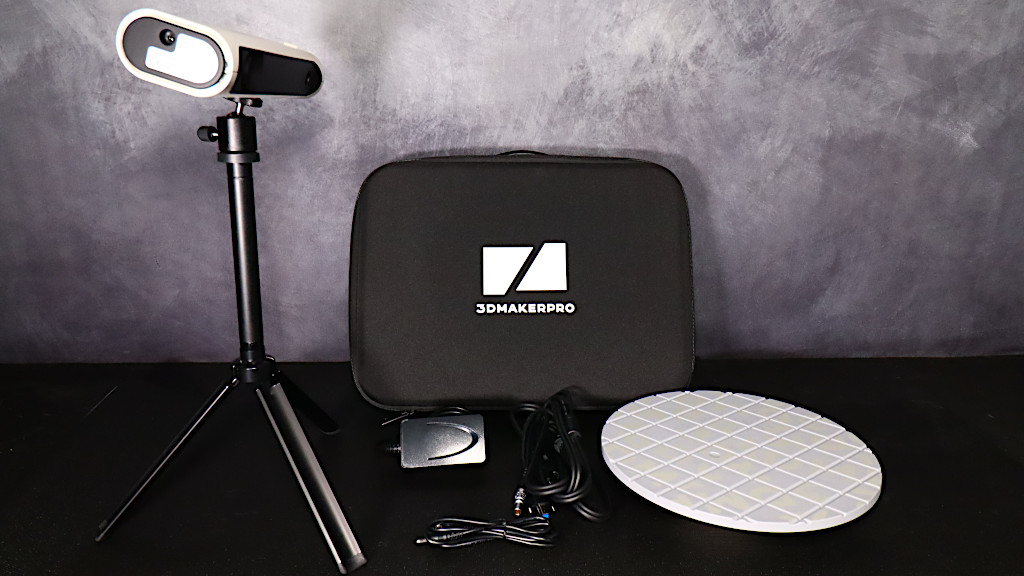
What’s in the Box
• Lynx 3D scanner
• tripod that doubles as a handle
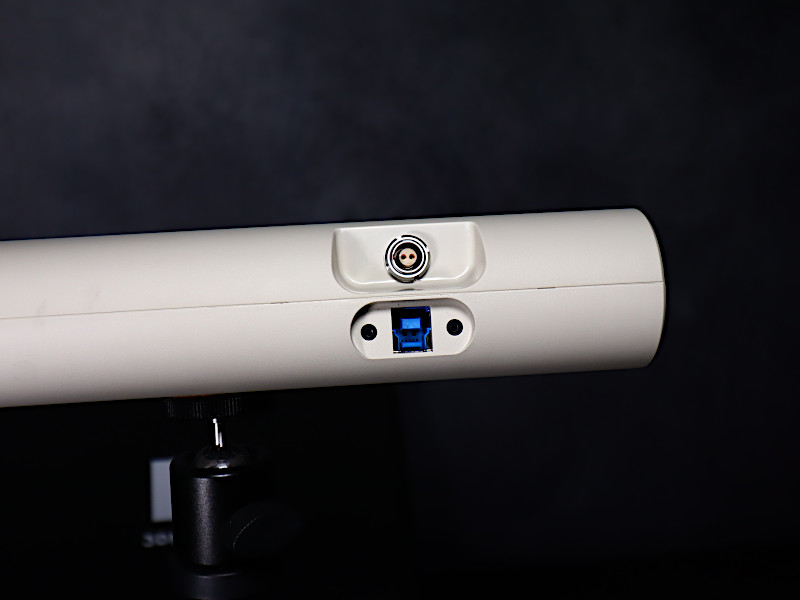
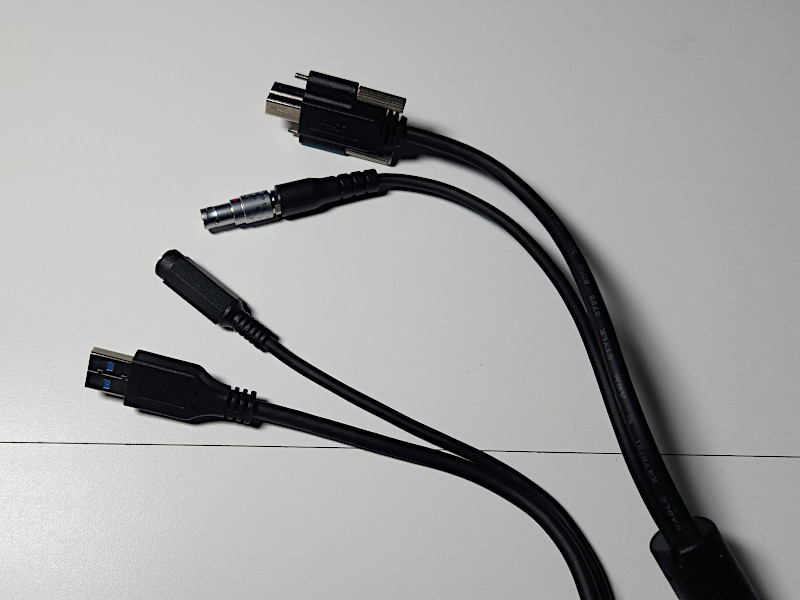
• data cable
• power adapter
• turntable
• extended surface for the turntable
• cable to connect the turntable to the scanner
• quick start guide
• carrying case
©3DWithUs – Photo: Will Zoobkoff
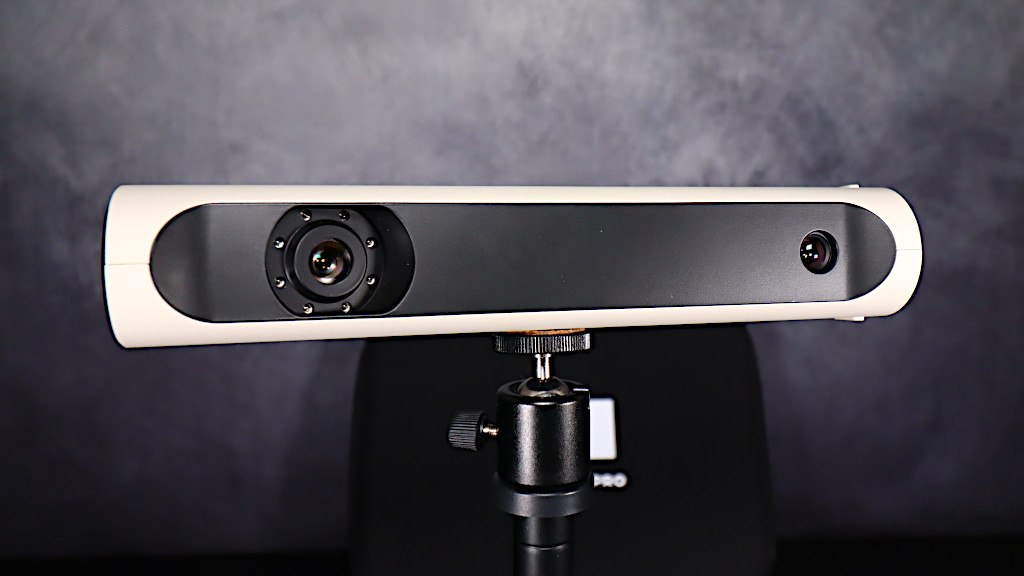
Setup and Design
As you open the package, you’ll find that the unboxing process is straightforward and hassle-free. The 3DMakerPro Lynx’s packaging is intentionally designed to be minimalist, focusing on the essentials and delivering a no-fuss experience for users. The inclusion of a dedicated carrying case is a thoughtful touch, making it easy to transport and protect your scanner while ensuring it’s ready for your 3D scanning adventures.
©3DWithUs – Photo: Will Zoobkoff
The Lynx 3D scanner’s premium bundle comes with a wide range of accessories. Along with the Lynx scanner itself, this bundle includes a handy tripod that cleverly doubles as a handle for extra mobility. You will have everything you need to get started thanks to the data cord and power adapter that are included. A turntable is also included in the box, which improves your scanning abilities by enabling dynamic object positioning. An additional surface for the turntable is supplied to increase the functioning of the device and accommodate a greater variety of objects for scanning.
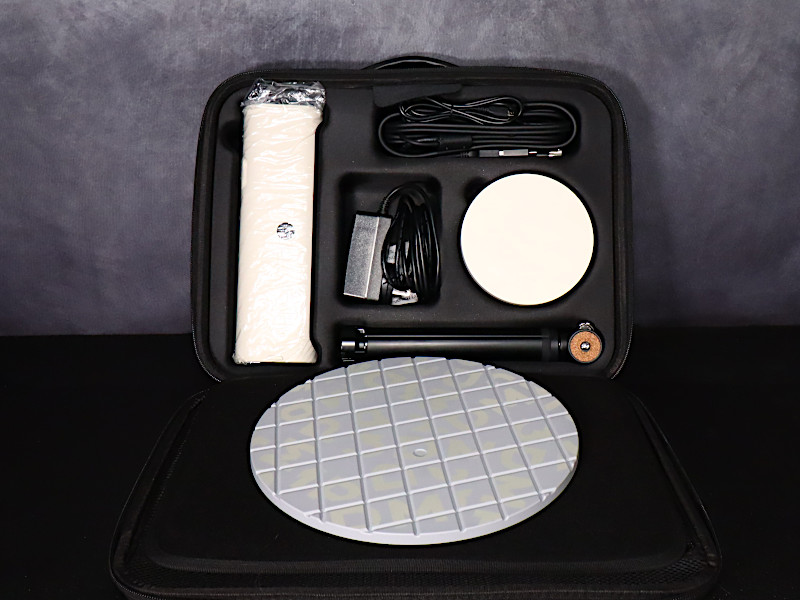
A dedicated cable connects the turntable and scanner which makes for easy integration. A quick start guide is provided to get you started using your scanner quickly and easily. But what really distinguishes the premium kit is the clever inclusion of a luxury carrying case to hold all these parts. In addition to offering secure storage, this instance is a testament to the careful thought put into improving the whole customer experience.
The inclusion of the clamshell carrying case demonstrates the company’s dedication to user happiness as well as its understanding of the importance of portability and convenience in the 3D scanning industry.
The Lynx Premium model includes a few extra features and elements not included in the Standard package. It’s worth noting that the Luxury version contains the Color Kit, which is great for capturing color textures. However, if color scanning is not required for your specific situation, the Premium or Standard editions are more than acceptable.
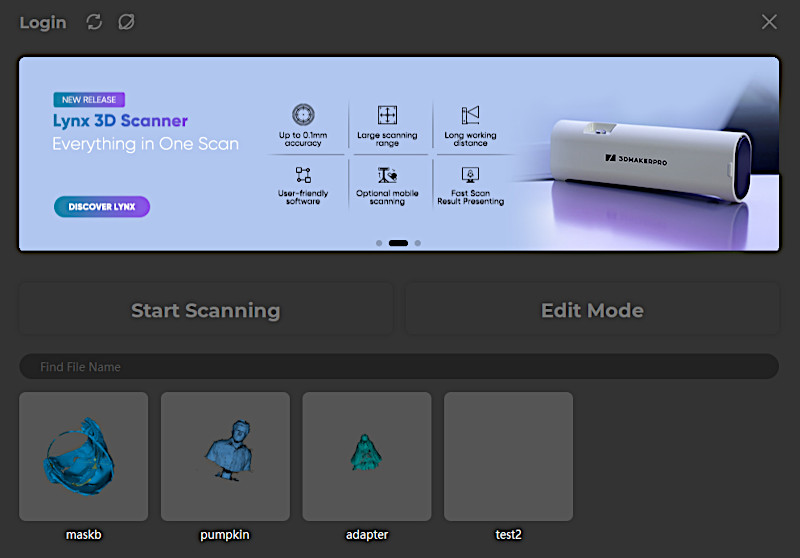
Software – JMStudio
The 3DMakerPro Lynx’s 3D scanning process is aided by the included JMStudio software. This adaptable program is your entry point to a flawless 3D scanning experience. You can start the capture of point cloud data right from the 3D scanner with JMStudio, which is the foundation of the 3D scanning process. JMStudio’s value is enhanced by the ability to clean and align the collected data. This phase is critical for ensuring your 3D model’s quality and precision. Following the editing and alignment, the software allows you to turn the data into a mesh. The mesh is a polished, comprehensive depiction of the scanned object or subject.
File Formats
JMStudio’s adaptability in terms of export possibilities is one of its outstanding qualities. Your 3D scan data may be readily exported to a number of popular 3D file formats, including OBJ, STL, ASC, and PLY. This adaptability makes it possible for you to easily incorporate your scanned data into a variety of applications and platforms. In essence, JMStudio streamlines the entire workflow of 3D scanning, from data collection through processing and export. The 3DMakerPro Lynx’s capabilities are improved by this user-friendly software, making it a complete solution for your 3D scanning requirements for both professionals and enthusiasts of 3D scanning.
When you launch the application, you’re greeted by the central welcome screen, and here lies a pivotal decision that sets the tone for your 3D scanning journey. You must choose whether to embark on the scanning adventure in scan mode or delve into the realm of editing with edit mode. It’s worth highlighting that these two modes seamlessly coexist within the same program; your choice essentially serves as your starting point in the world of 3D scanning.
3D Scanning Guide
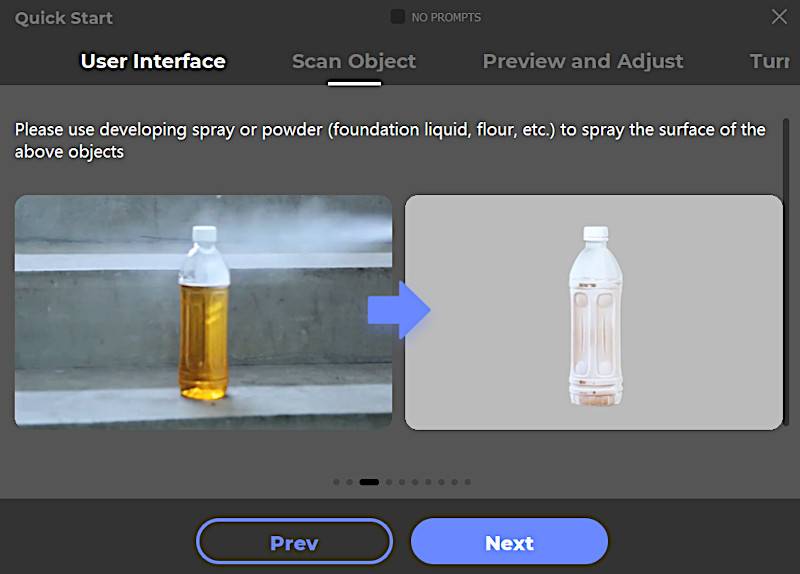
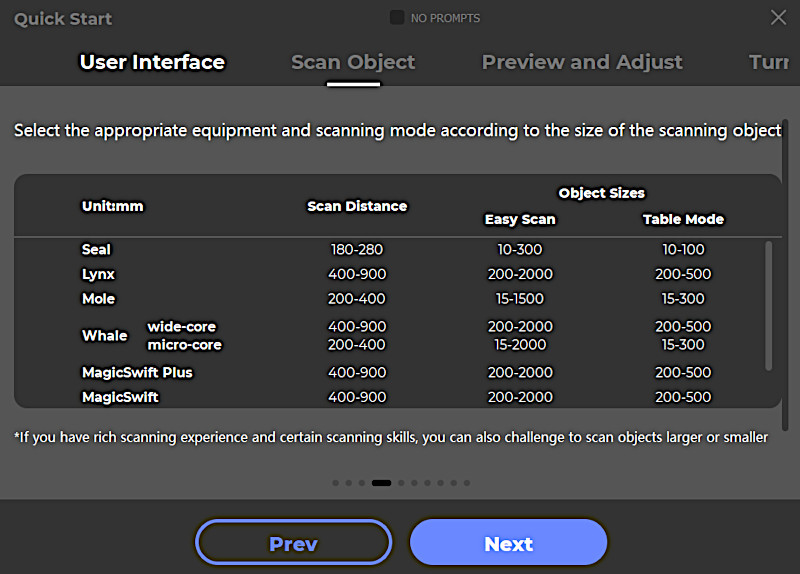
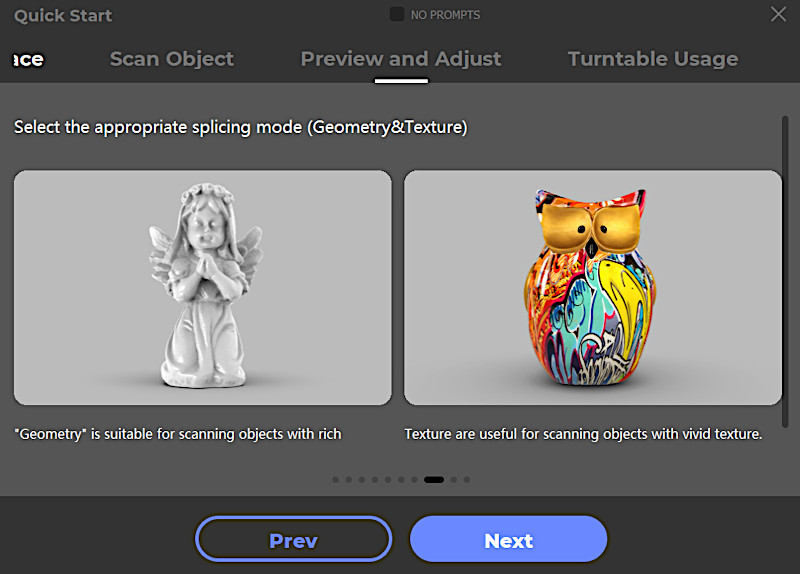
When you select scan mode, a user-friendly guide will assist you in adjusting and positioning the objects you want to scan. This guide’s depth and completeness are what make it so exceptional. It provides a wealth of knowledge and detailed but simple to follow step-by-step directions, explaining every topic in detail.
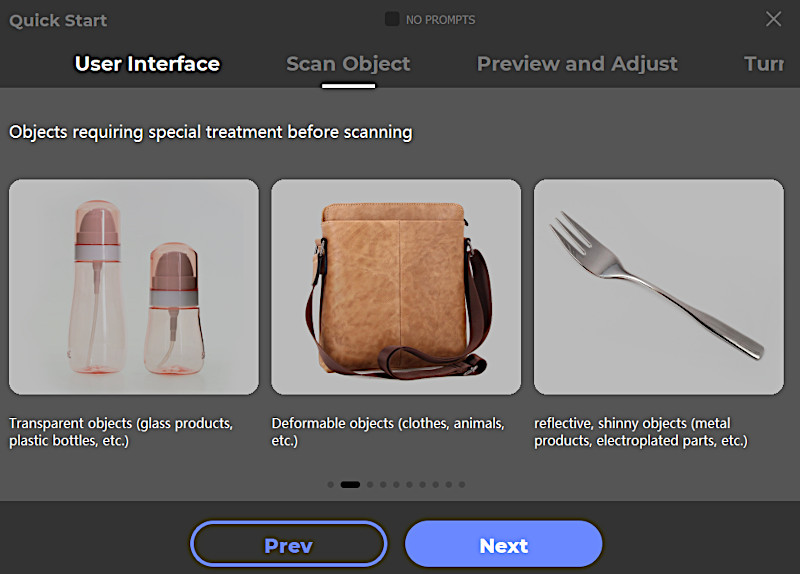
Guide: 3DMakerPro
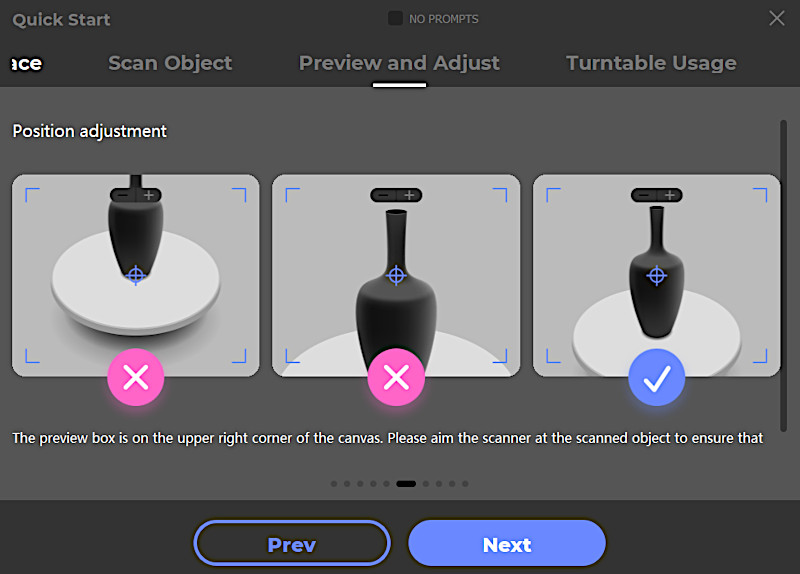
This function proves to be incredibly helpful, especially for those who are new to the field of 3D scanning, as it offers the clarity and assistance required to carry out a successful scanning procedure, inspiring confidence and competence in your scanning activities.
3D Scanning Objects with 3DMakerPro Lynx
An Asus ROG Strix laptop with a 13th-generation Intel Core i7-13650HX processor, 32 GB of RAM, and an Nvidia RTX 4050 GPU with 6 GB of dedicated video memory was used for our tests. I noticed that the RTX GPU didn’t seem to be actively used while testing. The laptop continued to use the integrated graphics even after I made an effort to forcibly prioritize the RTX in the Windows graphics settings.
In a laptop configuration with both integrated and dedicated graphics, it appears obvious that a software patch or update is required to enable the separate GPU’s utilization. The performance of the GPU would likely be enhanced by this patch, ensuring that it is fully utilized and boosting the overall functionality of laptops with dual graphics built in.
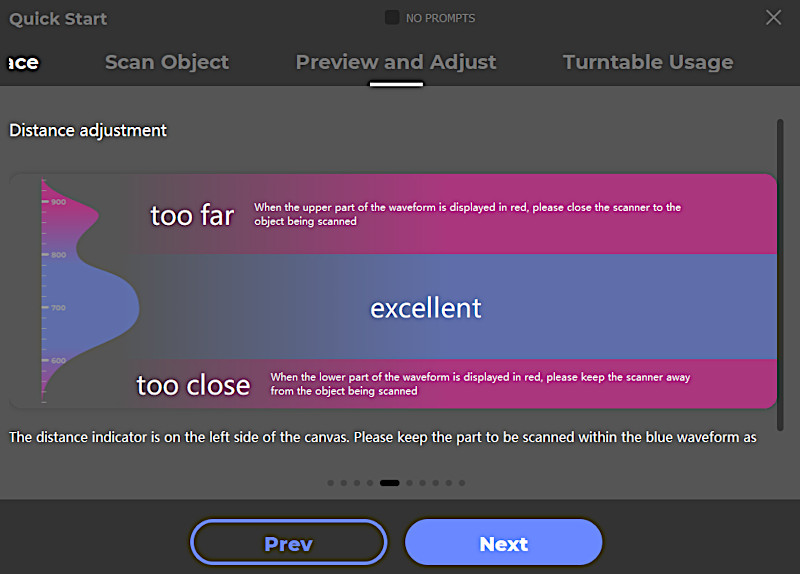
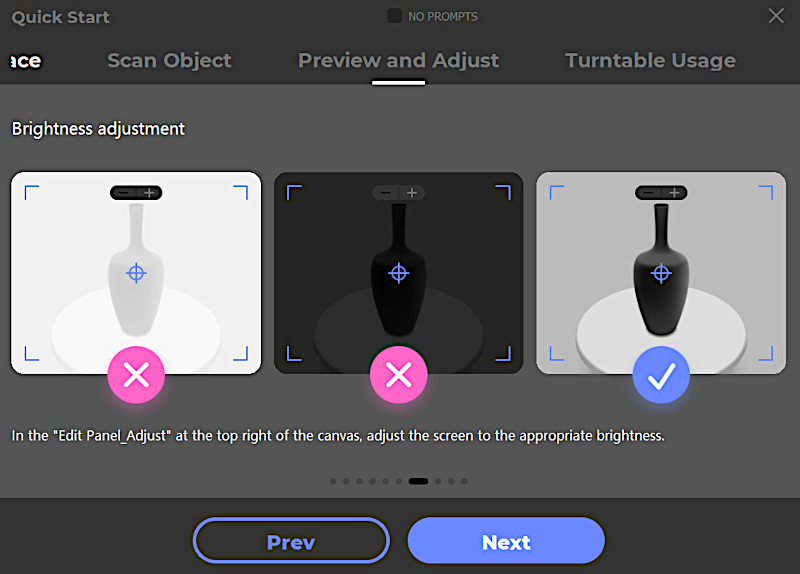
The initial phases of your scanning procedure are rather simple once you’re ready to start. You align the scanner so that it faces the object you want to scan. To improve the scanning circumstances at this stage, you might need to tweak the brightness settings in the software. It’s important to note that the software has a very helpful feature: it ingeniously highlights the red areas of the object that are difficult for the scanner to capture because they are either too close or too bright. This visual indication enables you to quickly recognize any potential problems and take appropriate action, resulting in the best scan results.
This function is quite helpful in assisting users with the scanning procedure and making it easier to get high-quality results. It not only improves the overall user experience but also highlights the software’s intelligent design by making the scanning process more approachable and user-friendly for users of all levels of experience, from novices to experts.
©3DWithUs – Photo: Will Zoobkoff
The length of the cable and the requirement to stay connected to a laptop or PC the entire time during the process hindered my ability to do large scans. The 3DMakerpro website handily offers the optional Connect device for just $89 USD as a convenient solution to this problem. With a built-in power bank, this device considerably improves the convenience of mobile scanning with your smartphone. It is a simple, affordable solution.
Choosing to purchase the Connect accessory turns out to be a game-changer, giving consumers far greater freedom in their scanning attempts. They are freed from the limitations imposed by cord length and the need to remain connected to a computer thanks to this ingenious add-on. Users can therefore take pleasure in their increased mobility and independence as they go out on their scanning excursions.
In addition to removing these physical restrictions, the Connect accessory improves the scanning process as a whole. Users are given the freedom to explore a wider range of scanning environments and scenarios, broadening the scope of what their 3D scanning gear is capable of.
Results
When using the majority of 3D scanners, it is typically advised to use 3D scanning spray or paint from Amazon for the best results. This makes it easier for the scanner to record the object with the highest level of clarity and accuracy. When scanning glossy or dark black things, the Lynx in particular may experience difficulties. In such cases, it is advised to use a coating that makes scanning easier. Fortunately, there are a number of such devices on the market that are both safe to use and simple to remove once scanning is over, improving the scanning process’ overall efficiency and efficacy.
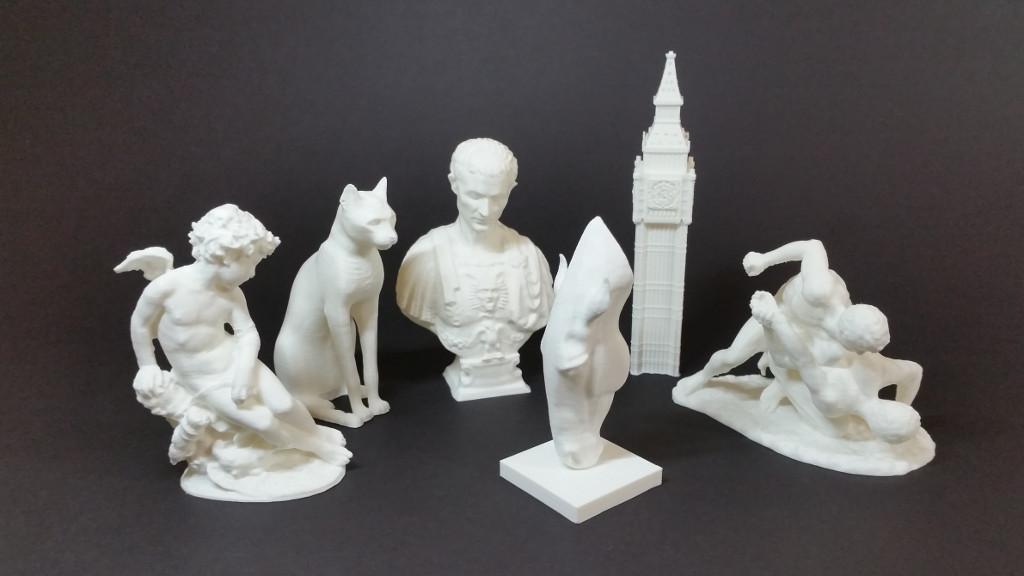
I used a variety of readily accessible items from my desk for my testing. I incorporated a pumpkin because it is a traditional emblem of this time of year in order to portray the mood of the forthcoming Halloween season. I also scanned a few busts that I had printed before for printer evaluations.
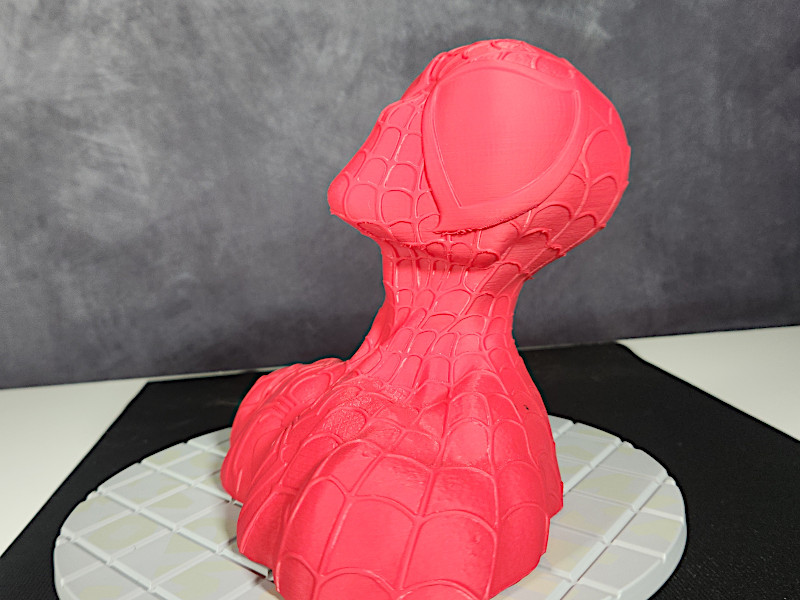
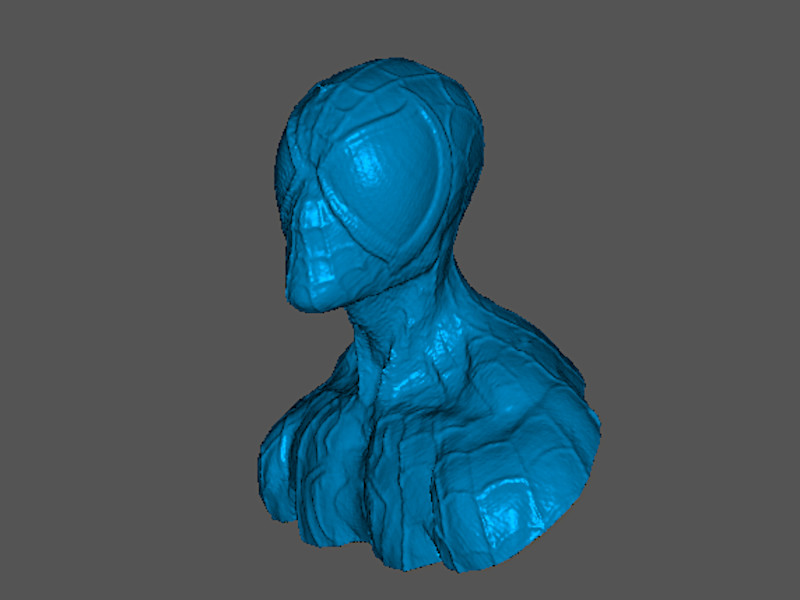
The first of them featured a beautiful bust of Spider-Man, while the second featured Joel from the well-known video game “The Last of Us.” These two busts were from the Eastman collection, which is renowned for its exquisite craftsmanship and detail. With such a wide variety of items, I was able to examine the scanner’s effectiveness for a variety of tasks, including intricate character busts and organic forms like the pumpkin.
– Initialize. Amazingly simple instructions come with the Lynx scanner for utilizing the turntable. You simply align the turntable and the object you want to scan before starting the scanning process. Once everything is set up, it’s time to remove the object from the turntable. Next, click the “initialize” button at the bottom of the screen.
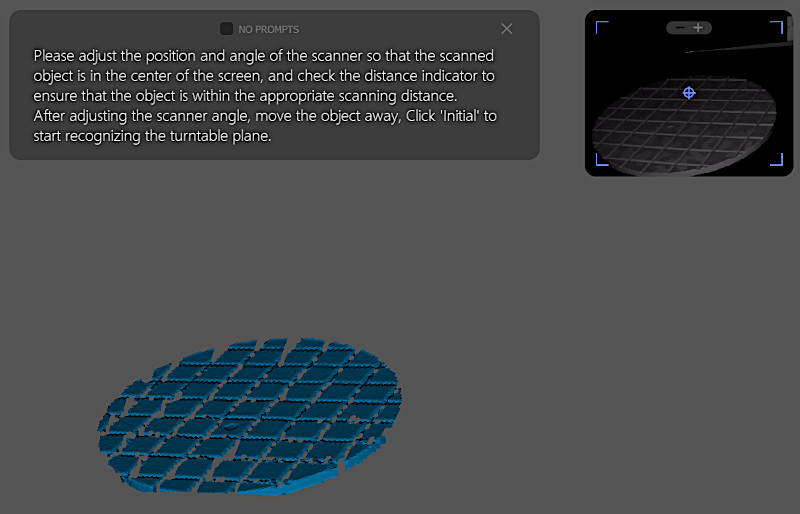
The scanner is set in motion to scan the turntable during this “initialize” procedure. It won’t take long before you have the opportunity to click the “timer” button. This step completes startup and makes it possible to conveniently remove the turntable now that the initial scanning phase is over.
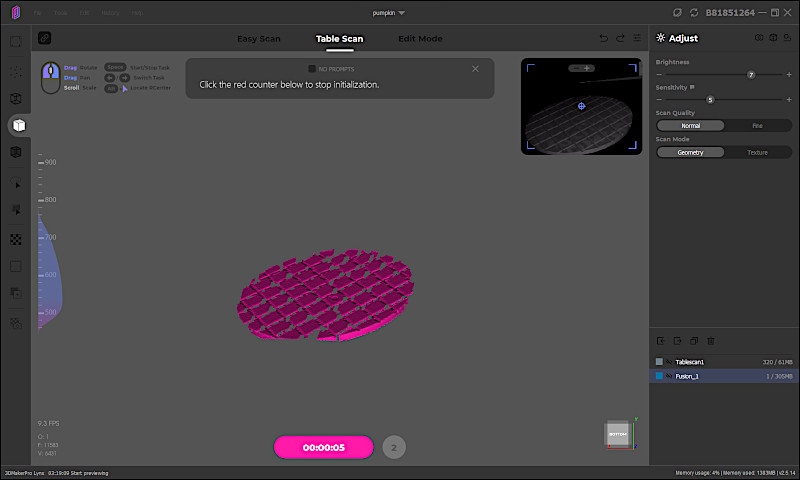
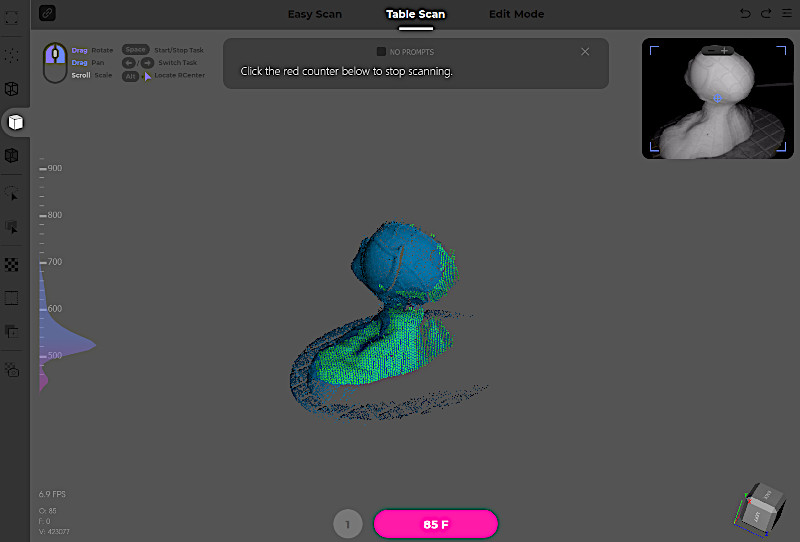
You then need to carefully put the item back on the turntable and click the “scan” button. The scanner will take 320 pictures of the thing after being set in motion by this action, which is significant. These pictures are taken utilizing the camera’s point cloud data to painstakingly build a 3D model of the object.This well-organized process makes it possible for you to use the Lynx scanner to perform accurate and comprehensive 3D scans. The procedure is designed for accuracy and efficiency, making it simple for users to produce outcomes of high quality.
When the scanning process is finished, the raw scan data appears on your screen, and you’ll see that the turntable is distinguished from the scanned object by being presented in a different color. By selecting the “delete” option, you may easily get rid of the turntable from the screen.
You can further hone and optimize your 3D model after reviewing the raw scan data and being happy with the outcomes. To do this, move your cursor to the right side of the screen, where you’ll see a large panel with a variety of processing options available. These choices are intended to improve and polish your scanned model.
The processing options include “Fusion,” which enables the seamless integration of scanned data, “Remove Noises,” which aids in the removal of any unwelcome artifacts or interruptions in your scan, “Repair,” which enables you to correct any model flaws, and “Simplify,” which streamlines the model for more effective processing. In addition, a helpful “simplify slider” allows you to precisely adjust the level of simplification in accordance with your unique demands.
There is also a “texture mapping” option for customers who have the supplementary color kit or want to add textures to the scanned model. With the help of this function, you can smoothly include color and texture into your 3D model to improve its aesthetic appeal and realism.
By incorporating these post-scan processing options, you can be confident that you have the resources and skills necessary to polish your scans and produce high-quality, polished 3D models that are suitable for a variety of uses and artistic efforts.
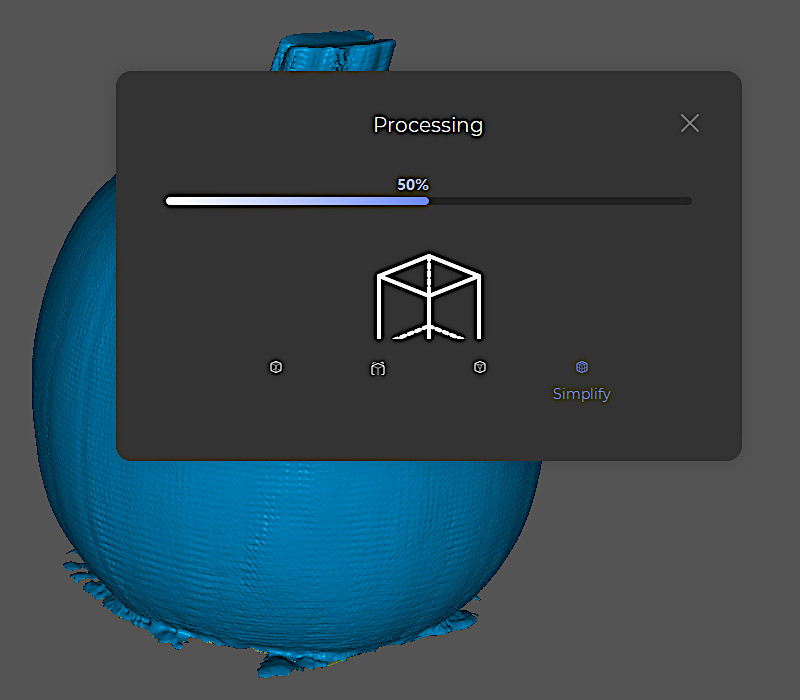
Click the “process” button to start the procedure after making your selections. It’s vital to remember that the processing time can vary greatly depending on the technical requirements of your machine. The laptop we utilized for our tests is a powerful machine, however even with its powerful capabilities, the processing time was still several minutes long because of the particular parameters chosen.
This shows that, despite being effective, the processing time can be affected by the difficulty of the work and the settings selected. To ensure the maximum quality and precision in the final 3D model, users should be ready to be patient during the processing phase, especially when applying complex or resource-intensive processing options.

©3DWithUs – Photo: Will Zoobkoff
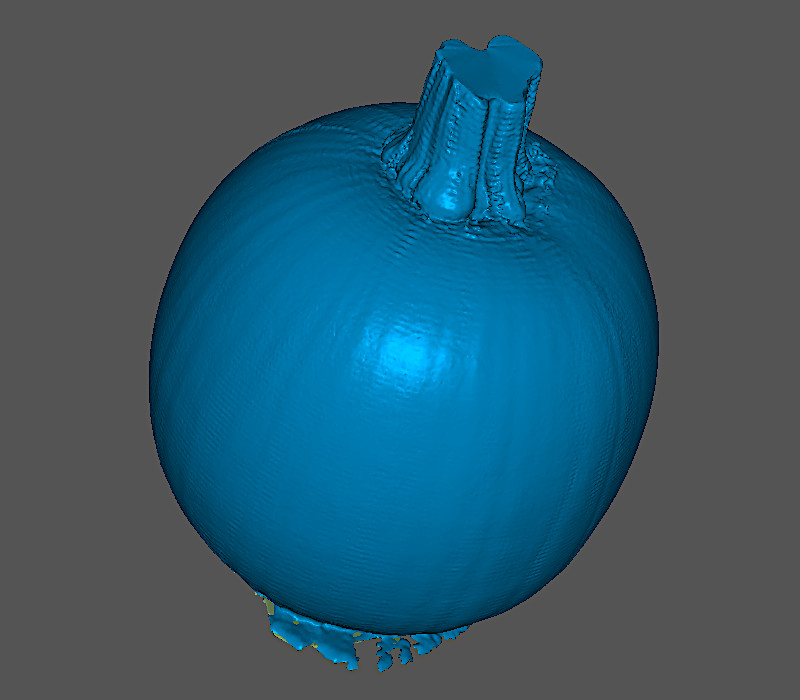
Impressive scan were obtained, capturing the pumpkin’s fine details right down to the stem. The scanning procedure went without a hitch, accurately reproducing even the minute details of the Spider-Man bust, producing a model that was true to the original, albeit with a somewhat softer appearance.
©3DWithUs – Photo: Will Zoobkoff
Joel’s bust was successfully scanned, producing a high-fidelity replica that accurately captured the details of his clothes and knapsack. These smaller details were cleaerly captured by the scanner, which resulted in a finely detailed model that accurately matched the original subject.
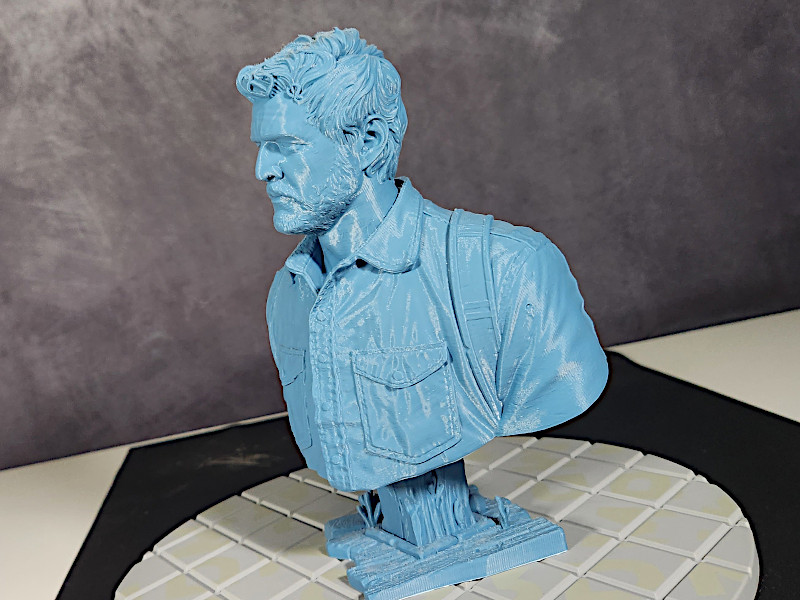
©3DWithUs – Photo: Will Zoobkoff
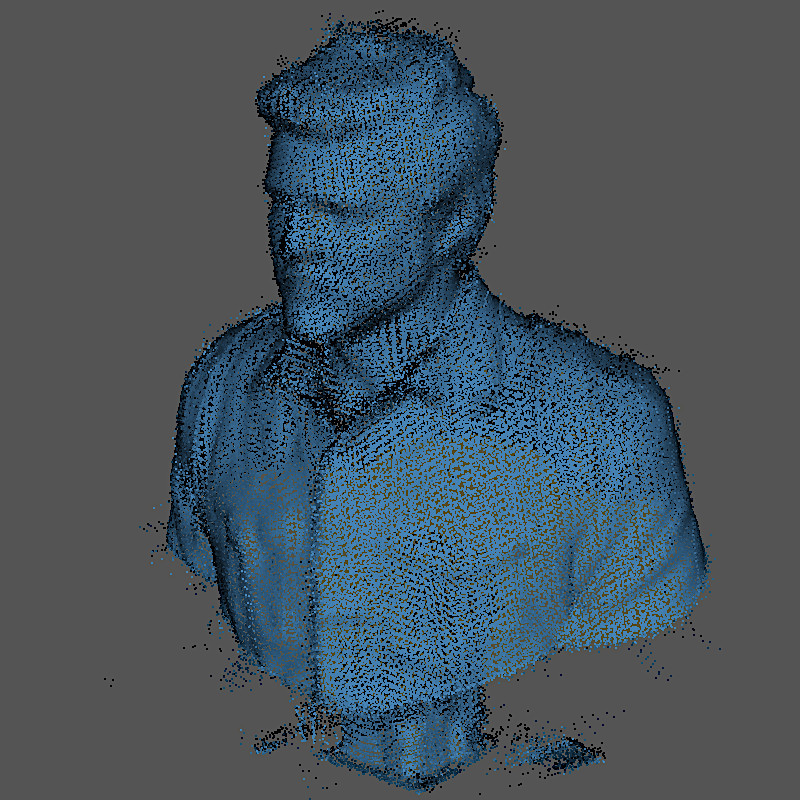

This demonstrates how the scanner can maintain the fine details of the items it scans, guaranteeing that the generated models are an accurate representation of the original topics and making it an ideal tool for various applications where precision and detail are paramount.
Compare 3DMakerPro Lynx to Other 3D Scanners
Compare to similar 3D scanners in the same price range:
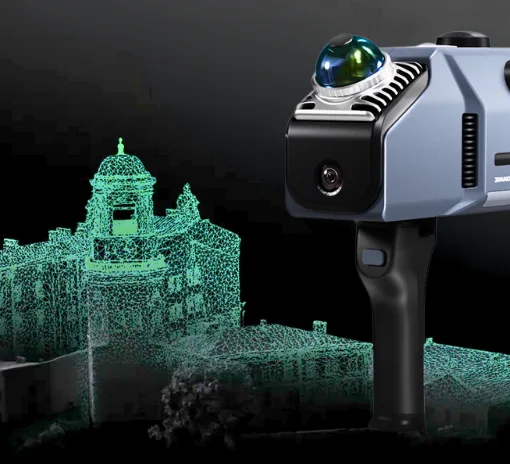
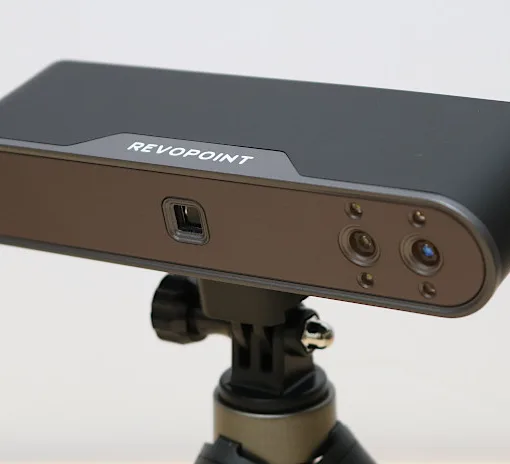
3D scanning technology is continually evolving and becoming accessible to a broader audience. In the realm of budget 3D scanners, there’s stiff competition among three major brands: 3DMakerPro, Revopoint, and Creality. While the 3DMakerPro Lynx and Revopoint Range are known for scanning large objects, Creality has yet to introduce such a product.
The 3DMakerPro Lynx and other portable 3D scanners may seem at a more expensive price point than photogrammetry apps like Polycam, but subscription-based applications may not be for everyone. Also, it is convenient to have a separate device in some cases. And, of course, such handheld 3D scanners are much cheaper than industrial 3D scanners.
Compare to the 3DMakerPro other 3D scanners:
Users who don’t need color scanning can add extra features and components with the Premium model, which is sandwiched between the other alternatives. The JMStudio software that comes with the scanner makes scanning easier and has the ability to export scan data in a number of different formats, which is a significant benefit.
Conclusion and Pros & Cons
3DMakerPro Lynx Review
Review Summary
The 3DMakerPro Lynx is a cost-effective and convenient 3D scanner designed for casual users and enthusiasts. Priced at $450, it boasts impressive features and is an excellent choice for those venturing into 3D scanning on a budget. Due to its simplicity and affordability, it’s a superb option for individuals eager to learn more about 3D scanning.
Although the scanner needs a continual power source, the presence of a clamshell carrying case improves portability. However, 3DMakerPro sells the Connect accessory for $89 USD, which gives users more mobility and independence when they are scanning. This add-on is revolutionary since it provides mobility and ease for scanning while on the go.
The Lynx’s scanning procedure is simple thanks to software supervision, despite certain GPU-related software difficulties. Whether it’s a straightforward pumpkin or a bust with exquisite detailing, the gadget is excellent at capturing minute details. The quality of scanned models is further improved by post-scan processing options.
In conclusion, the 3DMakerPro Lynx is an important advancement in the field of 3D scanning. It is reasonably priced and offers portability, accessibility, and excellent scanning capabilities. The Lynx makes 3D scanning easier for all users, new and seasoned alike.
Pros
Excellent scan quality
Stable software
Easy to use
Turntable connects to scanner
Great value
Cons
Cables are short for large scans
Tethered to pc (Connect allows mobility)