
Passionate about the world of 3D printing, one understands the challenges that can arise in acquiring high-quality 3D models. For those who share this enthusiasm, the value of a reliable 3D scanner in this pursuit is undeniable. The Creality CR-Scan Ferret Pro 3D scanner presents itself as an innovative solution designed to simplify the process of creating 3D models, suitable for individuals at any level of expertise. This remarkable device enables users to generate detailed 3D models from many objects, eliminating the need for extensive technical knowledge.
Let’s explore the performance of the CR-Scan Ferret Pro and determine whether it is a wise investment. By the end of this review, you will have a comprehensive understanding of its capabilities and whether it aligns with your specific requirements. I genuinely believe that tools such as the CR-Scan Ferret Pro 3D scanner have the potential to revolutionize the accessibility and ease of 3D modeling.
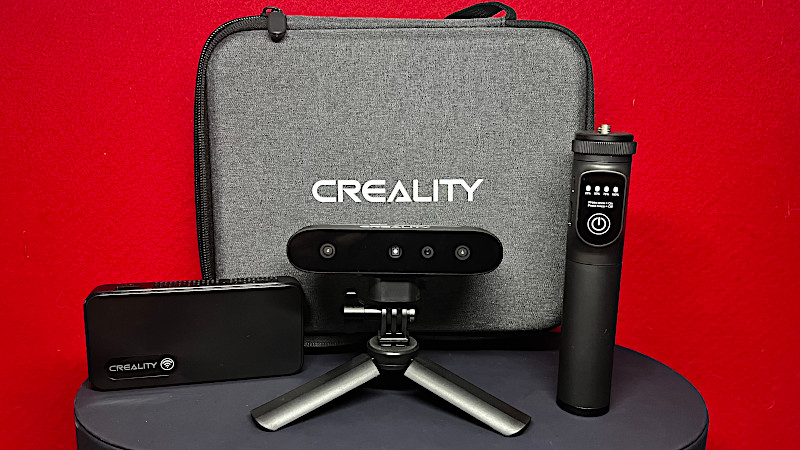
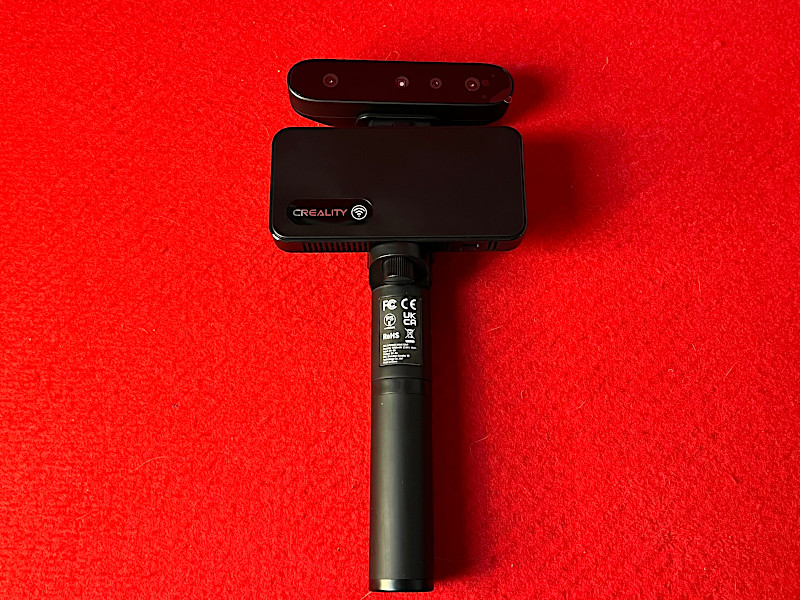
©3DWithUs – Photo: Richard Hirst
Table Of Contents (Jump to a Section)
- Specifications
- Included Accessories
- Assembly and Features
- Creality Scan App and Software
- 3D Scanning
- Processing
- 3D Printing The Scanned Objects
- Compare to Other 3D Scanners
- Conclusion and Pros & Cons
Creality CR-Scan Ferret Specifications:
Resolution: 0.16mm
Working distance: 150 – 700mm
Scanning speed: up to 30fps
Scan size: 150mm – 2m
Accuracy: 0.1mm
Runtime: 2.5hours
Battery capacity: 5000mAH
Operating systems: Windows, macOS, Android (iOS)
Capture range: 560*820mm
Minimum scanning: 150*150m
Machine size: 120*30*26mm
Machine weight: 105g
Where to Buy the CR-Scan Ferret Pro
Price: $418-449
Compare the Prices & Bundles:
Amazon
AliExpress
Official Website
Box Contents
Ferret pro scanner
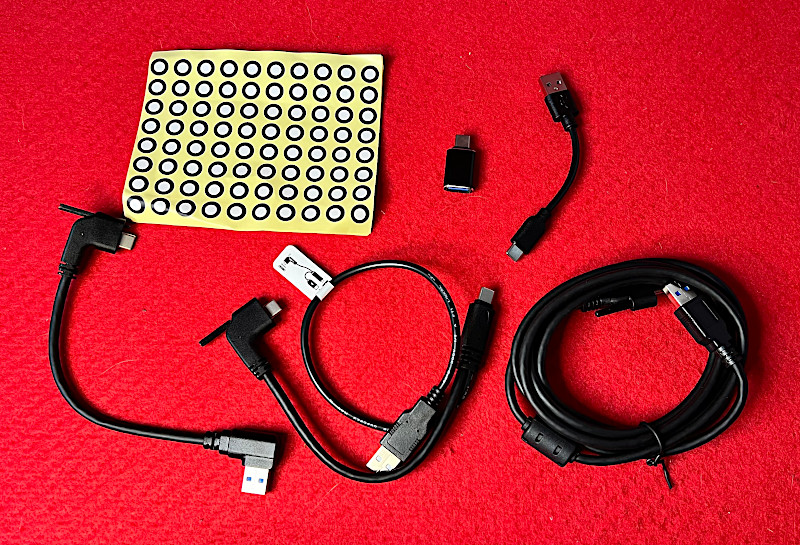
Multiple cables
Rechargeable hand-held handle
Wireless bridge
Mini tripod
Scanning dots
Instructions
Sturdy Creality scanner carry case
Mobile phone holder
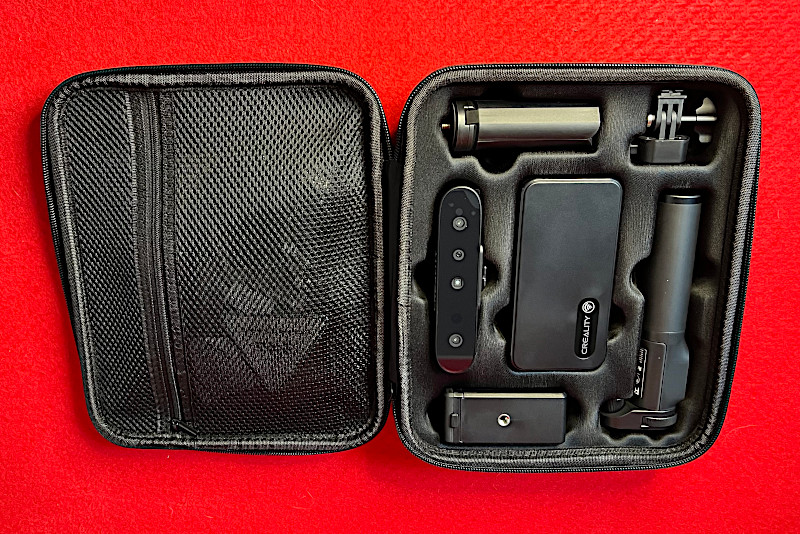
©3DWithUs – Photo: Richard Hirst
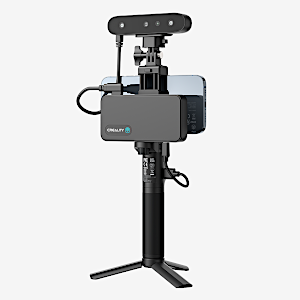
Assembly and Features
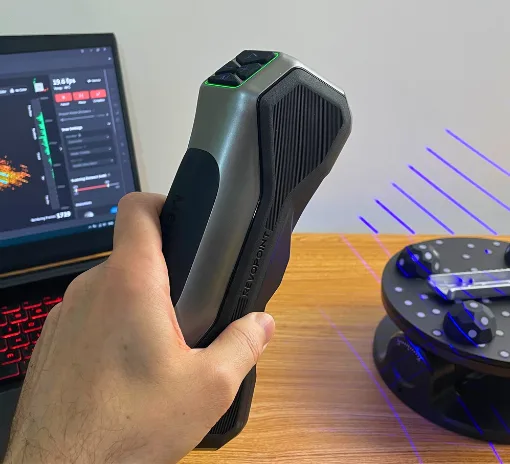
As a 3D printing enthusiast, the Ferret Pro 3D scanner caught my attention. Its compact size and portability make it an incredibly convenient tool that can be taken with you wherever you go, enabling on-the-go 3D scanning without any hassle. One notable feature is the anti-shake tracking technology integrated into this scanner, which ensures that you can achieve accurate 3D scans without the need for a perfectly steady hand. This feature alone sets the Ferret Pro apart, enhancing the overall user experience.
– WiFi. Moreover, the scanner harnesses the power of Wi-Fi 6 for swift transfer of image data to your smartphone. Additionally, the device boasts a high-quality scan mode with an impressive 0.1mm accuracy and a fast scan mode capable of capturing objects up to 2 meters in size.
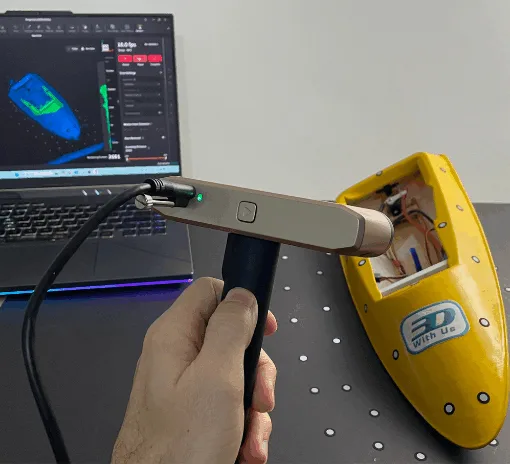
©3DWithUs – Photo: Richard Hirst
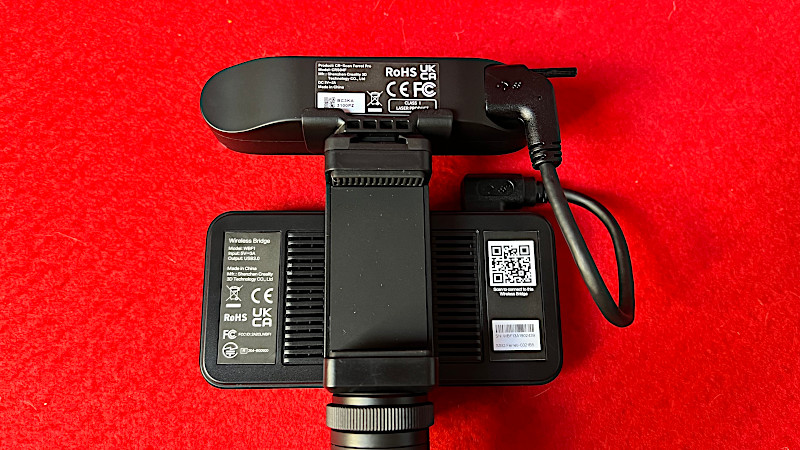
– Getting started. Getting started with the CR-Scan Ferret Pro is a straightforward process, as it is compatible with a range of operating systems including Windows, macOS, Android, and iOS. Whether you opt to use the PC software or the mobile app, installation is a breeze. During my own experience, I found the PC software particularly user-friendly, requiring minimal setup. With a simple connection to your PC’s USB port, you’re set to start scanning.
While the setup may be slightly more intricate on the mobile front, it is not overly complicated. Assembling the scanner, phone mount, and wireless bridge on the handheld device is necessary. Several cables are required to establish the connection between each component.
– Battery life. It is worth noting that the handheld handle has a 2.5-hour battery life but can drain fairly quickly. Therefore, I would recommend using the charge for scanning only and then processing and transferring files when the device is plugged in.
Admittedly, depending on the weight of your phone, the overall setup may feel somewhat heavy but easy to handle. In conclusion, the CR-Scan Ferret Pro 3D scanner offers features that make it an enticing investment for novice and experienced 3D printing enthusiasts. Its ease of use, portable design, and what I think is excellent build quality.
Creality Scan Software
The Creality Scan software for both mobile phones and PCs you download through a link provided I found it easy to install on both mobile phones and PCs. Both programs give you the same options for scanning which I found very good, especially for the handheld side of scanning it means you can take the scanner anywhere with you.
Scanning
After spending some time with the Creality Ferret Pro 3D scanner, I’ve picked up a few valuable tips. These helpful tips will undoubtedly contribute to achieving better results. Getting the scanner stable is key: To ensure accurate scans with small margins of error, it is best to place your object on a stable surface or turntable and your scanner on a tripod. This setup guarantees stability and reduces the chances of any unwanted movement. Then, try to get the lighting right.
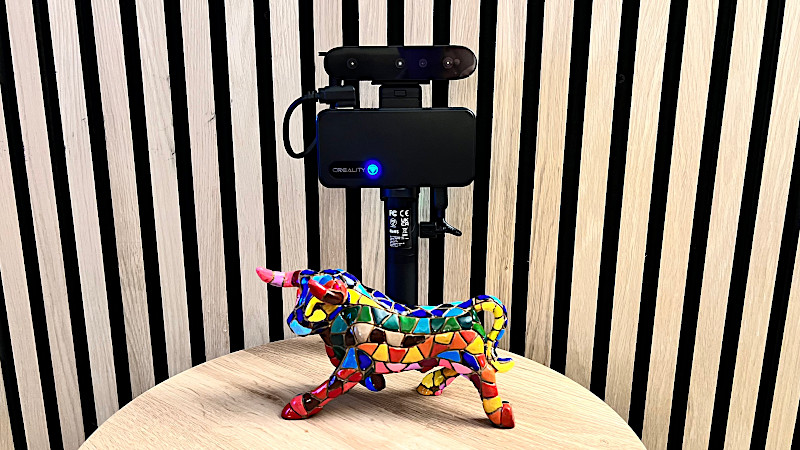
©3DWithUs – Photo: Richard Hirst
– Lighting. Lighting plays a crucial role in producing good scans. This is one part I found difficult in my print studio, as the lights are not that good. Making sure that your surroundings have sufficient light to effectively illuminate your object helps the scanner capture all the necessary details. While the 3D scanner is known for its user-friendly interface, it is important to keep in mind that it can be a bit fiddly, so patience is key during the scanning process, as it often requires multiple attempts to achieve the best outcome.
Dark or black objects and translucent parts can pose a challenge for the scanner. I found a few tips on this, using either scanning spray or a cheaper alternative, which is dry shampoo. By spraying the object, it creates a nice matte surface for scanning, but if you can’t obtain any, it is recommended to avoid scanning such objects, as their color can result in the scanner not getting good results.
Once you have completed the setup, including the device and all the connections, to the handle and wireless bridge, or if using a PC, just the USB cable, simply click the app or program and start the ‘New Scan’ button to commence the scanning process.
It is important to mention that the scanner tends to encounter difficulties navigating, sometimes prompting you to retrace your steps and readjust the position of the scanner. This can occasionally prove frustrating, especially when dealing with consistently challenging dark areas.
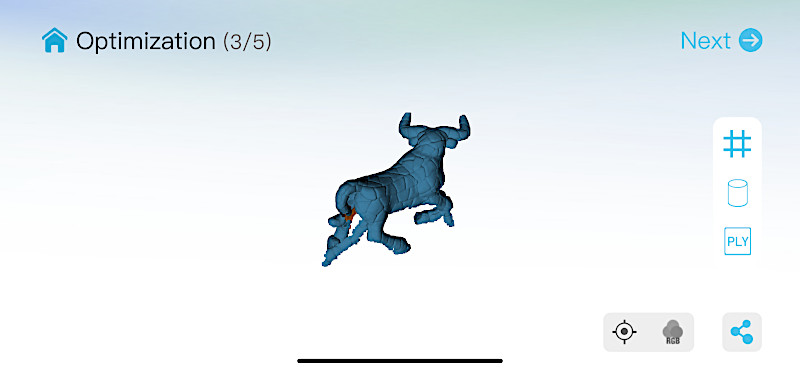
Once you have finished scanning, click the ‘Next’ button, allowing the software to optimize and create a mesh of your scan. If you follow these tips and employ a little patience, you will maximize the capabilities of the 3D scanner and get better results. Happy scanning!
Processing Scans
Once you have completed the scanning process and obtained good results, the next step involves optimizing the mesh. This can be achieved by simply clicking the ‘Next’ button on the app or program. It’s during this part that the result of the scan’s success can be seen—hopefully, the details and colors are good.
However, you might experience slight frustrations during this stage. You may come across missing sections, mostly in darker or translucent areas. It’s important to remember not to get discouraged. Practice makes perfect, and the more you use the scanner, the better your chances of getting better scan results.
I was surprised that the scanner performs great when scanning objects with vibrant colors. These scans seemed easier and yielded better results after the optimization process. Remember, with practice, you will improve your scanning skills.

3D Printing The Scanned Objects
After completing the scanning and processing stages, I proceeded to 3D print the finalized object to assess the quality of the print. Using my Creality K1 Printer for this task, I was thrilled to see the final results. The Creality Ferret Pro captures even the finest details, while the Creality Scan software prepares the scan for printing. The printed object’s details, captured during the scanning process, were impressive, and the Creality K1 Printer’s performance ensured that the model printed exceptionally well.
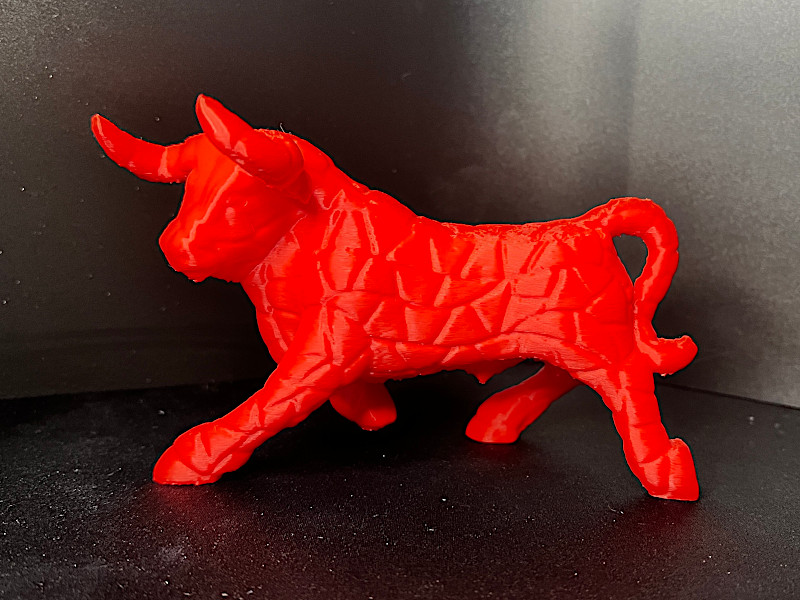
©3DWithUs – Print & Photo: Richard Hirst
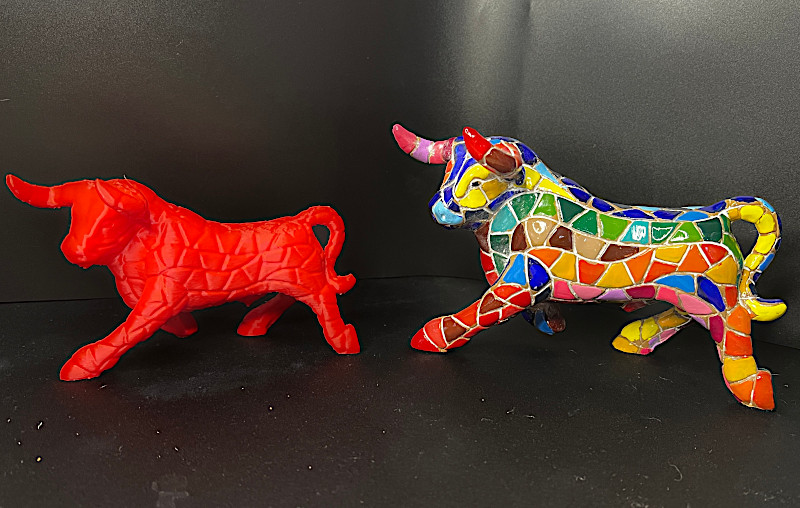
Thanks to the quality of the scanning and optimization software, the final print looked high-quality. The scanned object truly impressed me. The results obtained from this 3D printing experience, alongside the capabilities of the Creality K1 Printer, the Ferret Pro, and Creality Scan software, make me confident in recommending this combination to both professionals and novices seeking top-notch print quality and precise replication of scanned objects. With Creality’s scanners, printers, and software, you can expect outstanding results throughout the entire 3D printing and scanning process.
Compare Creality CR-Scan Ferret to Other 3D Scanners
Compare to the Creality other 3D scanners:
- Creality CR-Scan Ferret (Review)
- Creality CR-Scan Ferret SE (Review)
- CR-Scan Lizard 3D Scanner Luxury Combo (Shop)
The Creality CR-Scan Ferret Pro is the newest 3D scanner from the Ferret series. It now supports Mac, iOS, as well as Windows and Android. The CR-Scan Lizard, the oldest model, is still sold as a luxury bundle as it includes a turntable and color kit accessories.
Compare to similar 3D scanners in the same price range:
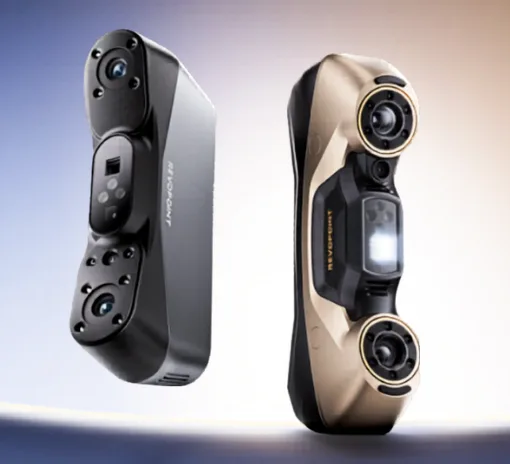
3D scanning technology is evolving further and becoming more accessible to a wider audience. In this field, we are witnessing competition between three major brands: Creality, Revopoint and 3DMakerPro.
One of the strongest points of the Creality CR-Scan Ferret Pro is its competitive price. While the regular retail price for the CR-Scan Ferret stands at $429 USD, it’s worth keeping an eye out for promotions and sales on Creality’s store page. In the past, it has been available for as low as $350, making it an even more attractive option for those looking to enhance their 3D scanning capabilities without breaking the bank. In comparison, other brands offer such low prices as Kickstarter Early Bird pledges, which are difficult to catch and involve pledge fulfillment and shipment delays.
The CR-Scan Ferret may seem at a more expensive price point than photogrammetry apps like Polycam, but subscription-based applications may not be for everyone. Also, it is convenient to have a separate device in some cases. And, of course, such handheld budget 3D scanners are much cheaper than industrial 3D scanners.
Conclusion and Pros & Cons
Price: $418-449
Compare the Prices & Bundles:
Amazon | AliExpress | Official Website
Creality CR-Scan Ferret Pro Review
Review Summary
This was my first time using a 3D scanner, and the experience has been both exciting and informative. With the Creality Ferret Pro as my chosen device, I navigated through the process, finding it relatively straightforward, yet occasionally encountering moments of frustration. But I was amazed by the results it produced.
The Creality Ferret Pro showcased a capability to capture details with precision. I was particularly impressed by its handheld functionality, allowing me to take the scanner wherever I needed. This feature proved to be incredibly practical and added convenience to the scanning process.
For people looking for a reliable 3D scanner, I highly recommend considering the Creality Ferret Pro. Its ease of assembly, battery life, and compatibility with most operating systems make it a good choice. Moreover, the scanner’s outstanding build quality gives it a quality feel when held in one’s hand.
In terms of affordability, I was pleasantly surprised by the price range of the Creality Ferret Pro. It offers excellent value for the quality it delivers. Investing in this product ensures that you obtain a reliable and accurate 3D scanning solution without breaking the bank. In conclusion, my experience with the Creality Ferret Pro has been positive, and it was fun to use and learn what a 3D scanner can do.
Pros:
Easy to set up
Can be handheld
Good quality scans
Cons:
A bit fiddly to get scan distance right
Needs good lighting


Absolutely blown away by the precision of the Creality CR-Scan Ferret Pro! Can’t wait to see how it revolutionizes 3D scanning.