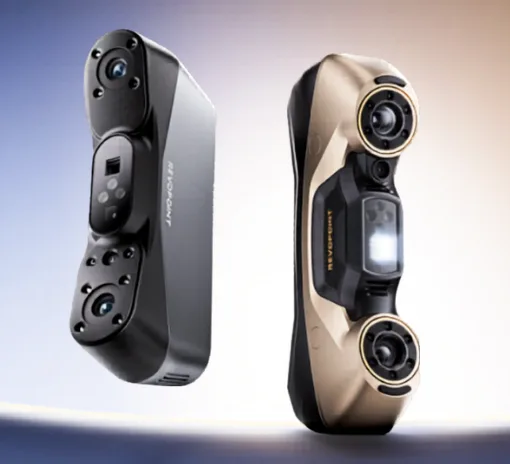
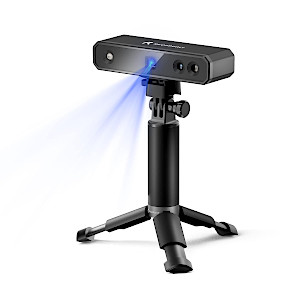
Revopoint is no newcomer to the 3D scanner market, and the Mini is the latest in a lineup aimed at bringing 3D scanning to the consumer market. The product of a successful Kickstarter campaign that raised over $3 million USD, the Revopoint Mini offers high resolution in a small package and the accompanying Revo Scan 5 software offers semi-professional editing capabilities in a free-to-download software.
Table Of Contents
- Specifications
- Included Accessories
- Scanning Included Test Model
- 3D Scanning Detailed Models
- Calibrating the Revopoint Mini
- Scanning for 3D Printing
- Compare to Other 3D Scanners
- Conclusion and Pros & Cons
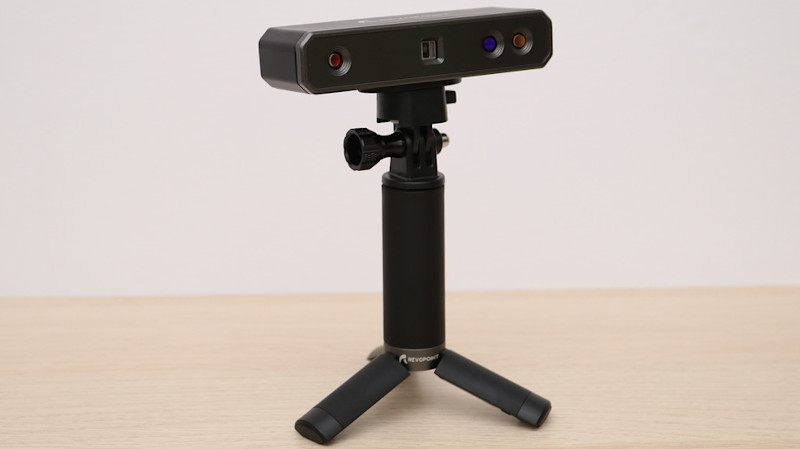
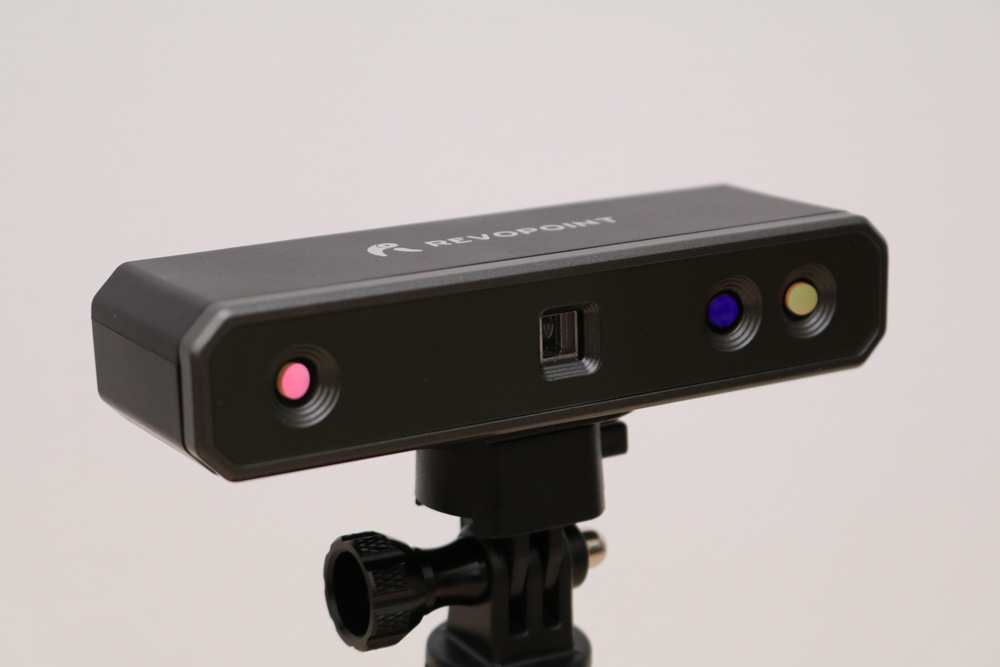
Revopoint Mini Specifications
Technology: Dual-camera blue light
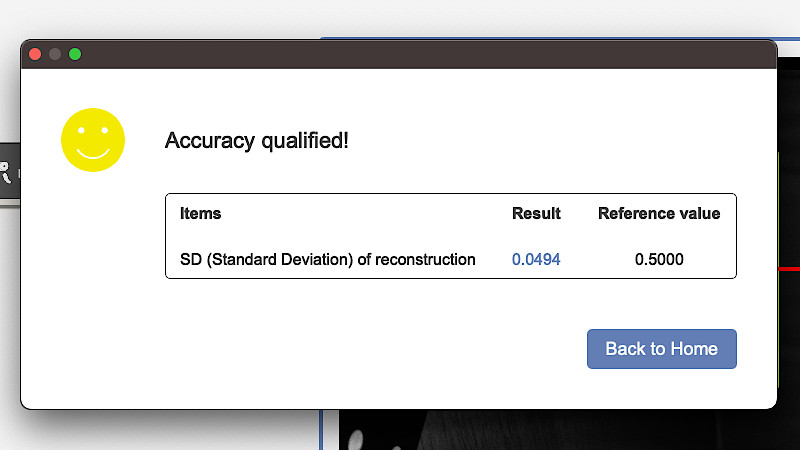
Capture Accuracy: 0.02mm single frame precision
Scan Speed: Up to 10 FPS
Minimum Scan Volume: 10mm x 10mm x 10mm
Connectivity: USB, WiFi
Output Format: STL, PLY, OBJ (with texture)
Dimensions: 120mm x 38.5mm x 25mm
Price: $799-$1,044
Affiliate Links: 3DWithUs is supported by its audience. Purchases via some links may earn us a small commission at no extra cost to you. This helps us to continue bringing you high-quality content. Our guides and reviews remain unbiased and independent.
Revopoint also advertises the Mini as being able to create print-ready models, something I was able to achieve using the Revo Scan 5 software. As opposed to other structured light scanners that cost several thousand dollars, the $799 Revopoint Mini is an accessible entry point for consumers interested in taking their 3D scans to the next level.
©3DWithUs – Photo: Andrew Sink
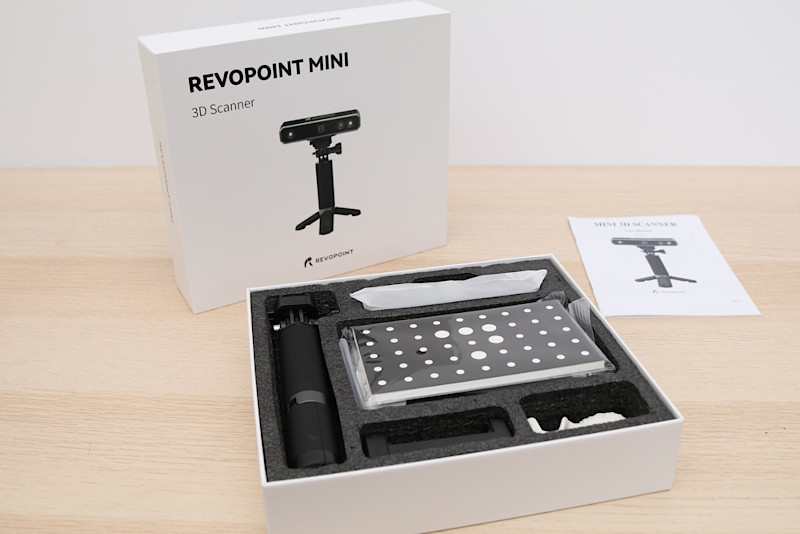
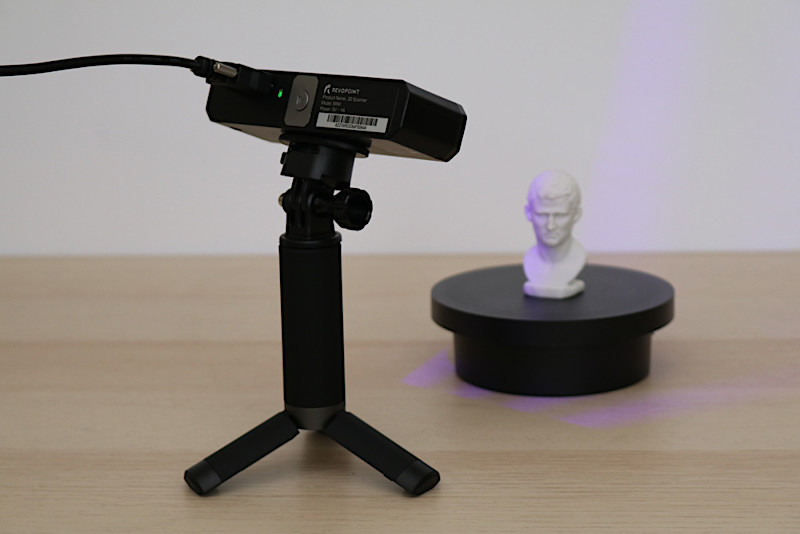
Included Accessories
The Revopoint Mini Standard Package includes the Mini 3D scanner, a tripod, a miniature turntable with a fold-out bed with markers pre-applied, calibration plate, markers, test model, black plastic background tarp, USB cables with USB-C adapter, and a phone holder and phone cable (for use with the mobile app). There are no other accessories required to get scanning; just download the software and you’re ready to go.
©3DWithUs – Photo: Andrew Sink
Considering the emphasis Revopoint has put on the Mini’s ability to scan small models, the miniature turntable makes sense for rotating small and delicate models. In addition, the black tarp can block off busy backgrounds to prevent the scanner from picking up items in the background during a scan.
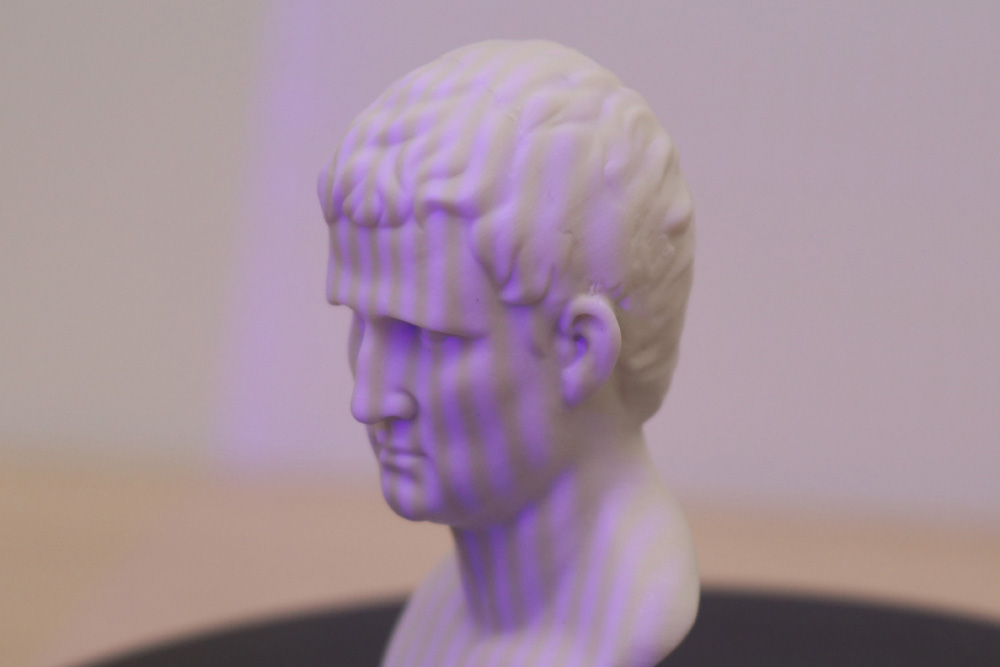
Scanning Included Test Model
The Revopoint Mini is a structured light 3D scanner that projects a pattern of light on an object and measures the distortion in the pattern to determine the geometry of the model. 3D scanning is just as much art as it is science, and some objects are much harder to scan than others. Shiny and reflective surfaces are hard to capture, and dark colors and voids can be mixed up in the software. To help ensure that users will have a successful first scan, Revopoint includes a ceramic bust that has a dull white finish. This asymmetrical model is ideal for scanning, and the small size of the bust means it fits easily on the turntable.
©3DWithUs – Photo: Andrew Sink
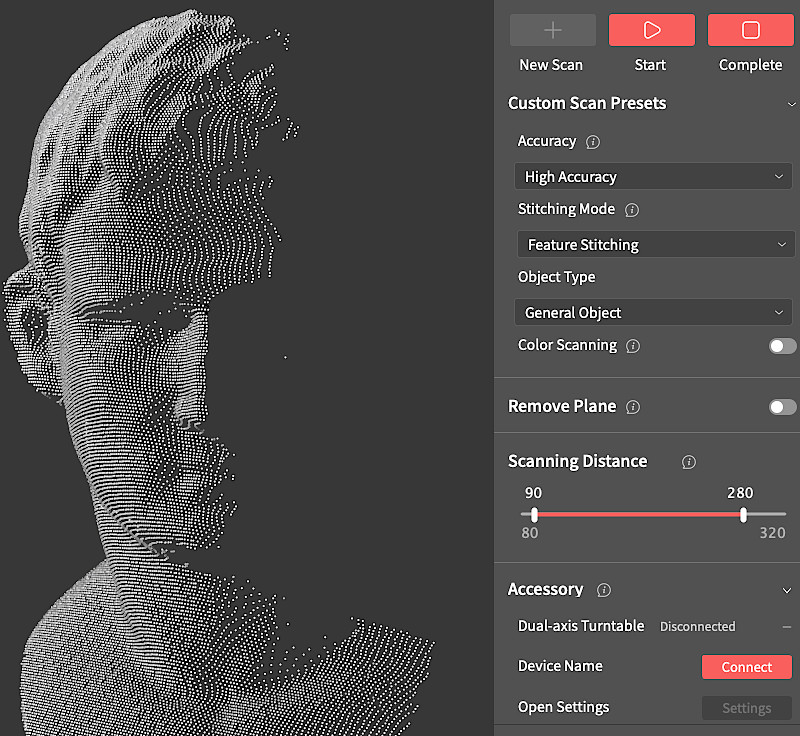
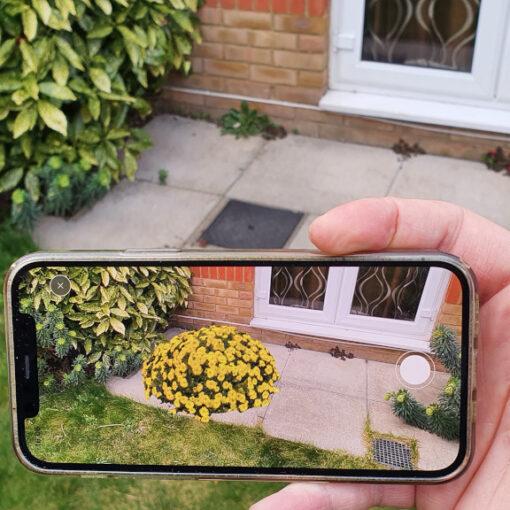
Revopoint recently released the beta version of Revo Scan 5, an app that allows users to capture scans, clean and manipulate the point cloud, create a meshed 3D model, and more. This app is currently under development, but it’s enough of a leap forward that it’s worth using instead of the previous Revopoint method of using two separate programs: one for capturing scans (Revo Scan) and one for post-processing and exporting mesh models (Revo Studio).
Screenshot: Revo Scan 5
The Revopoint Mini has a High Accuracy mode, which creates a dense point cloud that can be easily aligned with other point clouds. One of the features of Revo Scan 5 is the ability to take multiple scans of the same model and align them together to create a mesh. Instead of scanning a model and pausing to reposition, this workflow involves taking several scans at different angles and aligning them together after reducing the number of points. Using this workflow resulted in a clean scan of the included demo model with no holes and a smooth and detailed surface.
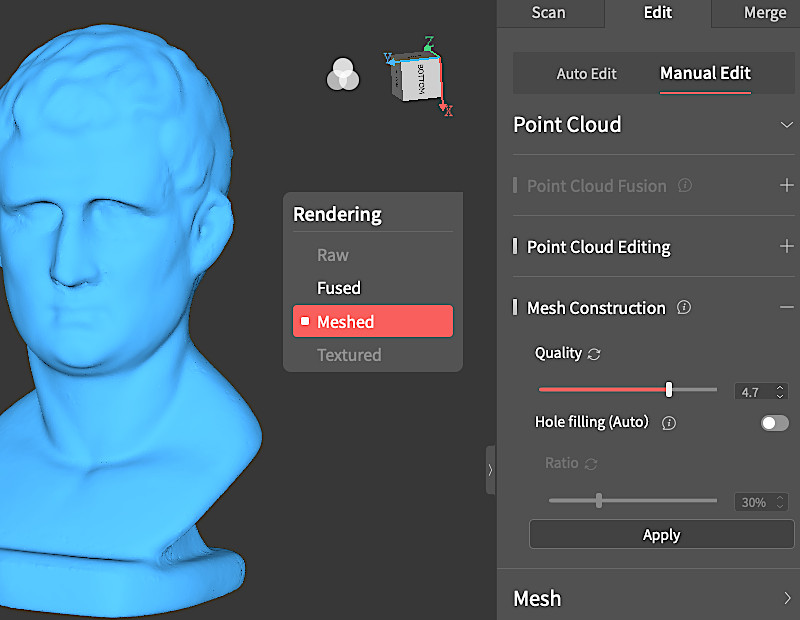
3D Scanning Detailed Models with the Revopoint Mini
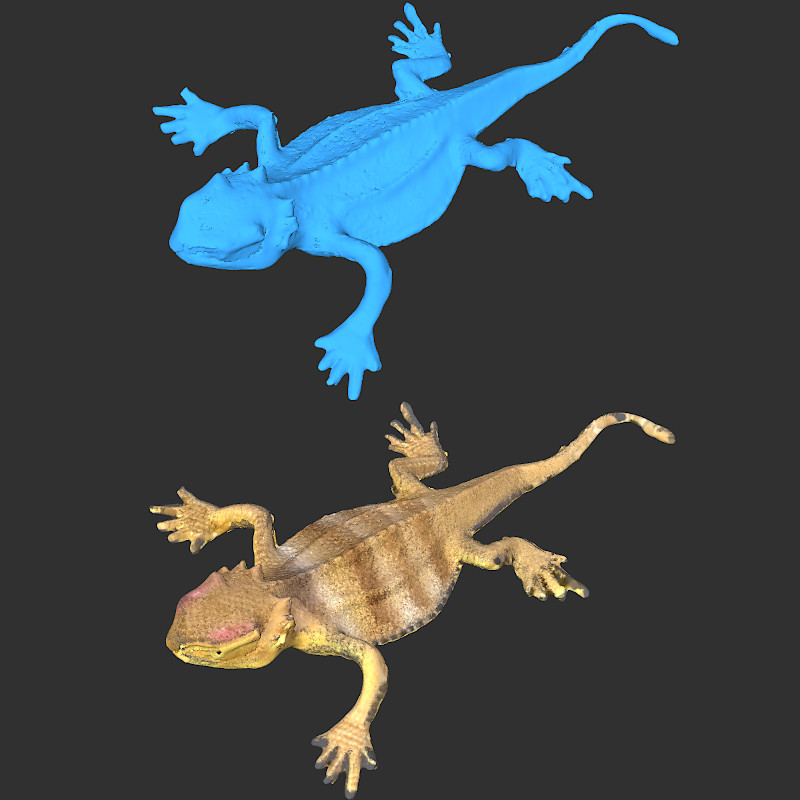
One of the key features of the Revopoint Mini is the ability to scan small and detailed models, something that many scanners struggle to accomplish. The advertised single-frame precision of 0.02mm (or 20 microns) is impressive, so I wanted to see how well it would work on a model with fine detail and small features. This model of a plastic lizard measured 4 inches long from nose to tail, and the fine fingers and detailed geometry on the back looked like a good challenge.
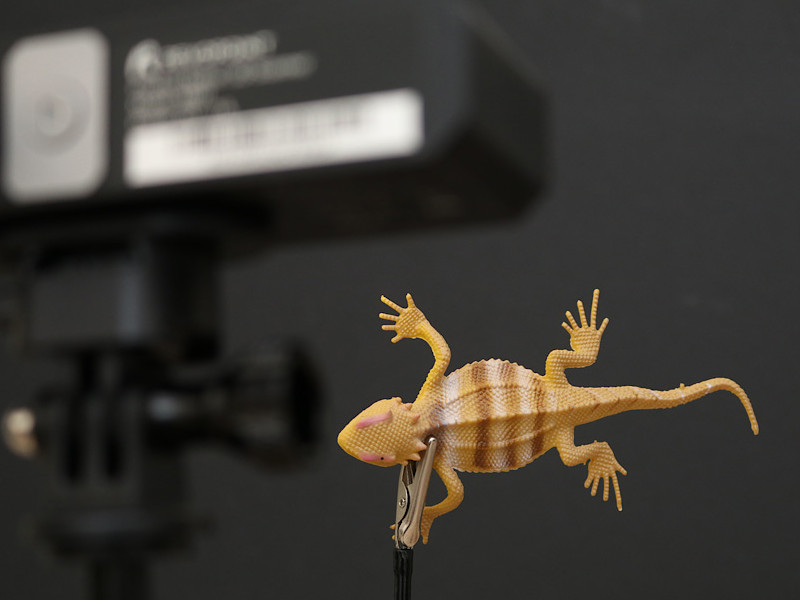
©3DWithUs – Photo: Andrew Sink
Screenshot: Revo Scan 5
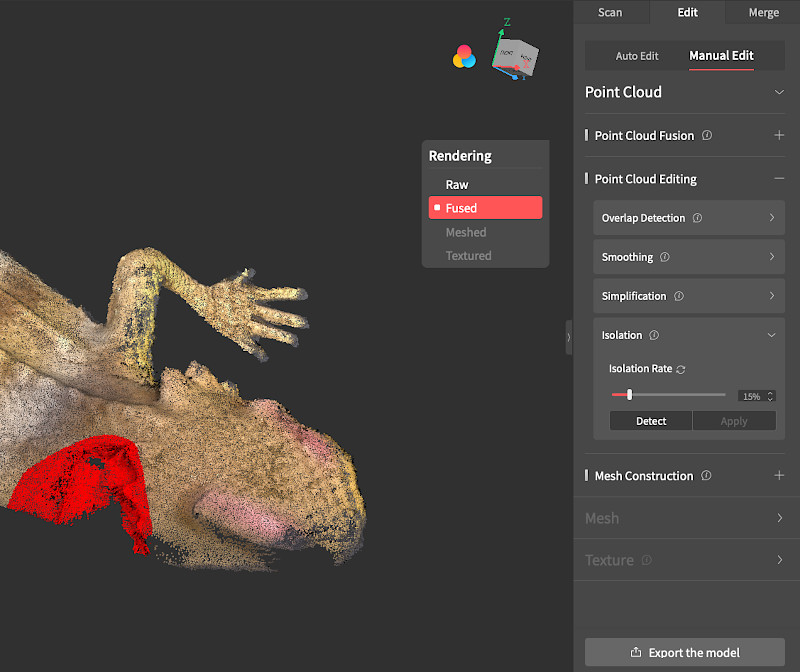
Due to the small size of the model, I used an alligator clip to hold it upright during scanning and keep it stable. The flexible tail deformed slightly when laid down flat, so holding it upright was the only way to scan it without altering the shape of the model. Because Revo Scan 5 offers point cloud editing directly in the app, I was able to remove the area around the alligator clip on each scan so it wasn’t present in the final model.
Screenshots: Revo Scan 5
I created several scans of the lizard, chose the ones that captured the most detail, and cleaned them up as point clouds. Once they had been cleaned, I aligned these scans in several steps before meshing the model. The final result had a lot of detail, and even a small bump on the tail (likely the result of a manufacturing defect) was present in the final scan. Some of the fingers didn’t fully resolve, but the mesh had a generally high level of detail.
©3DWithUs – Photo: Andrew Sink
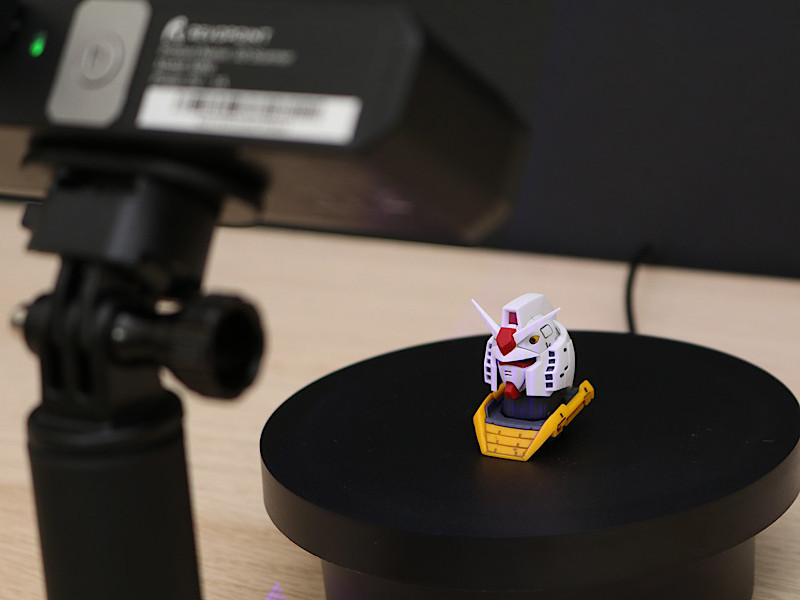
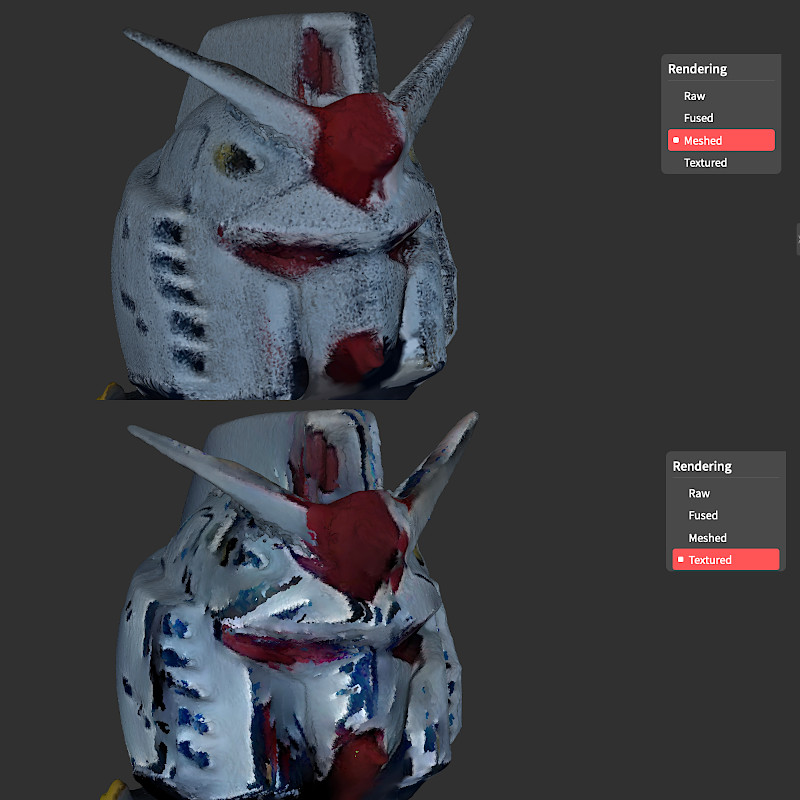
To go even smaller, I scanned the head of the Master Grade Gundam RX-78-2 to see if the fine detail would resolve. This model had been sprayed with a matte clear coat, so the dull surface and high level of detail looked like an ideal challenge for the Revopoint Mini.
The general mesh looked acceptable, and the per-point color looked mostly accurate. This color is applied at the point cloud level, where each point has a color applied to it. This isn’t a photo-realistic way to apply color, and isn’t easily transferred between programs like a textured mesh. The Texturing tool in Revo Scan 5 allows photos to be mapped over the mesh and the data is captured automatically if “Color Scanning” is enabled before scanning.
Screenshot: Revo Scan 5
After applying the texture, the quality of the model took a turn for the worse. The colors no longer mapped correctly, and the general texture didn’t look like it had been consistently applied. Unfortunately, Revo Scan 5 doesn’t offer any controls for adjusting the color or position of the texture, meaning the UV map of the texture isn’t something that can be controlled. I tried to apply a texture to a few other models, and had similar results where the colors actually looked better at the per-point level.
Calibrating the Revopoint Mini
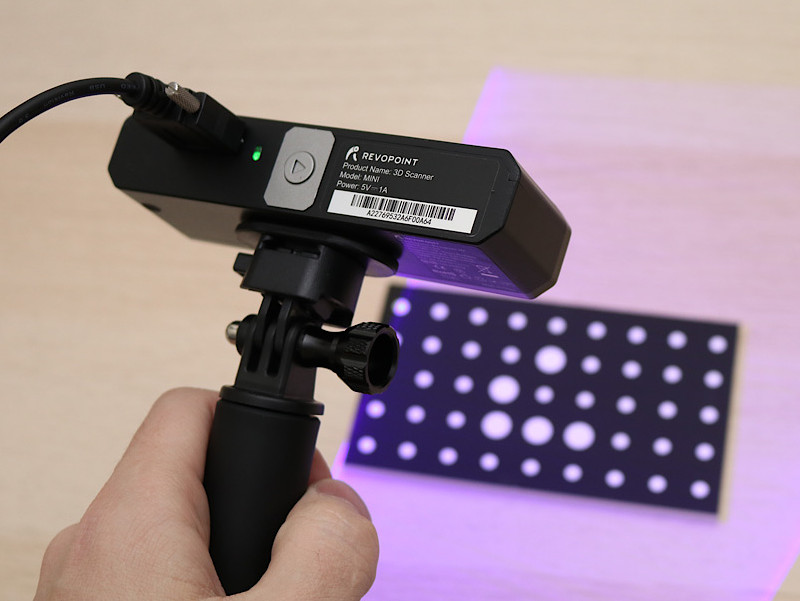
The Revopoint Mini includes a plate which can be used to calibrate the onboard cameras on the scanner. This calibration process involves moving the scanner into various positions over the board while maintaining a set distance, and takes about 10 minutes. Revopoint recommends that the scanner only be calibrated “If the 3D model’s surface looks very rough or grainy.”
©3DWithUs – Photo: Andrew Sink
My first few scans had issues with the mesh not aligning correctly, and calibrating the scanner fixed this problem. Unfortunately, this process also involves deleting all Revo Scan software from my computer and reinstalling before the scanner could be recognized. This is a painful process that is not mentioned anywhere in the documentation and was only resolved after sending a message to the support team.
Scanning for 3D Printing
3D scanning and 3D printing are complementary technologies, so it makes sense that at some point users will want to make 3D prints from the 3D scans that they are making. Revo Scan 5 is able to export mesh .stl files that can be used for this purpose. The built-in mesh editing tools reduce the number of external tools that are needed to create a print-ready model.
©3DWithUs – Photo: Andrew Sink
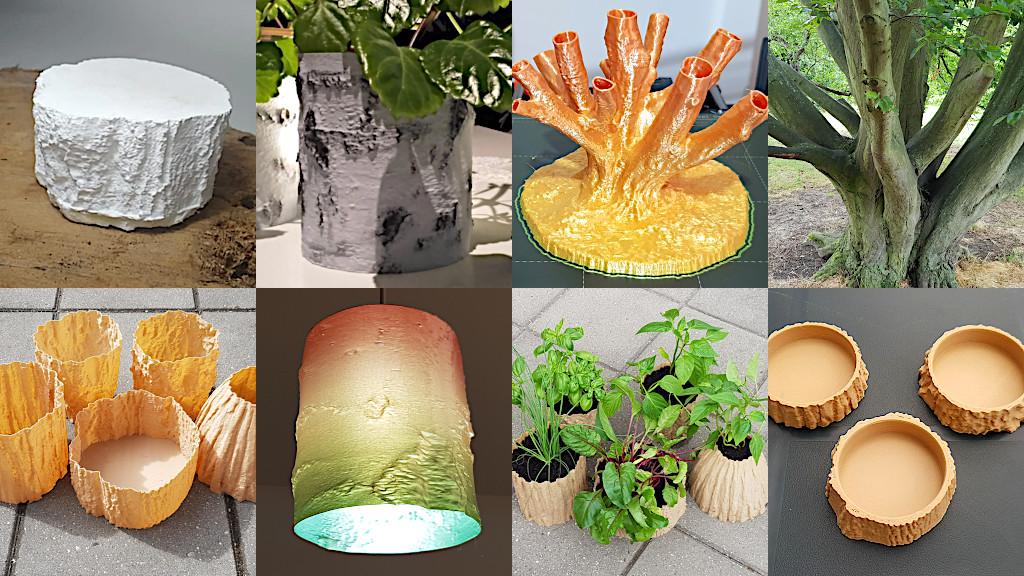
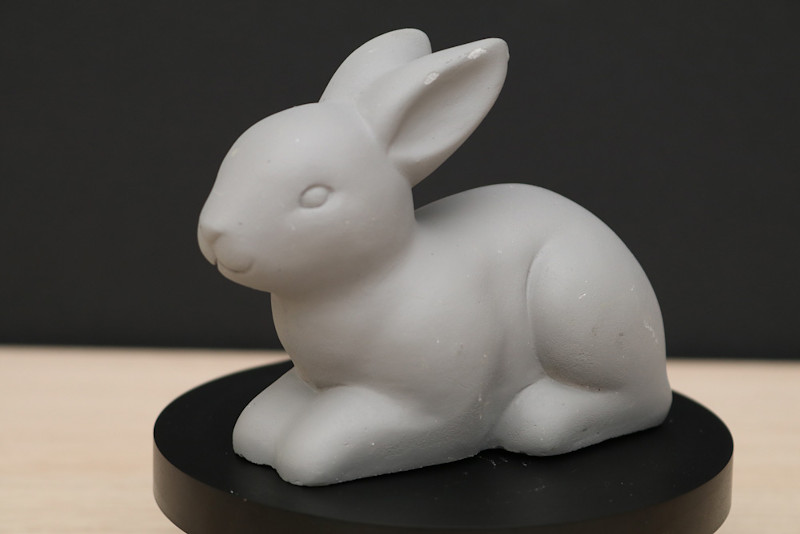
To test out this workflow, I used a ceramic bunny model that had ideal geometry for FDM 3D printing, including a flat base, limited overhangs, and no small or delicate features. I took three scans: one upright, and one of each side of the model. Using the built-in editing tools in Revo Scan 5, I cleaned up all three scans and aligned them together. This resulted in a very dense point cloud, which isn’t ideal for 3D printing.
Screenshot: Revo Scan 5
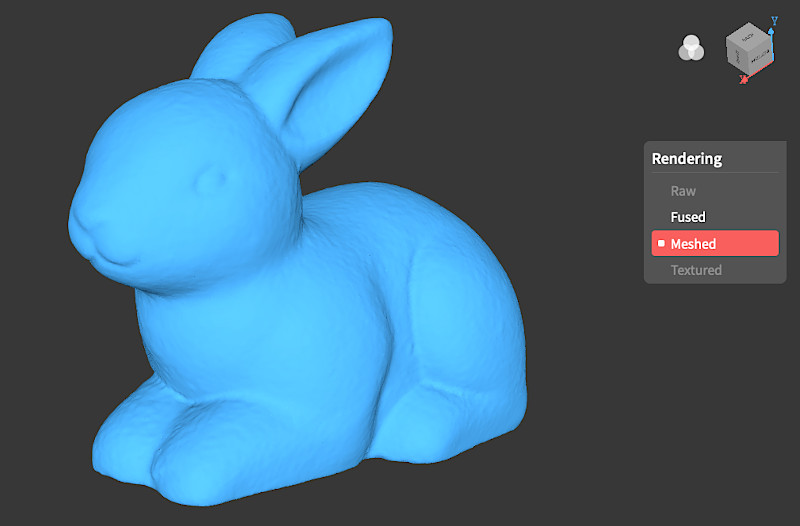
To create a model for 3D printing, the point cloud needs to be reduced before meshing. Because this scan was made using “High Quality” mode, the dense point cloud needs to be simplified and smoothed using the Point Cloud editing tools. Once the point cloud has been reduced, the model can be meshed and prepared for 3D printing. The model orientation is “as-scanned”, so it needs to be rotated before printing. In addition, the bottom isn’t completely flat and needs to be cut to give it a flat base for printing.
©3DWithUs – Photo: Andrew Sink
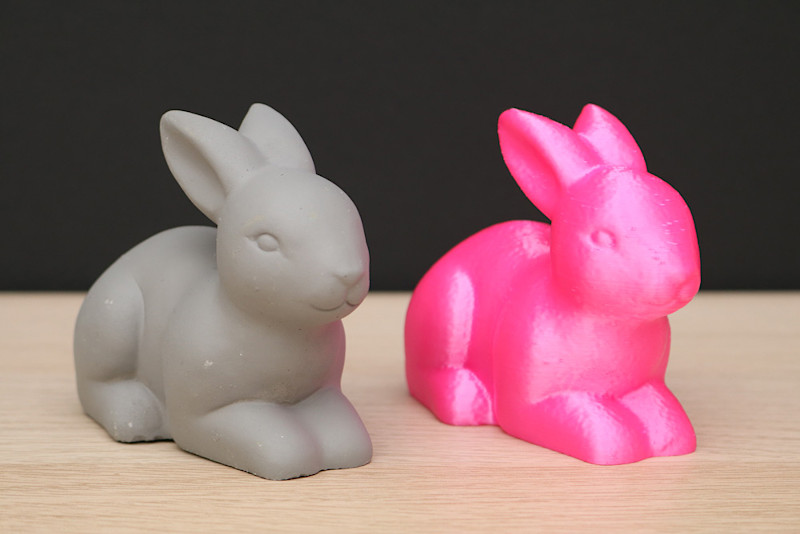
Printed on an Elegoo Neptune 3 Pro using Prusament Mrs. Pink PLA filament, the printed model retains the overall shape and contours of the original model. The detail around the mouth and feet is clear and defined, and the overall scale of the model is similar to the original. The printed model has some minor faceting where the point cloud was reduced without smoothing, but this can be addressed by adding an additional smoothing step in the Revo Scan 5 workflow. Overall, it’s an impressive print and shows that the Revopoint Mini is capable of making print-ready parts exported directly from the software. You can inspect the mesh yourself on Sketchfab to see what the finished product looks like.
Compare to Other 3D Scanners
Priced under $1k, the Revopoint Mini occupies a space in the broad gap between $12.99/month apps like Polycam that create models from photographs and “entry-level” professional scanners like the $24,800 Artec Space Spider. I would recommend the Revopoint Mini to anyone who feels limited by photogrammetry apps but doesn’t want to spend $20k+ on a 3D scanner for creating high-quality mesh 3D models.
Compare to similar budget 3D scanners in the same price range:
Compare to the Revopoint other 3D scanners series:
Conclusion and Pros & Cons
The Revopoint Mini Standard Package is available for $799.99 on the Revopoint site, and includes the standard turntable, grip with fold-out tripod, an extension for the turntable with stickers pre-applied, and all the required cables. The dual-axis turntable package is available for $885 and includes all these accessories with the larger dual-axis turntable instead of the standard one.
©3DWithUs – Photo: Andrew Sink
Just like the previous generation Revopoint POP that I reviewed, the real strength of the Mini is the ability to accurately capture geometry, but the texture and color leaves something to be desired. While I was impressed with the ability to directly edit and manipulate the point cloud data in Revo Scan 5, the tracking for the software was temperamental and sometimes required multiple attempts to correctly align.
I found that the mesh editing tools in Revo Scan 5 allowed me to salvage scans that I would ordinarily redo, which saved time and effort during scanning. However, it’s not a plug-and-play solution and will require some effort to fully unlock the potential of this scanner. I would recommend the Revopoint Mini to anyone who feels limited by photogrammetry apps but doesn’t want to spend $20k+ on a 3D scanner for creating high-quality mesh 3D models.
Revopoint Mini Review
Review Summary
Revopoint also advertises the Mini as being able to create print-ready models, something I was able to achieve using the Revo Scan 5 software. As opposed to other structured light scanners that cost several thousand dollars, the $799 Revopoint Mini is an accessible entry point for consumers interested in taking their 3D scans to the next level.
While the Mini created detailed mesh models for 3D printing, the sub-par color textures and manual mesh processing workflow prevented this scanner from rising to a higher rating. In addition, the Revo Scan 5 software will occasionally lose tracking during scanning, which can result in a longer workflow consisting of stitching together multiple smaller scans.
PROS:
– Low cost relative to other blue light scanners
– “High Quality” mode creates a highly dense point cloud for small and intricate models
– Revo Scan 5 software offers scan capture and mesh editing tools in one package
CONS:
– Tracking and alignment can be difficult on rotating turntable
– Color texture lacks clarity and looks unprofessional
– Tedious and poorly documented calibration process