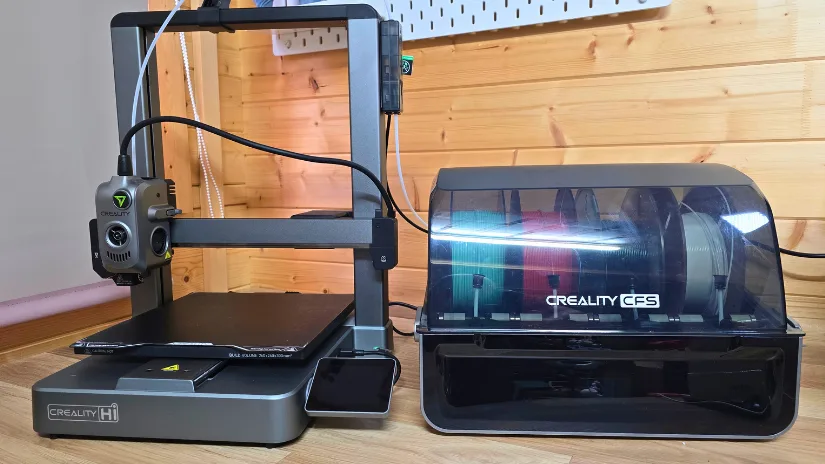
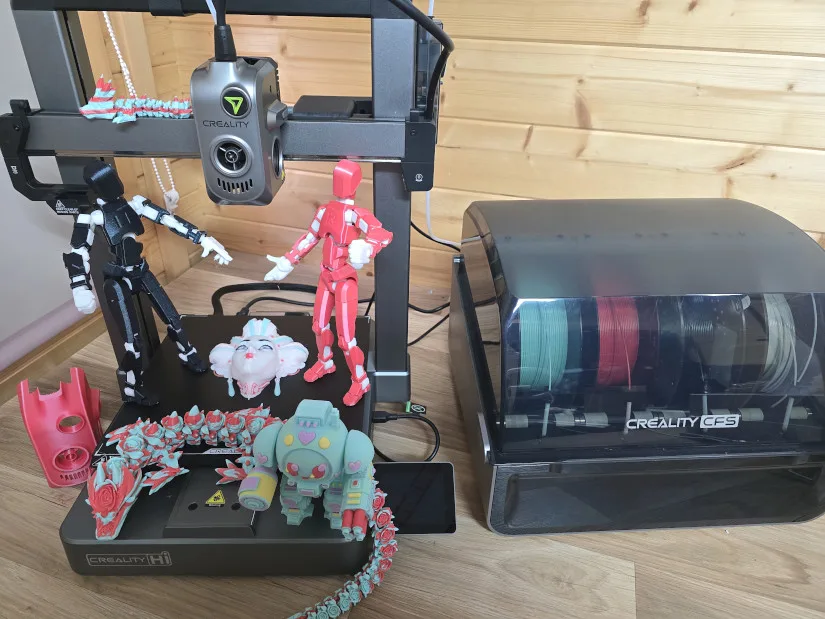
Creality Hi Combo is a budget bed-slinger FDM 3D printer that can handle up to 16 filaments. Its nearly all-metal body makes it easy for even novices to get started fast and efficiently. The printer comes 95% pre-installed, and once the prechecks were completed, I was printing within 10 minutes. To keep an eye on projects, the Hi Combo has an integrated camera. We’ll examine its features and printing capabilities in this review. In conclusion, I will share my final thoughts and list of pros and cons.
Table of Contents (Jump to a Section)
- Specifications
- Unboxing – What’s Included
- Setup and Design
- Software
- Testing and Results
- RFID Materials
- Compare to Other 3D Printers
- Conclusion and Pros & Cons
Where to Buy
Price: From $499

Compare the Prices & Bundles:
Official Store | Amazon | AliExpress
Creality Hi Combo Specifications
Technology: Fused Deposition Modeling XYZE Motor
Control Panel: 3.2″ color touchscreen
Printing Speed: 300 mm/s typical speed; 500 mm/s max speed
Build Volume: 260 × 260 × 300 mm (10.24 × 10.24 × 11.81 inches)
Acceleration: ≤ 12000 mm/s²
Printing Accuracy: 100±0.1 mm
Nozzle Diameter: 0.4 mm, compatible with 0.6/0.8 mm
Interface: USB port & WI-FI
Leveling Mode: Full auto leveling
Nozzle Temperature: ≤ 300 ℃
Heatbed Temperature: ≤ 100 ℃
Machine dimensions: 409 × 392 × 477 mm
Printer Package Dimensions: 650 × 460 × 240 mm
Combo Package Dimensions: 650 × 460 × 560 mm
3D Printer Net Weight: 8.75kg
3D Printer Gross Weight: 11.58 kg
Combo Net Weight:13.31 kg
Combo Gross Weight: 19.14 kg
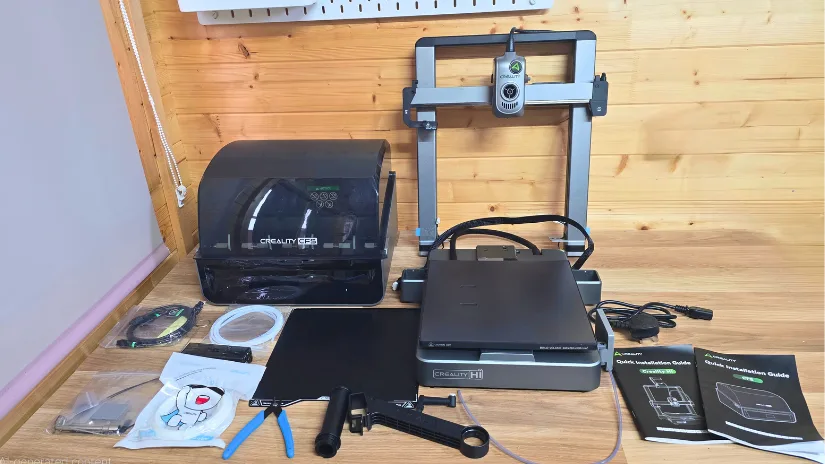
What’s in the Box
Base Component • Gantry Frame • Spool Barrel • Spool Holder • Anti Tangle Spool Holder • PTFE Tubes • Z-axis Motor Cover x2 • Power Cable • Allen Keys • Bolts • Socket spanner • Cutting Pliers • Filament • CFS (Combo Only)
©3DWithUs – Photo: Phil Macey
Setup and Calibration
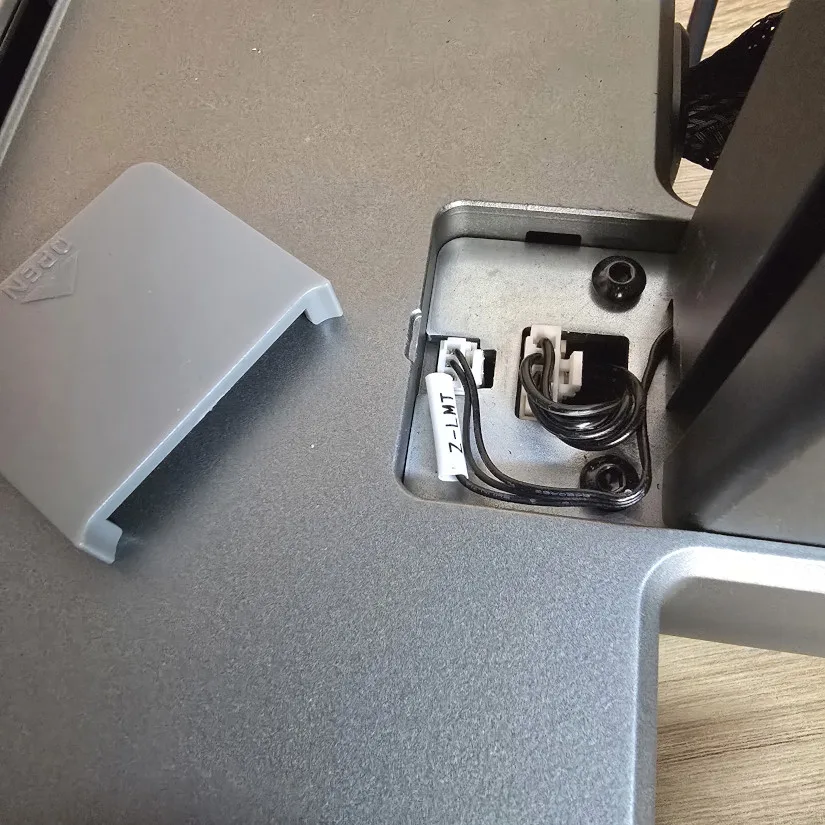
The Creality Hi was easy to assemble. First, installing the gantry frame to the base, the easy-slot design ensured the frame was stable even without the screws attached. Once the gantry is aligned, use 4 x M4 8 screws to tighten. The next step is to connect two M3 8 screws to lock against the holes on the back side of the base. Next, connect the left and right Z-axis motor wires and sensor wires, then install the 2 x Z-axis motor covers.
©3DWithUs – Photo: Phil Macey
– Spool Holder. The next step is to build the Spool holder, connect the spool holder and barrel together, and then connect the anti-tangle spool holder onto its assembly, and then tighten it with an M3*5 screw, and install the complete spool holder to the frame; the locations are clearly marked for ease of use.
©3DWithUs – Photo: Phil Macey
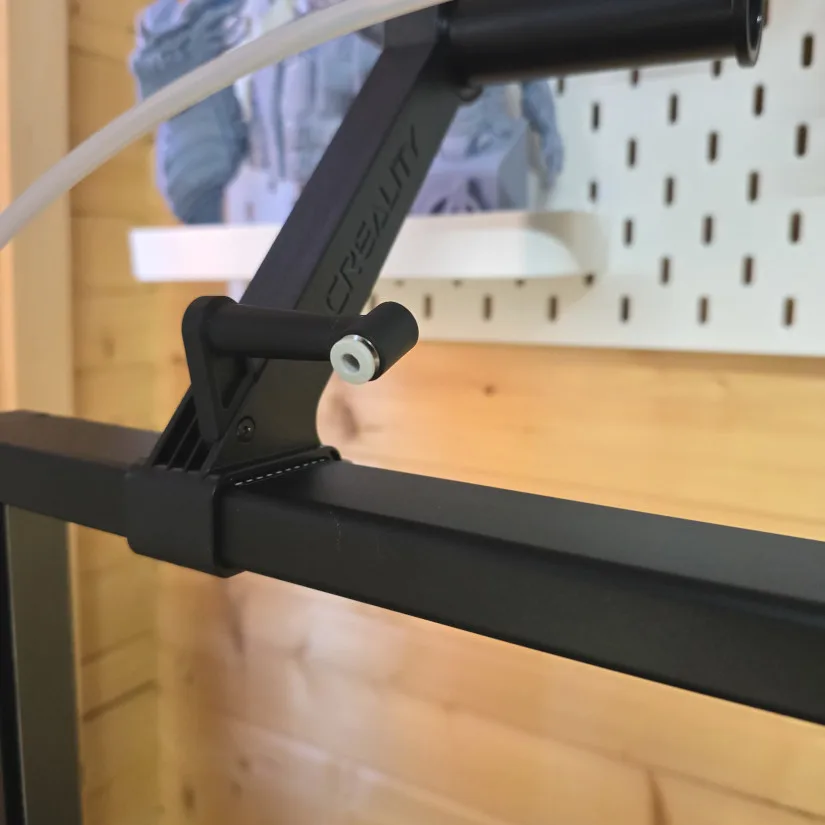
Next, flip open the touchscreen, which is pre-installed. The screen uses a tilt and twist system, allowing movements of 90 degrees pulling out and 60 degrees tilt. Care should be taken, as excessive force could damage the screen.
©3DWithUs – Photo: Phil Macey
– Wiring. Equipment wiring step: First, Clip the patch cords into the clamp, Connect the patch cords to the X-axis motor, then plug into power.
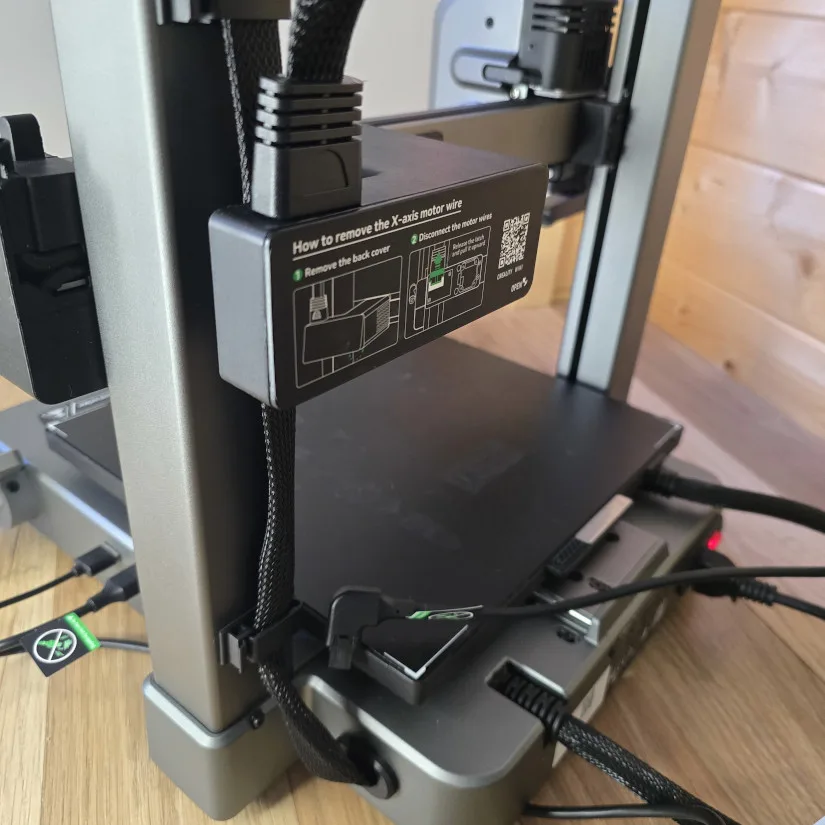
©3DWithUs – Photo: Phil Macey
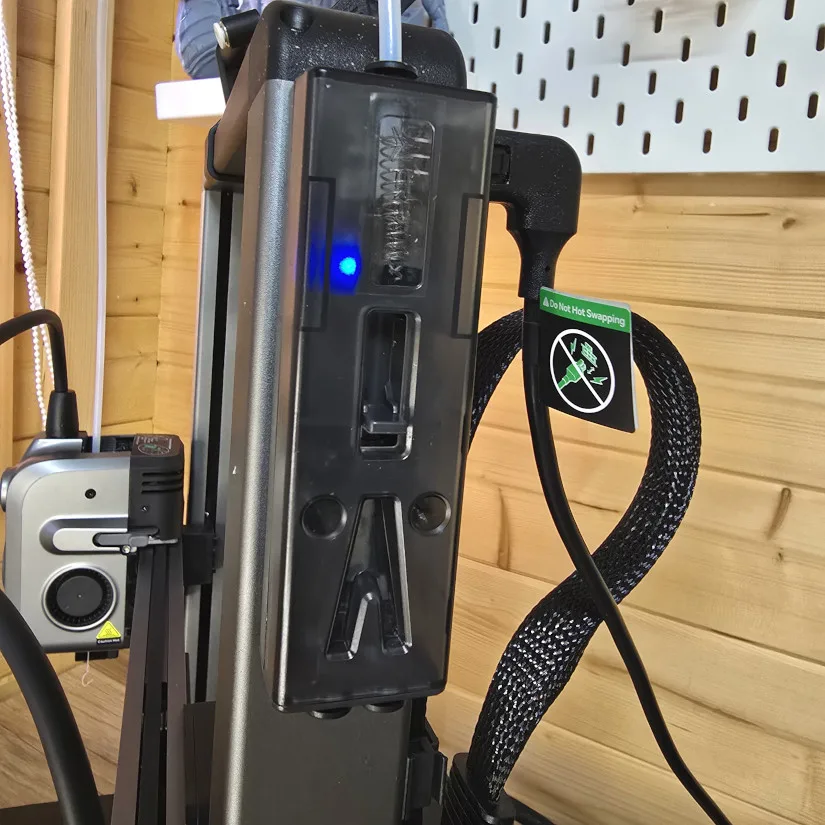
(Combo version only) First, remove the adhesive tape and stick it onto the buffer. Then, install the buffer onto the gantry (pay attention to the direction of the buffer) with a single outlet on top. First, cut a 60 cm piece of PTFE tube. Then insert one end of the PTFE tube into the CFS consumable outlet and insert the other end into the buffer; it can be inserted into any one of the four holes, providing 4 inlets for a 16-color system.
Connecting CFS to Buffer 485 Communication Line: Note that the bent connector should be inserted into position C on the buffer and the straight connector into position D on the CFS (either of the two 485 ports on the CFS can be used). Connecting the communication cable between CFS and Creality Hi 485: This cable has 6-pin straight connectors on both ends, with no distinction between front and back. One end should be plugged into position E on the CFS, and the other end should be plugged into position F on the machine interface.
©3DWithUs – Photo: Phil Macey
– Touchscreen & Setup. The next step is to power on the printer. The Creality logo will appear on the screen, followed by a request to select the language required. A visual image of the printer will show a green cube highlighting the need to ensure it is clear of debris. Read and agree to the privacy policy. Connect to the local Wi-Fi network; you can skip this step if printing only via USB. Select the time zone. You can also log in to the CrealityCloud. This will be followed by a device self-check. Ensure the build plate is attached to the heat bed. The check takes around 10 minutes. Refrain from touching the printer during this step.
©3DWithUs – Photo: Phil Macey
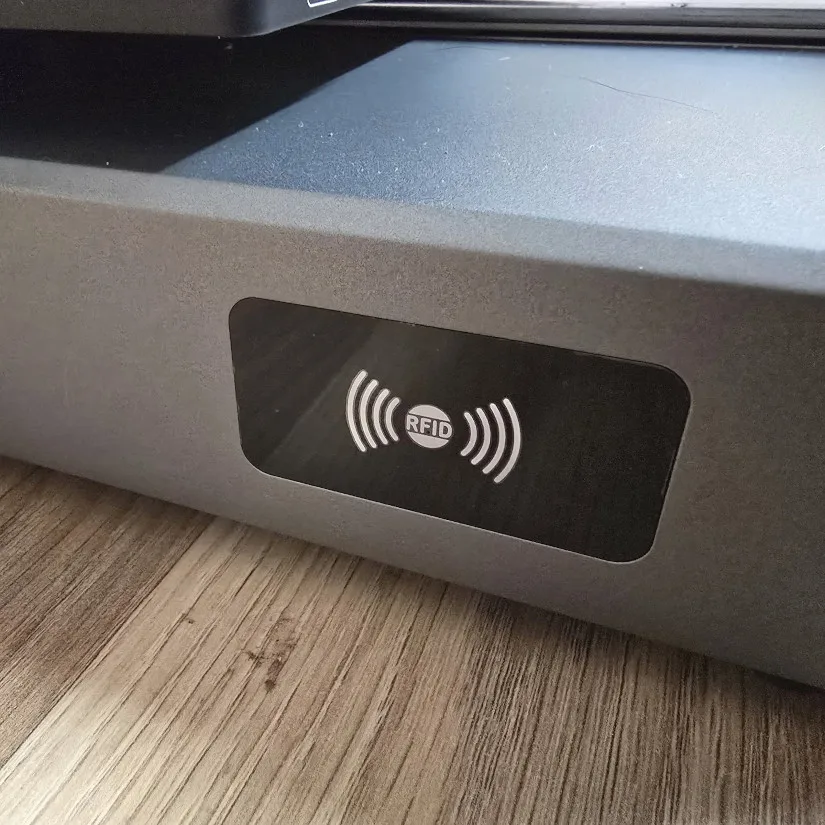
– RFID Scanner. Once the check steps are complete, the machine will have been leveled and calibrated. The Creality Hi boasts an RFID scanner to the left of the printer; this is for the use of single-spool printing. With any RFID-enabled spool, you can scan this and load it onto the screen. This review is based on the Hi Combo version, so both the printer’s RFID and CFS have this capability.
Follow on-screen instructions to load filaments either by single feed or via the CFS. No USB was supplied with this unit. However, I used a USB I had on hand and loaded files to demonstrate the machine’s capabilities, as seen later in this review and in my unboxing video found on my channel.
In my review video above, I showcase the unboxing, setup, and testing process in detail.
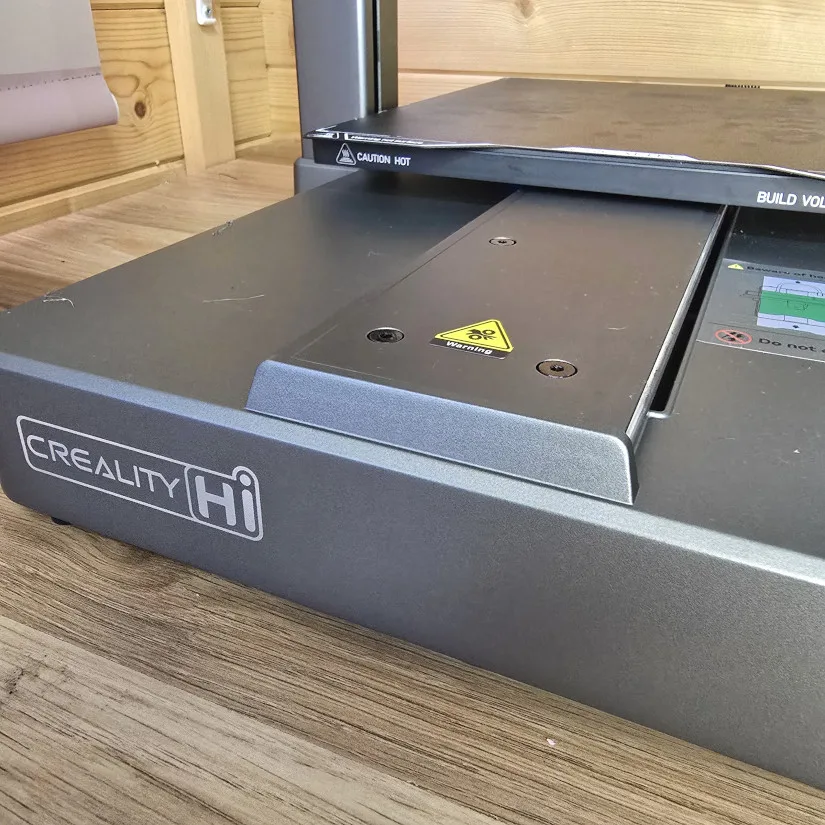
– Design Features. The Creality Hi Combo bed-slinger comes packed full of features. Its all-metal body, die-cast made of aluminum, allows for a rigid and stylish look to the printer, with speeds of up to 500 mm/s and acceleration of up to 12000 mm/s. Two independently motorized lead screws adjust the X-axis to the horizontal position, and a strain gauge in the toolhead auto-probes the bed for accurate leveling mesh. The printer also comes with a linear rail on the X-axis and two linear rods on the Y-axis. The rigid structure and smooth motion will considerably elevate the print quality.
©3DWithUs – Photo: Phil Macey
The X and Y-axis of Creality Hi are driven by step-servo motors with FOC algorithms. Minimal step loss and layer shift. It enables quiet and smooth motion even at a mind-blowing print speed.
To actively cancel out the vibrations, Creality Hi has a patented algorithm that can analyse the amplitude of vibrations at various print speeds and produce opposing signals. Consequently, you will obtain smoother surfaces, less ringing, and faster prints, also known as Input shaping.
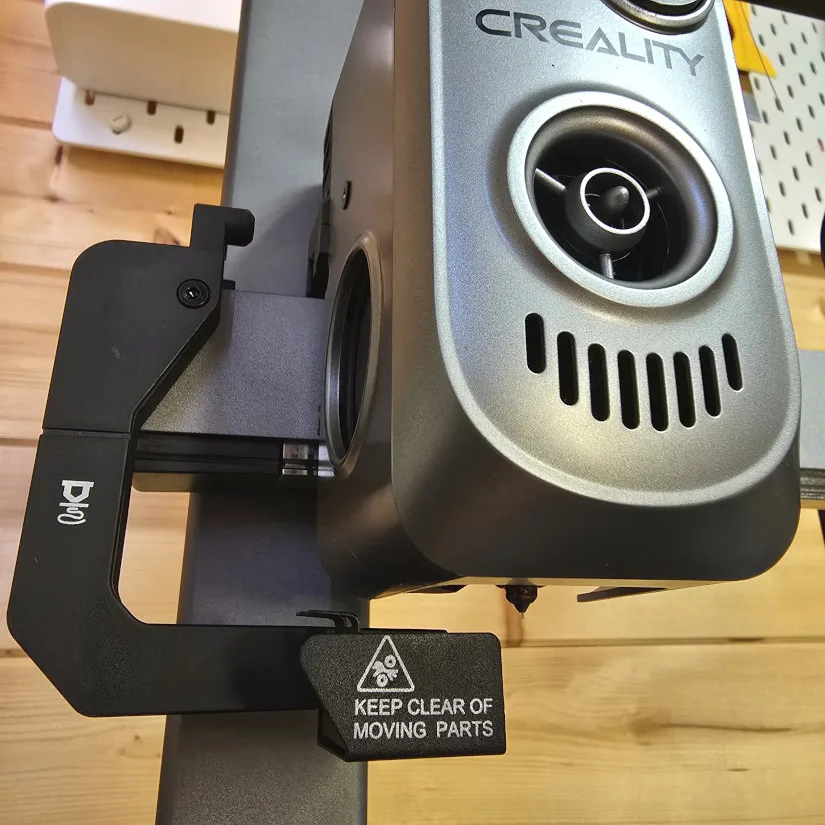
The Hi model also features the Quick Swap tri-metal nozzle tipped with hardened steel and an all-metal extruder with a built-in filament runout sensor for a clog-free printing experience. Being a multi-color printer, the Hi also features an automatic filament cutter.
©3DWithUs – Photo: Phil Macey
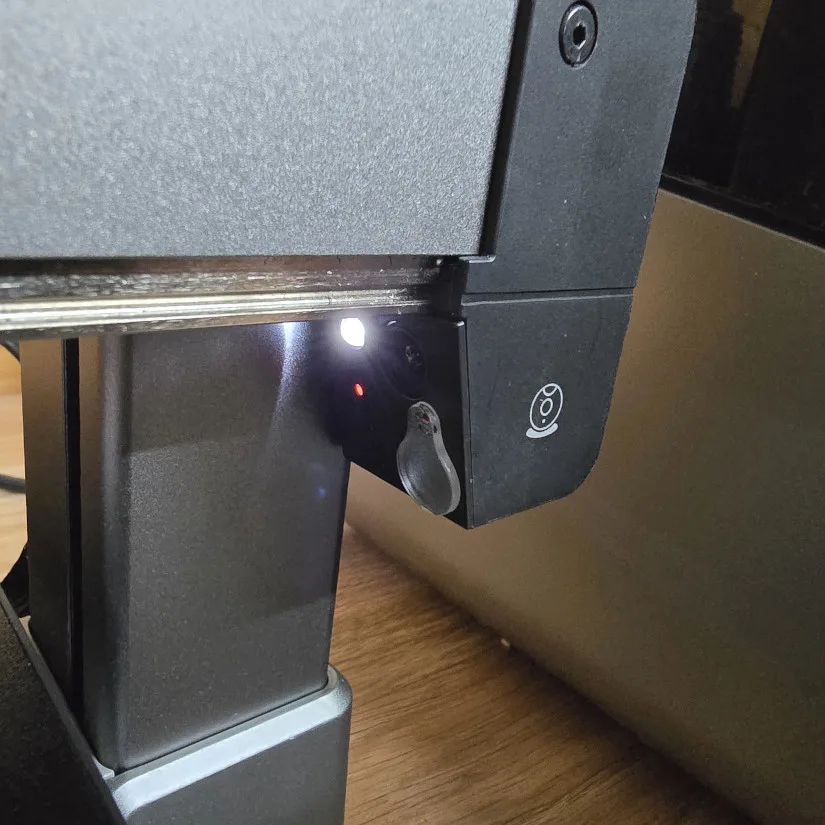
The Creality Hi also features a fold-away 3.2″ touchscreen and camera with a privacy cap. No screen assembly is required. Video monitoring of your print jobs, and camera cap for privacy protection.
©3DWithUs – Photo: Phil Macey
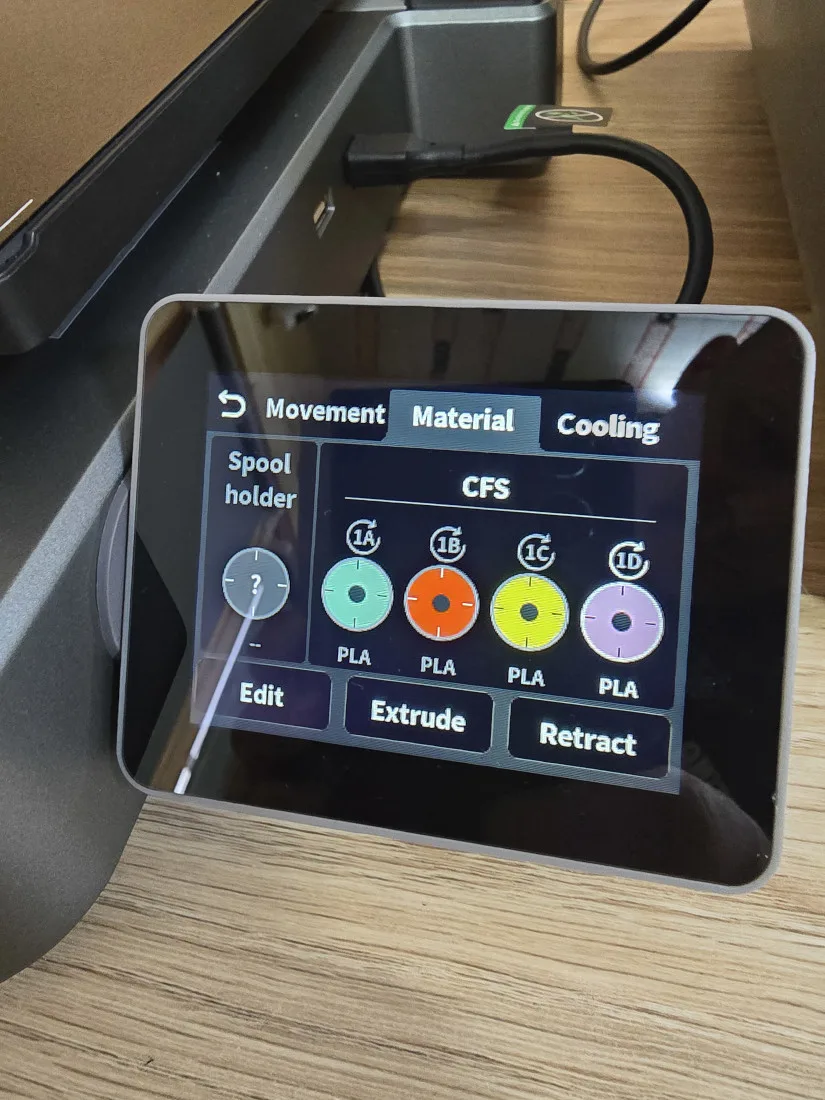
The Creality OS filament management system displays the current filaments being used (RFID only), both through the built-in CFS system and single feed via the touchpad to the left of the machine. Unlike some other competitors for low-cost multi-color printers, the Creality Hi Combo CFS comes with a connection hub on the back.
Software – Creality Print 6.0
For the printing tests, I selected Creality’s own slicing software, Creality Print 6, which can be found on the Creality website. I selected the Hi Combo machine in the machine model tab, and this preset all the required settings, i.e., build volume. With this model printer, you can add extra filament tabs, up to 16 in total, although the Combo comes with just 1 CFS unit but can be expanded to 4 CFS units. For this demonstration, I selected just 4 filaments.
Creality Print is based on the Orca slicer, which in turn draws from other slicers. Thanks to the open-source movement, slicer software has improved drastically in recent years. As a result, we can find many sophisticated features in the latest Creality Print slicer software.
Test Printing Results
– Model 1. For the first print, I wanted to print the Benchy and test out a multi-phase color print using the slicer. The transition between colors was seamless, the filament cutter worked well, and the waste was discharged to the left of the printer. You will need a waste bin option; I’m sure the 3D community will come up with a discharge system.
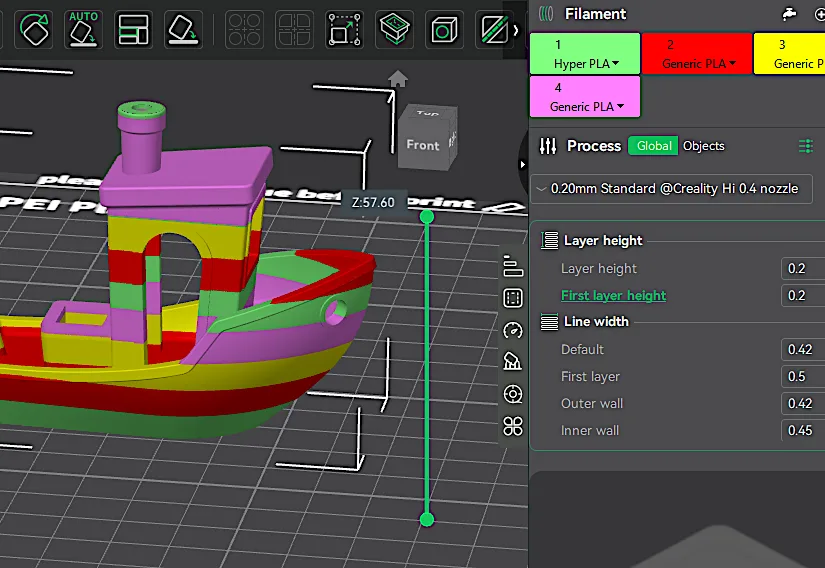
Screenshot
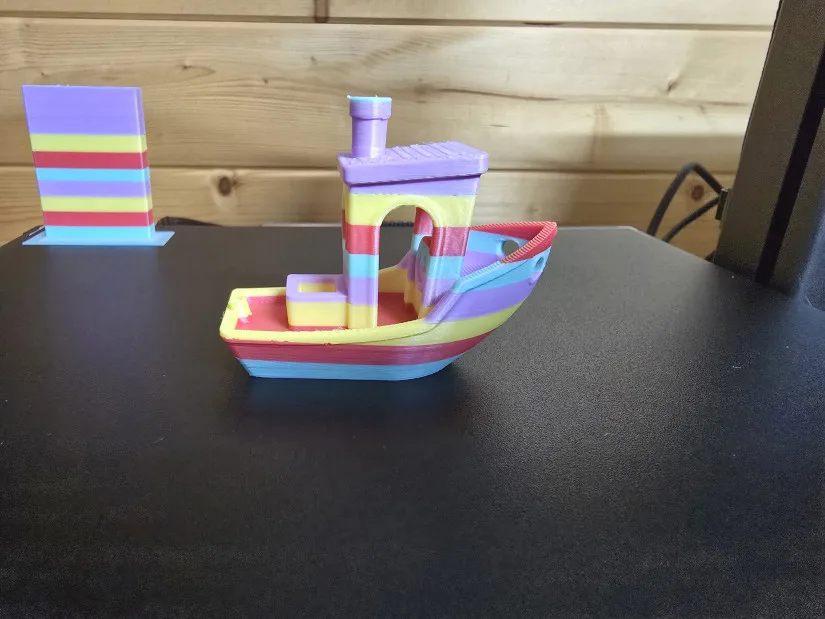
The filaments used were Soleyin Ultra PLA – Pineapple Yellow, Macaron Purple, Strawberry Cream, and Ocean Blue.
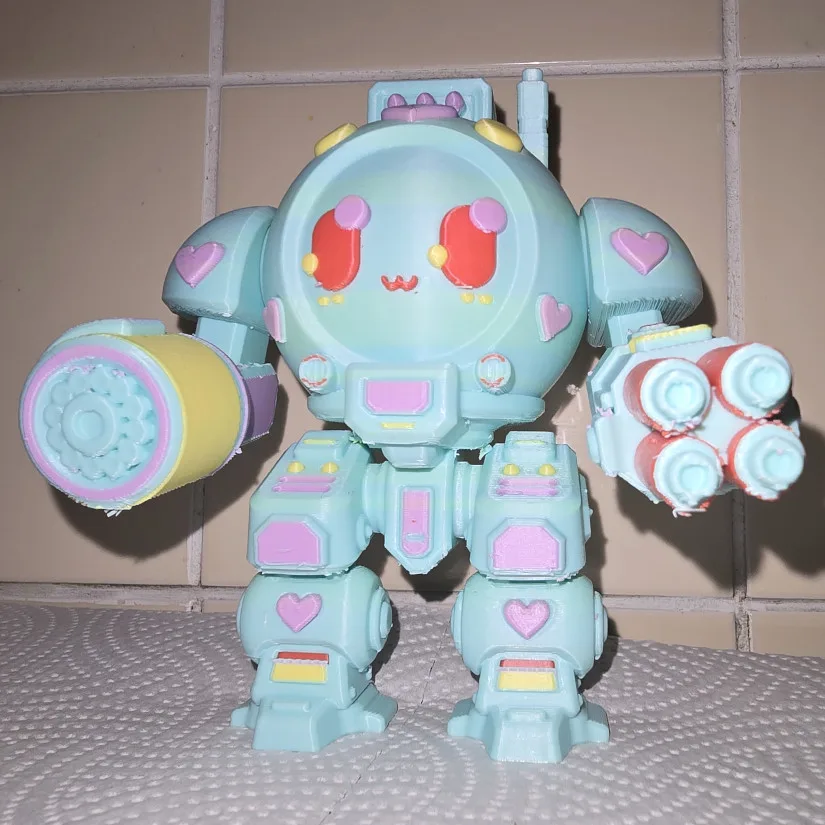
– Model 2. For the second model, I selected to print a complex UWU Strike Force Heartbreaker Robot, a model by CC0hort Club from Thangs. This model was split into three parts: main body and left/right arms. The print was sliced via Creality Print 6.1, and the print took approximately 22 hours to complete, using a 0.2-layer height and painted supports.
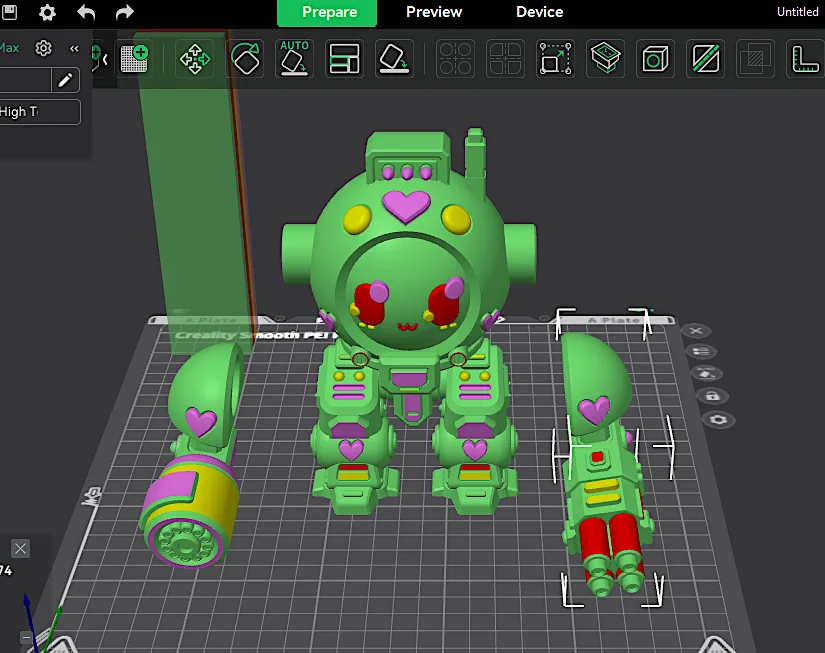
Screenshot
3D Model by CC0hort Club on Thangs
©3DWithUs – Print and Photo: Phil Macey
The one thing I noted was the amount of filament waste was almost 50% of overal print weight, this can be reduced with calibration of filament purging, also the ability to purge into another model.
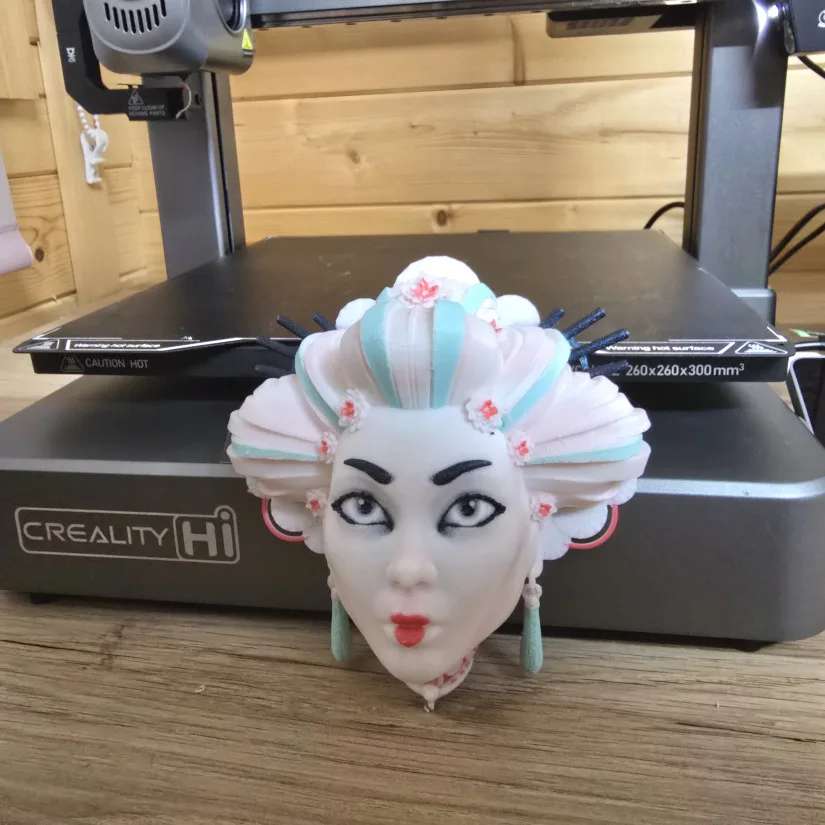
– Model 3. For the third model, I chose to print a multi-color print of the Geisha model by Pipecox Patreon. This model took approximately 19 hours to print with a large amount of filament purge.
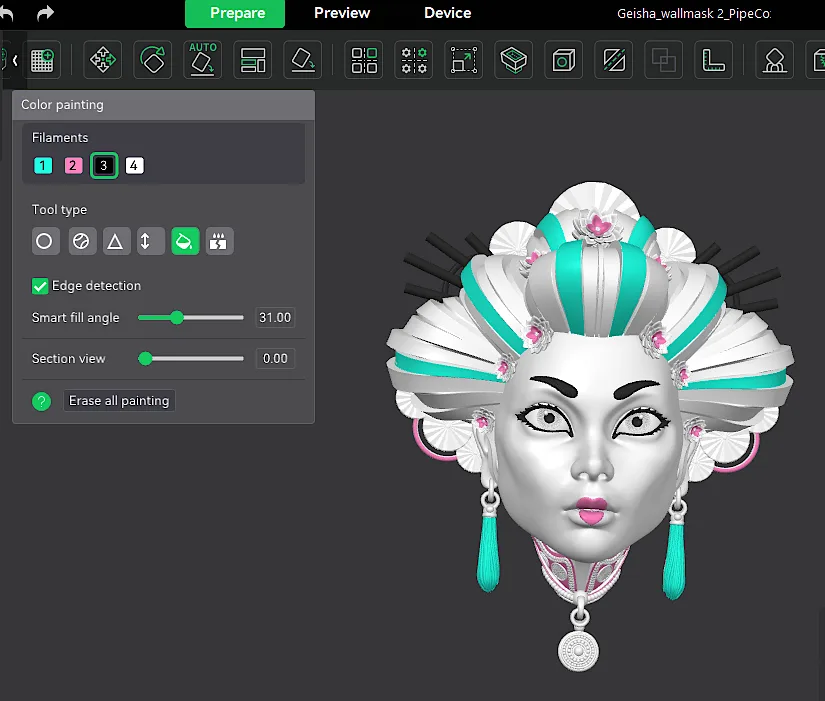
Screenshot
3D Model by Pipe Cox on Thangs
©3DWithUs – Print and Photo: Phil Macey
The model as shown in images had some filement bleed from red to white, but this once again is a user error in preparation, not the printer capabilities.
– Model 4. For the final model, I decided to use the full bed to ensure the auto-leveling works as intended. The model selected was Dummy 13 by Soozafone on Printables, which was sliced into two different builds. The first was the frame part, which was printed using white PETG, and then black PLA for the armor. The overall print took approximately 18 hours to print over two plates and required assembly.

3D Model by Soozafone on Printables
©3DWithUs – Print and Photo: Phil Macey
– Model 5. Here is another quickly arranged Easter-themed print. There is a great collection of themed toy bears by Bugman available on Printables. To quickly paint and arrange such a print was effortless. Read more about Easter 3D Print Ideas on 3DWithUs.
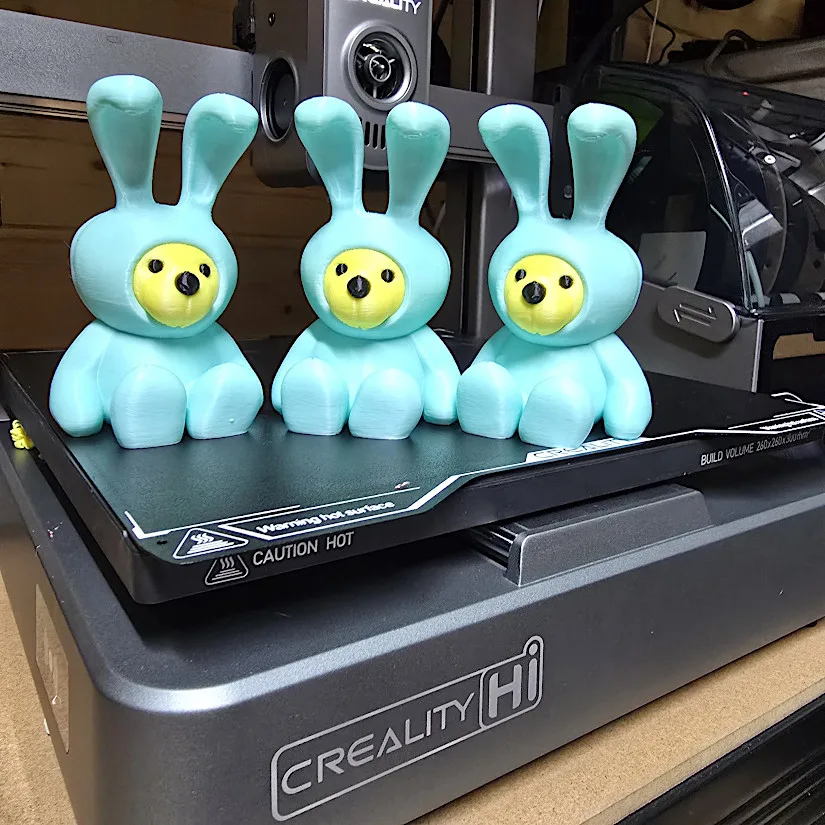
3D Model by Bugman140 on Printables
©3DWithUs – Print and Photo: Phil Macey
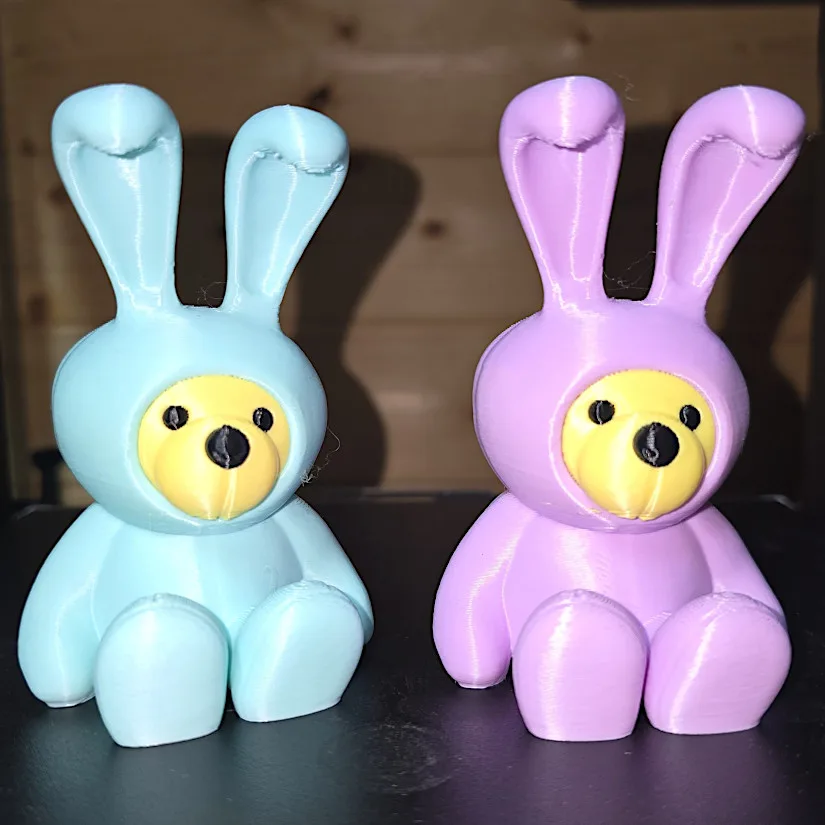
In my testing, I used Soleyin Ultra PLA filaments from Amazon: Pineapple Yellow, Macaron Purple, Strawberry Cream, and Ocean Blue. As you can see, I managed to use third-party filaments without issues.
RFID Materials
Radio Frequency Identification
3D printing companies are introducing RFID-enabled materials to improve user convenience and precision. RFID chips in filament spools allow printers to automatically recognize material types and adjust settings, reducing errors and saving time. This technology also helps manufacturers collect usage data to enhance future products and personalize user experiences.
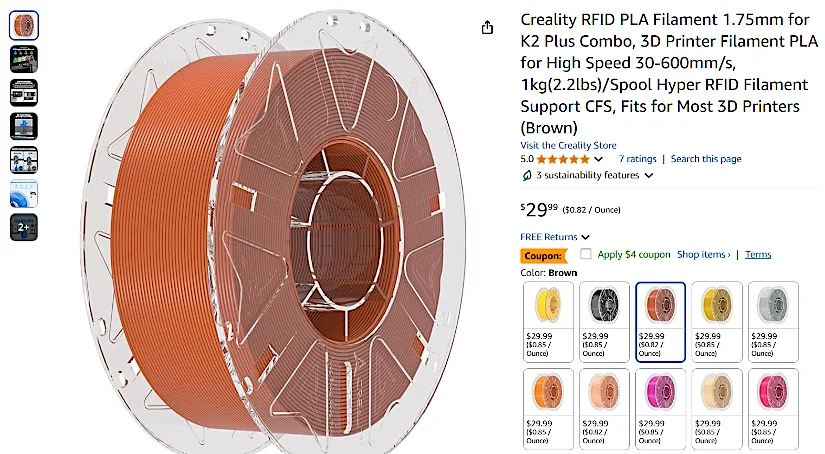
As you can see from my testing, I was able to use third-party filament without any issues. Creality has its own RFID-compatible filament collection on Amazon and the Official Website, which we recommend checking out.
Compare Creality Hi Combo to Other 3D Printers
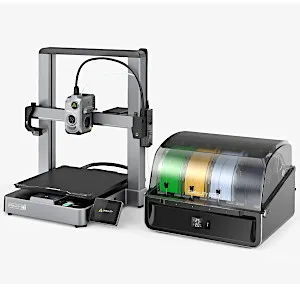
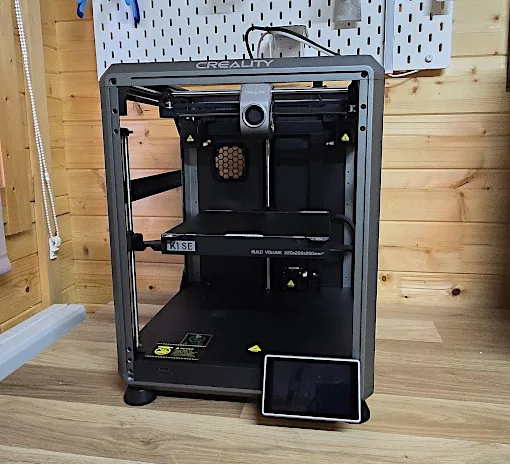
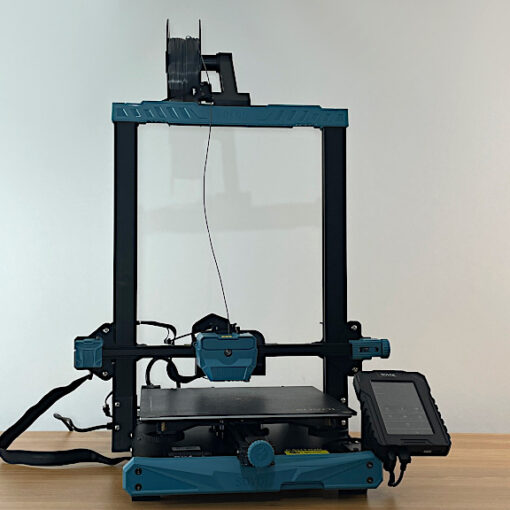
Even though the Creality Hi Combo Build looks similar to their flagship model, the Ender 3 V3, its build is slightly different, optimized primarily for the multi-color system CFS. On 3DWithUs, you can also check out the review of the Creality K2 Plus, a CoreXY build that’s much larger and pricier.
Compare to similar builds, volume and price range, FDM 3D printers on 3DWithUs.
In terms of price, build quality, and features, the Creality Hi Combo offers serious competition to products such as the Bambu Lab A1 Combo and the Anycubic Kobra S1 Combo. Last year, Creality made significant advancements in its Creality Print software, the Creality Cloud App, and the CrealityCloud file repository. Adding a high-performance multicolor system has benefited their overall ecosystem.
©3DWithUs – Print and Photo: Phil Macey
Have questions? Feel free to ask in the comment section below.
For a wider discussion or to share your own Creality Hi Plus prints, join us in the forum:
Conclusion and Pros & Cons
Compare the Prices & Bundles:
Official Store | Amazon | AliExpress
Creality Hi Combo Review
Review Summary
The Creality Hi Combo performed to a really high standard during my tests, as seen in the prints above. The machine’s build is of the highest quality, and the Hi Combo 3D printer comes with a 3.2-inch touchscreen, a camera with a privacy cover for print monitoring, support for Creality Cloud software, Wi-Fi control, and automatic leveling, among other features. It is 95% preassembled out of the box.
The Creality Hi Combo can handle up to 16 distinct colors and filaments by working with up to four CFS modules simultaneously. The material switcher for the CFS (Creality Filament System) was initially offered as an accessory for the expensive K2 Plus printer but is now included in the quite reasonably priced Hi Combo. The CFS loads and unloads four spools from the extruder for you while keeping them stored away in a sealed unit.
The Hi Combo also features an inbuilt RFID reader on the printer itself for single color printing. Due to the open bed-slinger nature of this 3D printer, print operations may be relatively vulnerable to environmental temperature changes. With a generous build volume of 260 x 260 x 300 mm, the printing experiences will be limitless.
The maximum temperatures for the nozzle and heat bed are 300°C (572°F) and 100°C (212°F), respectively. The Hi Combo comes with a quick-swap, tri-metal hardened steel nozzle and a titanium alloy heat break to reduce heat creep, twinned with its all-metal extruder, allowing for a clog-free experience. The Hi Combo is a multi-color printer, so it comes with an automatic filament cutter installed onto the printing head, with speeds of up to 500mm/s and acceleration of 12000 mm/s^2.
Quality multi-color printing can be achieved in quick time depending on the complexity of the model.
Overall, my experience from unboxing through to print completion was enjoyable and seamless, as shown in my unboxing video. With the printer needing only several screws to connect and wiring connections, this printer would be accessible for all users, from inexperienced to experienced 3D hobbyists.
Pros
• High-quality build materials
• RFID scanner
• Build volume
• Inbuilt camera for timelapse and live monitoring
• Fast printing
• Low-cost printer
Cons
• Open bed slinger design
• Locator slot for build plate for easy connection.
My husband and I jist got this printer and followed all the directions, but it just wont print. Any suggestions?