With a build volume of 320 x 320 x 400 mm, the Mingda Rock 3 3D printer offers a large format FDM printing experience that is typically not found at the sub – $500 price point, with many common aftermarket upgrades installed at the factory. The silent stepper motors, dual Z leadscrews, and direct drive extruder all come together to create a machine that is able to print large parts quickly, quietly, and repeatedly.
Table of Contents:
Mingda Rock 3 Specifications:
– Extruder: .4mm Nozzle
– Heated Bed: 0-90 degrees C
– Build Volume: 320 x 320 x 400 mm (12.6” x 12.6” x 15.75”)
– Materials: 1.75mm Filament (PLA, PETG, TPU, etc.)
– Connectivity: USB / SD Card
– Interface: 3.5” Color Touchscreen LCD
– Dual Z Threaded Rods
– Direct Drive BMG Clone Extruder / v6 Clone Hot End
– TMC2208 Silent Stepper Motors
Price: $389-499
Product affiliate links:

Amazon
Official Website
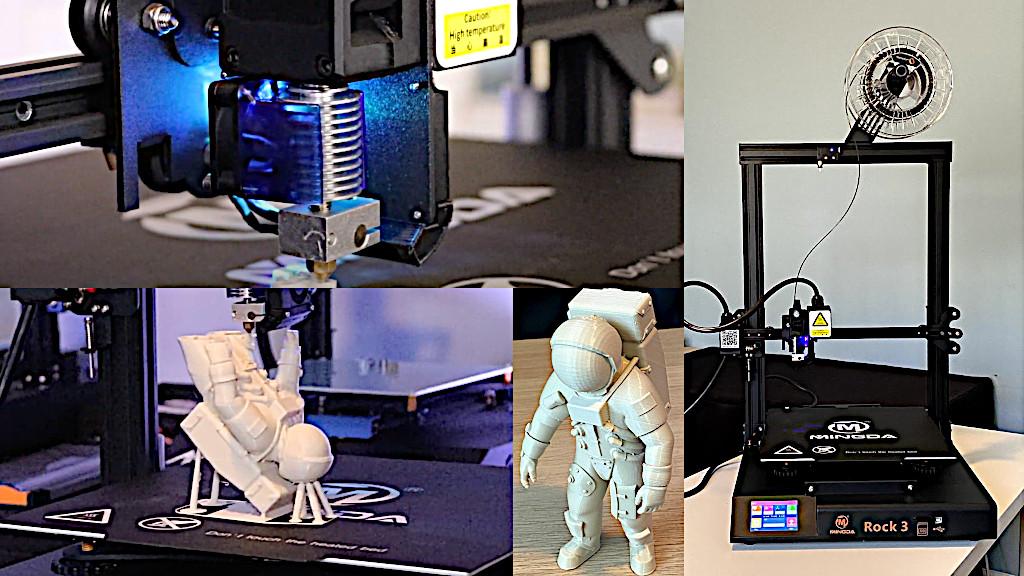
(Image: Andrew Sink)
3D Printer Assembly and Review
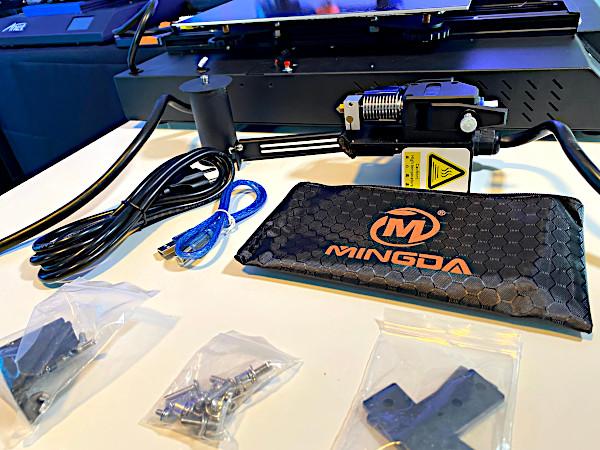
The Mingda Rock 3 ships with all required tools and hardware for assembly and doesn’t require any wiring, soldering, or any complex process beyond the abilities of a beginner. The base of the printer has the Y-axis pre-assembled, with the belts pre-tensioned and all of the wiring connected internally. The base of the Rock 3 measures 22” x 16.5”, so you’ll want to make sure you have a large enough surface to accommodate it.
(Photo: Andrew Sink)
The Rock 3 includes an SD card, USB cable, allen keys, a leveling card, and a basic assembly guide to get the user off to a quick start. Assembling the printer is similar to other aluminum extrusion machines; just attach the X/Z gantry to the base, secure the bolts, and connect the endstops and Z motors.
Direct Drive Extruder
(Photo: Andrew Sink)
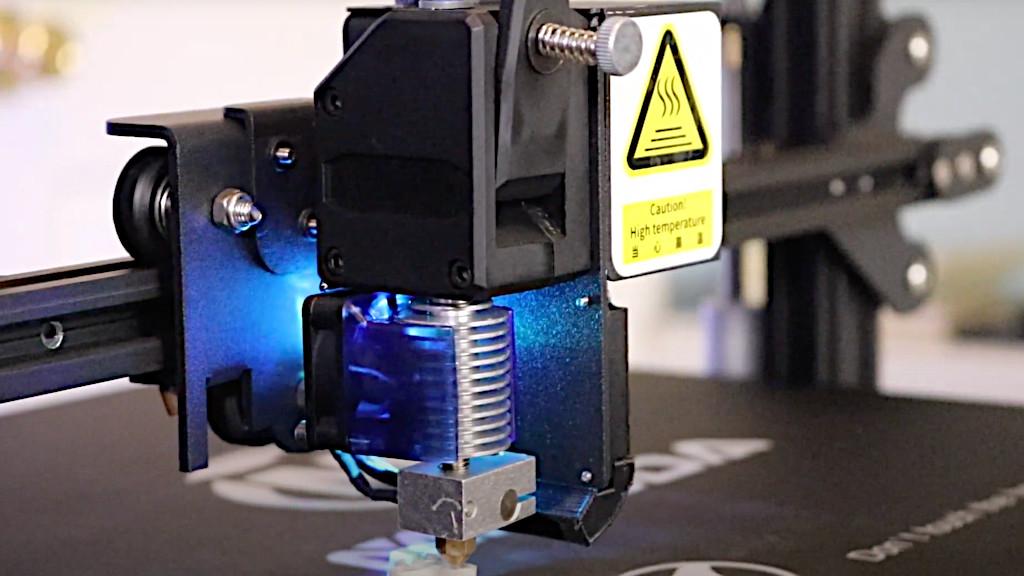
One of the key features of the Mingda Rock 3 is the extruder and hot end assembly. The Rock 3 uses a Bondtech BMG clone extruder coupled with a v6 clone hot end. This is an interesting configuration, and is typically found as an aftermarket upgrade on most machines. This lightweight configuration allows for faster travel on the X-axis while not requiring the long retraction moves typically associated with a Bowden extruder setup. Just like the Mingda D2, the Rock 3 has a color-changing LED attached to the assembly that lights up the area directly under the hot end, and is useful for seeing how the layers are adhering.
Large Volume 3D Printing
(Photo: Andrew Sink)
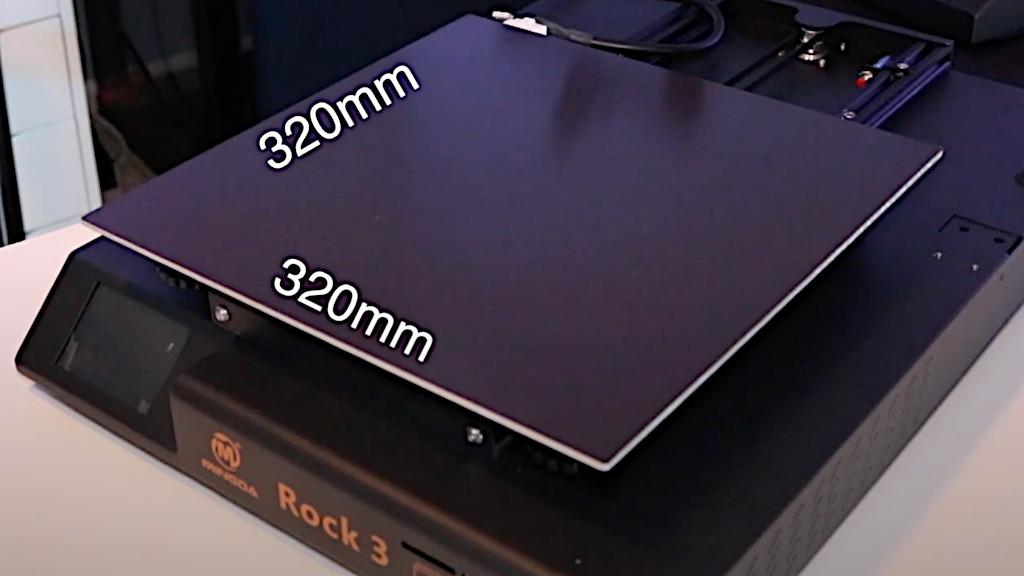
The build volume of the Rock 3 is 320 x 320 x 400mm (12.6” x 12.6” x 15.75”) which allows for the printing of large parts in a single print. Leveling the platform in the X/Y plane is achieved by adjusting the four large thumbscrews at each corner of the build platform manually. The build surface is a flexible magnetic mat that adheres solidly to the magnetic base, and is easily removed by peeling it off. Parts are easily removed from the mat by gently bending and allowing the part to pop off.
First Prints – Mingda Gcode Files
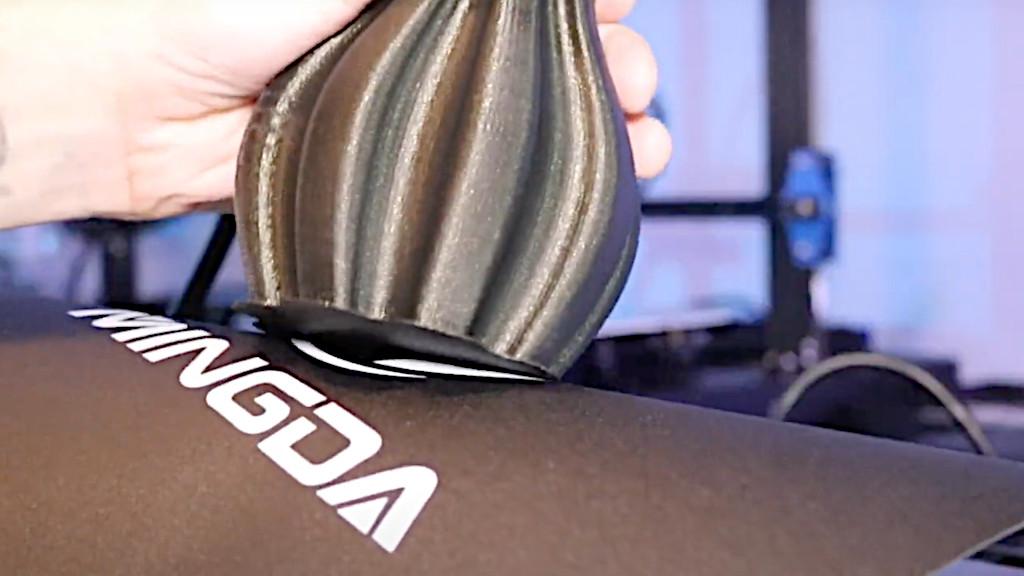
The Rock 3 comes with an SD card that includes a quick installation guide, a .exe installer for RepetierHost 2.1.6, several STL files, and a folder with pre-sliced .gcode files for test printing. For my first print, I printed the “Round vase.gcode” to see how these files were prepared. For this test print, I used Fillamentum “Vertigo Galaxy” PLA material. Just like some of the test prints included with the Mingda D2, this file was prepared with a large raft, many solid layers, and took nearly 12 hours to print.
(Photo: Andrew Sink)
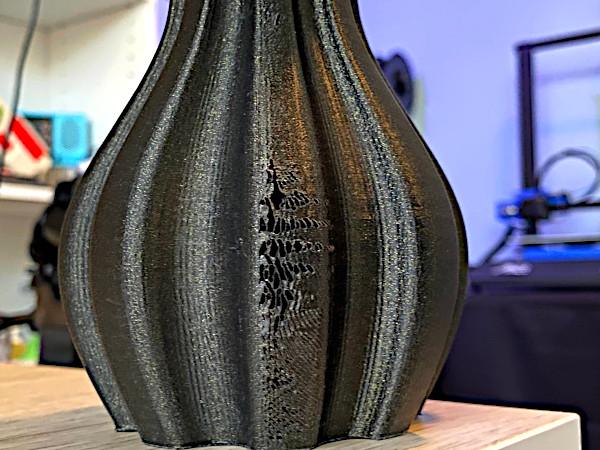
It was also sliced with each layer reversing direction after completing, which caused a seam up the side of the mode. I would definitely recommend skipping the included demo prints, as the quality isn’t representative of what the machine can accomplish, and the 12 hour build time is excessive for a first print.
(Photo: Andrew Sink)
Slicing Software: RepetierHost vs PrusaSlicer
The Rock 3 ships with RepetierHost 2.1.6 by default, which can be a little confusing for new users who are expecting a more well-known printer preparation software like Cura. I personally use PrusaSlicer for almost all of my printers, so I used the included gcode files to create a profile in PrusaSlicer that would work with the Rock 3.
(Photo: Andrew Sink)
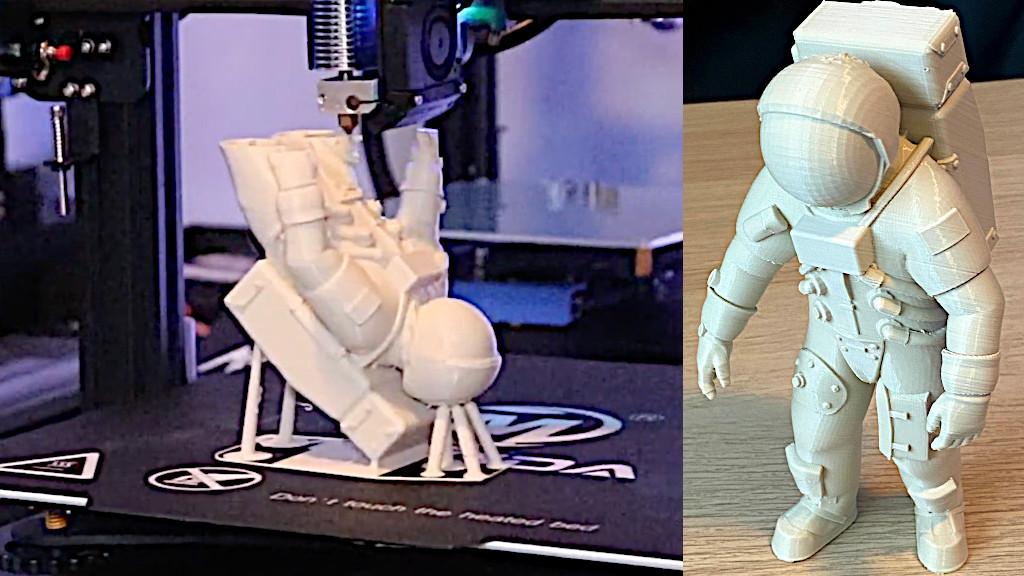
To test out the slicer software, I printed the Apollo Astronaut by Charlie1982 at .2mm layer height using Printed Solid Jessie ‘Beige 500’ PLA. The model printed out clean and without issues, and the built-in supports snapped off easily but left visible marks. The printed model has some light banding and other visible artifacts, which indicate the machine will require some dialing in with the new slicing software.
3D Printing with Full Z Axis Height – Filament Runout Sensor
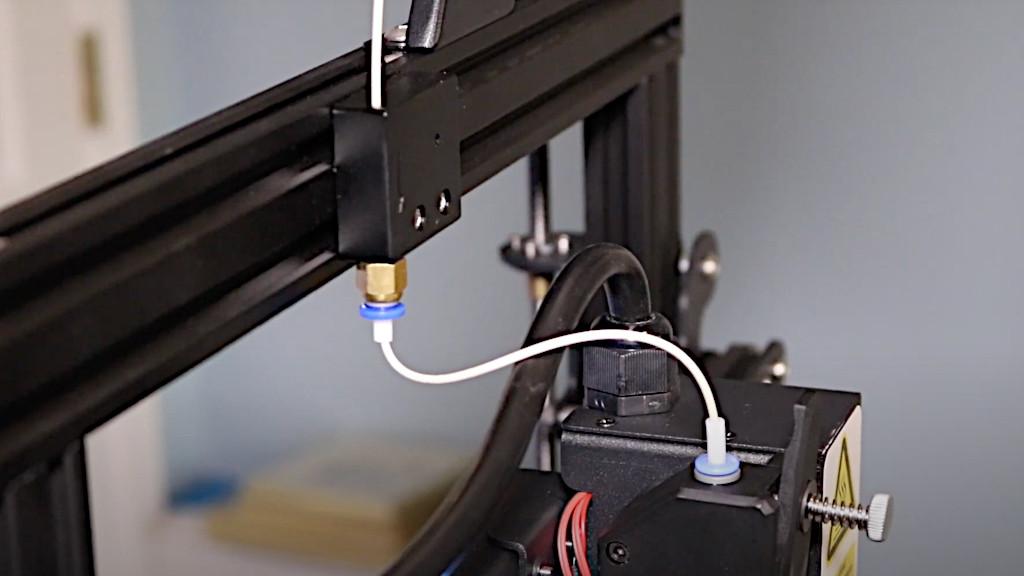
While running some test prints, I noticed a strange design issue on the Rock 3 that needs to be addressed if you’ll be printing parts at the full 400mm Z height. The filament run-out sensor is located on the X/Z gantry, and is located behind the extruder assembly on the Y axis. This means that filament passing through the runout sensor also needs to curve forwards towards the extruder assembly, which causes an S-curve shaped pinch point when the extruder raises on the gantry. If printing a model above 350mm, this curve can be challenging for brittle or composite filaments, and the runout sensor is actually lower than the filament input when the gantry is maxed out at 400mm.
There are two easy solutions: A) disable the filament runout sensor and B) bypass the sensor by placing a piece of filament in it and run the material directly into the extruder. A better solution would be to develop a bracket that pushes the sensor up in Z and forward in Y, which would allow the sensor to be used even with full height prints.
(Photo: Andrew Sink)
Should you buy the Mingda Rock 3?
The Mingda Rock 3 offers a lot of features that are useful to any potential user who is hoping to print large items with a direct drive extruder and easily remove them from the build platform. The silent stepper drivers and dual Z leadscrews help to push this printer to a higher level of performance, but experienced power users may be disappointed with the lack of an automatic bed leveling device.
The manual leveling process works well and is relatively quick but could likely be removed altogether with the addition of a probe to measure Z offset distance. Aside from a few minor design quirks, the Rock 3 is a great value considering it’s sub-$500 price point, and includes upgrades that will benefit any user who purchases one.
Mingda Rock 3 Pro Review – Updated Features
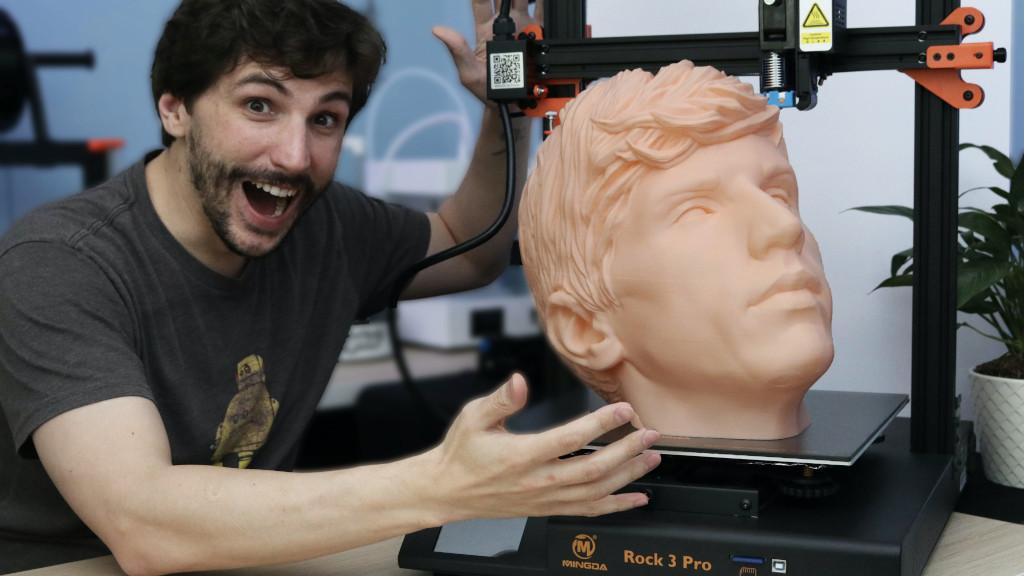
Since the launch of the Rock 3, Mingda has created an updated version of the printer with all new features and upgrades called the Mingda Rock 3 Pro. The Rock 3 Pro is similar in size and capabilities to the Rock 3, with some notable upgrades that make it an easy choice for more experienced users looking for a professional large format 3D printer around the $500 price point. Some of the concerns I had with the Rock 3 during my initial review (such as the location of the filament runout sensor) have been addressed in the Rock 3 Pro and the machine benefits greatly from these updates.
(Photo: Andrew Sink)
Mingda Rock 3 Pro Specifications:
Extruder: .4mm Nozzle
Heated Bed: 0-90 degrees C
Build Volume: 320 x 320 x 400 mm (12.6” x 12.6” x 15.75”)
Build Platform: Carborundum Glass
Materials: 1.75mm Filament (PLA, TPU, etc.)
Connectivity: USB / SD Card
Interface: 3.5” Color Touchscreen LCD
Dual Z Threaded Rods with Anti-Backlash Nuts and Synchronous Belt
Direct Drive BMG Clone Extruder / v6 Clone Hot End
TMC2208 Silent Stepper Motors
X/Y Belt Tensioners
Filament Runout Sensor
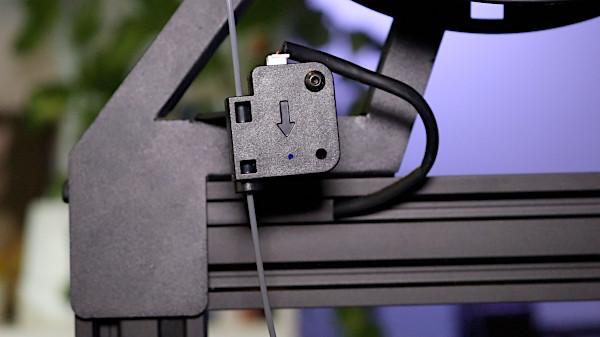
One of the primary concerns I had with the Mingda Rock 3 was the location of the filament runout sensor. The sensor was mounted flush with the Z axis gantry, and any print that exceeded a certain height would create a highly constrained filament path. This constrained path meant that the Rock 3 was not able to fully take advantage of the full 400mm of the Z height.
(Photo: Andrew Sink)
The Rock 3 Pro features an updated filament runout sensor that has a bracket that creates an offset from the frame and allows the filament to travel in a straight path between the sensor and the extruder. The filament runout sensor also swivels to prevent the filament from bending excessively during printing.
(Photo: Andrew Sink)
Updated Z Axis Components
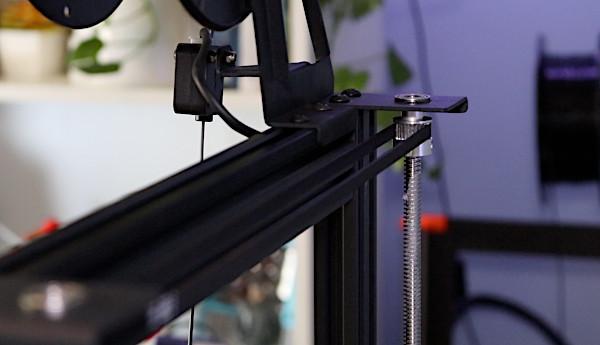
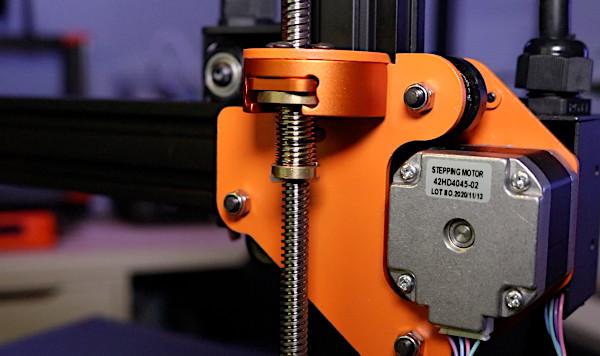
The Rock 3 Pro includes new updates to the Z axis, including a synchronous belt that connects both of the threaded Z rods. This belt allows both of the threaded rods to turn in unison, preventing either rod from becoming misaligned from the other during printing. This belt and gear system is typically found as an upgrade kit on large format printers like the Creality CR-10, but it ships pre-assembled and ready to use on the Rock 3 Pro. In addition to the belt, Mingda has also added anti-backlash nuts to both of the threaded Z rods. These components feature anodized aluminum parts, which really help give the Mingda Rock 3 Pro a finished look and feel.
(Photo: Andrew Sink)
Additional Features
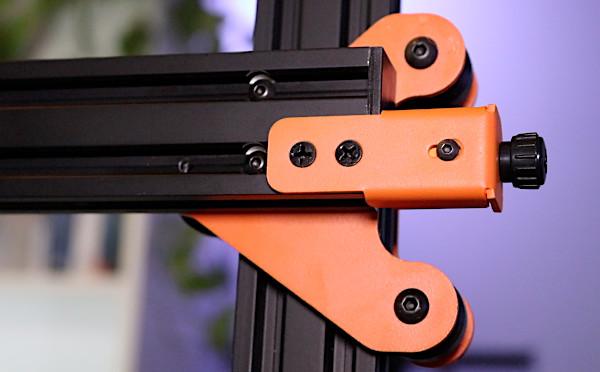
The Mingda Rock 3 Pro also features built-in belt tensioners on both the X and Y axes, which allow the user to manually adjust the tension on the belt.
(Photo: Andrew Sink)
This feature allows users to easily dial in print quality by making adjustments that would be otherwise difficult and time-consuming.
(Photo: Andrew Sink)
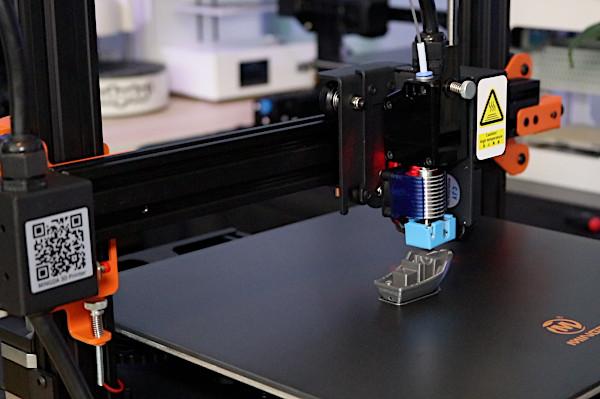
The Carborundum glass build platform heats up quickly, and I had no problems getting parts to stick to it during printing. After the build platform cools, printed models easily pop off without requiring any tools or sharp objects.
(Photo: Andrew Sink)
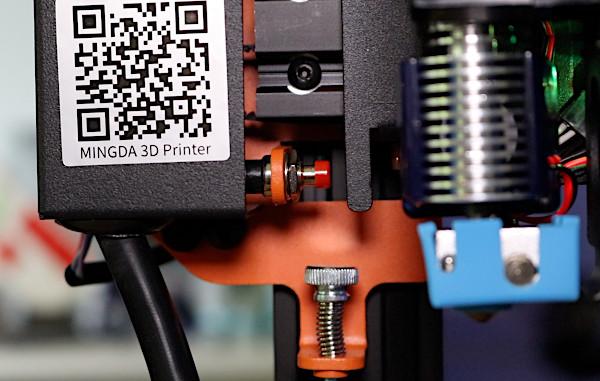
The Mingda Rock 3 Pro uses the same momentary switches for each endstop as the Rock 3. The Z offset can be manually set with the adjustable screw mounted to the X axis gantry, and allows for a simple and straightforward method of setting the distance between the nozzle and the glass build platform. Calibrating the bed is a manual process, and can be accomplished by adjusting the thumbscrews present at all four corners of the bed to calibrate for any unevenness in the build platform.
(Photo: Andrew Sink)
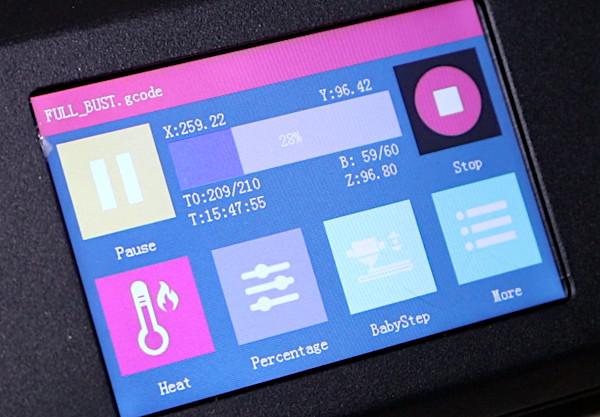
The Rock Pro 3 uses the same 3.5” color touchscreen as the original Rock 3, which I like. The interface is bright, responsive, and easy to navigate. In addition to offering a quick shortcut to common adjustments during printing (nozzle/bed temperature, speed, etc.) the ‘BabyStep’ option allows for a live adjustment of the Z offset. This is critical for getting a first layer that adheres well to the platform, and making it easy to adjust on the fly is a big benefit for the operator.
Mingda Rock 3 Pro Build Volume – My Big Head
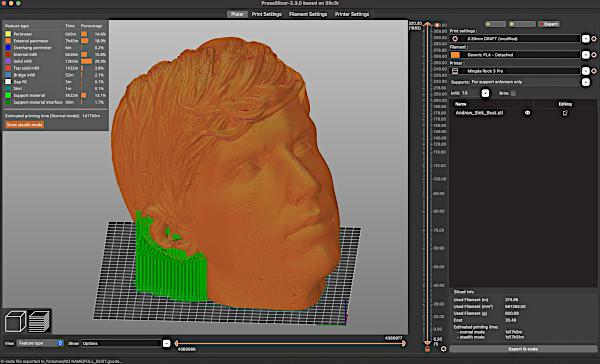
To test out the overall build volume of the Rock 3 Pro, I 3D printed a scan of my head that I made several years ago. This 3D model is based on a scan made with photogrammetry app 123D Catch. The rough scan was cleaned up by digital artist Dan Mitchell and the various holes and defects on the model were fixed and prepared for 3D printing. Unfortunately, Autodesk has since removed 123D Catch from their list of supported software, but there are many great photogrammetry alternatives that you can use to make a similar scan, many of which even work on your phone.
(Screenshot: PrusaSlicer)
I prepared the model for printing in PrusaSlicer, and used a profile similar to the one I had originally created for the Rock 3. The model was scaled up to fit in the build volume of the printer, and the total estimated print time was over 41 hours. Despite the lack of a raft, brim, or any adhesive applied to the bed, the part printed very well on the first try, and stuck to the bed during printing and easily popped off after the bed had cooled. I made this print using the stock .4mm nozzle included with Rock 3 Pro, but it would have printed in a fraction of the time if I had used a larger nozzle to extruder thicker layers. You can check out our guide on how to replace your .4mm nozzle if you’re interested in learning more.
Where to Buy
The Mingda Rock 3 Pro is currently available for $539.99 on Amazon, which puts it about $130 more than the original Rock 3. For the price, I think it makes sense for more experienced users who are looking for a polished printing experience to investigate the Rock 3 Pro over the Rock 3 due to the inclusion of additional features that make this printer a pro model. The belt tensioners, updated filament runout sensor, glass platform, and more all combine to make this a solid printer for the price.
- MINGDA Rock 3 FDM 3D Printer on Amazon
- Read more: Mingda D2 3D Printer Review: Pro-Level Features at an Entry-Level Price
- Read more: Mingda Magician Pro Review – Large and in Charge
Read More & Compare
Read more about desktop 3D printer builds and processes. Type, volume, FDM or Resin – all to consider. Or jump to the latest 3D printer reviews.
For a comparison with other FDM 3D printers please refer to the
detailed budget FDM 3D printers guide.


Hi, great review of the Rock 3! Thanks for this.
Have you tried printing PETG filament on your Rock 3?
Do you mind sharing your Prusa slicer profile using PETG on Mingda Rock 3 please? I will really appreciate yet.
Looking forward to your reply.
Stay safe!
Regards,
Ganie