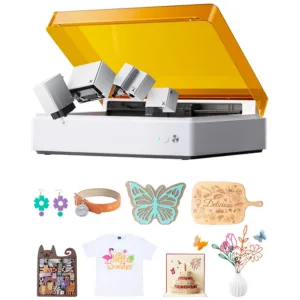
xTool’s M1 Ultra positions itself as a true ‘multi-tool’ desktop maker — a diode laser cutter and engraver combined with a blade-cutting platform for vinyl, paper, fabric, thin leather, and more. It comes as a fully enclosed machine with a single, unified software workflow. The M1 Ultra feels like the natural next step in xTool’s steady evolution. After offering powerful laser setups, this time the company focuses on making things easy and flexible. It allows quick tool changes, works with many accessories, and uses software that handles both laser and blade cutting smoothly.
In this review, we look at the real experience, including setup and learning curve. We also create a few projects using various materials, and as usual, wrap up with final thoughts and a list of pros and cons.
Where to Buy
Price: $1,099.00 – $1,399.00
Compare the Prices & Bundles:
Official Store | Amazon | AliExpress
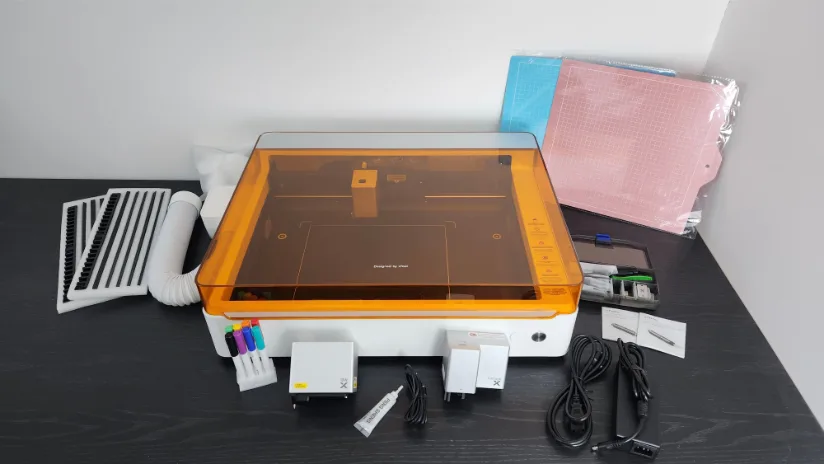
What’s in the box
• xTool M1 Ultra machine (enclosed) • 10W diode laser module • Ink Module (inkjet head) • Multi-Function Carriage (swaps blade/pen/foil) • Cutting blade + fine-point blade • Pen holder + fine-point pens • Rotary blade (for fabrics) • Foil transfer tip • Smart Air Assist • Riser Base with Honeycomb Panel (enables taller work & cleaner cuts) • RA2 Pro rotary for cylinders • Smart heat press and stand (Stand sold separately) • AP2 Air Purifier (Sold separately) • User Manuals • Sample materials
©3DWithUs – Photo: Will Zoobkoff
Specifications
• Functions: Laser cutting/engraving, blade cutting, inkjet printing, pen drawing, foiling
• Work area: Laser/Blade/Pen 300 × 300 mm (blade ~295 × 295 mm); Inkjet ~296 × 286 mm
• Max speed: Up to 400 mm/s
• Laser module (10W diode): Spot size ~0.04 × 0.06 mm; typical one-pass cuts up to ~6 mm basswood / ~5 mm opaque acrylic (material-dependent)
• Precision: Positioning ~0.02 mm; motion accuracy ~0.01 mm; probe ranging precision ~0.1 mm
• Z capacity (with Riser Base): Laser up to ~125 mm; Inkjet/Pen/Blade up to ~138 mm
• Z capacity (without Riser): Laser up to ~27 mm; Inkjet/Pen/Blade up to ~20 mm
• Rotary support (with RA2 Pro + Riser): Approx. 0–99 mm diameter range on the machine; broader ranges available via RA2 configurations
• Air Assist: Smart, software-controlled external unit
• Riser + Honeycomb: Honeycomb ~407 × 329 mm; boosts max workpiece height (laser) to ~125 mm
• Software & connectivity: xTool Creative Space (XCS); USB, Wi-Fi, IP; file types: SVG, DXF, JPG/JPEG, PNG, BMP, TIF
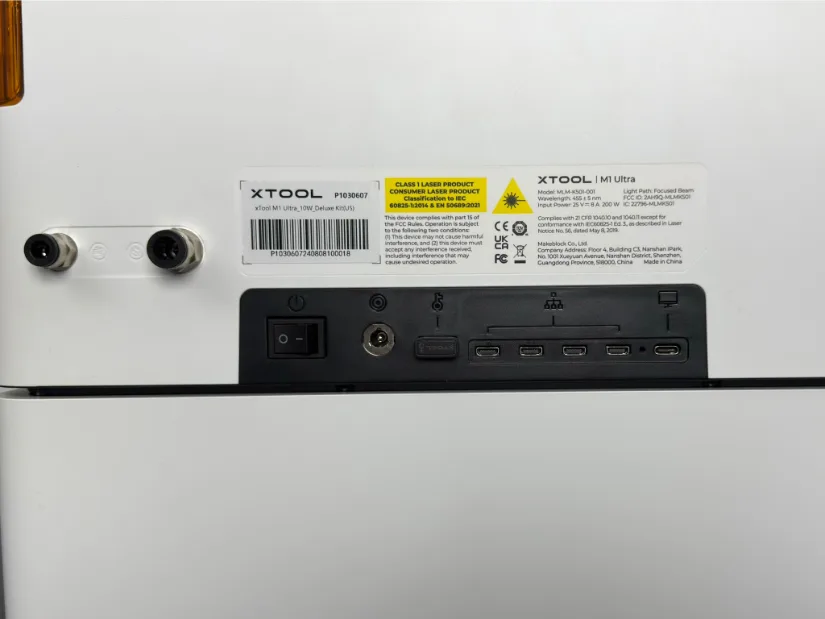
• Safety: Enclosed, Class 1 laser
• Machine size/weight: ~620 × 498 × 178 mm; ~17 kg
• Power: Max input ~200 W (100–240 V AC)
Setup and Design
Setup is straightforward: unbox the M1 Ultra, remove the internal packing, connect power and the exhaust (or AP2 purifier), and attach Smart Air Assist if included. If you’re using the Riser Base, place the M1 Ultra on it, open the front door, and slide the honeycomb into one of the riser slots. Next, install the module needed for your project (laser, blade, pen/foil, or ink). Before your first job, download and install xTool Creative Space (XCS) on your computer, connect the machine via USB, then set up Wi-Fi and apply any firmware updates XCS prompts.
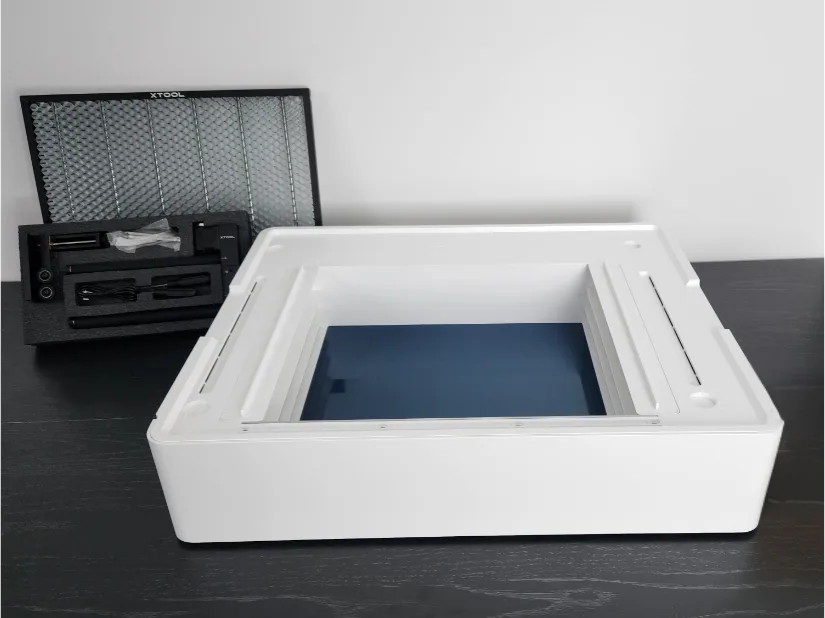
©3DWithUs – Photo: Will Zoobkoff
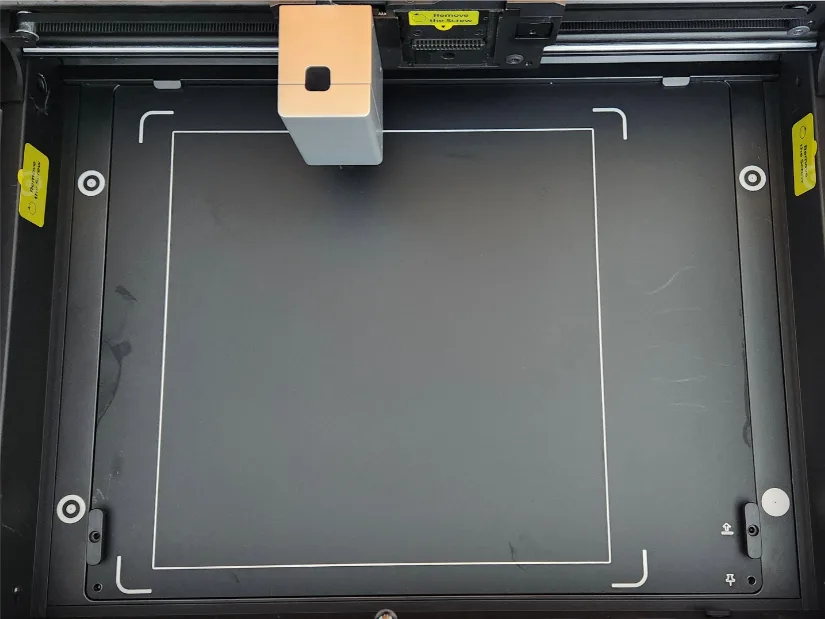
When you’re ready, use XCS’s workspace snapshot feature to capture a photo of your bed and material—via the iOS/Android app and send it to your PC running XCS—to align artwork precisely (especially handy on machines without a built-in camera). From there, frame your job; the machine will auto-check focus distance before cutting, engraving, or printing. For reference and troubleshooting, xTool’s wiki is excellent, with step-by-step setup guides, accessory how-tos, material settings, and clear diagnostic flows.
Design
Machine (Chassis & Ergonomics)
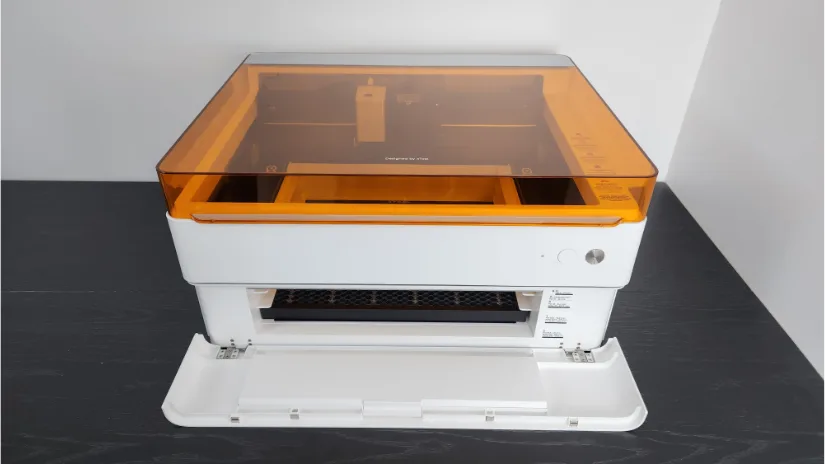
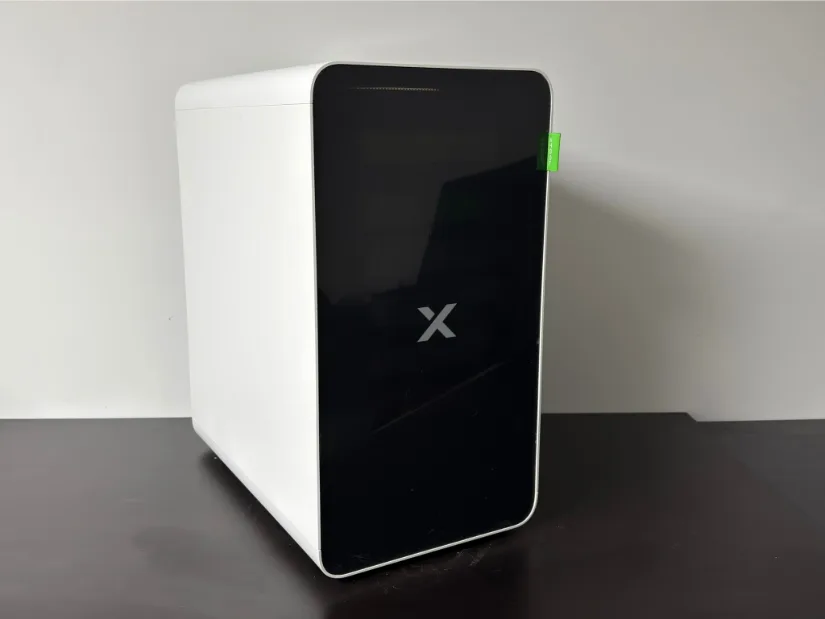
The M1 Ultra looks and feels like a purpose-built desktop appliance rather than a hobby frame. It’s a low-profile, fully enclosed metal chassis with a front access door that makes it easy to load sheets, mats, and the honeycomb when you’re using the Riser Base. Inside, a single multi-function carriage swaps between laser, blade, pen/foil, and ink modules without rehoming the whole machine, keeping the work area predictable. Cable and air routing are tucked away, with a dedicated port for Smart Air Assist and a rear path for the exhaust/AP2 purifier, helping with both fumes and noise. Ergonomics are bench-friendly: flat top, square footprint, and a lid/door combo that gives line-of-sight to the bed for framing (alignment is still primarily in XCS). Appliance-style I/O (power, USB, Wi-Fi) and easy filter access round it out. Paired with the modular riser and slide-in honeycomb, the design encourages quick context switches—paper to plywood to tumblers—without turning your workspace into a jumble of parts.
Modules at a Glance
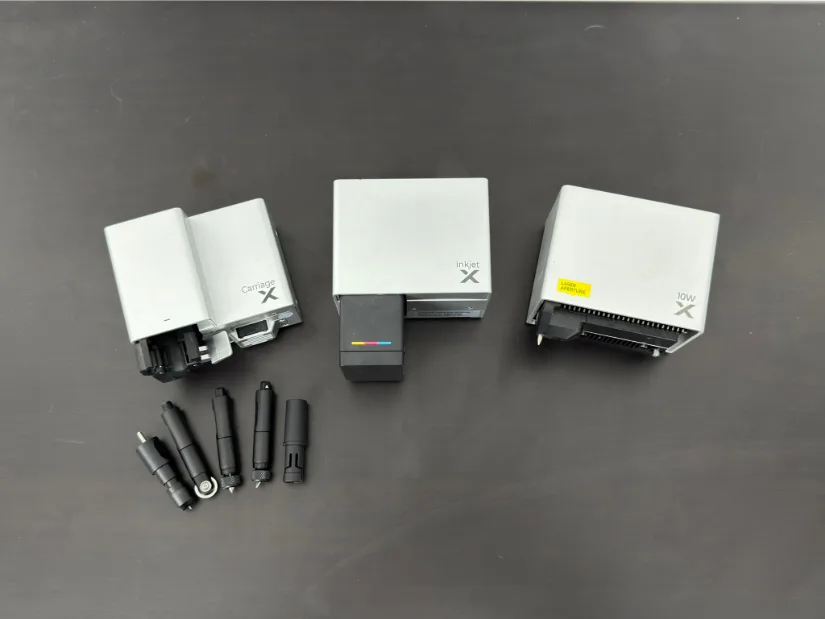
©3DWithUs – Photo: Will Zoobkoff
1) Laser Module (10W)
• Smaller spot size favors fine-detail engraving; still capable of light-to-medium cutting.
• Typical one-pass cuts: ~6 mm basswood / ~5 mm opaque acrylic (material-dependent); thicker stock benefits from multi-pass + strong air assist.
2) Blade-Cutting System
• Handles HTV, permanent adhesive vinyl, paper, cardstock, and stickers/kiss-cuts.
• Works on the sticky mat, so you’re not locked to fixed sheet sizes—great for scrap optimization.
3) Pen/Foil (Plotter)
• Plots text, line art, labels, stencils, planner pages, and sticker outlines with crisp registration.
• Multi-color designs are easy: pause between layers or group colors by layer in XCS.
4) Inkjet Module
• Prints on many smooth, flat, inkjet-compatible surfaces: stickers, greeting cards, transfer media, etc.
• Simple controls; we’d welcome additional print parameters beyond intensity.
AP2 Air Purifier (Optional Accessory)
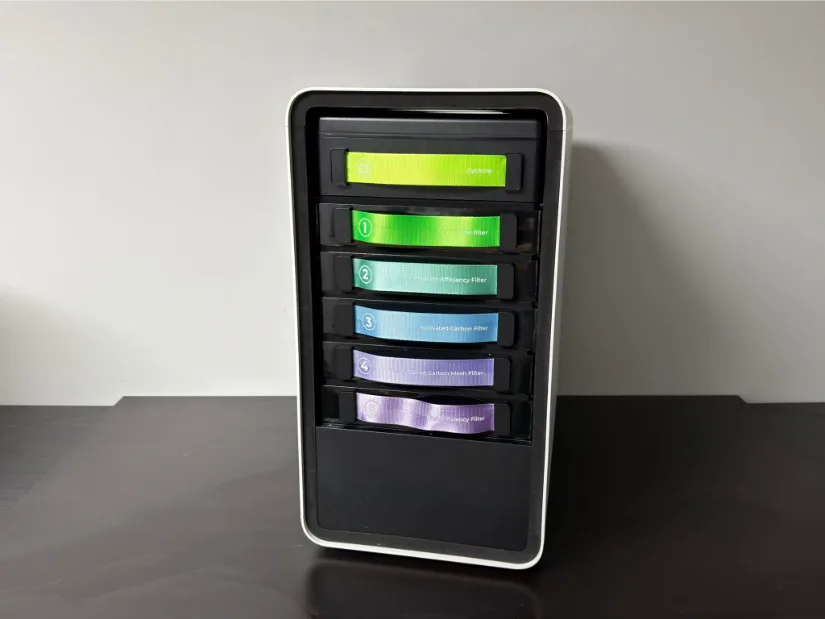
The AP2 Air Purifier pairs with the M1 Ultra to capture smoke and particulates from engraving/cutting. It connects via hose to the rear exhaust path and uses multi-stage filtration (pre-filter, HEPA-class, and activated carbon) to reduce odor and particulates. Airflow is ample for typical desktop jobs, and the compact, appliance-style form factor keeps noise and placement manageable in a home workspace. If venting to a window isn’t practical, AP2 is the most straightforward way to keep fumes under control.
©3DWithUs – Photo: Will Zoobkoff
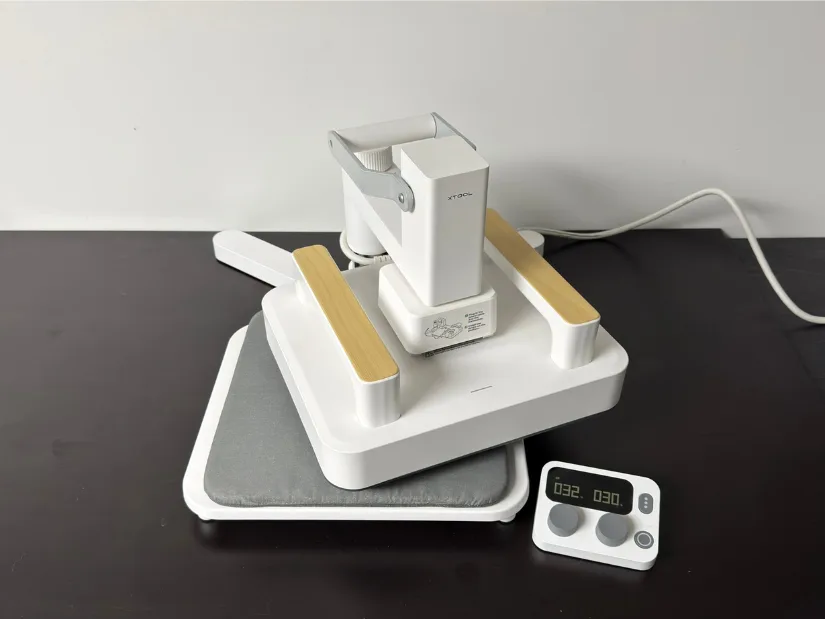
Smart Heatpress and Stand (Optional Accessory)
The xTool Smart Heat Press is a compact, even-heating press designed for HTV and inkjet transfer work. The standalone controller lets you dial in temperature and time precisely, and it heats quickly to common presets for cotton, blends, and specialty films.
©3DWithUs – Photo: Will Zoobkoff
Paired with the Smart Press Stand, you get stable, hands-free operation and adjustable pressure via the stand’s side dial—great for consistent adhesion on larger graphics. Together they make pressing fast, tidy, and repeatable, with fewer scorch marks and edge lifts.
Software XCS
xTool Creative Space (XCS) is a unified, beginner-friendly app that speaks “laser, blade, pen/foil, and ink” in one workspace. You get layer-based controls, per-module workflows, live/snapshot bed alignment, image trace, text/shape tools, offsets and kerf compensation, node editing, material test grids, and job history. It runs on Windows/Mac, with iOS/Android apps that can snap your material and send it to XCS for precise placement. Firmware updates, device setup, air-assist control, and rotary/riser profiles are all built in, so you’re not juggling plugins.
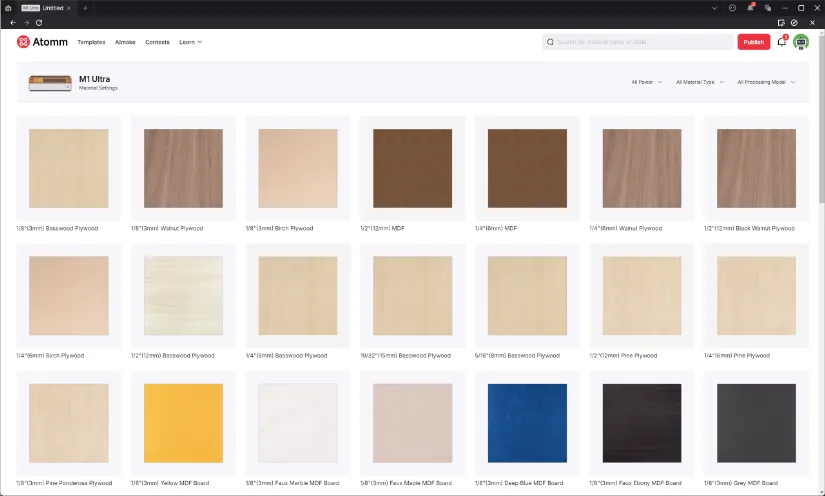
The real time-saver is XCS’s reference presets. xTool includes a vast material library with tuned settings for basswood and birch, opaque/translucent acrylics, leather, paper/cardstock, fabrics, anodized/painted metals, glass/ceramic marking workflows, and blade-cut media like vinyl and HTV. Each preset pairs proven power/speed/focus/pass counts with quick test swatches, and you can clone or edit them to match your own stock. For this review, we relied on these reference settings throughout testing to keep the process quick and simple, which sharply shortens the “dial-in” phase—especially when switching between laser and blade jobs.
Testing and results
The real time-saver is XCS’s reference presets. xTool includes a vast material library with tuned settings for basswood and birch, opaque/translucent acrylics, leather, paper/cardstock, fabrics, anodized/painted metals, glass/ceramic marking workflows, and blade-cut media like vinyl and HTV. Each preset pairs proven power/speed/focus/pass counts with quick test swatches, and you can clone or edit them to match your own stock. For this review, we used these reference settings throughout our testing to keep the process quick and simple. The result is a smoother setup that sharply shortens the “dial-in” phase—especially when switching between laser and blade jobs.
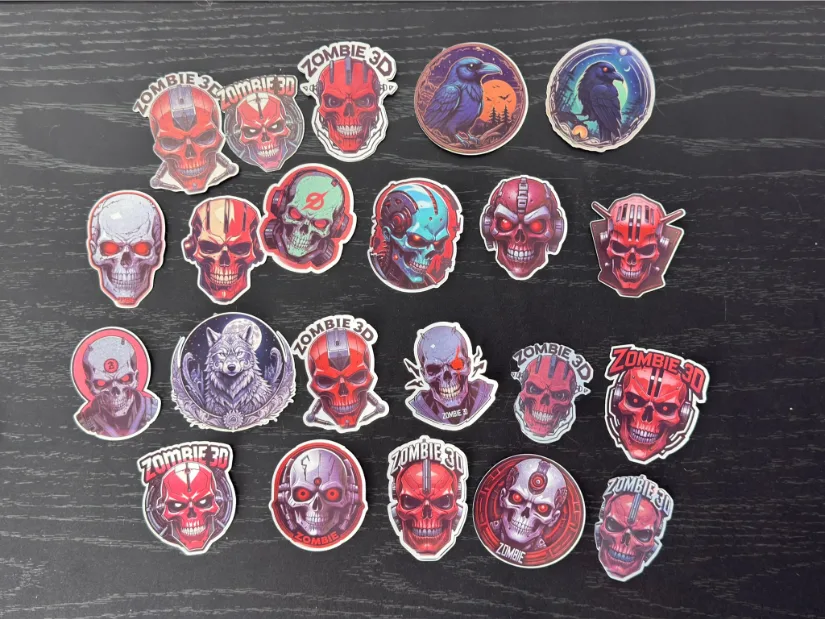
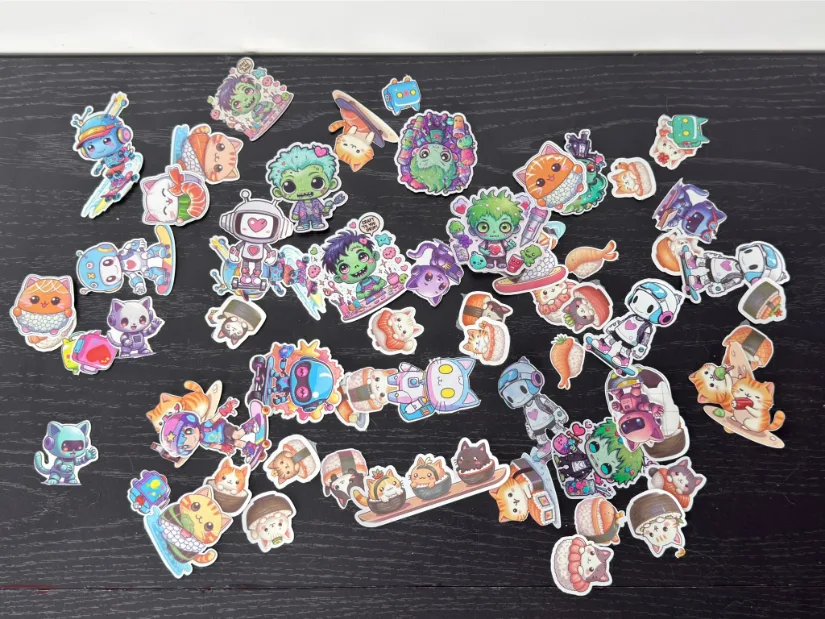
Inkjet module
With the Inkjet Module, there’s a wide range of project types—stickers, inkjet transfers, greeting cards—and you can print on nearly any smooth, flat surface that’s compatible with inkjet ink. For this review, we used various holographic papers to produce a set of stickers, then cut them after printing. We set print strength to 85% for rich color and used the reference cutting settings, increasing pressure to 100 to ensure clean, through-cuts for each sticker. If you plan to hand out full sheets (or keep stickers together until use), lower the pressure for a gentler kiss-cut.
©3DWithUs – Projects & Photo: Will Zoobkoff
©3DWithUs – Projects & Photo: Will Zoobkoff
©3DWithUs – Photo: Will Zoobkoff
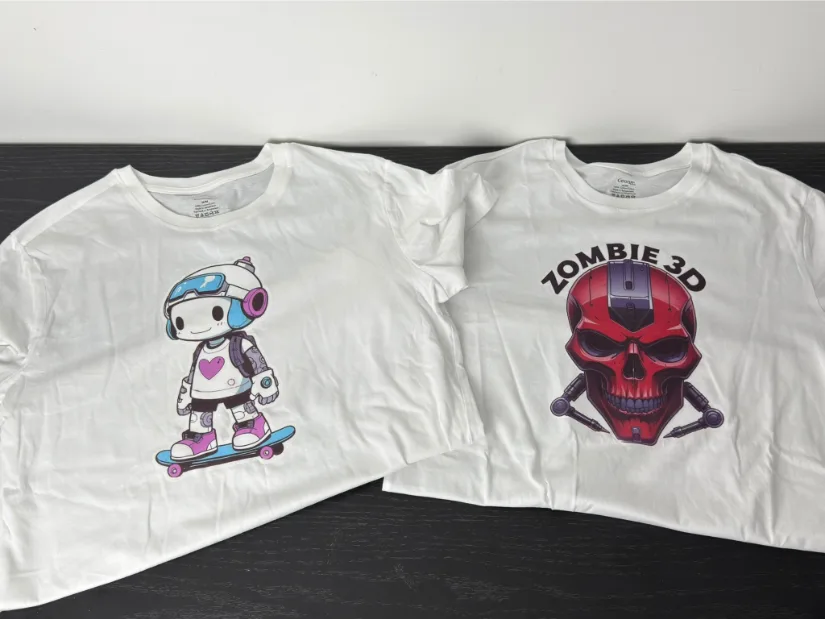
We also made several shirt transfers using inkjet transfer paper (readily available on Amazon). There are versions for light and dark fabrics; dark-fabric transfers also work on light colors and often appear slightly more vibrant. Be sure to make a clean contour cut—any unprinted film will be visible on the finished shirt after pressing. We applied transfers with the Smart Press and Smart Press Stand, using the standalone controller to set temperature and timer for proper adhesion. Pressure is adjustable via the dial on the stand’s support post. If you do a lot of iron-ons, this stand is a must-have for consistency and ease.
Overall, the Inkjet Module delivers excellent print quality. Colors are clear with no bleed, and the fine blade cut stickers cleanly. The iron-on transfers also pressed smoothly, without snags or tearing. That said, we’d welcome more software controls beyond simple intensity adjustments.
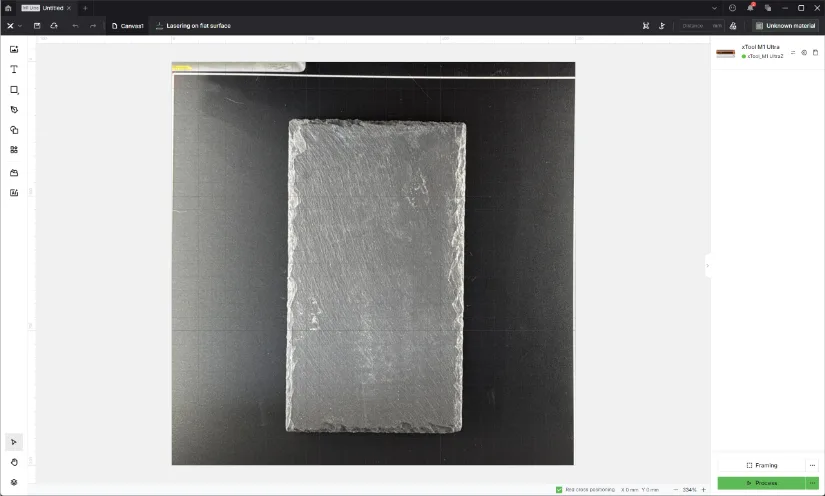
Laser module
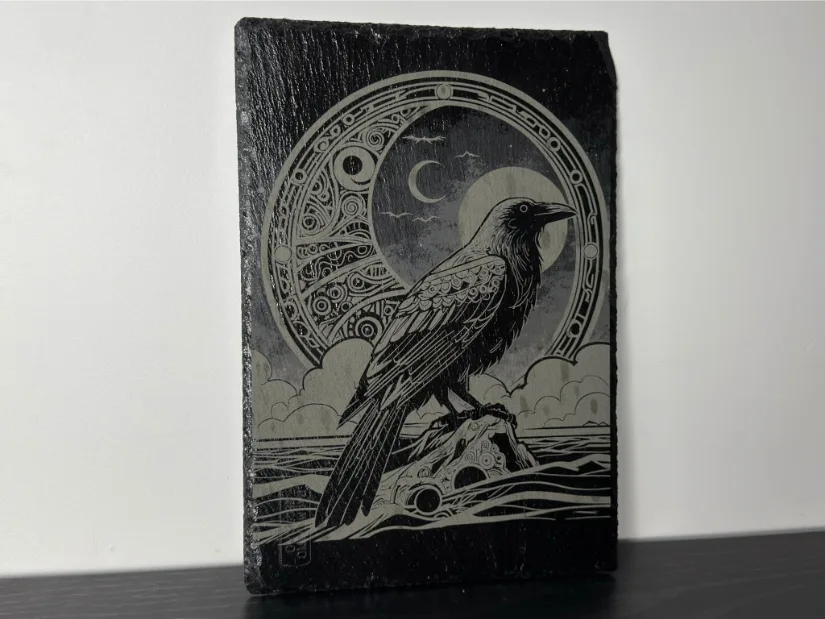
Using the included 10W laser module, we focused on just a couple of projects—xTool is well known for its laser prowess, and with so many options on the M1 Ultra, we narrowed our testing to a slate tile and a painted canvas, both featuring Native-themed raven designs we created for engraving. With the optional Riser Base, you can cut/engrave thicker or taller objects than with the M1 Ultra alone, and it’s required if you want to use the RA2 Pro rotary for tumblers or other cylindrical items. The 10W module’s smaller spot size favors fine-detail engraving; if you primarily need to cut thicker stock, the 20W module is a strong choice for throughput, though you may trade a bit of image definition on photo-style engraves. (For reference, the 10W typically manages one-pass cuts around ~6 mm basswood or ~5 mm opaque acrylic; thicker materials generally require multi-pass cuts and good air assist.)
©3DWithUs – Projects and Photo: Will Zoobkoff
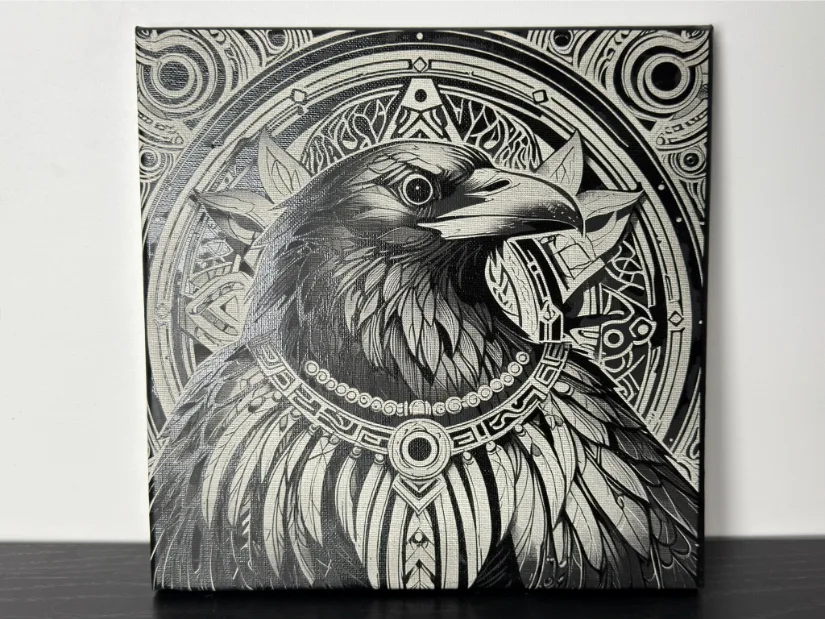
Both pieces turned out excellent using the reference settings in XCS. The slate took about 2 hours and the canvas about 4 hours to complete. On slate, varying power on vector passes can produce distinct tonal shades, and grayscale artwork also renders nicely; adding a clear coat afterward helps the design pop. For the canvas, cleanup is simple—wipe with a clean cloth to remove any residue from the engraving process. A clear coat isn’t necessary on canvas but can be applied for added protection.
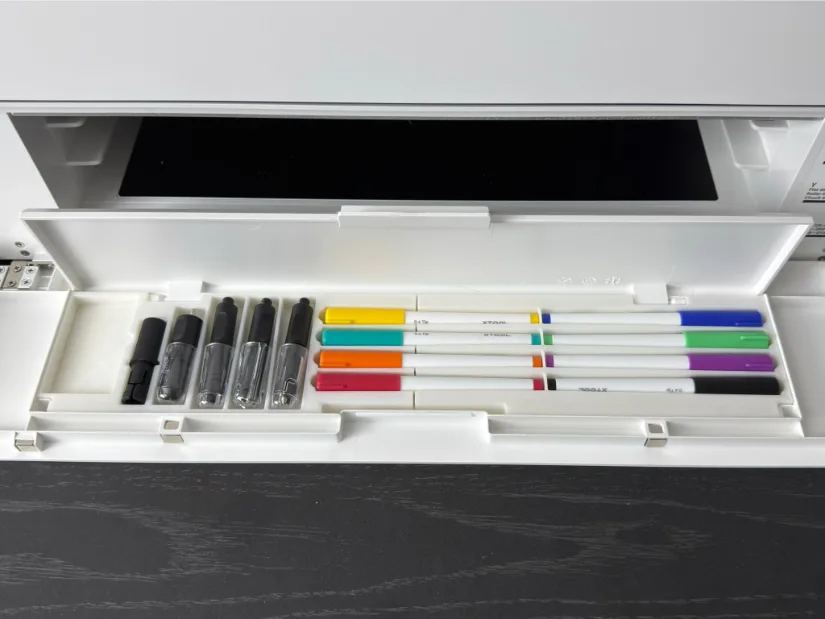
Pen Plotter
The M1 Ultra also works as a pen plotter, and it’s useful for far more than doodles. You can address envelopes and letter greeting/invitation cards with consistent, elegant text; draw line-art illustrations, coloring pages, planner/bullet-journal spreads, maps/diagrams, labels and sticker outlines; plus templates, stencils, and score-and-draw craft projects. Several colored pens are included, so multi-color designs are easy—set pauses between layers to swap pens, or group colors by layer in XCS. For best results, use a light-grip mat for paper/cardstock, keep sheets flat at the corners, and stick with the reference pen settings (they dial in lift height and pressure nicely).
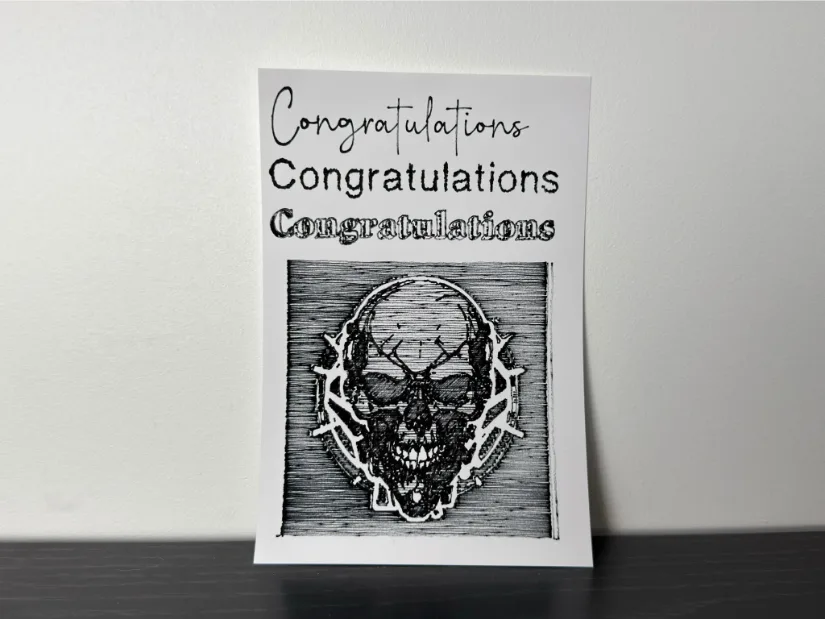
In testing, we plotted sample text and a line-art image with the black pen on standard paper. The output was clean and even, with no skips, wiggles, or smearing. You can add hatching or cross-hatching fills for shading, then follow up with a blade kiss-cut to turn those drawings into stickers—registration stays tight since it’s the same machine doing both steps. Overall, pen plotting pairs well with the M1 Ultra’s multi-tool workflow when you want crisp graphics without firing the laser.
Blade cutting
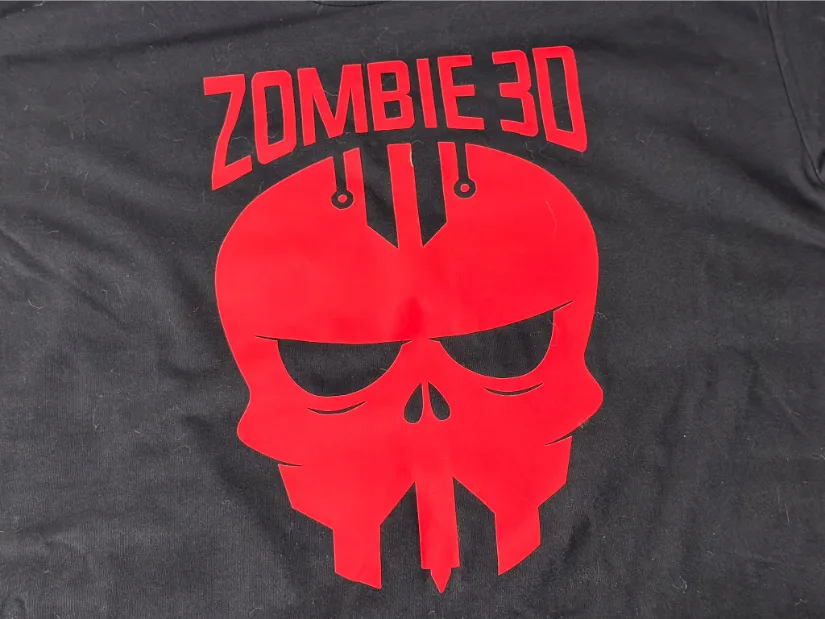
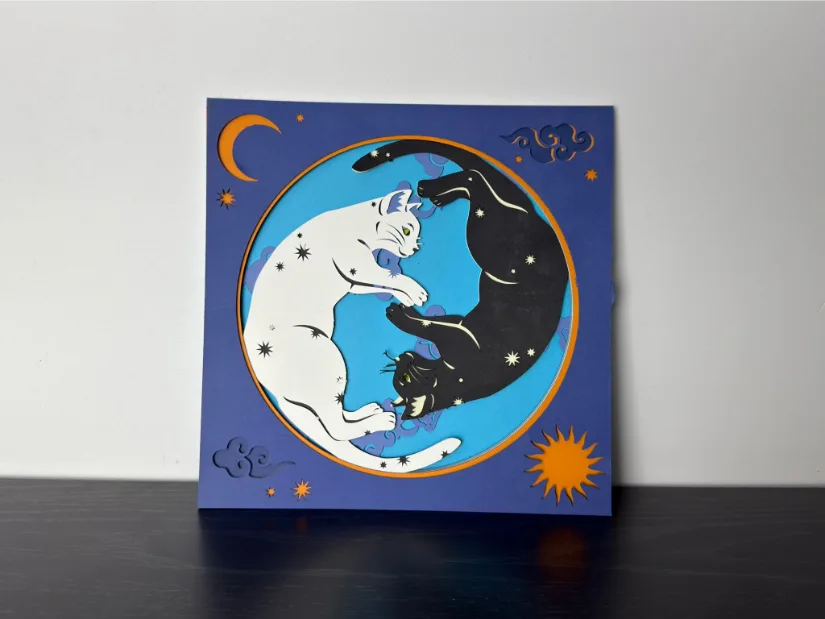
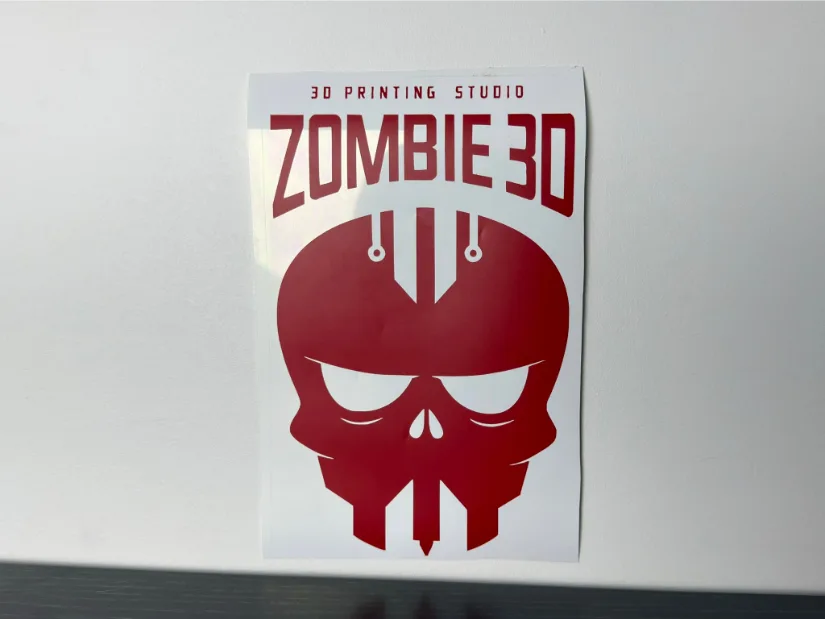
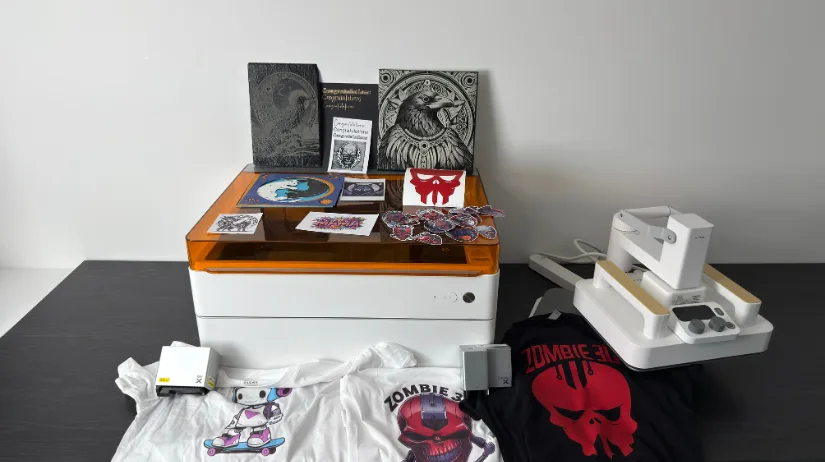
We used the cutting blade for stickers and inkjet transfers, and also tested vinyl cutting. First, we cut an iron-on transfer of the StudioZombie3D logo in HTV and applied it with the Smart Heat Press and stand. Then we made a smaller logo in permanent adhesive vinyl for use on a variety of surfaces. Using the reference settings for both HTV and permanent vinyl, the cuts were clean and consistent—even the small letters weeded without trouble. On some machines, corners don’t quite meet and create tiny “bridges” that tear during weeding; we saw none of that here. We also ran a multi-layer paper project: a nine-layer cat cutout. As with the vinyl, the reference settings worked perfectly—the cuts were clean and easy to weed.

©3DWithUs – Projects and Photo: Will Zoobkoff
Using the XCS app to photograph the workspace helped us save material by positioning designs precisely on the vinyl. And because the sticky mat isn’t limited to fixed sheet sizes, you can place odd-sized offcuts and make the most of scrap pieces—reducing waste and keeping costs down.
Foil Transfer
Another option with the M1 Ultra is foil transfer. This uses a rounded, stylus-type tip in the cutting module to press foil onto your design, applying it to a variety of materials. It’s great for invitations, greeting cards, envelopes, and leather; with the extra-grip mat, leather and other fabrics stay put. For testing purposes, we foiled simple text on construction cardstock. You’ll need to secure the foil sheet with tape—preferably a low-tack tape that won’t tear or mar the paper you’re transferring to.
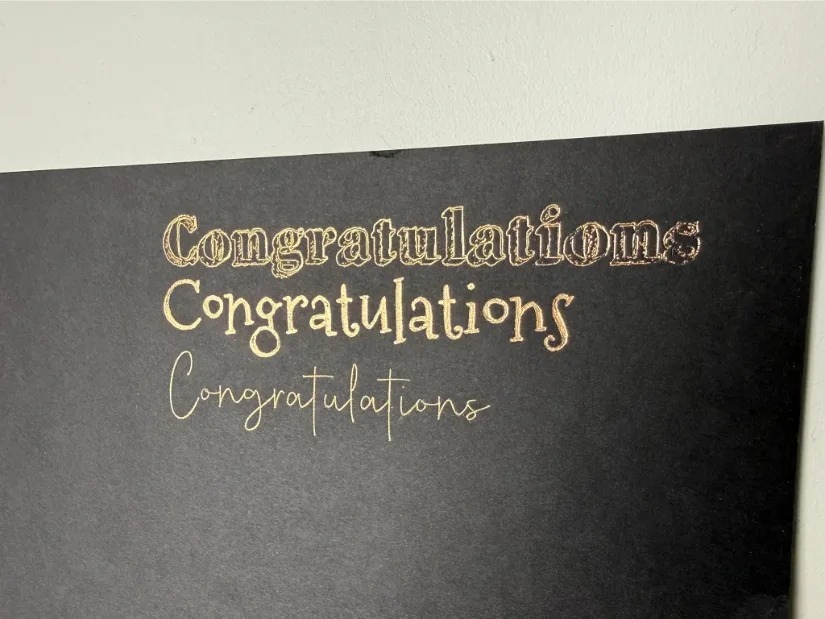
Our results were clean and consistent, even with a fill pattern. As long as the foil is firmly secured, the reference settings produce a crisp transfer on a range of materials.
Compare to Other Lasers and Craft Systems
Compare to Other xTool Laser Cutting and Engraving Machines:
xTool has a diverse range of laser systems to cover all needs. Here is a very helpful comparison page where you can compare products and laser types. On 3DWithUs, we thoroughly tested a few of their machines.

©3DWithUs – Projects and Photo: Will Zoobkoff
For a wider comparison with other laser cutters and engravers, please refer to the detailed Best Laser Cutters and Engravers Guide.
As a multi-disciplinary craft machine, the M1 Ultra stands out with few direct competitors. Another versatile system featured on our website is the Snapmaker Artisan, though it differs significantly in both focus and functionality.
The xTool M1 Ultra can work well for makers, small studios, and craft enthusiasts who value versatility and space savings over raw laser power. While it may not match the output of larger CO₂ or diode systems, its ability to combine laser, inkjet, blade, and pen tools in one enclosed setup makes it an attractive all-in-one option. It’s ideal for users who want to move easily between engraving, cutting, and creative crafting without switching machines or software.
©3DWithUs – Projects and Photo: Will Zoobkoff
Have questions? Feel free to ask in the comment section below.
For a wider discussion or to share your own xTool M1 projects, join us in the forum:
Conclusion and Pros & Cons
Compare the Prices & Bundles:
Official Store | Amazon | AliExpress
xTool M1 Ultra Review
Review Summary
The M1 Ultra delivers on its ‘multi-tool’ promise more convincingly than most hybrids. In daily use, the swap-and-go workflow, solid enclosure, and XCS’s reference presets meant we could move from inkjet stickers to blade cuts to slate/canvas engraves with minimal fuss—and consistent results. The 10W laser’s smaller spot excels at detail (our slate and canvas pieces were crisp, if not fast at 2 hours and 4 hours respectively), while the blade system handled HTV and permanent vinyl cleanly, even on tiny lettering. The pen plotter is a sleeper feature for cards, labels, and planner pages, and the ink module produced vibrant stickers and reliable transfers, though XCS could use more print controls beyond intensity. Add the Riser Base, RA2 Pro, and (if venting is tricky) the AP2 purifier, and the M1 Ultra becomes a compact, bench-friendly production stack.
Who’s it for? Makers and small studios that value versatility and space savings over raw laser wattage. If you primarily cut thick stock, the 20W module—or a dedicated CO₂—will make more sense. But for mixed workflows where speed, safety, and simplicity matter, xTool’s ecosystem and preset-driven XCS shorten the learning curve and keep projects moving. One box won’t replace every specialist tool—but here, it replaces just enough to earn permanent bench space.
Pros
• Enclosed system
• large cutting area
• XCS software-controlled
• XCS App can take a background image for alignment
Cons
• Inkjet setting limited