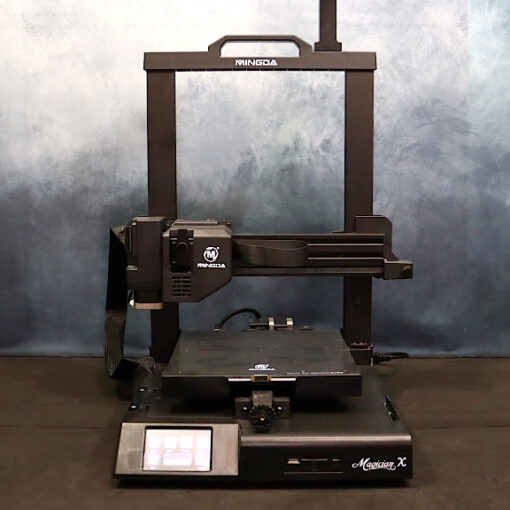
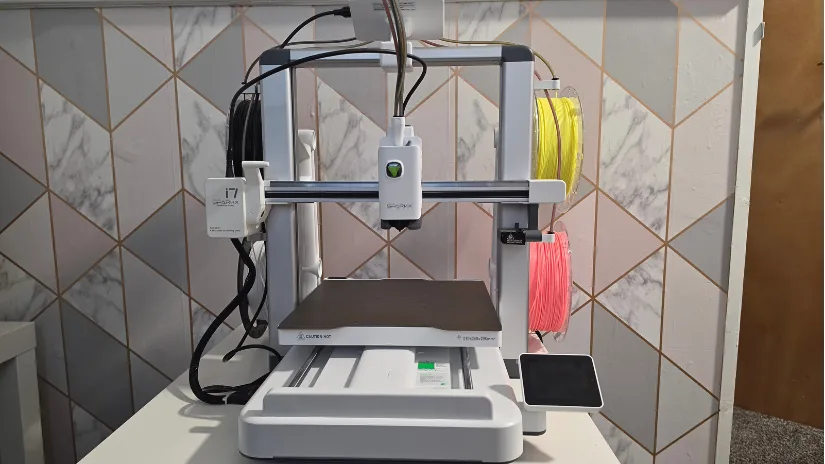
Creality has introduced the SPARKX i7 Nano, a compact model in the i7 lineup designed to bring multi-color printing to smaller workspaces. Despite its reduced footprint, it can produce prints in up to four colors and has a clean, minimalist form factor that sits comfortably on a desk. The i7 Nano aims to make multi-color 3D printing more practical, budget-friendly, and accessible to a wider range of users.
In this hands-on review, I will look at the SparkX i7 Nano, its CFS Nano multi-color system, setup process, key features, software, and printing performance. As always, we will finish with the main pros and cons.
Table of Contents
Where to Buy SPARKX i7 Nano
Price: $299/€299
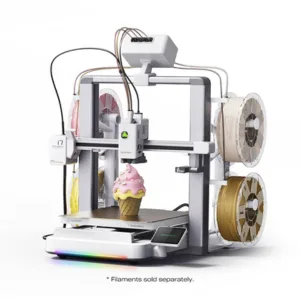
Compare the Prices & Bundles:
Official Website | Amazon
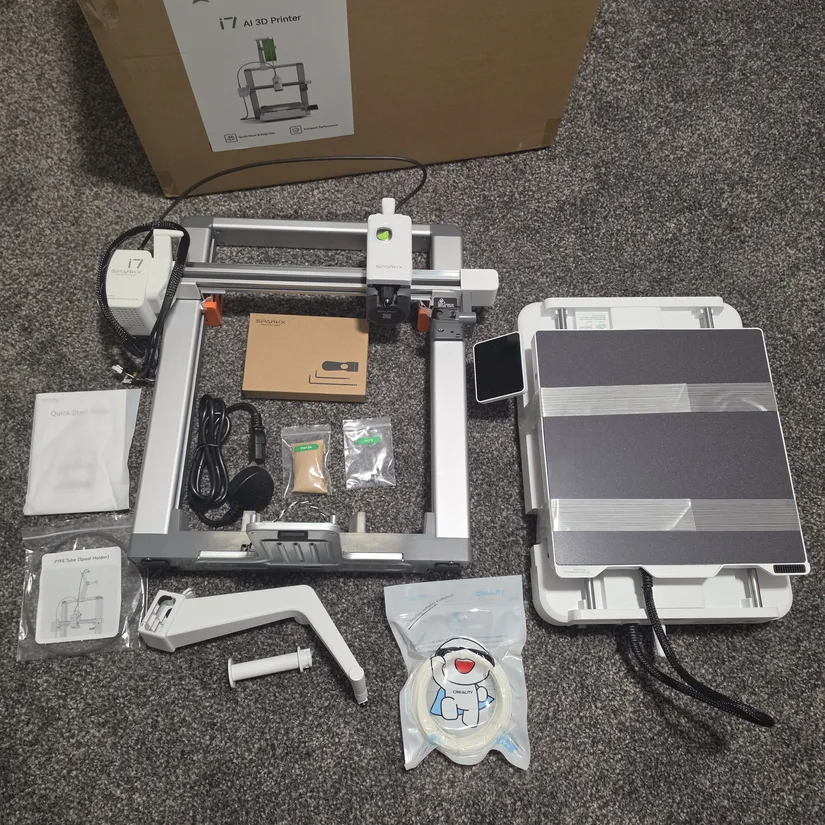
What’s in the Box
The SparkX i7 Nano package includes the printer frame, base housing, print plate, spool holder, power cable, accessory box, PTFE tube, and a filament sample.
©3DWithUs – Photo: Phil Macey
The CFS Nano kit is supplied separately and includes the CFS Nano unit, Nano bracket, two side buckles, two main brackets, two bridge connectors, four spool holders, four pneumatic fittings, a five-slot cable clip, 485 cable, several PTFE tubes, connection screws, and a hex key.
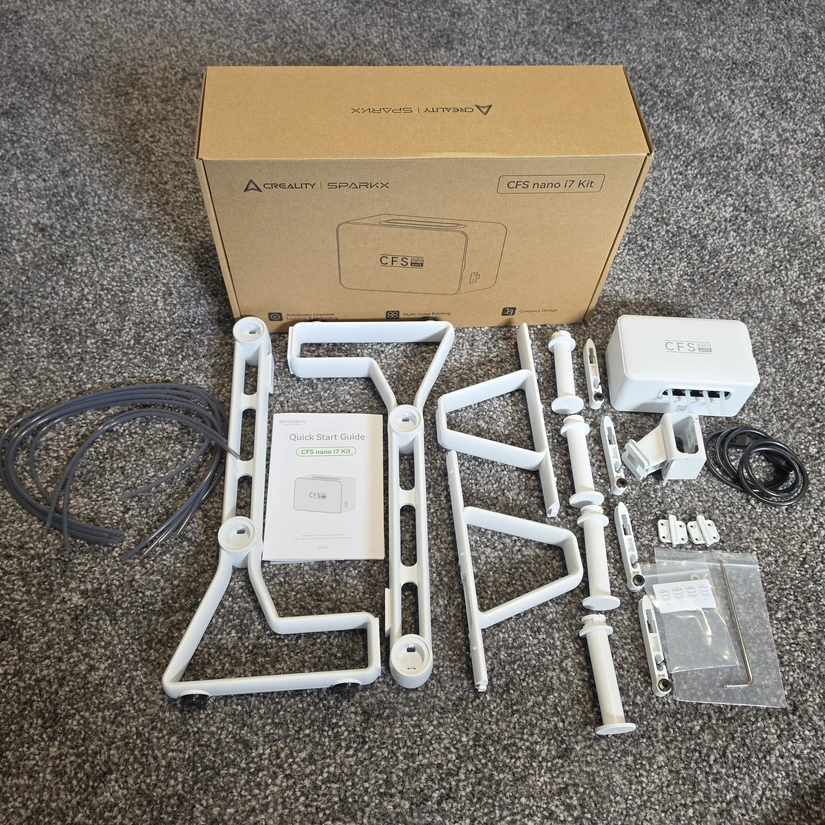
©3DWithUs – Photo: Phil Macey
Please note that the product may be slightly revised over time, with additional add-ons or features introduced. Visit the official product page for the latest product contents and specifications.
Creality SparkX i7 Nano Specifications
- Printing technology: FDM (Fused Deposition Modeling)
- Print volume: 260 × 260 × 255 mm
- Printer dimensions: 470 × 423 × 456 mm
- Extruder type: Direct drive
- Multi-color system: CFS Nano
- Nozzle diameter: Standard 0.4 mm
- Printing speed: Up to 500 mm/s, standard 300 mm/s
- Filament diameter: 1.75 mm
- Maximum extruder temperature: 300°C
- Heated build plate temperature: Up to 100°C
- Maximum acceleration: 10,000 mm/s²
- Layer thickness: 0.05–0.3 mm, recommended 0.2 mm
- Display: 2.85-inch colour touchscreen
- Camera: 720p AI camera with lighting
- Print status light: Full RGB
- Build plate: Dual-sided PEI
- Connectivity/storage: 2.4 GHz Wi-Fi and 8 GB eMMC
Unboxing and Setup
Assembly starts by taking the printer frame and base housing out of the packaging. Insert the base housing through the printer frame and press it down until it clicks into place.
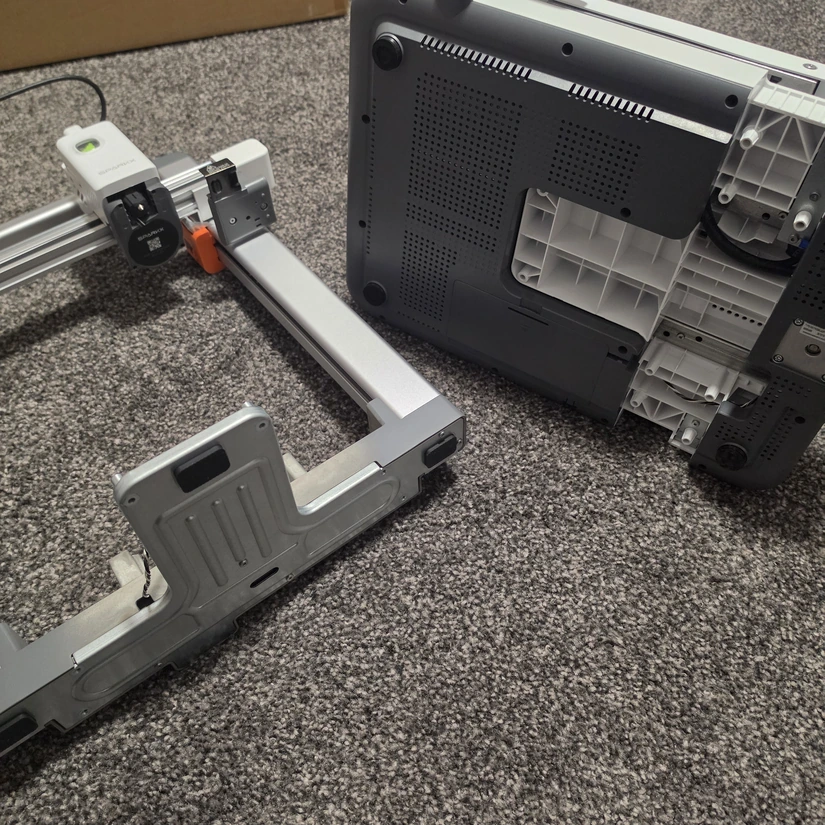
©3DWithUs – Photo: Phil Macey
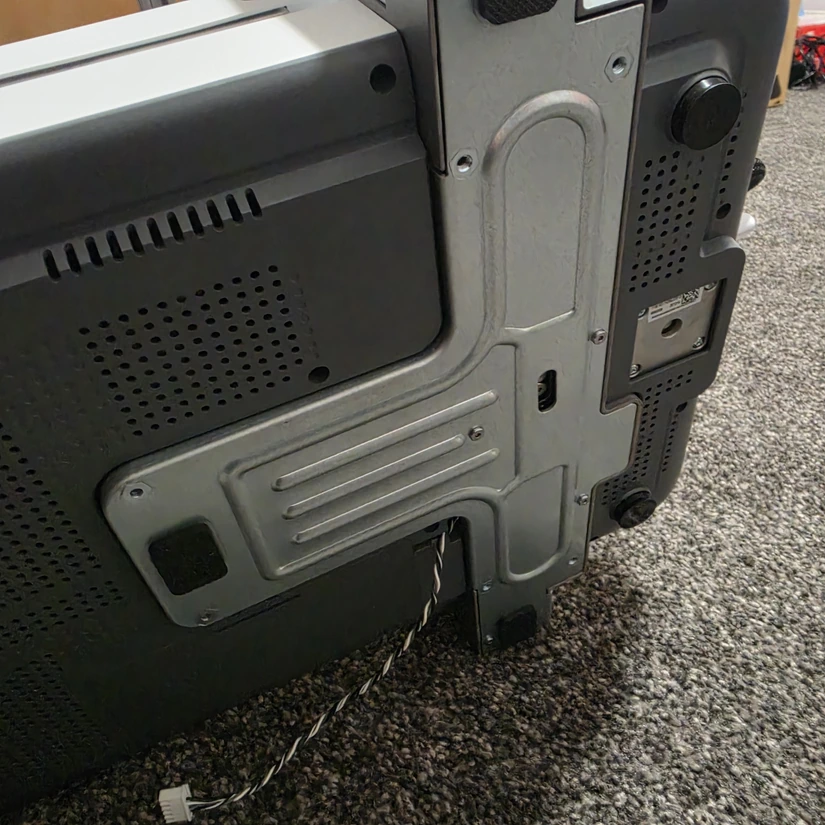
©3DWithUs – Photo: Phil Macey
Once the assembly is seated correctly, use the H2.5 hex key to tighten the ten M4 × 34 screws on the top of the base. Move the heated bed backward and forwards as needed to gain access to the fixing points.
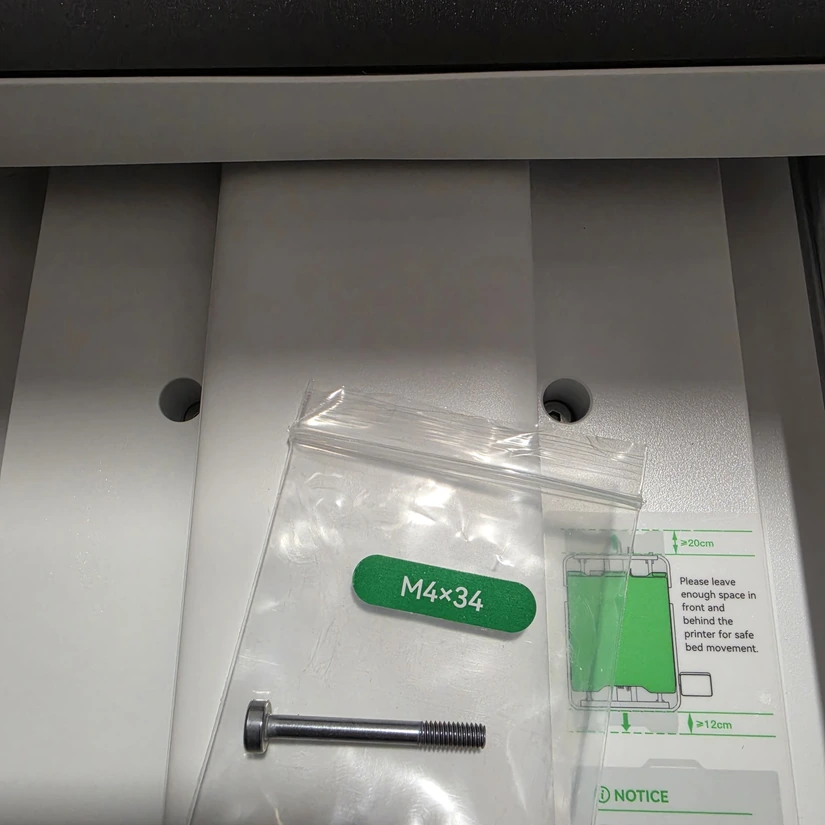
©3DWithUs – Photo: Phil Macey
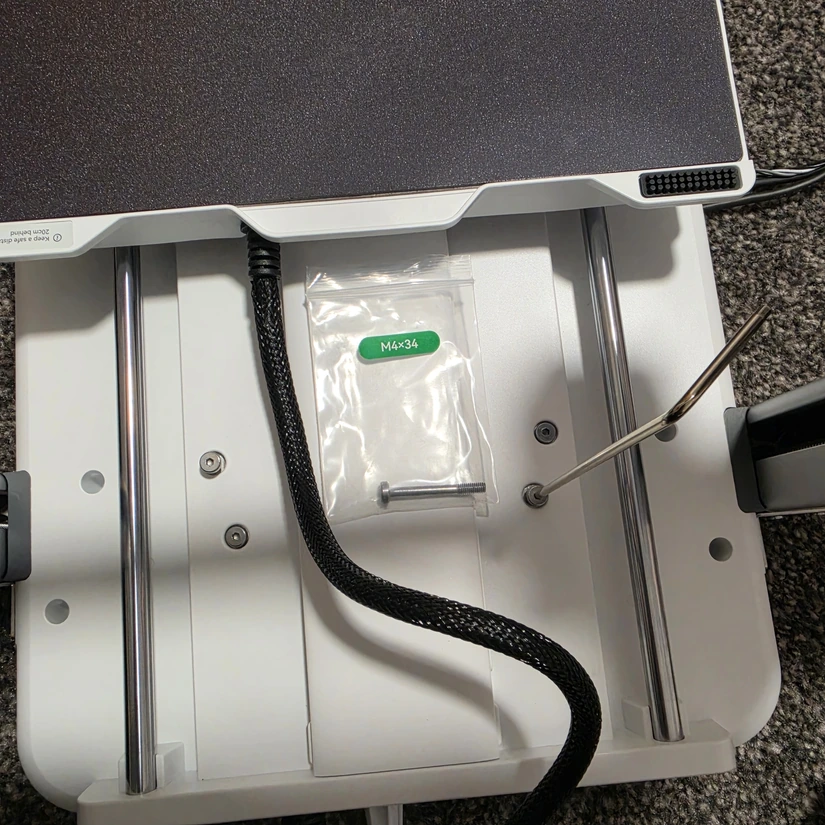
©3DWithUs – Photo: Phil Macey
Use the H2.0 hex key to tighten the two M3 × 8 screws on each side of the unit.
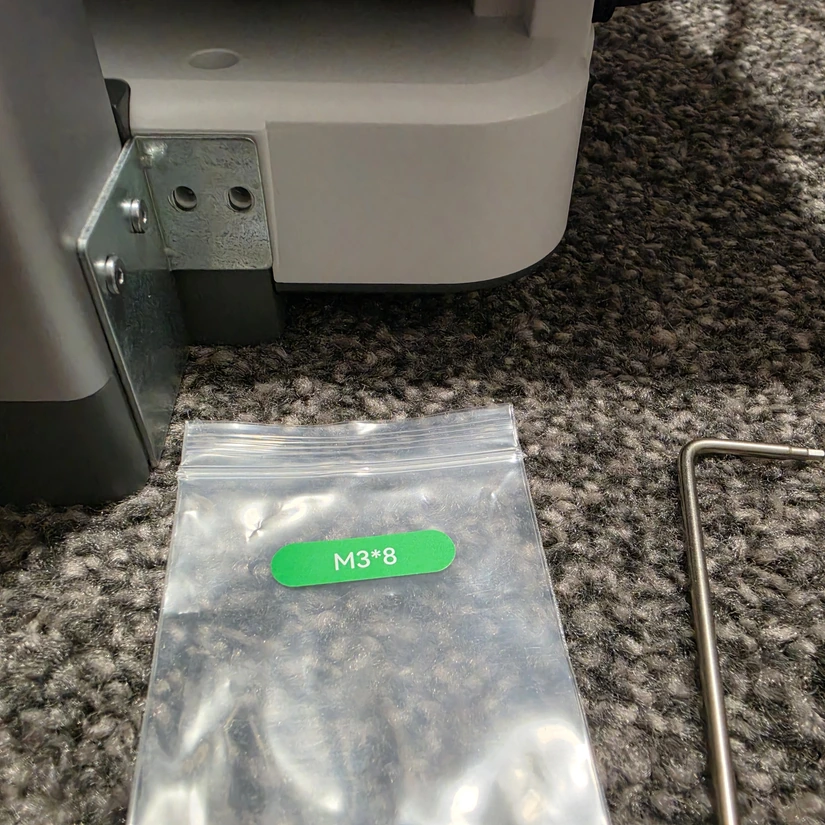
©3DWithUs – Photo: Phil Macey
Next, open the bottom mainboard cover and connect the signal cables to their corresponding ports, then reinstall the cover.
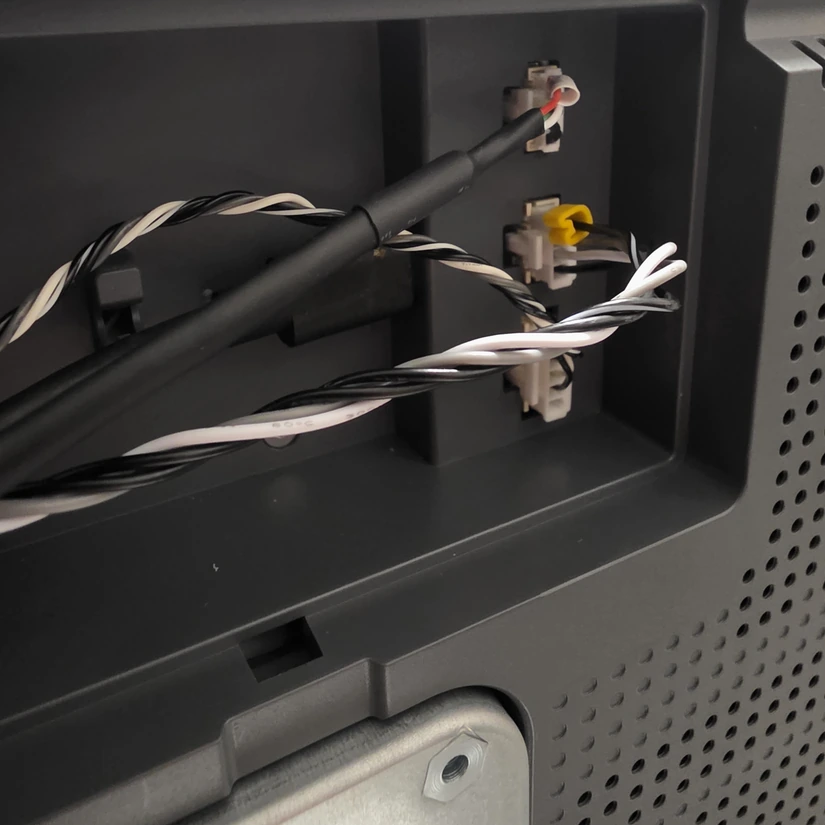
©3DWithUs – Photo: Phil Macey
Finally, unscrew and remove the X-axis lock brackets located at the back of the machine to release the X-axis. Install the print plate on the heated bed, making sure it is correctly oriented.
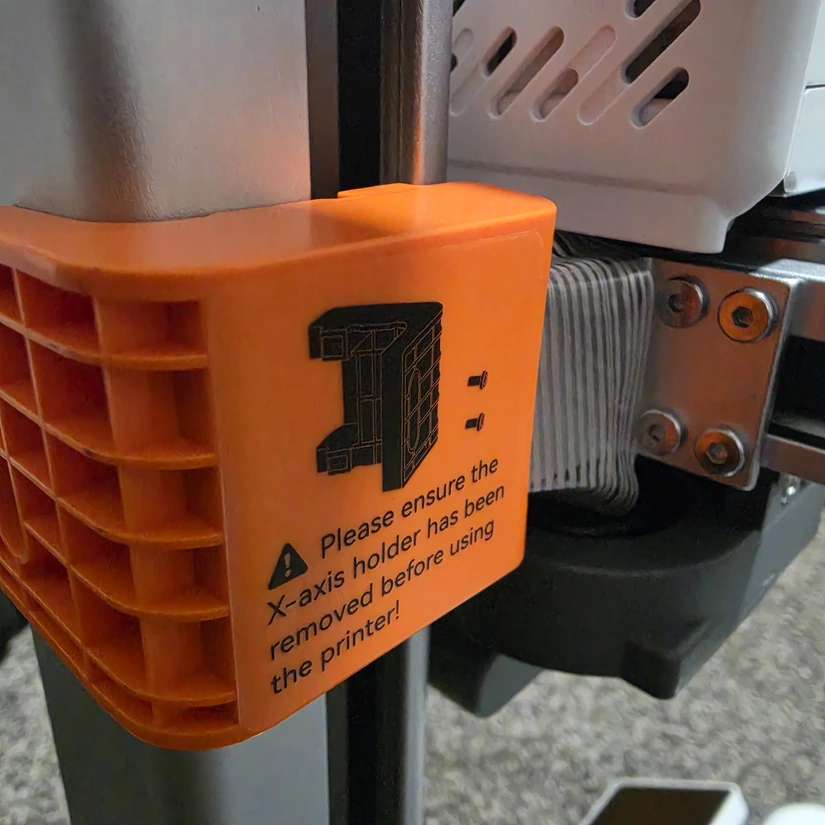
©3DWithUs – Photo: Phil Macey
For single-color printing, the standard spool holder can be installed at this point. If you are using the CFS Nano kit, continue with the installation steps below.
CFS Nano Installation
Install the two side buckles with M3 × 6 screws. Using the H2.0 hex key, attach the buckles to the left and right rear sides of the gantry, making sure to use the lower screw slots.
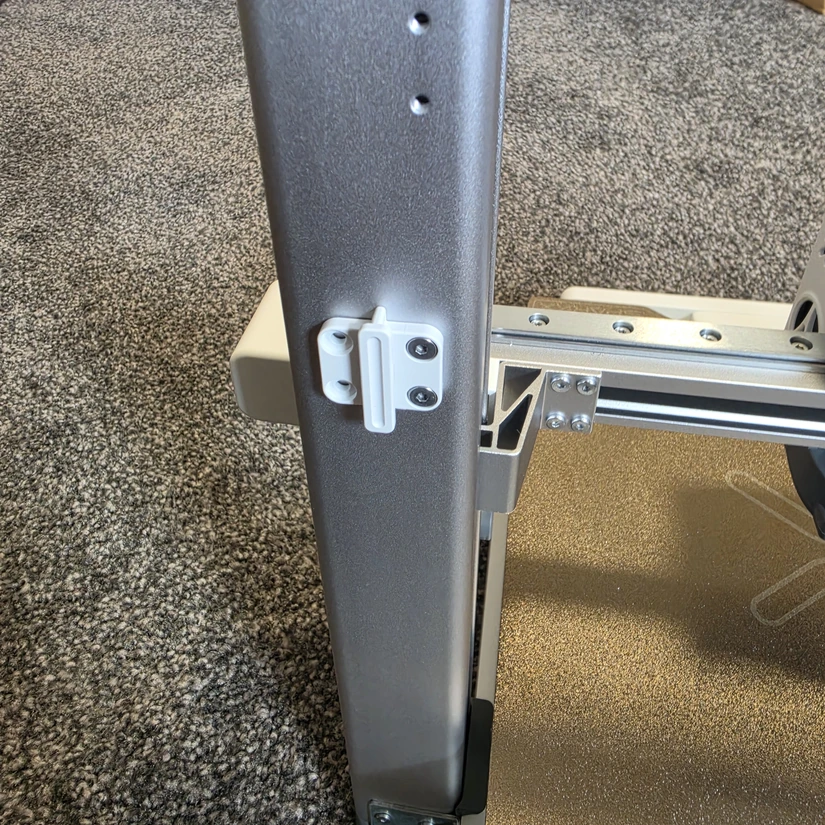
©3DWithUs – Photo: Phil Macey
Take the four pneumatic fittings and two bridge connectors and assemble the left and right sides as shown.
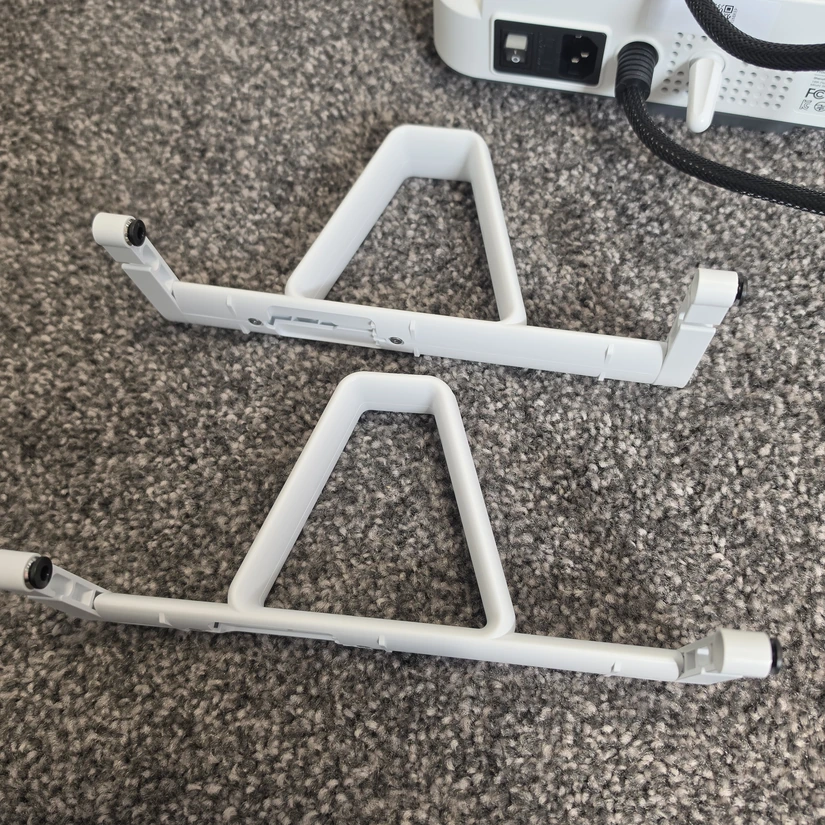
©3DWithUs – Photo: Phil Macey
Slide the left bridge connector into the main bracket from top to bottom, then screw in the spool holder counter-clockwise. Repeat the same process for the right bridge connector on the opposite side.
©3DWithUs – Photo: Phil Macey
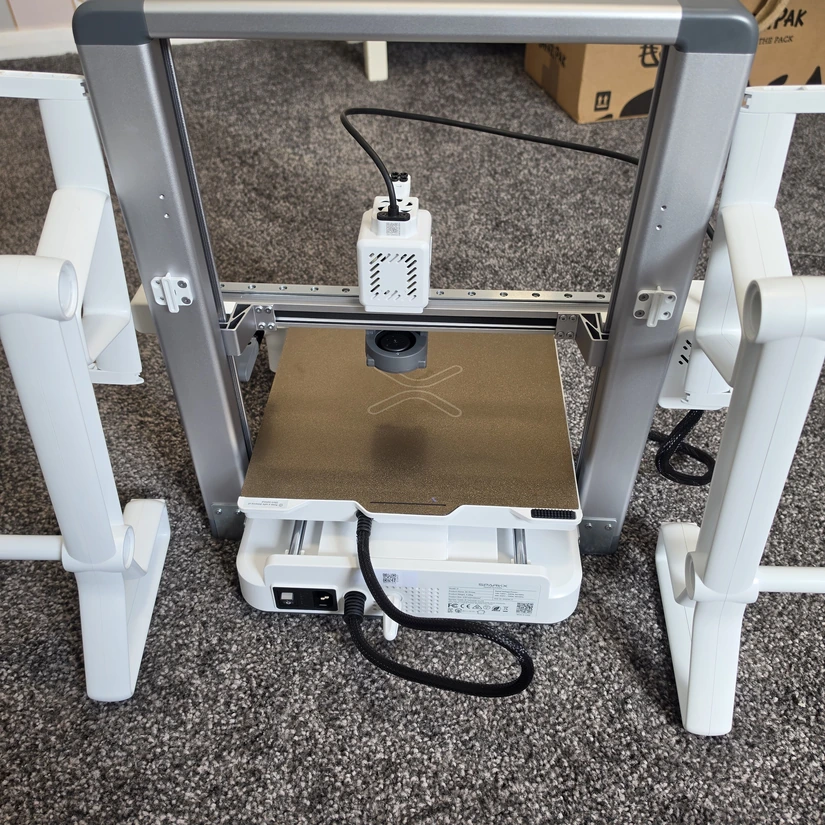
Slide each assembled spool rack down into the side buckles and shoulder screws.
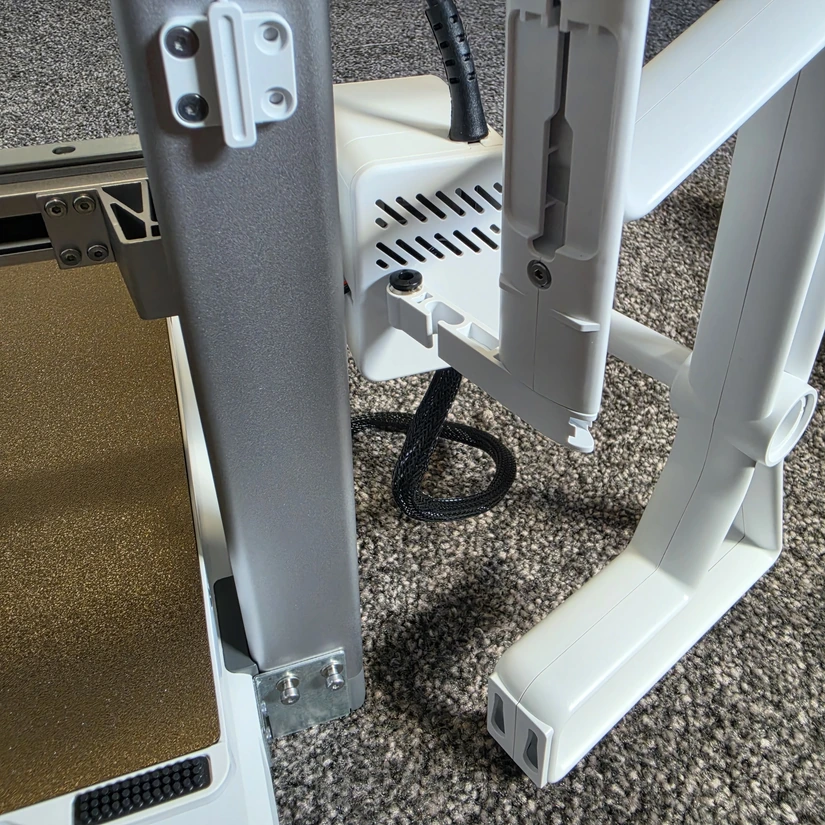
©3DWithUs – Photo: Phil Macey
Both spool holders should sit on either side of the printer as shown below.
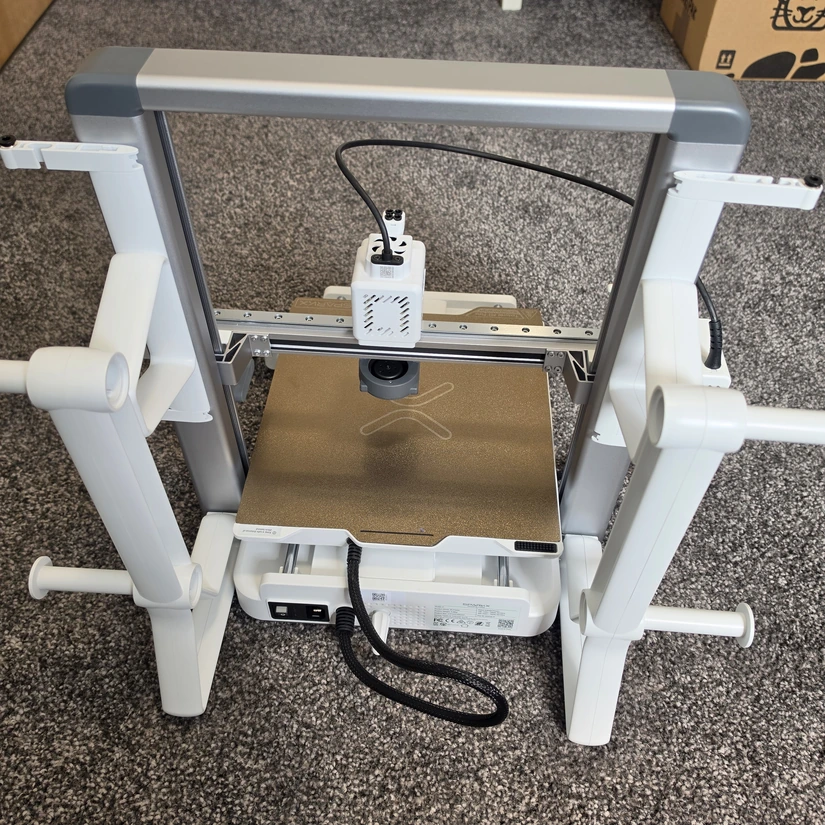
©3DWithUs – Photo: Phil Macey
Install the CFS Nano bracket on top of the gantry. Pay attention to its orientation: the CFS logo should face forward towards the front of the printer.
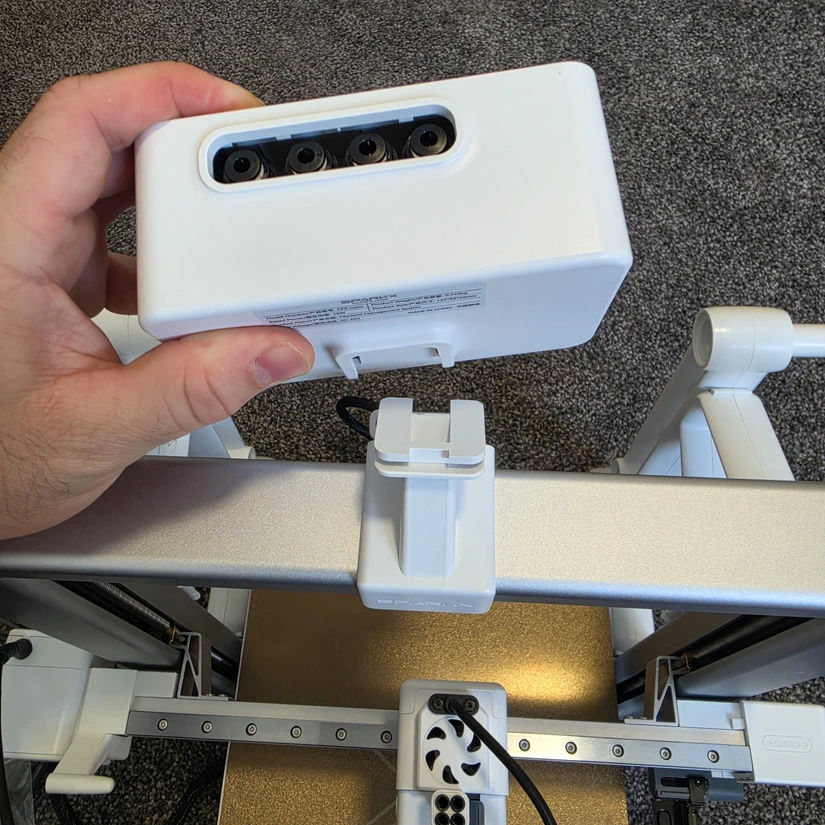
©3DWithUs – Photo: Phil Macey
Fit the CFS Nano onto the bracket.
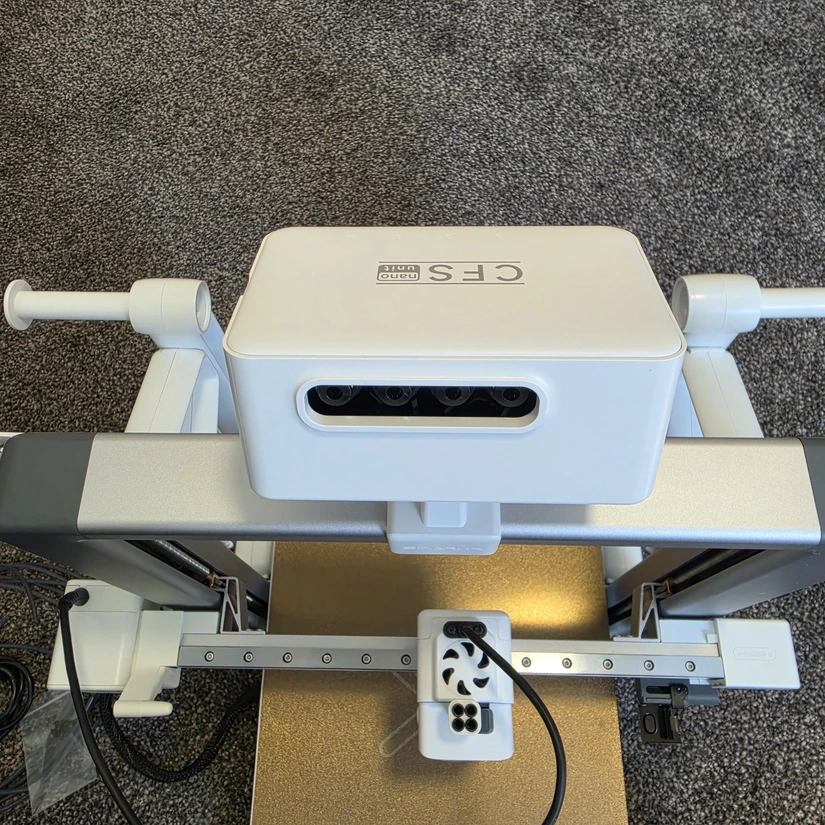
©3DWithUs – Photo: Phil Macey
Take the 485 cable and connect one end to the port on the left side of the CFS Nano. Clip the cable into the slots on the spool frame, then connect the other end to the printer port located next to the USB port.
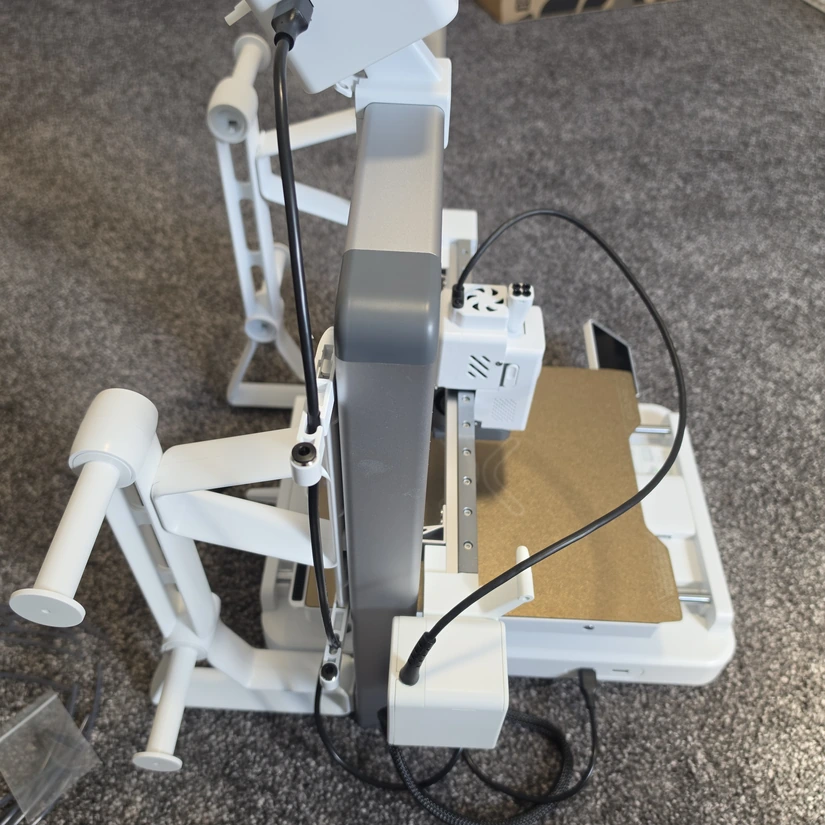
©3DWithUs – Photo: Phil Macey
Connect the PTFE tubes to their corresponding fittings. The four long 520 mm tubes run from the CFS Nano to the SparkX i7 Nano toolhead and are held together with the five-slot cable clip.
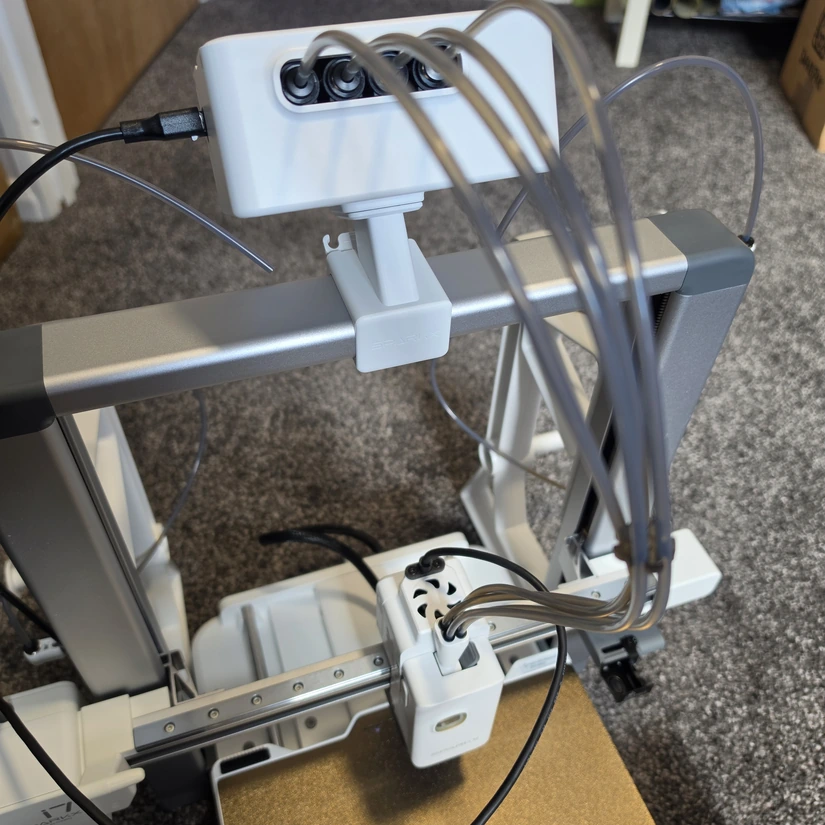
©3DWithUs – Photo: Phil Macey
Insert the four shorter 35 mm PTFE tubes into the filament inlets of the CFS Nano. The remaining longer tubes connect to the pneumatic fittings beneath the spool holders, while the shorter tubes connect to the fittings above them.
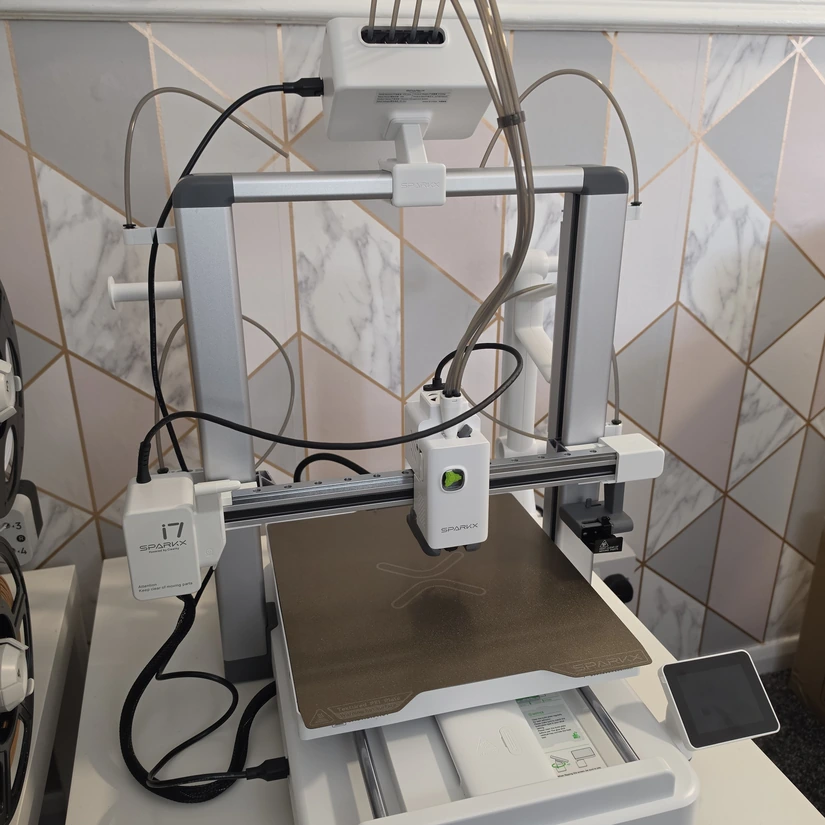
©3DWithUs – Photo: Phil Macey
Firmware Update
Power on the printer and follow the initial setup process on the touchscreen. If the printer does not recognise the CFS Nano and still shows only the single-spool setup, update the printer firmware. The firmware can be updated over the air or installed from a USB drive.
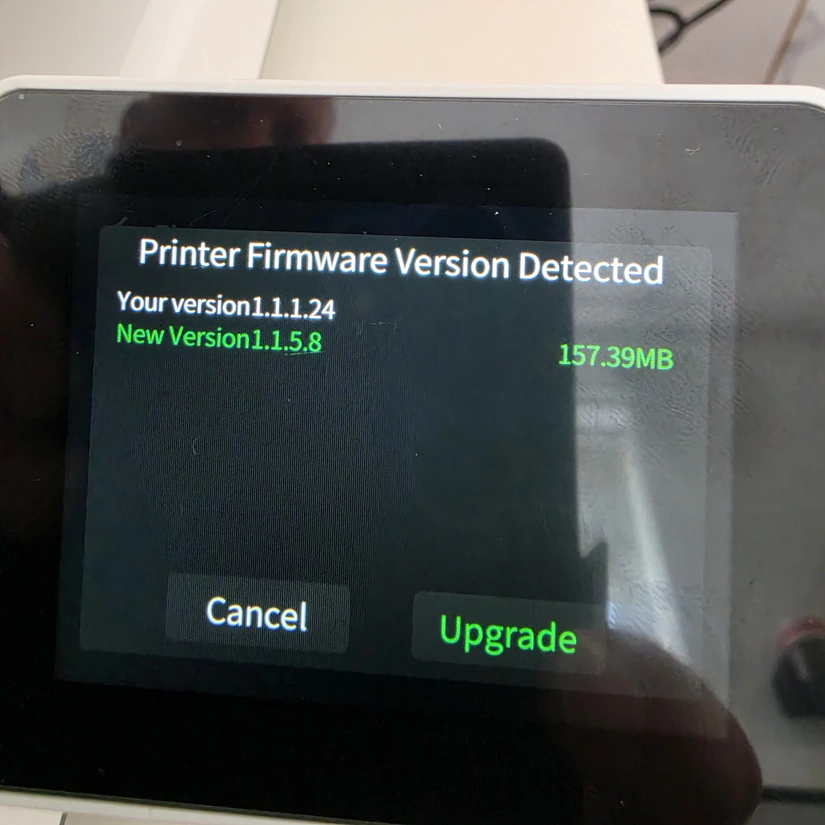
©3DWithUs – Photo: Phil Macey
Once recognized correctly, the touchscreen displays both the CFS Nano and spool-holder options.
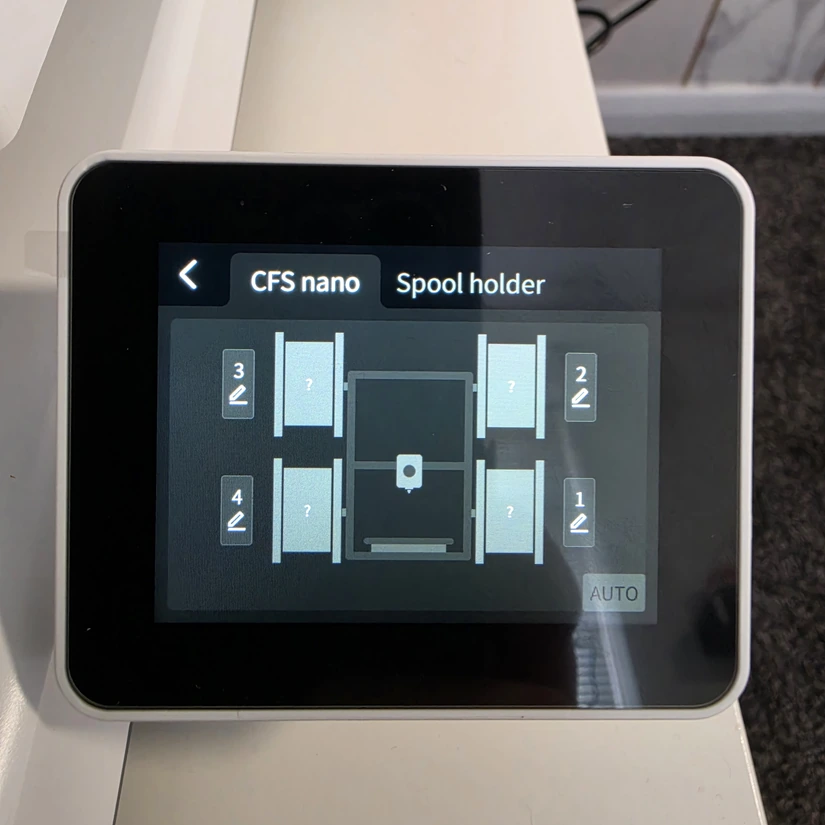
©3DWithUs – Photo: Phil Macey
Design Features and CFS Nano System
The SparkX i7 Nano uses an all-metal frame designed to provide rigidity and stability during high-speed printing. Its compact desktop footprint is one of the main attractions of the machine, especially when paired with the smaller CFS Nano system.
The printer also features a quick-release hotend system. Hardened steel nozzle options from 0.2 to 0.8 mm are intended to make it easier to switch between different print resolutions and materials.
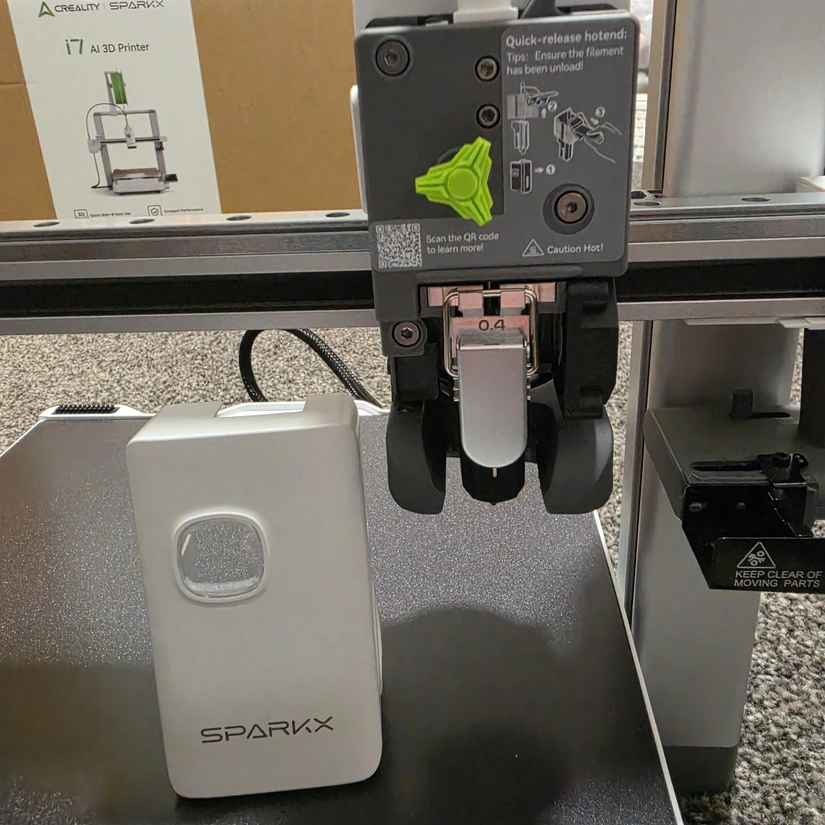
©3DWithUs – Photo: Phil Macey
Other notable features include up to four-color printing with the CFS Nano, print speeds up to 500 mm/s, a low-noise Night Mode rated at around 45 dB, automatic leveling, and a 260 × 260 × 255 mm build volume.
A built-in 720p AI camera provides real-time monitoring and print analysis. The camera also includes a physical privacy visor.
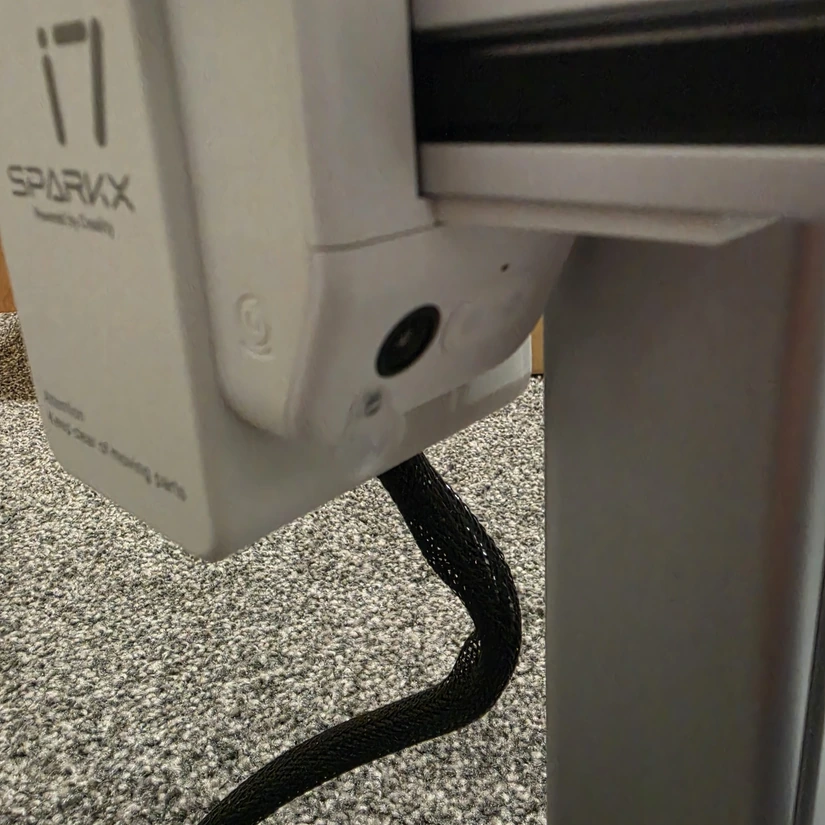
©3DWithUs – Photo: Phil Macey
The printer has a custom RGB lighting bar across the front, which provides visual feedback while also giving the machine a more polished appearance.
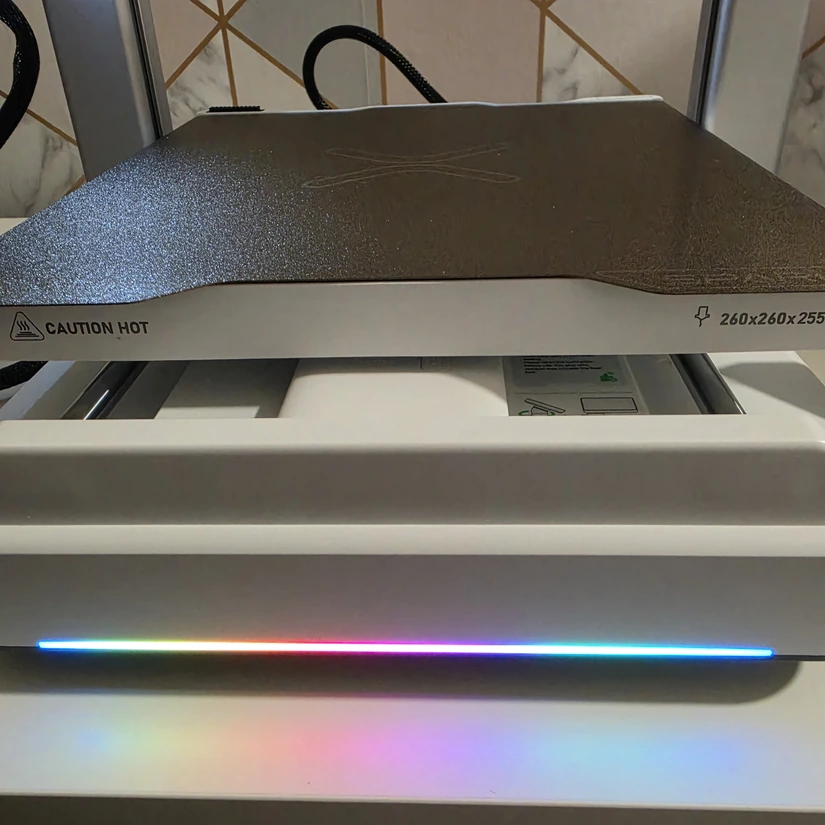
©3DWithUs – Photo: Phil Macey
Inside the CFS Nano
The Creality CFS Nano is built around a compact mechanical and electronic system for multi-material filament feeding. Inside, a brushless hub motor handles filament switching while a brushed inlet motor pulls filament into the system. These motors work with idler pulleys, PTFE routing tubes, and a compression block that keeps filament aligned and tensioned as it moves through the hub. A built-in desiccant chamber provides passive moisture control for stored filament.
Electrically, the Nano uses a GD32-based mainboard to coordinate motion and sensing. Communication with the printer and buffer is handled through RS485. Photoelectric sensors monitor filament presence, while an integrated RFID reader can identify compatible Creality tagged materials and load the corresponding printing parameters. The front display shows slot status, warnings, and humidity information.
The outer panel is easy to remove, giving straightforward access to the internal components.
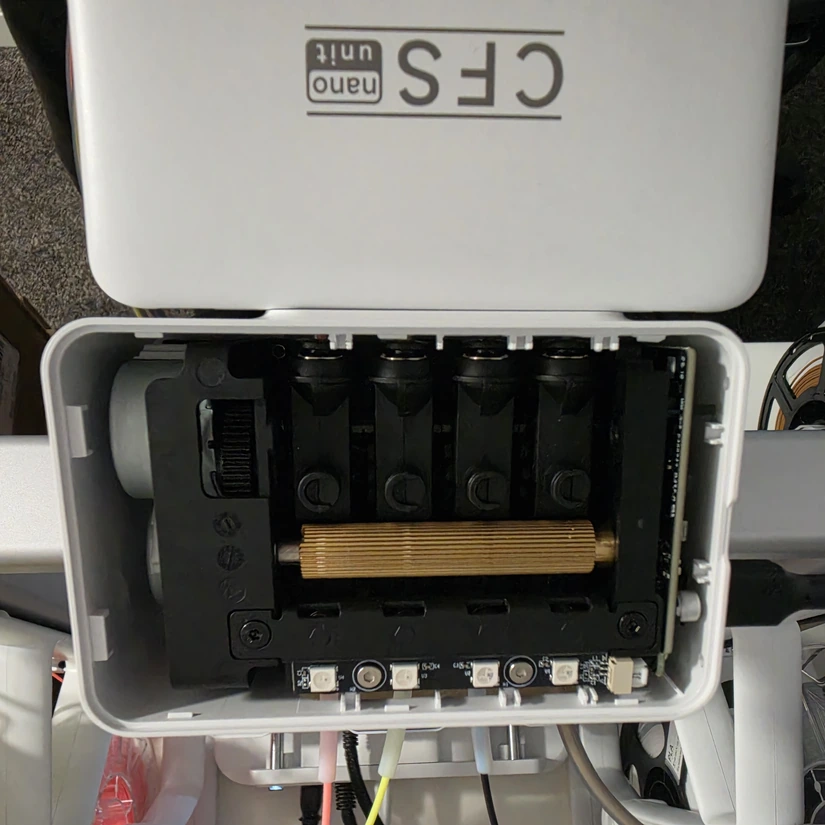
©3DWithUs – Photo: Phil Macey
Calibration and Creality Print 7.2
Follow the on-screen self-check and calibration procedure before printing. The printer runs through several automated checks and calibration steps, and once they are complete it is ready to use.
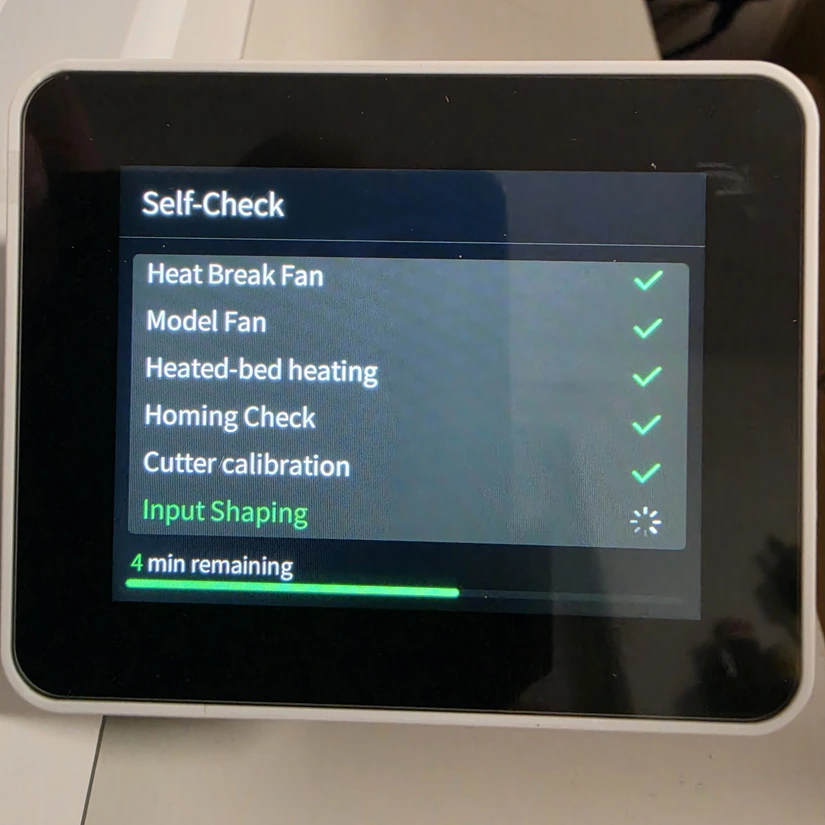
©3DWithUs – Photo: Phil Macey
The user interface is straightforward, with clear on-screen guidance that makes the setup approachable. The printer also includes a selection of pre-sliced models in its internal memory, which are useful for first tests and quick validation prints.
For slicing, I used Creality Print 7.2. Most of my testing focused on the CFS Nano and its color-feeding capabilities.
Multicolor Test Prints
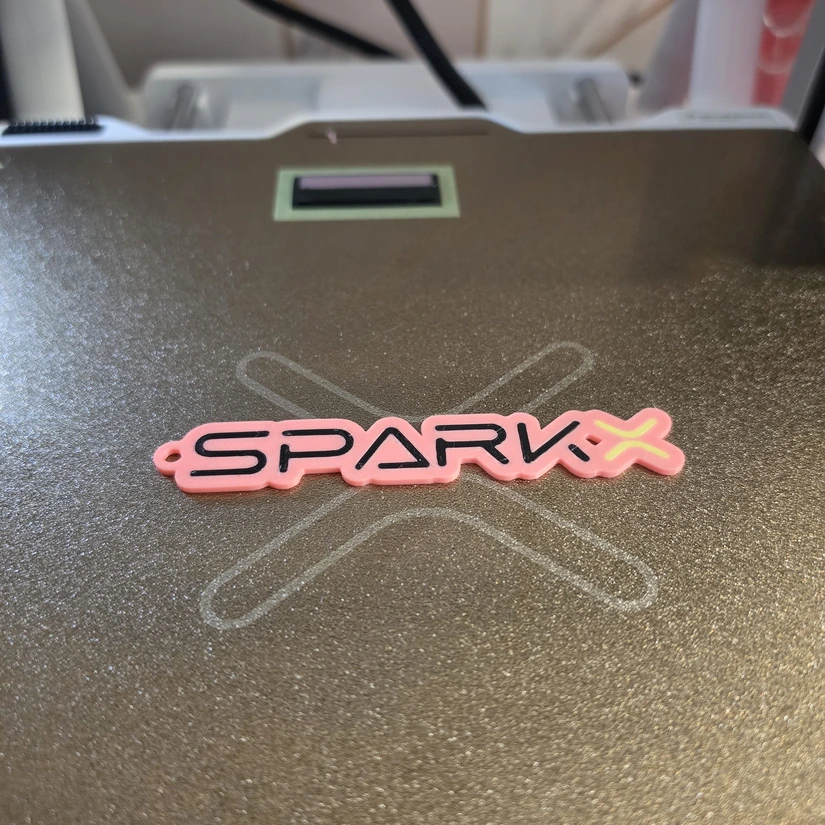
Model 1: Three-Colour SparkX Keyring
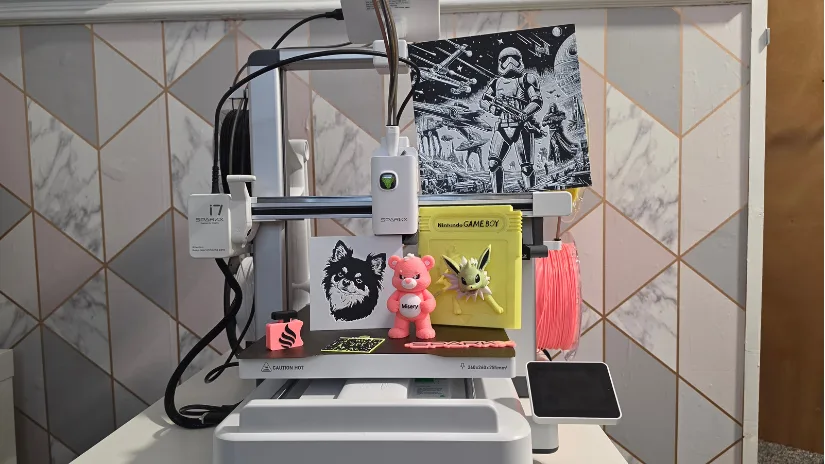
The first test was the pre-sliced SparkX keyring. It used Creality Hyper Luminous Pink, Hyper Luminous Yellow, and Hyper PLA Black. The print took roughly 35 minutes and the resulting quality was outstanding.
©3DWithUs – Photo: Phil Macey
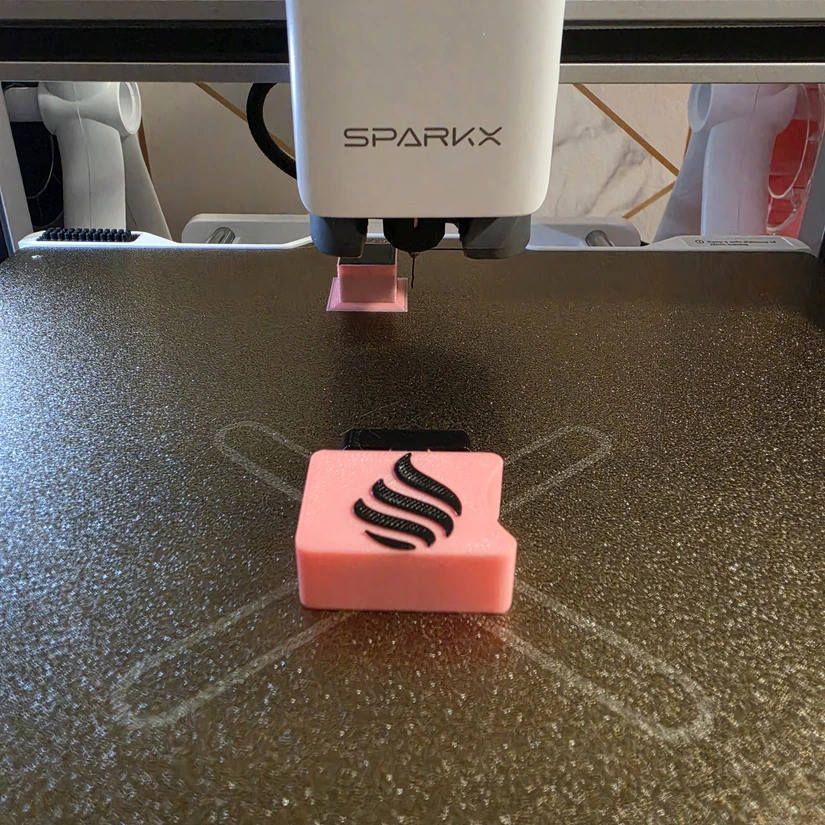
Model 2: Fidget Clicker
The second print was a fidget clicker downloaded from the Creality online store through the slicer. I selected the SparkX i7 file and it sliced without problems. I printed it using the PLA already loaded, although PETG would be a better choice for long-term durability. The finished model used Hyper Luminous Pink and Hyper PLA Black and came out very well.
©3DWithUs – Photo: Phil Macey
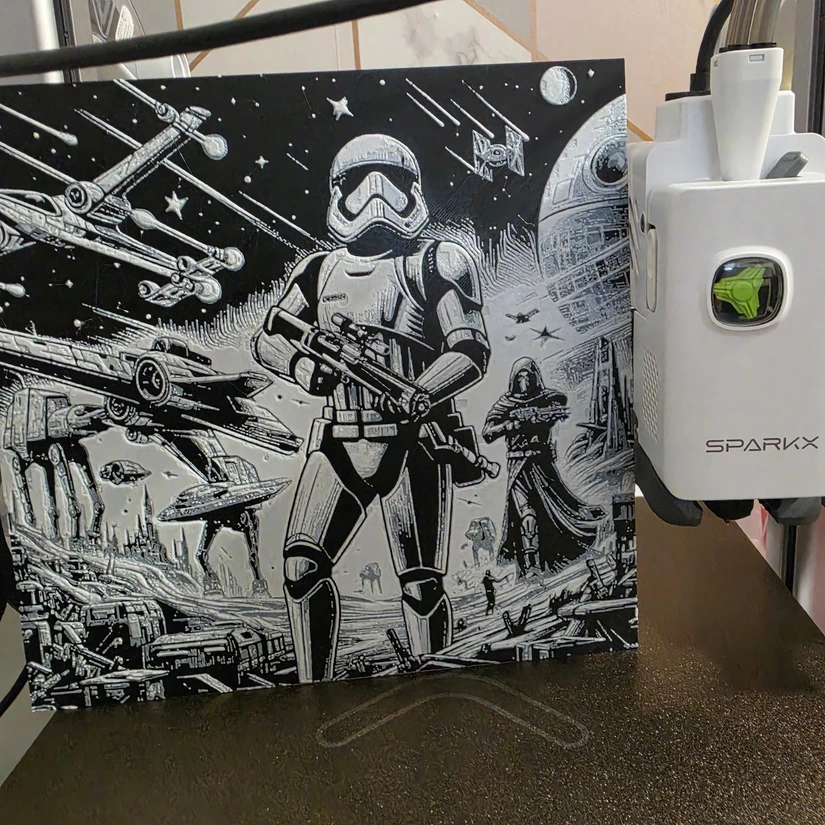
Model 3: HueForge Stormtrooper
For the third model, I printed a two-color HueForge Stormtrooper design from MakerWorld using Creality Hyper PLA Black and generic white PLA. The flat print took approximately 4.5 hours. It was a useful test of the SparkX i7 Nano’s ability to produce fine detail across a large flat surface with the CFS Nano, and the detail came out impressively clear.
HueForge Stormtrooper model on MakerWorld
©3DWithUs – Photo: Phil Macey
Model 4: QR Code Keyring
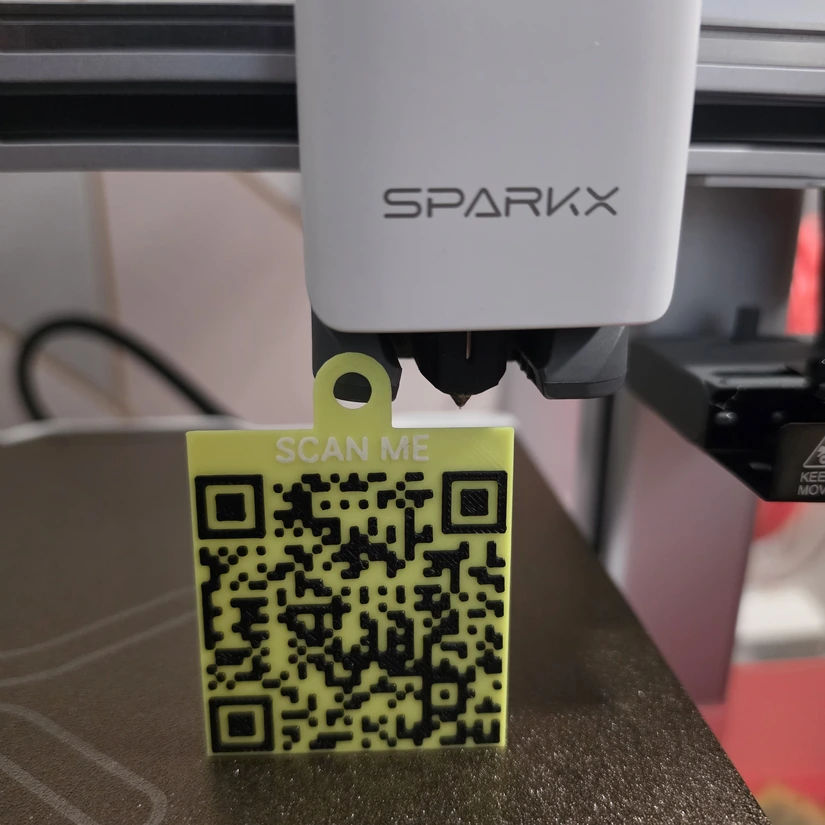
For the fourth model, I created a QR code keyring using the MakerLab function on MakerWorld. The tool allows you to customise the keyring with links or other information, which could be useful for craft fairs and events. This was another flat model, printed in three colors with very little waste.
©3DWithUs – Photo: Phil Macey
Model 5: Multi-Part Care Bear
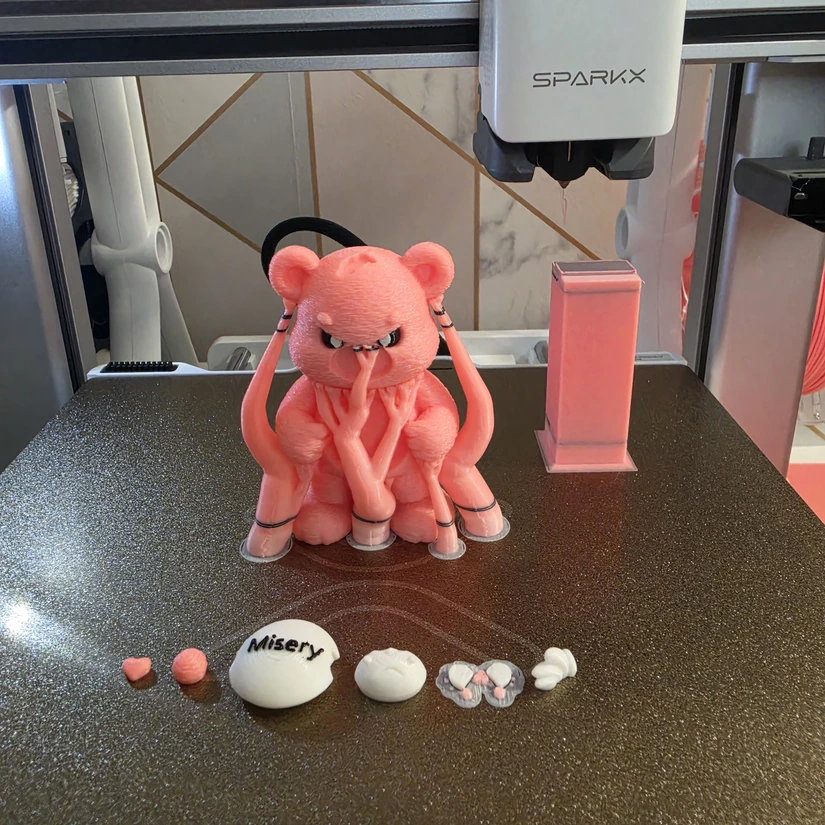
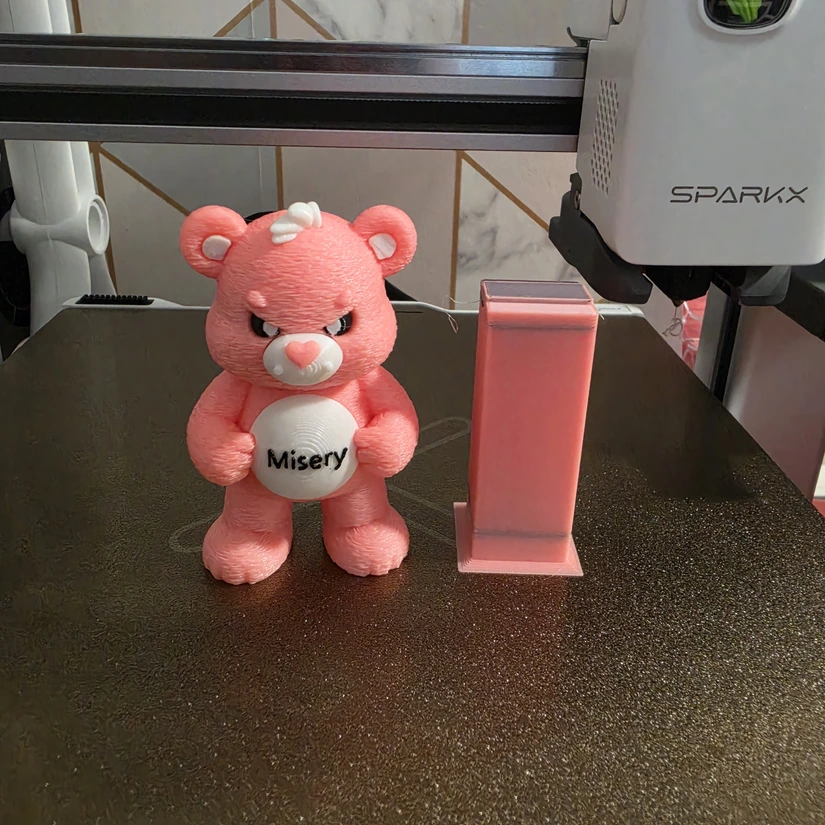
For the fifth model, I printed a Care Bear design from MakerWorld. Several parts were single-color, while other sections benefited from multi-color printing. After printing, the individual components were glued together and the chest lettering was added in Creality Print. The model used three colors at a 0.12 mm layer height and took approximately five hours to complete. Filament waste was minimal because the model was separated into distinct parts.
©3DWithUs – Photo: Phil Macey
©3DWithUs – Photo: Phil Macey
Model 6: Image-to-3D Print
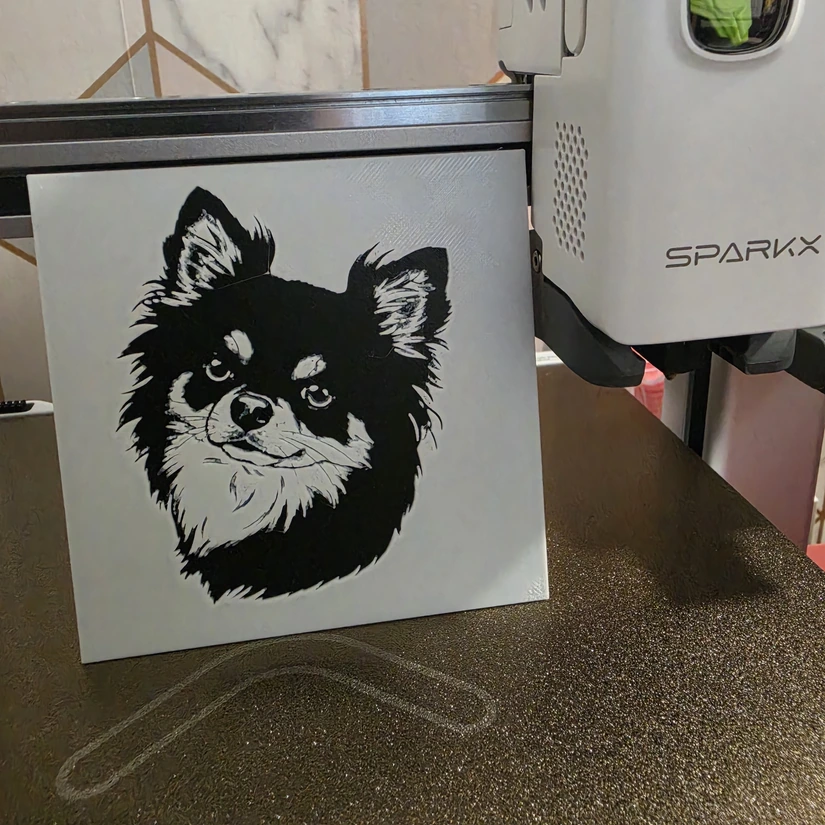
For the sixth model, I used MakerWorld’s Image to 3D tool and selected a two-color combination. The tool can support more colors if required, but this black-and-white test was enough to show the detail that the printer and CFS Nano could reproduce from the generated model. The result came out very well.
©3DWithUs – Photo: Phil Macey
Model 7: Pokemon / Nintendo Wall Art
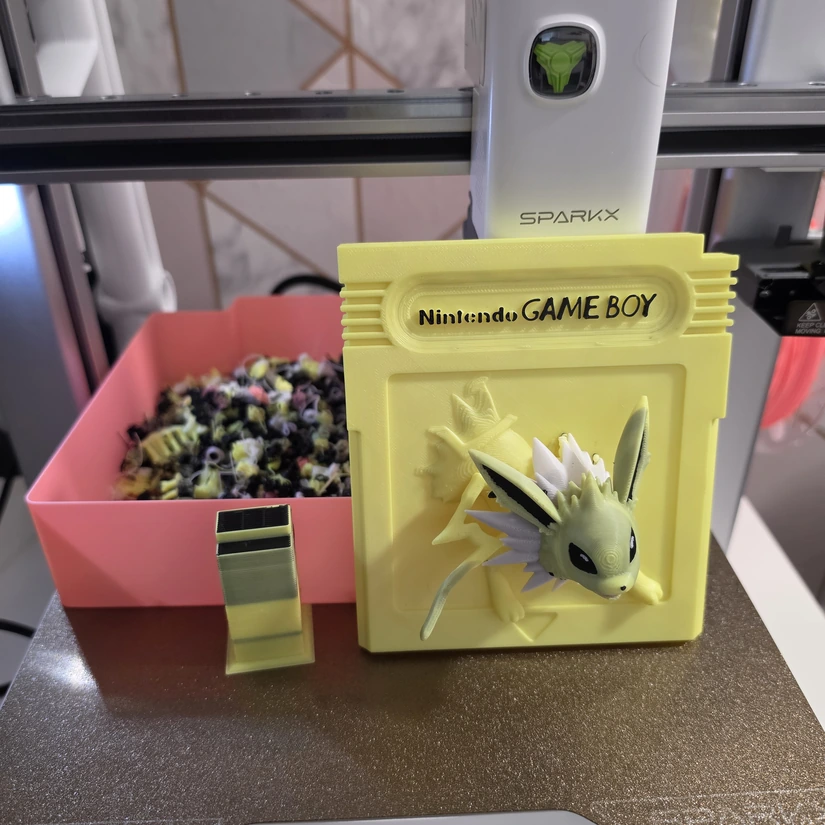
For the final model, I printed Pokemon / Nintendo wall art from Nostalgic3D. The model was printed as one job using Creality Hyper Yellow, Hyper PLA Black, and generic white PLA. It took around 13 hours and required supports. The print came out well overall, although the color purging settings in the slicer could use some adjustment.
©3DWithUs – Photo: Phil Macey
Hands-on Video
The video above provides a closer look at the Creality SparkX i7 Nano and CFS Nano in action, including the multicolor setup and some of the prints featured in this hands-on review.
Compare Creality SparkX i7 Nano to Other 3D Printers
Creality now offers several 3D printer families for different users. The newer K2 and K3 (coming soon) series focus on faster, coreXY, more automated machines, while the SparkX i7 Nano takes a more compact and budget approach. It is designed for users who want modern features and multi-color printing without moving to a much larger enclosed setup.
At the other end of Creality’s range, the classic Ender series remains one of the most recognisable entry points into FDM 3D printing. Ender machines are generally simpler and more traditional in design, while the SparkX i7 Nano adds features such as automatic calibration, AI monitoring, higher print speeds, and integrated multicolor capability. You can use our existing Creality printer reviews and guides below to compare the SparkX i7 Nano with other models in the lineup.
- Creality K2 Pro Combo Review: 8-Color Printing with Two CFS Units
- Creality Hi Combo Review: 3D Printer Tests, Tips and Settings
- Creality Ender-3 V3 Review: 3D Printer Testing
Beyond Creality, the SparkX i7 Nano also competes with a growing number of compact multicolor printers from other brands. One of the most obvious alternatives is the Bambu Lab A1 Combo with AMS Lite, which follows a similarly accessible approach to multi-color FDM printing while offering its own software ecosystem and automation features. You can see our hands-on testing in the Bambu Lab A1 Combo review.
More broadly, the SparkX i7 Nano fits into the budget-friendly end of the modern FDM market, where buyers now expect faster printing, auto-leveling, easier setup, and increasingly, multi-color capability without moving into premium pricing. For a wider overview of affordable options from Creality, Bambu Lab, Anycubic, Elegoo, Sovol, and other brands, see our Budget FDM 3D Printers guide.
©3DWithUs – Photo: Phil Macey
Have questions? Feel free to ask in the comment section below.
For a wider discussion or to share your own SPARKX i7 Nano prints, join us in the forum:
Conclusion and Pros & Cons
Compare the Prices & Bundles:
Official Website | Amazon
Creality SPARKX i7 Nano Review
Review Summary
The Creality SparkX i7 Nano paired with the CFS Nano multicolour attachment delivers one of the most streamlined, user-friendly, and capable printing experiences I have had in a long time. From the moment both units came out of the box, the setup process was refreshingly simple, with clear steps and intuitive assembly. Within around 20 minutes of unboxing, I had the printer and CFS Nano built, configured, and ready to print.
The SparkX i7 Nano feels like a well-engineered machine built from quality materials. Its linear rails, rigid frame, and clean mechanical layout give it a premium feel that translates into consistent printing. The RGB light bar at the front is more than an aesthetic touch and gives useful visual feedback during operation.
The user interface also deserves mention. It is fast, logical, and easy to navigate, with settings where you would expect them to be. Combined with the AI-assisted camera for monitoring and print detection, the SparkX i7 Nano feels designed to reduce the amount of attention needed during longer or more complex jobs.
Print quality was excellent across the test models. Fine details, smooth surfaces, and sharp edges were produced consistently, while the high-speed capabilities remained usable thanks to the printer’s vibration compensation and pressure-control systems.
The CFS Nano kit is where this setup becomes particularly interesting. It is easy to install, compact, and designed to reduce the overall footprint compared with larger multi-colour systems. There is no bulky external enclosure, and the top-mounted layout keeps the filament paths relatively tidy and integrated with the printer.
The dual-motor system for channel selection and filament feeding worked smoothly throughout my testing. Every multi-colour print completed without jams or misfeeds, and colour switching remained reliable. For users who want multi-colour capability without the space requirements of a larger filament system, the CFS Nano is a compelling option.
Taken together, the SparkX i7 Nano and CFS Nano provide a fast-to-set-up and easy-to-use multi-colour printing system. Across my tests, I encountered no failed prints or mechanical problems, and the printer produced consistent, detailed results from start to finish.
Pros
- High-temperature nozzle and heated bed
- CFS Nano multi-colour system is easy to install
- Solid build quality
- Relatively low cost
- Fast printing
- Dual-sided PEI build plate
Cons
- Open-frame design limits suitability for higher-temperature filaments
- Bed-slinger design
- Wi-Fi signal dropped several times during testing