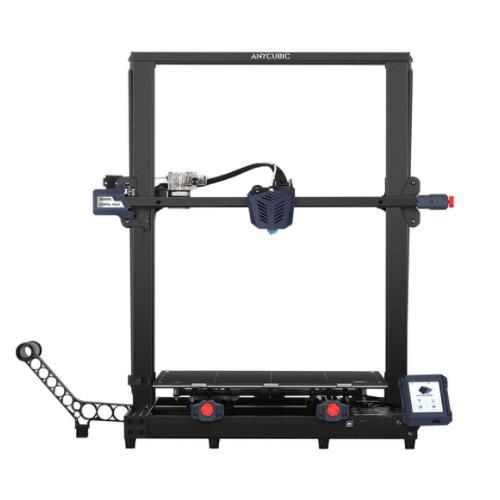
The Anycubic Kobra Max is a large format FDM 3D printer that features a 400x400x450mm build volume and has been designed from the ground up to offer an uncompromising experience to the prosumer market. The Kobra Max shares many design elements with the Anycubic Vyper, but offers superior features in nearly every category. The adjustable belt tensioners on the X and Y axes, the dual threaded Z rod, 500 watt power supply, and other features make the Anycubic Kobra Max a contender for one of the best large format 3D printers on the market.
Anycubic Kobra Max Specifications:
Build Volume: 400 x 400 x 450 mm (15.7” x 15.7” x 17.7”)
Nozzle Size: 0.4mm
Bed Leveling: Anycubic LeviQ Automatic Bed Leveling Sensor (25 Point)
Material: PLA, ABS
Build Platform: Removable Carborundum Glass Plate
Connectivity: MicroSD Card
Interface: 4.3” Color Touchscreen LCD
Comparison Table
Affiliate links:
Amazon
AliExpress
Official Website

© 3DWithUs – Photo: Andrew Sink
Kobra Max Review – Hardware Features
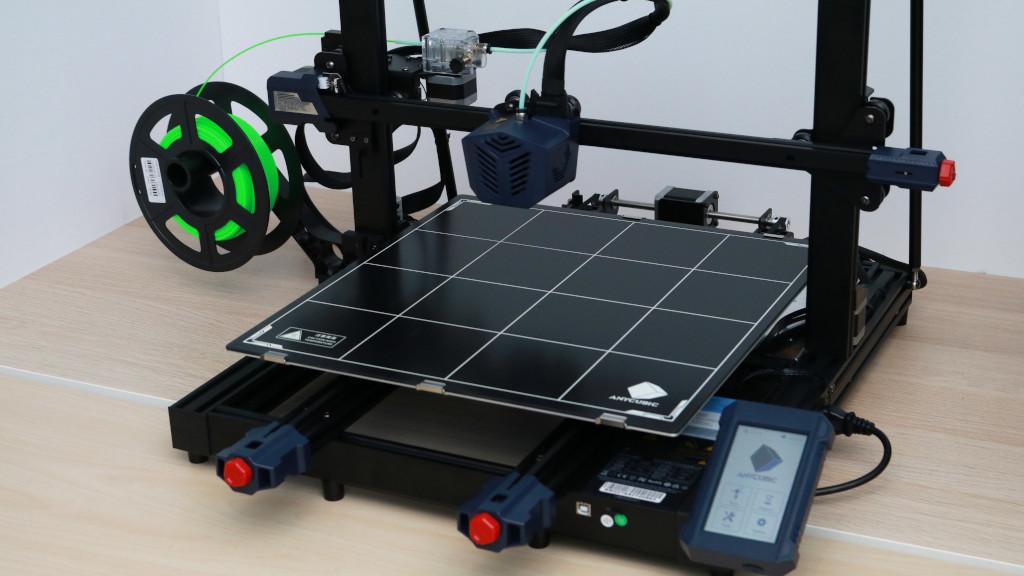
The Anycubic Kobra Max is a feature-rich 3D printer that is packed with functionality aimed squarely at the prosumer market. The extruder features an adjustable tension dual-gear filament drive as well as a filament run-out sensor. The hot end uses a 0.4mm E3D Volcano-style nozzle and has a small LED mounted underneath, which makes it easy to see parts as they are printing. The Kobra Max ships in a partially assembled state, and the hardware assembly is limited to attaching the Z axis stage to the base and connecting all the wiring terminals, which can be completed easily in under an hour.

© 3DWithUs – Photo: Andrew Sink
Innovative LeviQ auto-leveling system
One of the most impressive features of the Kobra Max is the automatic bed leveling, done using Anycubic’s LeviQ strain gauge leveling sensor. This strain-gauge based approach works by touching down at 25 points on the bed to create a mesh that compensates for any irregularity in the print platform. I used this system to level the bed after assembling the printer, and did not need to be re-leveled or adjusted once in over 100 hours of testing. This is an impressive feat given the large volume of the Kobra Max and should be a major selling point to any users who are interested in a printer that doesn’t require manual leveling. This consistent printing experience is ideal for anyone using this printer for production: for example; this would be perfect for Etsy sellers making 10-100 parts per week.

© 3DWithUs – Photo: Andrew Sink

© 3DWithUs – Photo: Andrew Sink
The dual Y axis belts on the Kobra Max are a feature that is not often seen on printers in this price range. The dual aluminum extrusions that run under the heated bed allow for a high level of stability during Y axis travel. By adding a second extrusion (along with pulley, belt and tensioner) on the Y axis, Anycubic has given the Kobra Max the ability to print large, heavy parts without worrying about Y axis wobble.
Z Axis Stabilizing Rods
The Kobra Max is a large format printer, and this directly translates into a large frame. The i3-style design (aluminum extrusions in an inverted T format) of the Kobra Max results in a Z axis frame that sits over 27” high from the base of the machine, which could wobble if not correctly constrained.

© 3DWithUs – Photo: Andrew Sink

© 3DWithUs – Photo: Andrew Sink
The dual Z axis stabilizing rods are used to anchor the Z axis to the base of the printer and prevent it from moving or wobbling during printing. This design is well-implemented: the setup of these rods was quick and easy and they are a low-cost way to keep the frame stable while printing tall parts. In addition, a synchronization belt links both Z lead screws together to prevent the X axis from moving unevenly.

© 3DWithUs – Photo: Andrew Sink
4.3” Color LCD Touchscreen
The Kobra Max uses a 4.3” color touchscreen as a primary user interface, and it is bright, responsive, and filled with useful information. During printing, the Z axis offset can be adjusted in small increments (sometimes referred to as baby-stepping), a useful feature for adjusting a print on the fly. The LCD also shows a progress indicator during printing which can be used to estimate the amount of time left on a print.

© 3DWithUs – Photo: Andrew Sink
3D Printing Included Test Print
The Kobra Max included a single test print on the microSD card titled ‘owl.gcode’. Printed using Fillamentum Vertigo Galaxy PLA, this model printed perfectly on the first attempt. The detail is sharp and the smooth contours of the model are consistent with no banding, which is what I would expect from a printer in this price range. The owl model itself is fairly small, measuring under 4” tall and 2” wide.
Given the large volume of this printer, a more suitable test print would be printing multiple models at various points on the bed, or a tall thin part to show off the Z axis height. I liked the quality of the printed demo, but I would have been happier with something that couldn’t also be done equally well by a small format printer.

© 3DWithUs – Photo: Andrew Sink
Cura Slicer Settings for Kobra Max
The Kobra Max is compatible with Ultimaker Cura, a popular slicer app for 3D printers that is feature-rich enough for most users while being accessible for beginners. Anycubic shipped this Kobra Max to me before the initial release, so profiles for the printer weren’t available directly within Cura. Instead, Anycubic included these profiles on the microSD card that came with the machine.
I used the profile included with the printer to slice a few files, including the Frog model by Hairald on PrusaPrinters. The included print profile has a few quirks (such as printing infill before walls, which typically results in a deformed skin), but it’s a great place to start for this printer. The instructions included with the Kobra Max also cover the basic set-up for this printer, and I didn’t encounter any issues while preparing prints for the machine.

(Screenshot: Cura)
Cura Settings:
Layer Height: .2 mm
Wall Thickness: .4mm
Wall Line Count: 1
Infill Density: 15%
Infill Type: Grid
Print Speed: 60 mm/s
Extruder Temperature: 200° C
Build Plate Temperature: 60° C
Retraction Distance: 6.5 mm
Retraction Speed: 25 mm/s

© 3DWithUs – Photo: Andrew Sink
3D Printing on the Anycubic Kobra Max
Printed using Anycubic Green PLA, the frog model printed out well at various sizes, with lots of detail visible and no real major defects. The Kobra Max ships with a 0.4mm nozzle, which is the same nozzle size as used in smaller printers such as the Sculpto PRO2. This isn’t an issue when printing small models, but printing models that take advantage of the large build volume of the Kobra Max will quickly reach the 24+ hour print time mark.

© 3DWithUs – Photo: Andrew Sink
Shipping the Kobra Max with a 0.6mm (or 0.8mm) nozzle instead of a spare 0.4mm would be a quick way to reduce print time and make the printer more appealing to users interested in printing large parts quickly.

© 3DWithUs – Photo: Andrew Sink
Printing functional parts (like the Citadel Paint holder by Zimlorog) would print much faster with these larger nozzles without sacrificing detail or quality. To learn more about how nozzle size can impact print time and quality, be sure to read our article on nozzle size settings. Alternatively, using a quick-change nozzle system like the E3D Revo would be an ideal solution to this situation.

© 3DWithUs – Photo: Andrew Sink
Ideal for Large Format 3D Printing
The large build volume of the Kobra Max makes it ideal for printing large parts that wouldn’t fit on a smaller printer without splitting into pieces. For example, the Curved Honeycomb Vase by eggnot scaled up to 320% fit comfortably within the build volume of the Kobra Max with room to spare. Printed at this scale, it measures nearly 15” tall and printed in just under 18 hours using the Spiralize Outer Contour setting in Cura, which prints the model as a single continuous toolpath.

© 3DWithUs – Photo: Will Zoobkoff
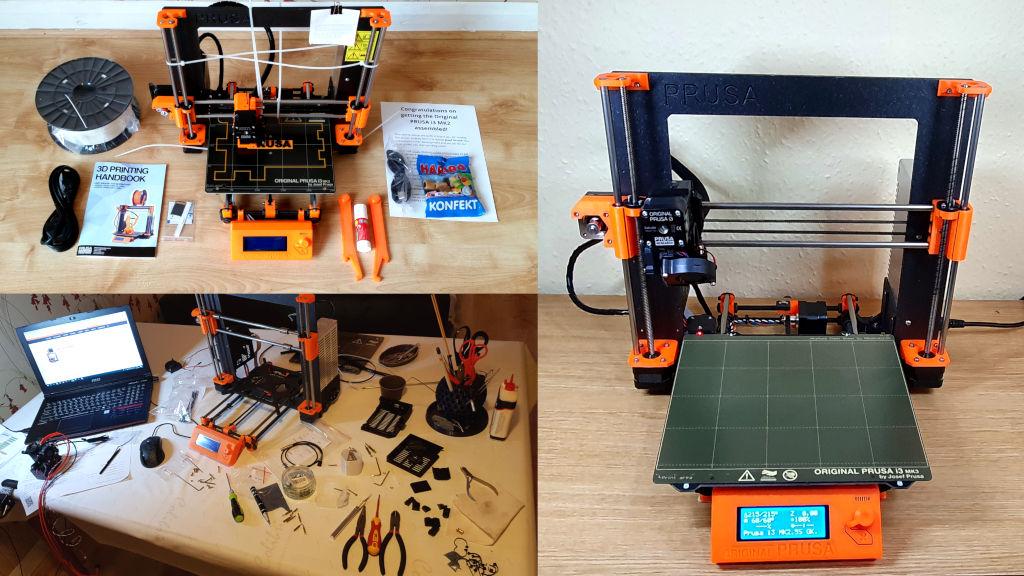
Anycubic Kobra vs. Anycubic Kobra Max
Along with the Kobra Max, Anycubic has also released a smaller 3D printer called the Kobra which features many of the same hardware features with a smaller build volume. The Kobra features a build volume of 220x220x250mm, a direct drive extruder, a single Z axis threaded rod, and has been designed to be a lower-cost alternative to the larger and more capable Kobra Max. You can read more about the Kobra in our review here.

© 3DWithUs – Photo: Andrew Sink
Watch Will Zoobkoff’s Unboxing and Setup video to get a picture of what’s involved:
Conclusion
There’s no doubt about it; in our Anycubic Kobra Max review, we found that this is a no-holds-barred large format FDM 3D printer that offers ample build volume and an impressive set of features. The automatic bed leveling using the Anycubic LeviQ strain gauge sensor worked flawlessly during testing and allowed me to print edge-to-edge on the build platform with no issues, and required no adjustment between prints. With a retail price of $569, the Anycubic Kobra Max is not a small investment. However, if you need large volume, trouble-free operation, and repeatable performance, the Kobra Max is likely a good fit for you.
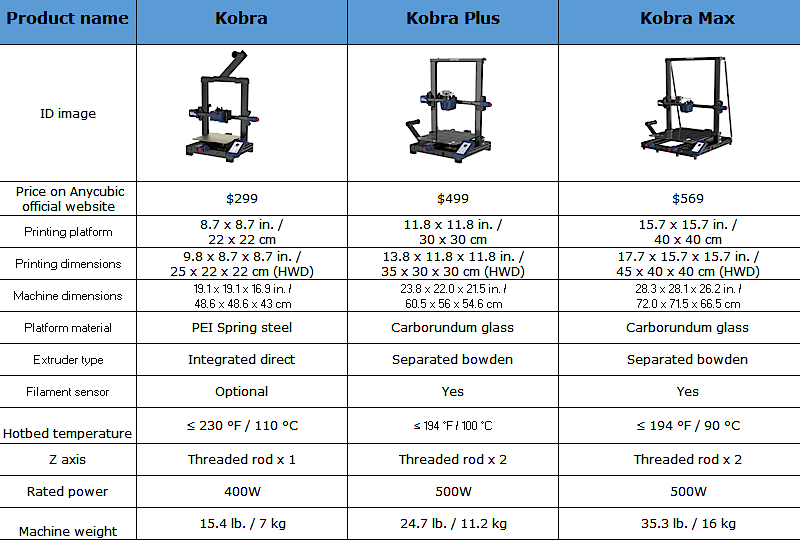
Anycubic Kobra, Anycubic Kobra Plus, and Anycubic Kobra Max Comparison
Anycubic has released three printers in the Kobra line: the Anycubic Kobra, the Anycubic Kobra Plus, and the Anycubic Kobra Max. Please compare the machines in the table below.
- Read more: Anycubic Kobra Review
- Read more: Anycubic Kobra Plus Review
The Kobra stands alone as the sole direct-drive machine in the lineup with a PEI spring steel build platform, while both the Kobra Plus and the Kobra Max use a Bowden style extruder with a Carborundum glass build platform and the LeviQ 25 point automatic bed leveling system.
Amazon
AliExpress
Official Website
Anycubic Kobra Star Rating
Review Summary
The Anycubic Kobra Max is a large format FDM 3D printer that features a 400x400x450mm build volume and has been designed from the ground up to offer an uncompromising experience to the prosumer market. The adjustable belt tensioners on the X and Y axes, the dual threaded Z rod, 500-watt power supply, and other features make the Anycubic Kobra Max a contender for one of the best large format 3D printers on the market.
PROS:
– Large Volume 400x400x450mm
– LeviQ automatic bed leveling system works perfectly, even on the full build volume
– Silent stepper drivers and quiet fans keep noise to a minimum
CONS:
– Cura profile needs adjustment
– Lackluster test model

How do you use the type 3 usb port, as my printer did not have a micro sd card fitted only a slot in the casing. The 3D printer setup was very easy to do.
I bought this printer as I wanted to print a 3D prosthetic leg out or carbon fibre filament with a 1mm nozzle.
Can I connect the printer to my tablet to do what I need?
The micro sd card not included in the kit, I nor was the usb cable or scraper.
Please help me with my project to print a prosphectic leg for me to use daily.
I chose the Kobra Max for the height it can print.
Because an NHS leg weighs more than 30lb and I cannot wear a leg that heavy because I have sclerosis of the spine as I was blown up in the Falklands War in the Royal Navy.
I am sick an tired of being in a wheelchair and want to stand on my own two feet.
Please me or put me in contact that can help me clear do what I need.
Regards
LORD Dave L Chance