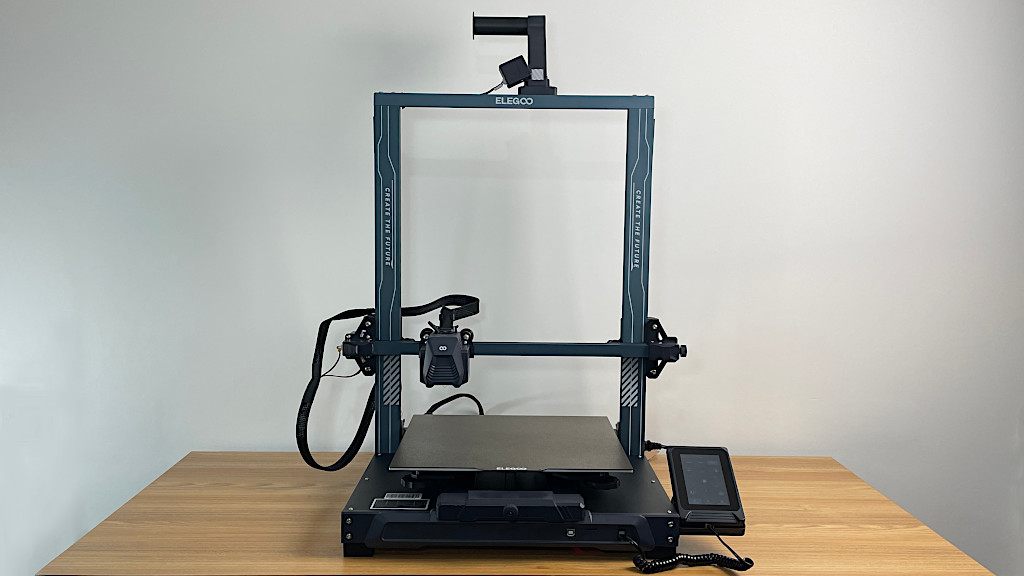
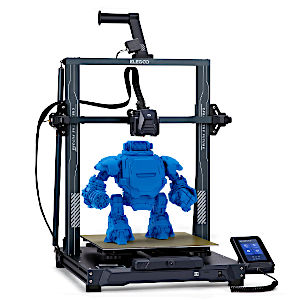
Elegoo Neptune 3 Plus is a medium-sized 3D printer in the recently launched series. Yet again, Elegoo managed to integrate all nice-to-have features, such as automatic bed leveling, flexible build plate, silent printing, and touch screen, into a plus-sized budget machine. The combination of 49 points of automatic, manual bed leveling and a sheet with a special coating ensure that there are no issues with bed adhesion on such a big build plate. It is my second FDM printer from this brand, and on this website, we have similar printers to compare. Let’s review this machine, test some challenging prints, including with a bigger 0.6mm nozzle and exotic filament, and list the Pros and Cons.
Table of Contents
- Specifications
- Unboxing and Assembly
- 49-Point Bed Leveling
- Test Prints
- Micro SD Card
- Filament Run-Out Sensor
- Elegoo Cura Slicer Settings
- 3D Printing with PLA
- 3D Printing with TPU
- 3D Printing with 0.6mm Nozzle
- 3D Printing with Wood Filament
- Compare to Other 3D Printers
- Conclusion and Pros & Cons
Elegoo Neptune 3 Plus
Price: $350
Product affiliate links: 3DWithUs is supported by its audience. Purchases via some links may earn us a small commission at no extra cost to you. This helps us to continue bringing you high-quality content. The product featured was provided for an honest detailed review. Our guides and reviews remain unbiased and independent.
Compare the Prices & Bundles:
Official Store | Amazon
Elegoo Neptune 3 Pro Specifications:
Build Volume: 320 x 320 x 400mm / 12.59” x 12.59” x 15.74”
Extruder: Dual-Gear Direct Drive Extruder
Bed Leveling: Automatic and Manual
Material: PLA, PLA+, TPU
Build Platform: Flexible Textured PEI Build Platform
Connectivity: Micro SD Card, Cable
Interface: Removable 4.3inch Color Touchscreen LCD
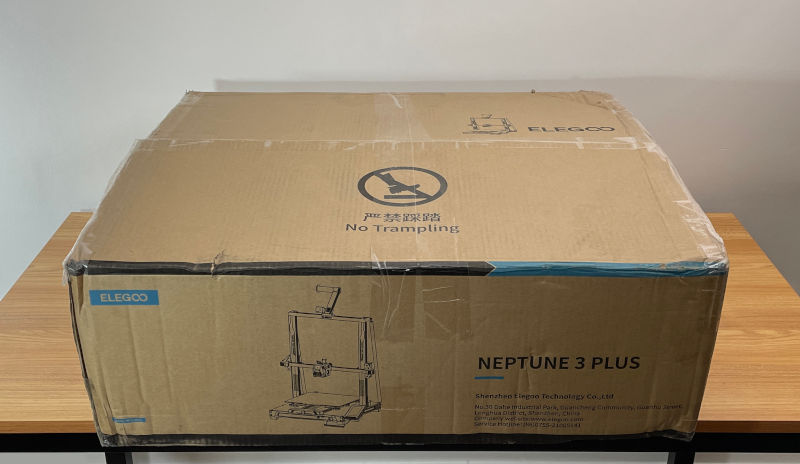
Unboxing and Assembly
Elegoo Neptune 3 Plus arrived in a big box that almost covered the whole desk. One of the box corners was slightly bent in but no vital parts were damaged, the protective foam did its job well.
©3DWithUs – Photo: Max Funkner
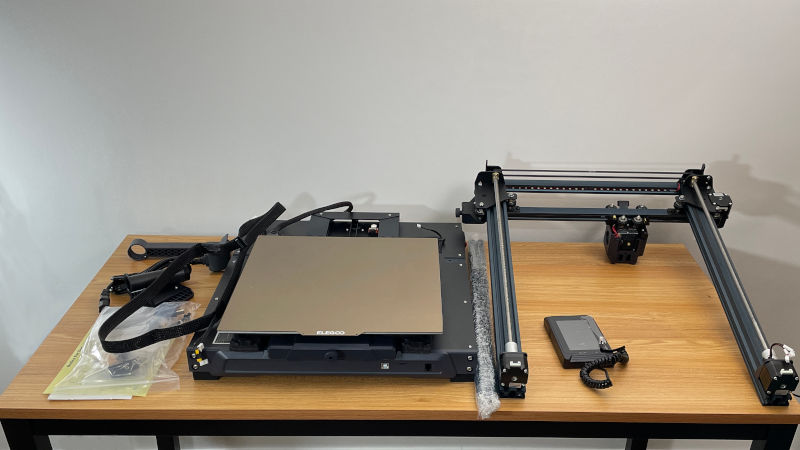
Assembly. A video tutorial on a micro SD card was helpful from the beginning. The main concern was that such a heavy structure may squash some of the vital parts during the assembly. Following the video tutorial, I made sure I was assembling the gantry on the same side. When two major parts were securely connected, it was easy to assemble the rest: a filament holder, a screen holder, and a run-out sensor. The last thing was to connect all connectors. Overall, the assembly took me approximately 20-30min.
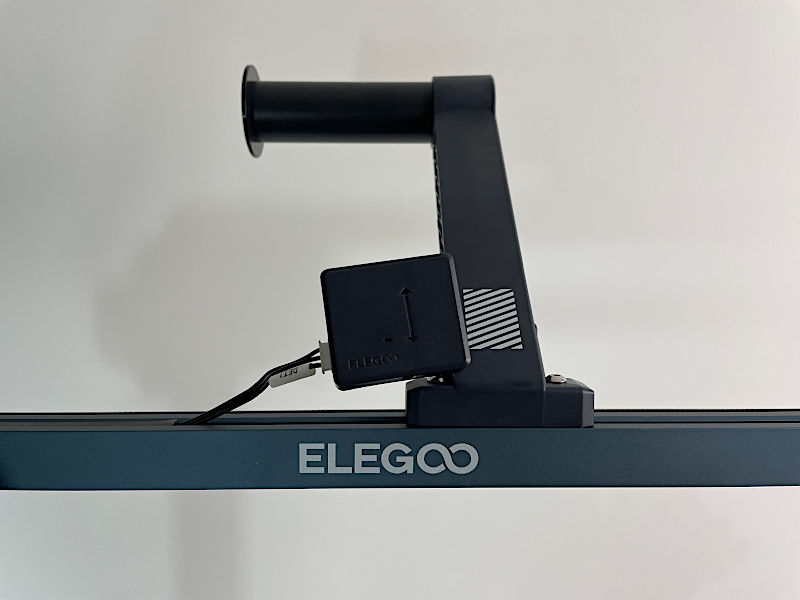
I was surprised to see the filament sensor location, and have to say, it does its job well. This system worked well with both 1kg spools and with loose filament bits.
©3DWithUs – Photo: Max Funkner
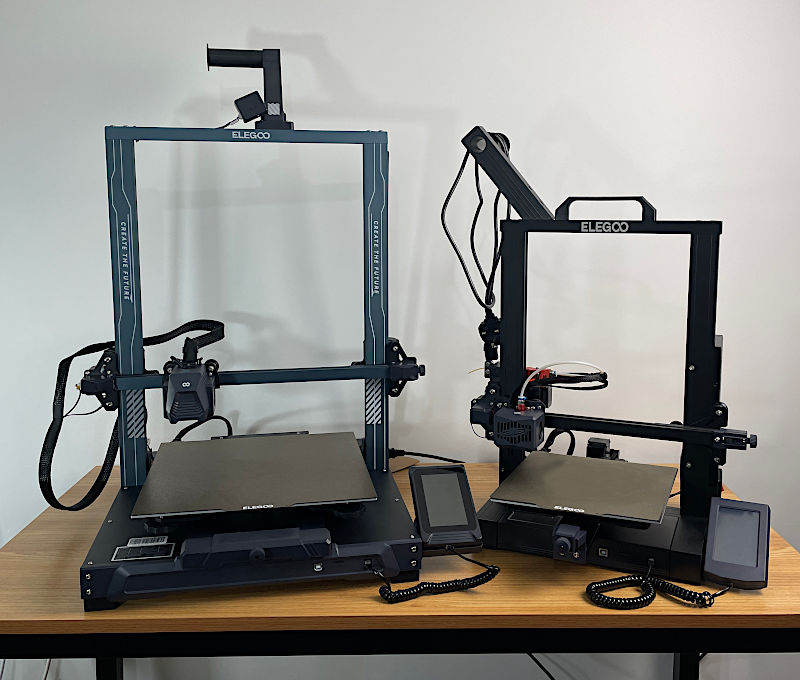
In comparison to Neptune 3, Neptune 3 Plus is a significantly larger printer with a bigger build volume. I have them here for comparison. On our website, you can also find the reviews for Neptune 3 and Neptune 3 PRO.
©3DWithUs – Photo: Max Funkner
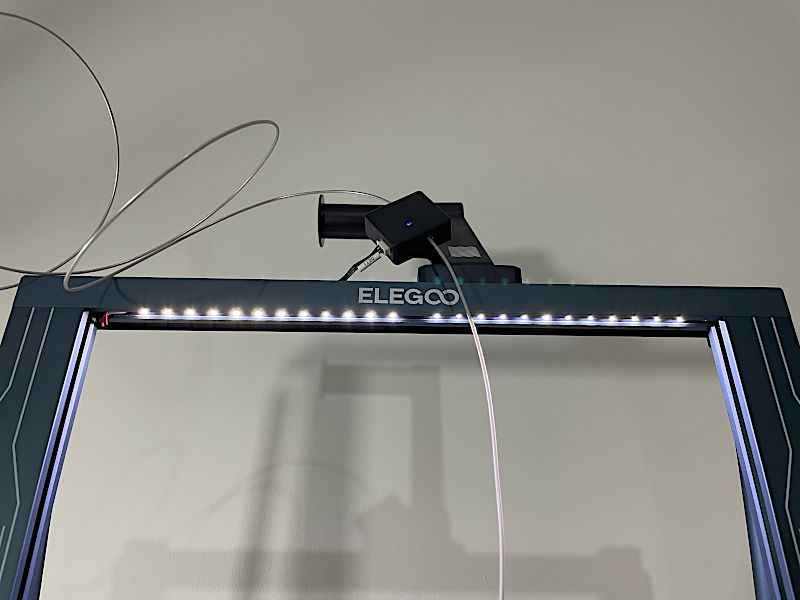
LED Strips. I have no need to use these lights as I have plenty of lighting options in my studio. But I can see why it can be helpful in other cases. If a printer is positioned somewhere in a poorly lit place, there is no need for a separate light source as an integrated LED light bar does the job.
©3DWithUs – Photo: Max Funkner
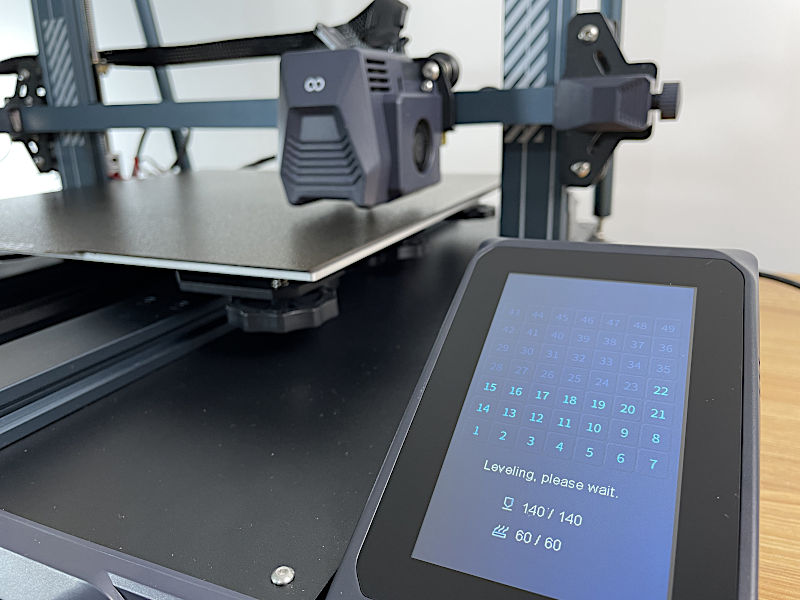
49-Point Bed Leveling and Heating the Build Plate
To level such a big build platform precisely, the process consists of two stages. Automatic 49-point leveling and manual leveling by adjusting six wheels with a piece of paper between the build plate and the nozzle. I was surprised to see such a manual calibration still in use on the newest 3D printer models. But apparently, it is the only way to make sure the big build plate is leveled well. Once both leveling stages were completed, I had no issues with bed leveling for more than 20 prints and counting.
©3DWithUs – Photo: Max Funkner
Bed leveling is crucial for bed adhesion. But it is also important to mention a PEI magnetic flexible platform with a special coating. While the bed is warm, the grip is strong, and when the bed is cool, the print gets released. The texture of the print bottom is another nice surprise.
©3DWithUs – Photo: Max Funkner
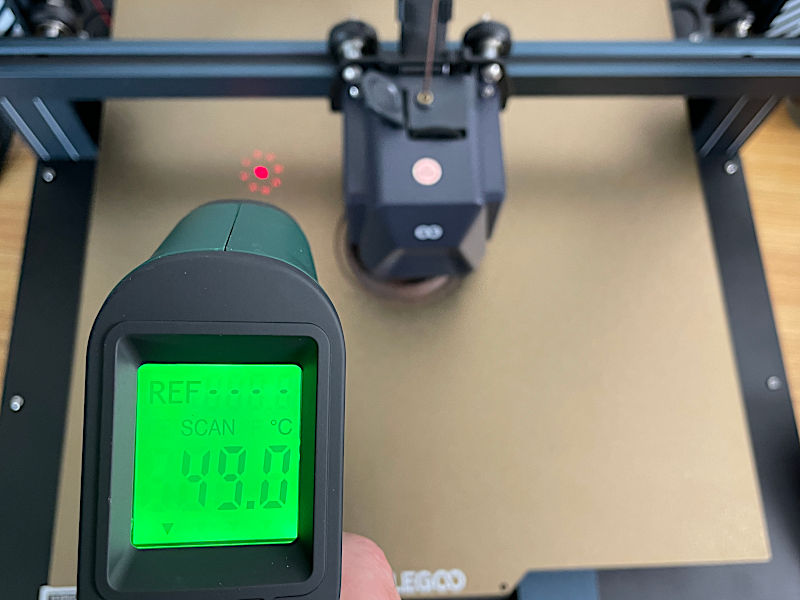
Another pleasant feature is that Neptune’s 3 Plus bed heats up very quickly. I checked the bed temperature with a scanner and it showed that it was at a stable 48-49°C in various points. The applied setting was for 50°C.
Test Print – First Fail
My first test print was pre-uploaded on a micro SD card that came with the machine, a mini Buddha statue model. When the print was finished, I realized that the print quality was awful, with uneven layers. Have a look at the print in white PLA in the image below. It turned out that I completely ignored the fact that the printer was shaking slightly, and this resulted in a bad quality print.
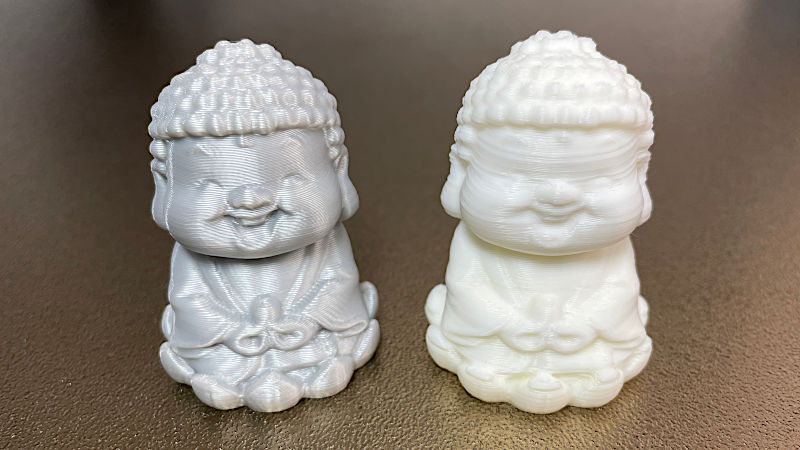
©3DWithUs – Prints & Photo: Max Funkner
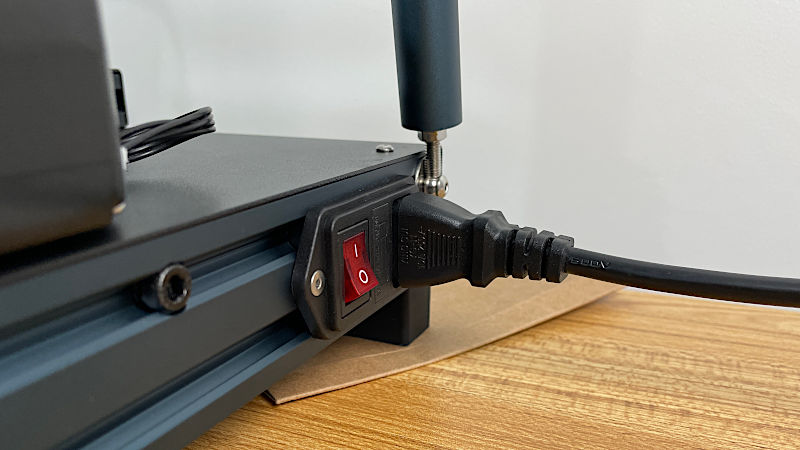
At first, I thought that one of the printer’s feet was uneven and this caused shaking. But it turned out that it was the desk that was uneven. Using a piece of cardboard, I fixed an issue quickly. The second Buddha test print in silver PLA came out much better.
©3DWithUs – Photo: Max Funkner
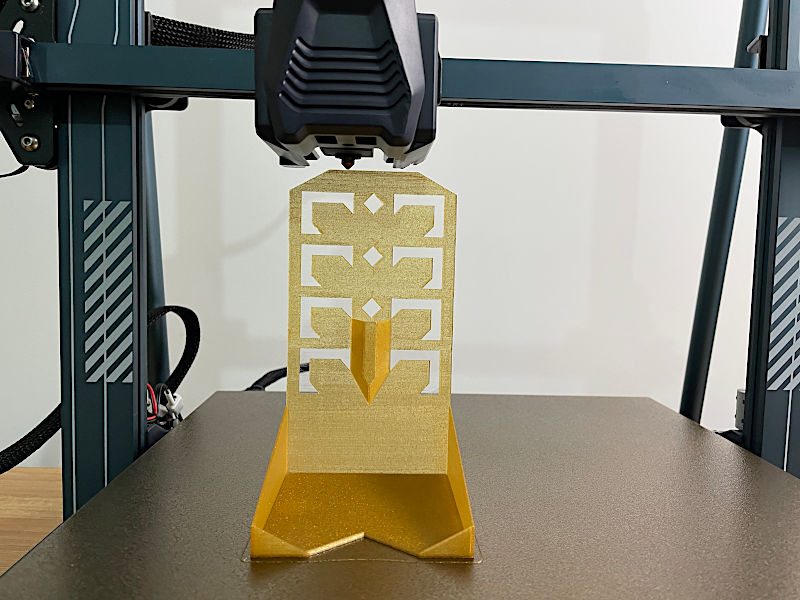
Another interesting test print offered by the Elegoo’s team was a tool holder. I like an idea of a functional item as a test model. We added this item as an example to our functional 3D prints article. This print is challenging as it has ELEGOO letters on it. Such letters often expose one of the known weaknesses of direct drive extruders – ghosting. Direct drive extruders are heavier than Bowden and therefore are prone to shake the printer. To minimize ghosting issues, it is recommended to reduce printing speed and again to ensure the stability of a 3D printer.
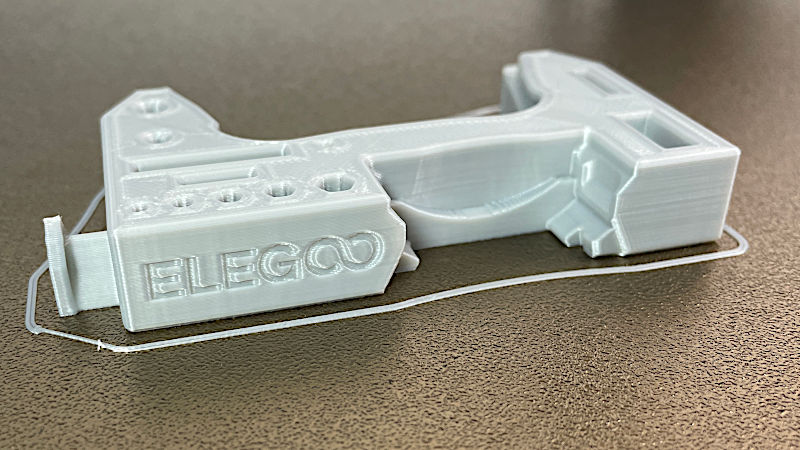
©3DWithUs – Photo: Max Funkner
Micro SD Card – Mind Saving the Files
The included micro SD card got corrupted twice and I didn’t save the files it had on it. I am not sure if it is possible to recover the files in such cases. As I tend to save projects in slicer software, I didn’t care too much about it and re-formatted the card to use it again. But anyway, it was a sort of disappointing experience. Also, I feel that such a small SD card is tricky to deal with. It just doesn’t work with my big fingers, and I always fear that I will crash it while handling it. I wish it was the usual SD card or a USB stick instead.
Filament Run-Out Sensor
The surprisingly positioned filament run-out sensor worked well with both 1kg filament spools and with large loose filament samples and bits. With the system featured below, I had no issue utilizing large filament bits and non-standard spools from the past decade.
©3DWithUs – Photo: Max Funkner
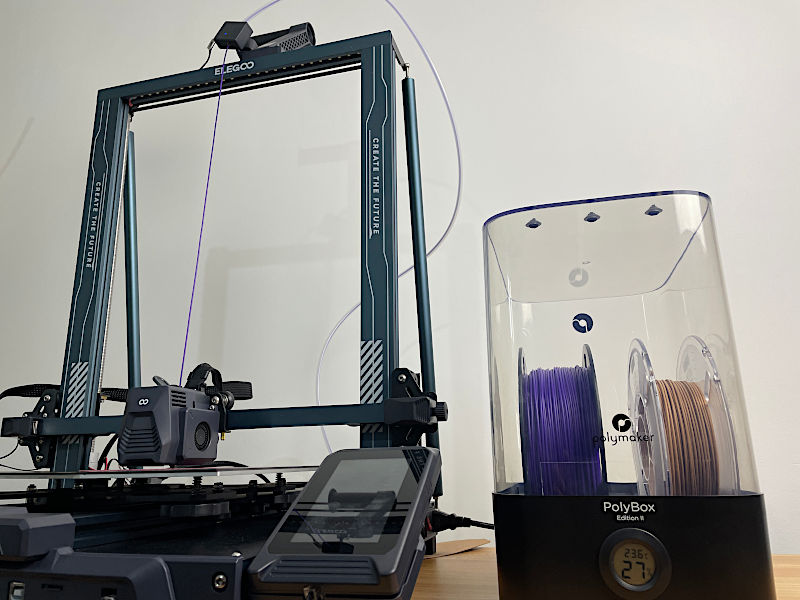
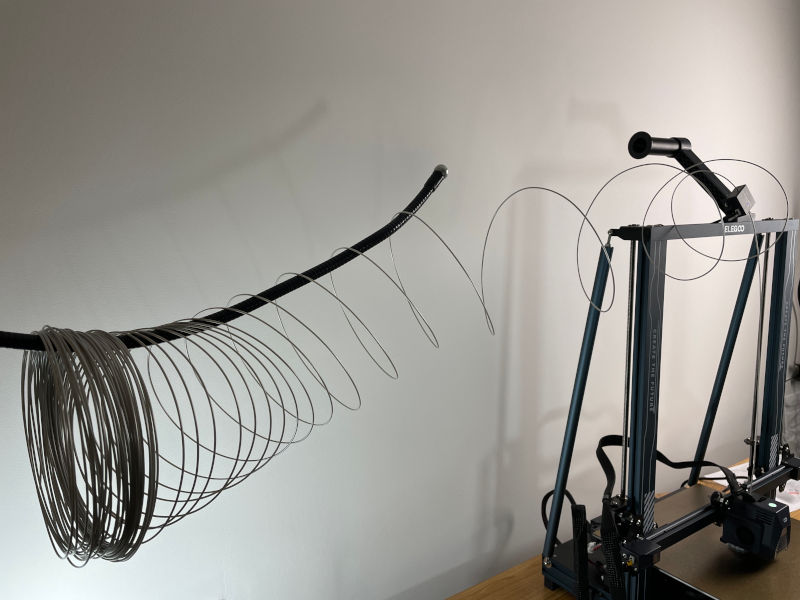
With the filament dryers and dry boxes, there is a different story though. If the filament dryer is on the desk, then it feels like there is significant tension happening when the extruder pulls the filament. In such cases, if the material is fragile, such as Wood composites, for example, the filament may snap at any moment. When using filament dryers is important, then they should be placed or even wall mounted somewhere higher to secure a smooth flow.
Slicer Software Settings
Most of the prints I featured in this review, I sliced with the included Elegoo Cura software. Generally, I am happy with it and quite often use the preview window to track the nozzle movement at the specific layer.
Strings Test by 3DPrintBunny on Thangs.
Elegoo Cura Preview – MP4: Max Funkner
One particular quick setting I started liking more and more, is Adhesion. When ticked in the slicer, it automatically creates a brim or a raft. And when printing such models like articulated dragons with countless small objects, a raft is a very welcome feature. Please find in the screenshot below how to switch from Raft to Brim if needed.
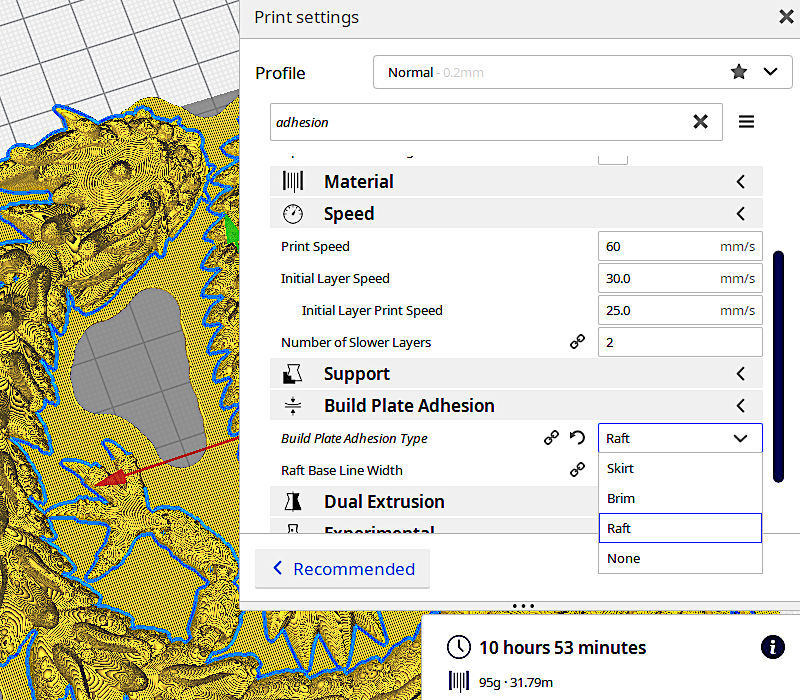
Screenshot: Cura Preview
Also, the preset Coarse 0.4 profile, plus Spiralize Outer Contour setting worked well for printing Vases with a 0.6mm nozzle. A 0.6mm nozzle is ideal for Neptune 3 Plus as quality and printing speed get balanced. Read more about printing with a 0.6mm nozzle below.
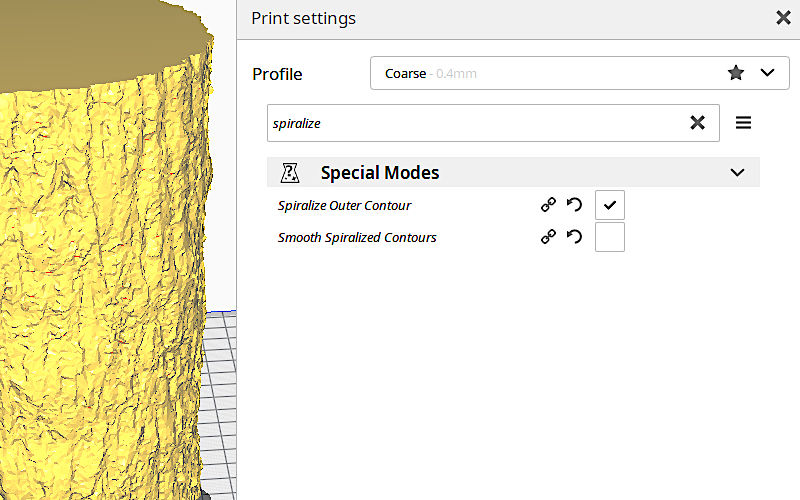
Screenshot: Cura Preview
Color Change. What I could not figure out is how to implement pause on a particular layer height or the M600 command. Extensions – > Post Processing -> Modify G-Code custom scripts didn’t work. I have to mention that this didn’t work with any slicer I tried, namely PrusaSlicer and Cura 5. Sad as I definitely want to play with the different filament colors, especially on such a large and well-performing build plate. I will edit this review if I find a solution.
Test Printing with PLA
Printing with PLA is straightforward. By using Elegoo Cura default Normal Profile Settings with unticked Adhesion, I printed my Post-it Note Holder. There was slight ghosting detected but Glitter Amolen PLA conceals it well.
©3DWithUs – Print & Photo: Max Funkner
Another print was more challenging. Popular in 3D printing at home flexible articulated print-in-place models are difficult to print without a raft. Such models as articulated dragons, for example, may consist of 40+ different joints on the bed. And even if bed adhesion is perfect, then any accidental knock off any single joint by a traveling nozzle may ruin the ongoing 20h+ print easily. The easiest solution to print such objects is to use a raft. Below is Imperial Dragon by Flexi Factory printed in Rainbow Glow-in-the-Dark PLA. The model is scaled to 70% and was printed in about 11 hours.
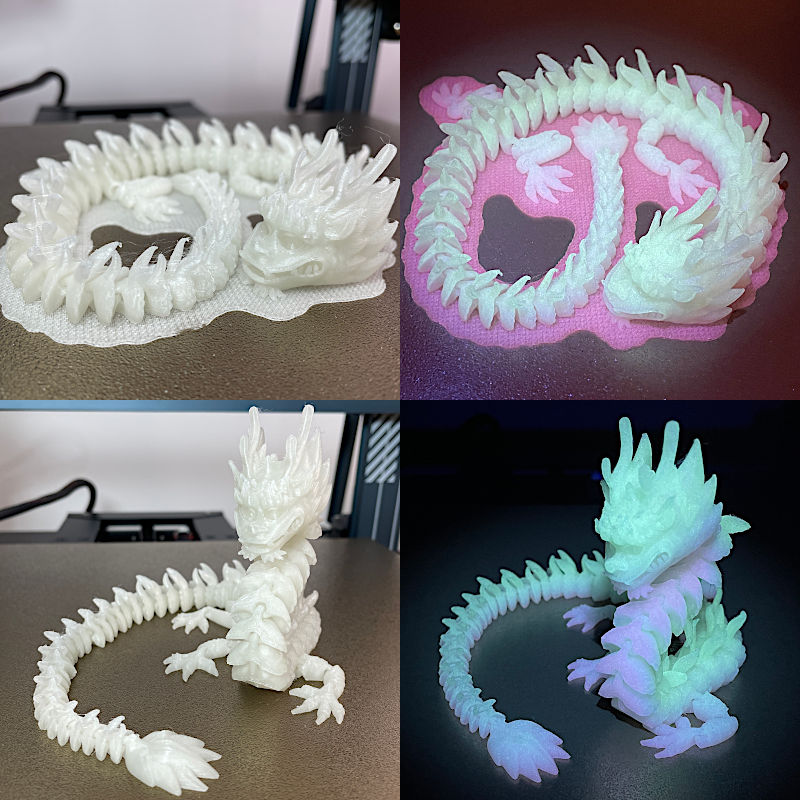
©3DWithUs – Print & Photo: Max Funkner
Another model I printed in dual-color PLA with a 0.6mm nozzle was a vase. The 260mm-tall print came out well but I felt that I missed the dual color pattern. I suspect it is possible to calculate and implement a much better color transition, even for such a big object, as there are some nice prints featured on social media using the same PLA. I have to learn how.
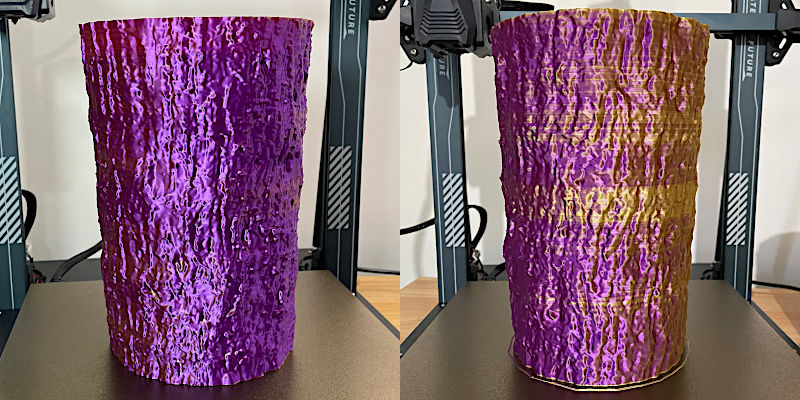
©3DWithUs – Print & Photo: Max Funkner
This model is Giant Redwood Scanned Tree Trunk Vase from the scanned tree trunk collection. I printed this vase also in TPU and Wood filaments, please find the images below.
Test Printing with TPU or Other Flexible Filament
This is where the Direct Drive extruders shine as they perform better than Bowden-type extruders when printing in TPU or other flexible materials. The distance between the dual gears and the melting zone is minimal so no material gets lost during extruding and retracting.
Tree Trunk Vase 3D Printed in Flexible TPU
©3DWithUs – MP4: Max Funkner
This SainSmart TPU is an awesome material and we featured it in our Flexible Filament Guide. Interestingly, the recommended 3D printing temperature is 200–220°C and 40 – 60°C for the build plate. But I achieved the shiniest result when 3D printing in a vase mode with a 0.6mm nozzle at 230°C. The filament fused so well that the walls came out with a level of transparency.
3D Printing with Wood Filament
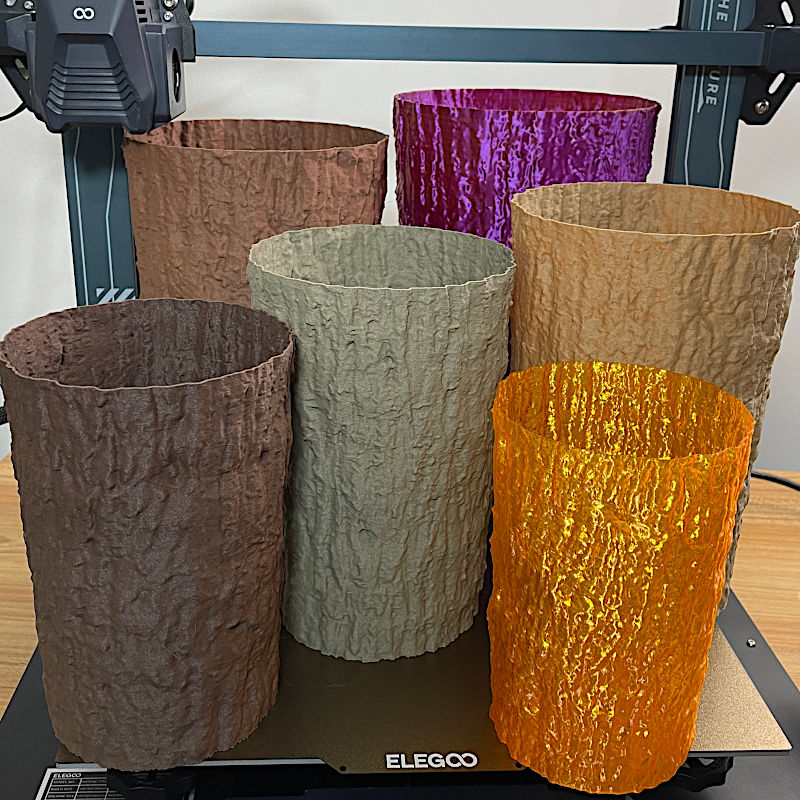
On this website, you can find a lot of content about printing with Wood filament. Featured below are four shades of Timberfill, a wood filament range by Fillamentum. Great material as it feels and smells like real wood. There is a drawback though. This type of material is tricky to print with as it is a composite that consists of PLA and wood particles and it can block the nozzle easily. In my Wood filament guide, there are a few tips and tricks on how to avoid nozzle clogging, and changing to a 0.6mm nozzle is a highly recommended option.

©3DWithUs – Print & Photo: Max Funkner
Before changing to a 0.6mm nozzle, I managed to print a few models of a Slightly Overengineered Olpe Vase by Nat A Cyborg with a 0.4mm one in a vase mode. I would recommend printing in such a delicate filament with a 0.4mm nozzle only in a vase mode. Then the flow is continuous and the nozzle blocking occurs rarely. And even then, in between the prints, I would regularly clean the nozzle by running through a trusted PLA.
Elegoo Neptune 3 Plus was the ideal printer for testing this wood filament range. The Plus volume size and easiness of switching to the wider nozzle in order to print bigger and faster made it work well. As the result, I printed a lot of models on this printer for the Fillamentum Timberfill filament review.
3D Printing with 0.6mm Nozzle
I think a 0.6mm nozzle should be the default nozzle size for a 3D printer with such a big build volume. The print quality is nearly the same but prints come out much quicker. The vases featured in the image below, were printed within a range of 3.5 and 5 hours. Here is the guide with printer settings for different nozzle sizes.
©3DWithUs – Print & Photo: Max Funkner
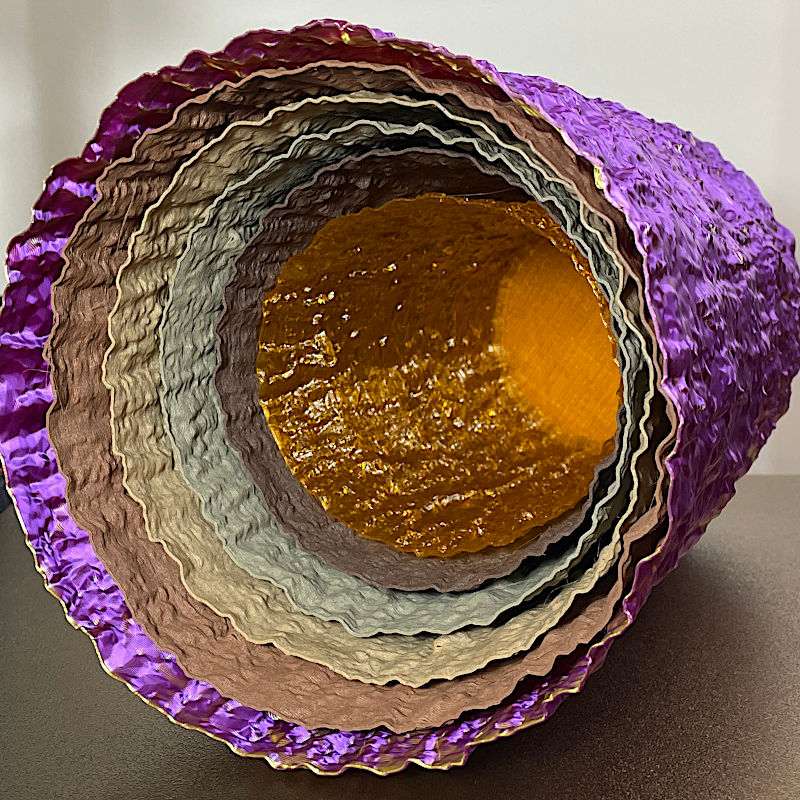
©3DWithUs – Print & Photo: Max Funkner
This model is Scanned Giant Redwood Tree Trunk Vase, a part of the Scanned Tree Trunk Models collection on Cults. A lot of items can be created from such precursor models and from the idea. On 3DWithUs, we have a 3D Scanned Tree Texture for 3D Printing Guide and a video on this subject. Neptune 3 Plus prints such objects without any issues.
Compare to Other 3D Printers
Compare to the similar volume FDM 3D printers in the same $300 price range:
- Sovol SV07 Plus (Review)
- Anycubic Kobra Plus (Review)
- Mingda Magician Pro (Review)
- Longer LK5 Pro (Review)
Compare to the Elegoo Neptune series 3D printers:
Together, the Elegoo Neptune 4, Neptune 4 Pro, Neptune 4 Plus, and Neptune 4 Max constitute the latest products in the Neptune FDM 3D printer series. If some of the machines haven’t been reviewed on our website yet, you can refer to their primary comparison table in the image below to get a general overview.
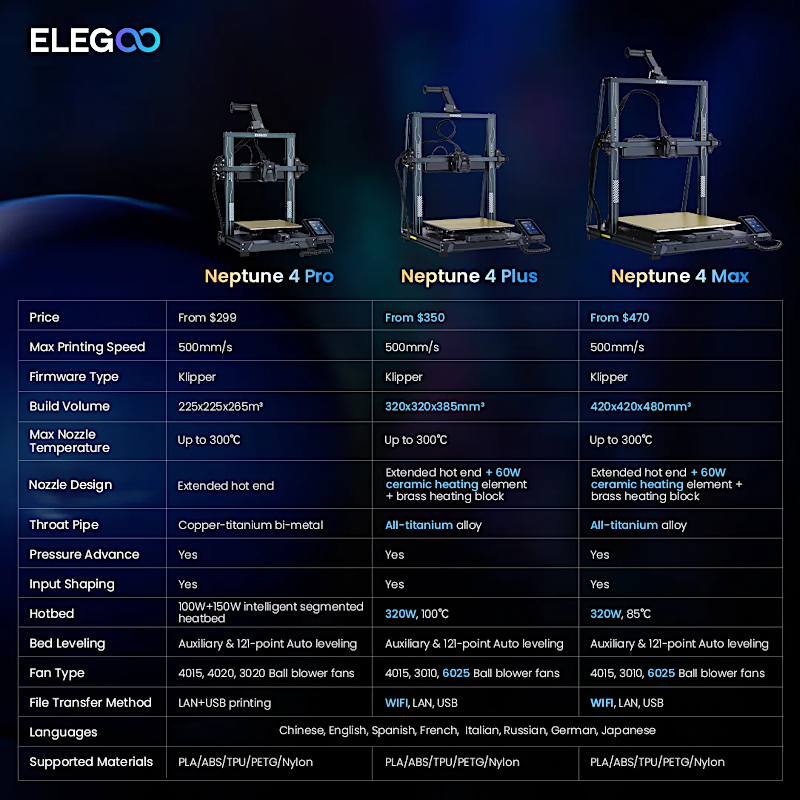
Image: Elegoo
Review Conclusion and Pros & Cons
I was pleasantly surprised by the Elegoo Neptune 3 Plus performance. During my testing, I found out that a big volume on a budget 3D printer doesn’t necessarily mean quality loss. Direct Drive extruder deals with TPU and Wood filament like a boss, and from now on, this is my go-for machine for large prints. The only downside is that I cannot play with color changes. If you know the solution or/and can recommend a custom Elegoo Neptune 3 Plus profile, please leave a comment below.
Compare the Prices & Bundles:
Official Store | Amazon
Elegoo Neptune 3 Plus Review
Review Summary
I was pleasantly surprised by the Elegoo Neptune 3 Plus performance. During my testing, I found out that a big volume on a budget 3D printer doesn’t necessarily mean quality loss. Direct Drive extruder deals with TPU and Wood filament like a boss, and from now on, this is my go-for machine for large prints. The only downside is that I cannot play with the color/filament changes at specific layers.
PROS:
Affordable price
Large volume
Excellent bed leveling and adhesion
Good for TPU and brittle Wood materials
CONS:
No automatic option to pause at the specific layer
Micro SD card – got corrupted
Micro SD card – fiddly to handle