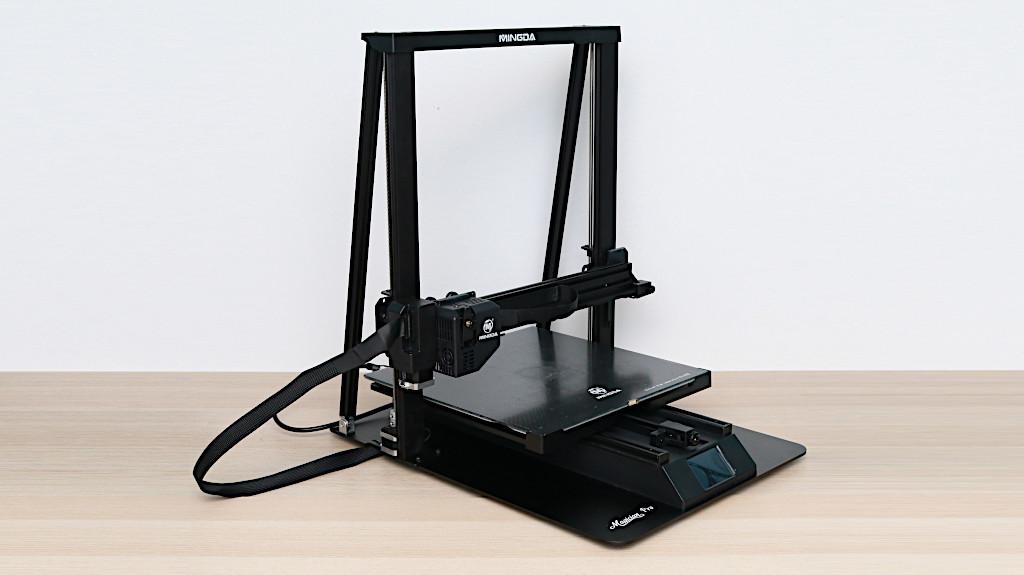
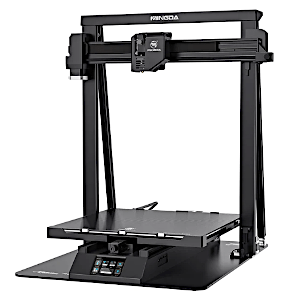
The Mingda Magician Pro is a large format FDM 3D printer that contains features typically only seen in more expensive machines but has a consumer-friendly price tag. The 400 x 400 x 400mm build volume is large enough to handle most oversized pieces, and the Carborundum glass build platform offers excellent adhesion without delamination or warping. The Magician Pro includes only a single print profile for PLA+, and this means additional profiles for larger prints will require manual editing.
Mingda Magician Pro Specifications
Build Volume: 400 x 400 x 400 mm
Extruder: Direct Drive
Bed Leveling: Automatic, 36 Points
Material: PLA, ABS
Build Platform: Removable Carborundum Glass Plate
Connectivity: SD Card, USB, USB-C
Interface: 4.3” Color Touchscreen LCD
Price: $599-639
Affiliate Links:
Amazon
Official Website
The Magician Pro is similar in appearance to other large-format machines like the Kobra Max, but the automatic bed leveling and direct drive extruder give it an edge in performance and capabilities.
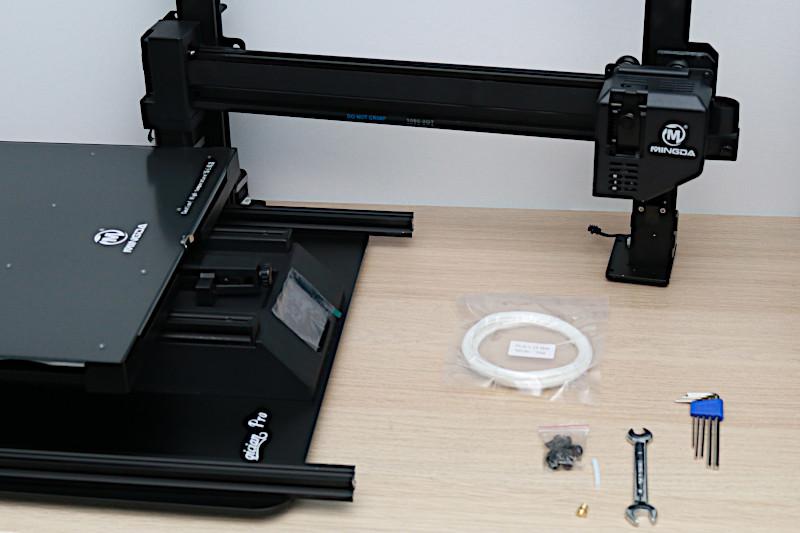
Assembly Process
The Mingda Magician Pro is clearly targeted at the prosumer market, and the fast assembly process shows that Mingda has put time and effort into the unboxing experience. The Magician Pro only requires six screws to bolt the frame to the base, and an additional two screws for the supporting extrusions that prevent the frame from bending. Wiring the Magician Pro is easy, with only a few connections for the Z axis, a ribbon cable for the extruder and X axis, and a sturdy, reinforced cable for the heated bed.
© 3DWithUs – Photo: Andrew Sink
In addition, the frame is designed to allow the bolts to be inserted from the top down, meaning this printer can easily be assembled on a table without flipping it over or on its side. This might not seem like a big deal, but it’s a huge improvement over the experience of assembling similarly sized printers that require quite a bit of maneuvering to put together.
© 3DWithUs – Photo: Andrew Sink
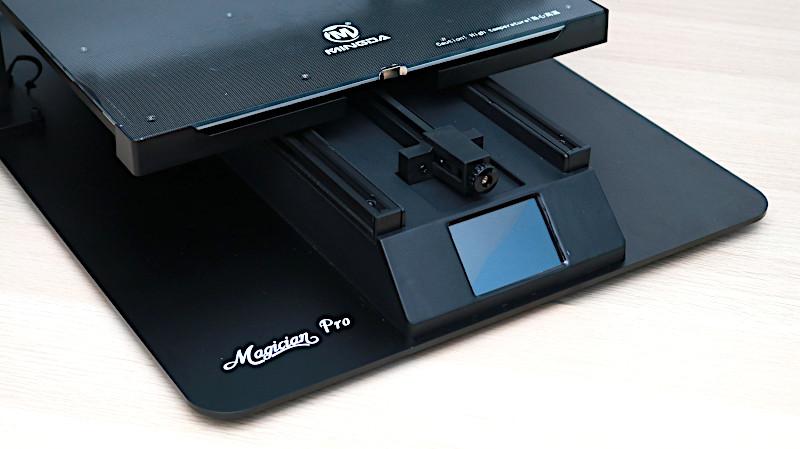
The Magician Pro is a little unusual in its design, and you may have already noticed this from the pictures. Instead of aluminum extrusions (like the Creality Ender 3) or a metal base (like the Mingda D2), the Magician Pro uses a single panel of aluminum as a base and includes the Y-axis, screen, and other electronics in a plastic enclosure mounted directly above it. This metal base gives the Magician Pro an extremely sturdy feel, and the flat black finish of the metal along with the flat-faced aluminum extrusions give the printer a more industrial appearance.
Direct Drive Extruder Module
The Magician Pro uses a direct drive extruder, meaning the motor that drives the filament feeds directly into the hot end assembly. This style of extruder is preferred for elastomeric materials like TPU, which require a constrained toolpath and can’t be easily fed through a long tube without stringing during printing. In addition, the Magician Pro includes multiple part cooling fans in the module as well as a strain gauge for the automatic leveling feature.

© 3DWithUs – Photo: Andrew Sink
The hot end comes equipped with a .4mm nozzle, which I found to be a limiting factor for achieving high print speeds. Given the large volume of the Magician Pro, a large nozzle (like a .8mm) would allow larger parts to be printed in less time, something potential owners of this machine are likely interested in. If you’re interested in learning about the impact changing nozzles can have on print speed, be sure to read our article on changing nozzle sizes.
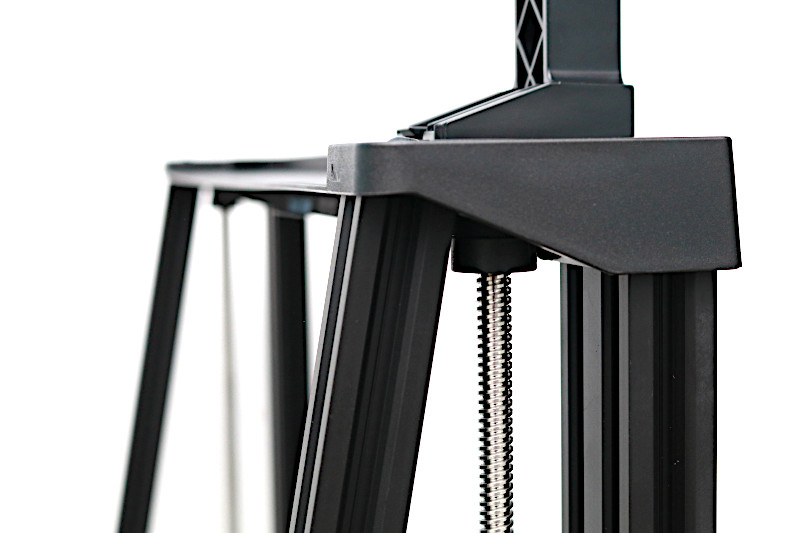
Z-Axis Stability
The 400mm Z height of the Magician Pro is impressive, and something that potential users may be interested in to print helmets, automotive accessories, or other large models. To fully utilize this build height, Mingda has added several features to fully realize the potential of this printer. For instance, the Z axis utilizes two independent motors and threaded rods to drive the Z axis, and also utilizes a synchronous timing belt to prevent them from ascending or descending unevenly, which can cause banding in a part. In addition, two aluminum extrusions extend from the base to the top of the frame to add additional stability and prevent the frame from wobbling or rocking back and forth during printing.
© 3DWithUs – Photo: Andrew Sink
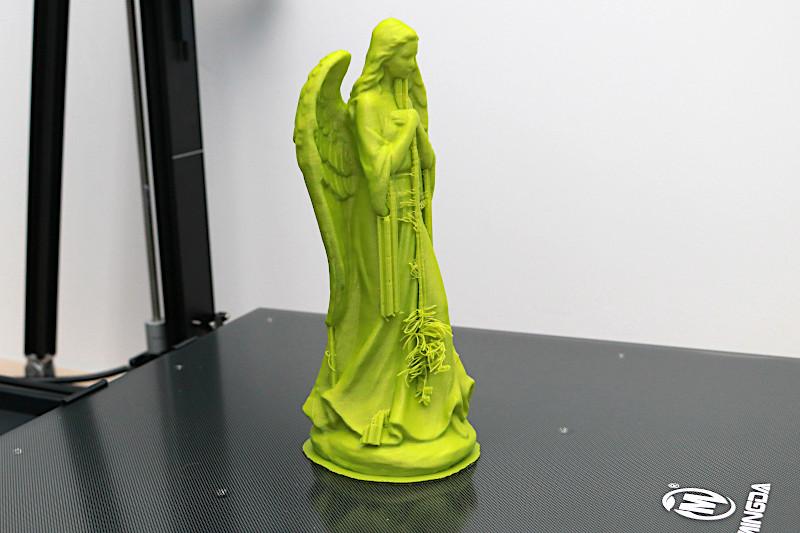
Printing Included Test Print
The Magician Pro includes a single demo model called “Angle.stl”(sic) on the SD Card, and it features a quirk unique to Mingda. Unlike a typical test model that has some internal infill to provide strength and stability during printing, Mingda has included a model that is completely hollow. I’ve seen a similarly hollow model on a Mingda printer before (the Mingda Rock 3), and it seems like a strange choice for a demo. The model also had part of the support structure break off during printing, and I can’t help but feel like a model with no support material and some infill would have made a more impressive demo. The angel model is about 200mm high and takes about four and a half hours to print, which feels appropriate for a printer this size.
© 3DWithUs – Print & Photo: Andrew Sink

© 3DWithUs – Print & Photo: Andrew Sink
Cura Proffile and Instructions
The Mingda Magician Pro ships with a copy of Cura 4.13.1, and includes instructions on how to manually create a printer profile. I used this included copy of Cura as well as the included information for this review, and found the slicer worked very well for general printing.
Preview: Cura Slicer
NOTE: Since the writing of this review, Mingda has included a profile for the Magician Pro on version 5.0.0, which was not tested.
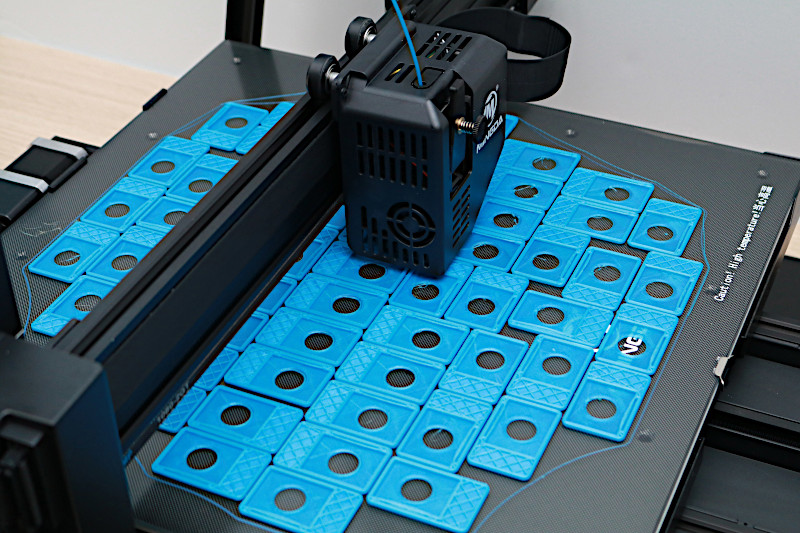
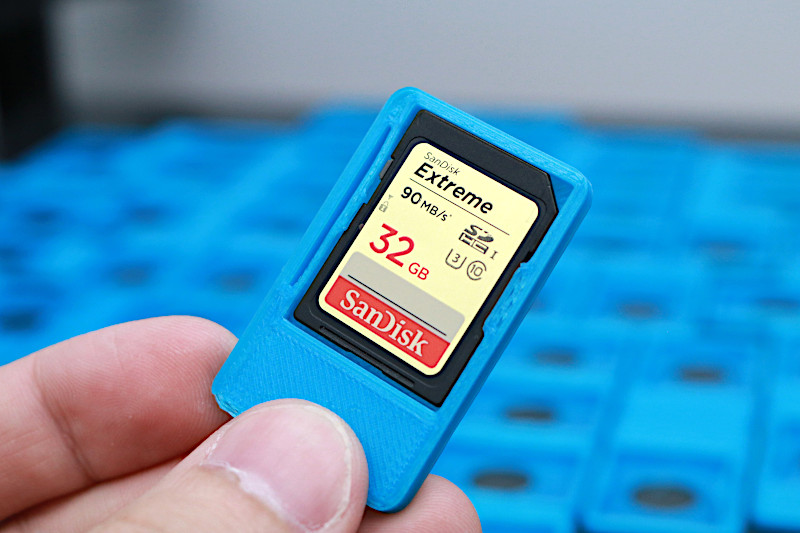
3D Printing Multiple Models on the Mingda Magician Pro
The large build area of the Mingda Magician Pro is a compelling feature for anyone interested in printing large numbers of small parts simultaneously. The SD card holder with built-in label by Nem is a perfect example; it’s a small part with a low build height that can be efficiently packed on the build platform of the Magician Pro. For this review, I printed 61 SD card holders simultaneously, which took a total of 16 hours and 51 minutes, which is a cycle time of about 16 minutes per part.
© 3DWithUs – Print & Photo: Andrew Sink
© 3DWithUs – Print & Photo: Andrew Sink
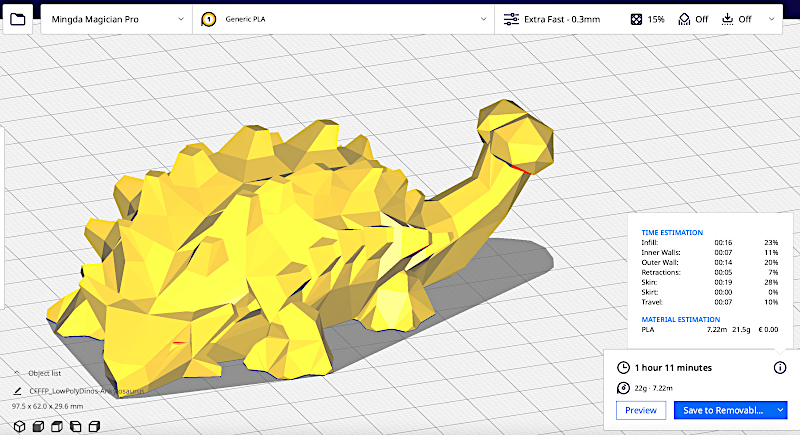
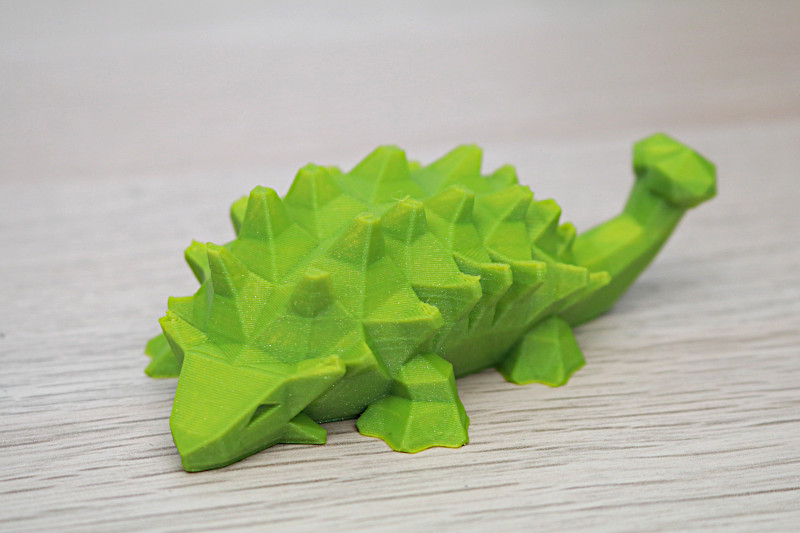
Other Test Models
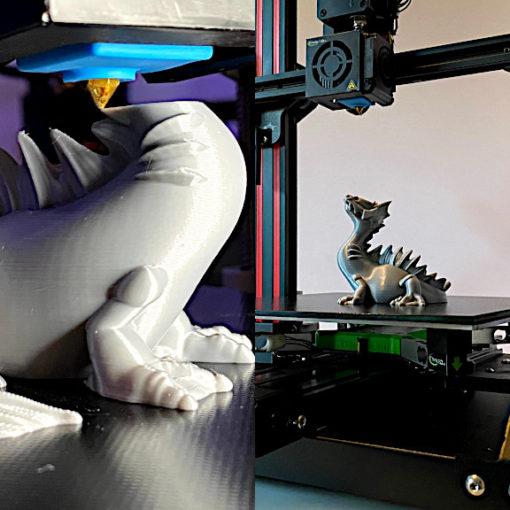
Models like the Low Poly Dinos by the 3D Printing Professor also printed well, with fine details resolving at a .2mm layer height using the default speed values provided by Cura.
© 3DWithUs – Print & Photo: Andrew Sink
I printed several of these models for this review, and was impressed with the overall quality of the models, with the layers appearing clean and consistent when printed with Printed Solid Slime Green Glitter PLA.
© 3DWithUs – Print & Photo: Andrew Sink
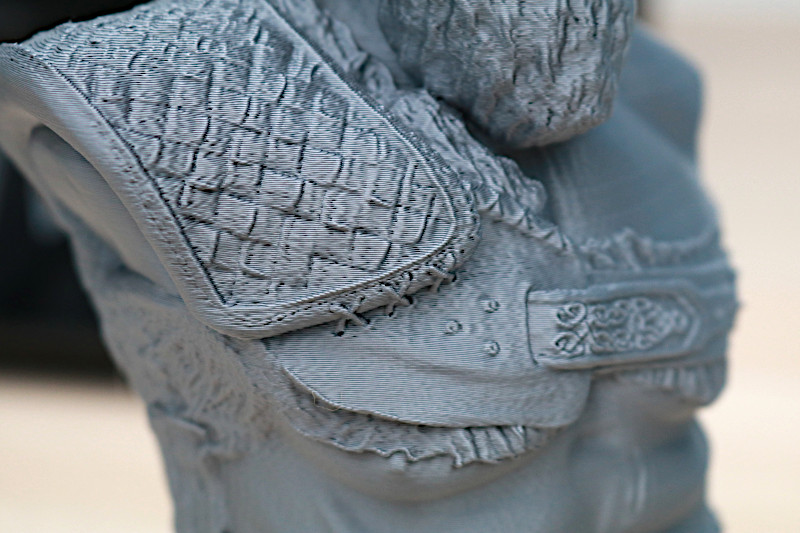
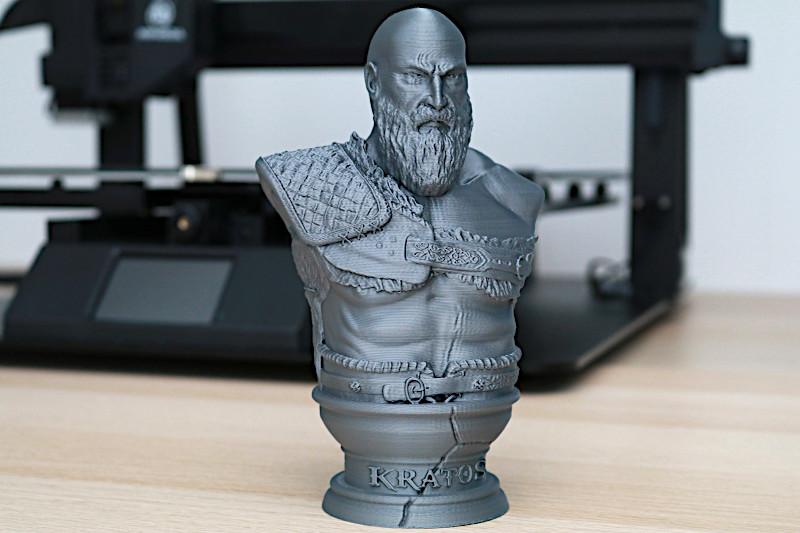
The Kratos bust by Fotis Mint also looked fantastic, with a high level of detail showing on the various textures of the model.
© 3DWithUs – Print & Photo: Andrew Sink
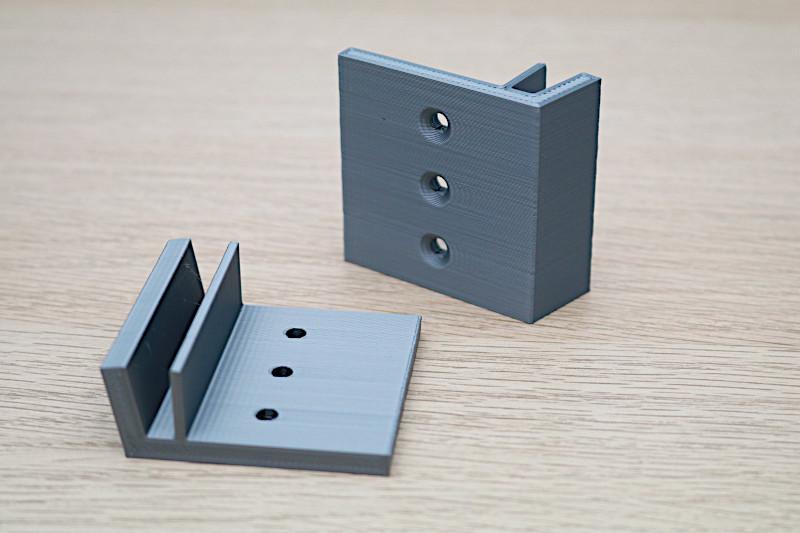
I also printed a few brackets for a photography stand that I designed, and they were clean and consistent at a .28mm layer height.
© 3DWithUs – Print & Photo: Andrew Sink
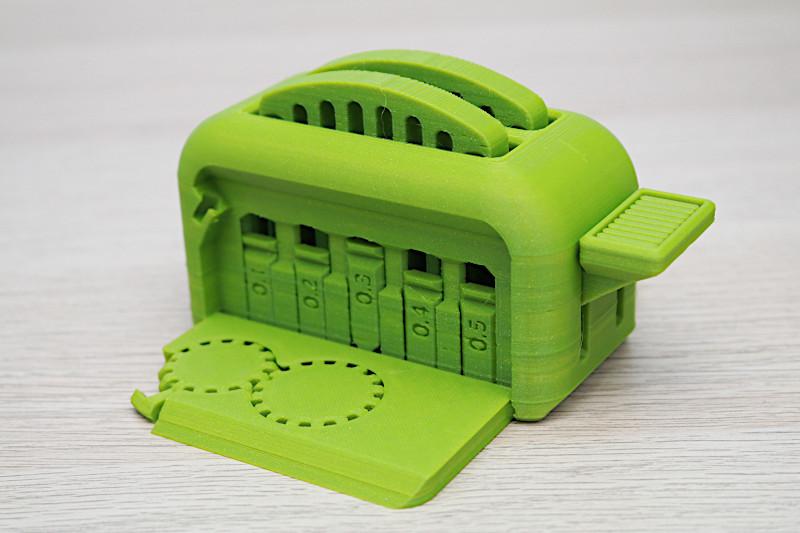
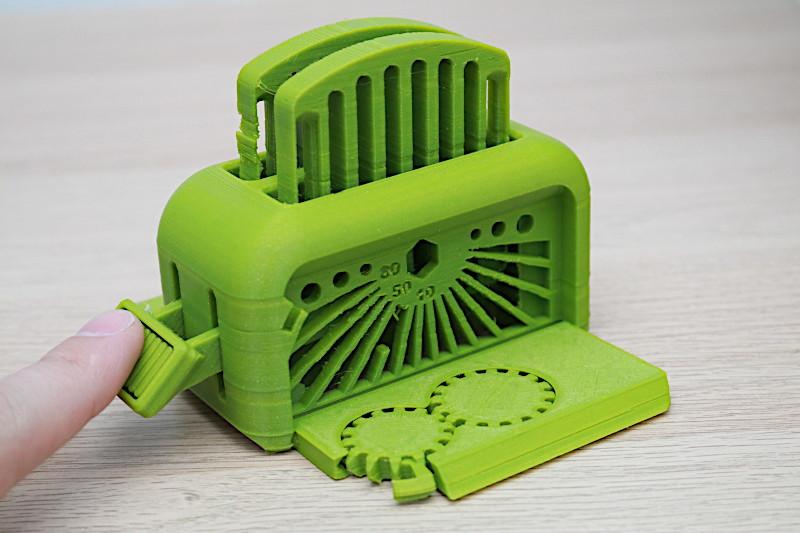
The Torture Toaster by Clockspring has a few issues, and some of the fine features broke off during printing. The tolerance test at .5, .4, and .3mm all moved freely, but .2mm and .1mm were locked in place. The lack of an optimized profile (or multiple profiles) for this printer in Cura meant that it was hard to determine if the issue was with the hardware or software. An easy fix from Mingda would be to include several print profiles (fast, fine, draft, etc.), which would likely be expected at this price point.
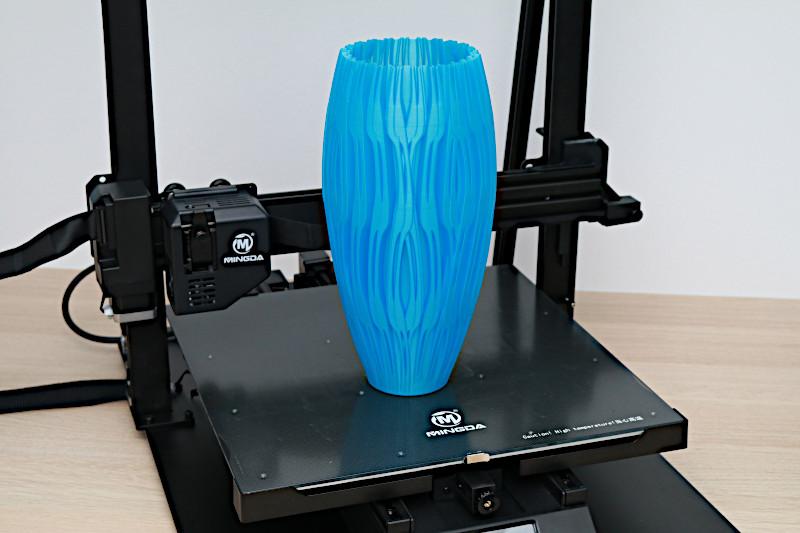
Vase Mode Printing on the Mingda Magician Pro
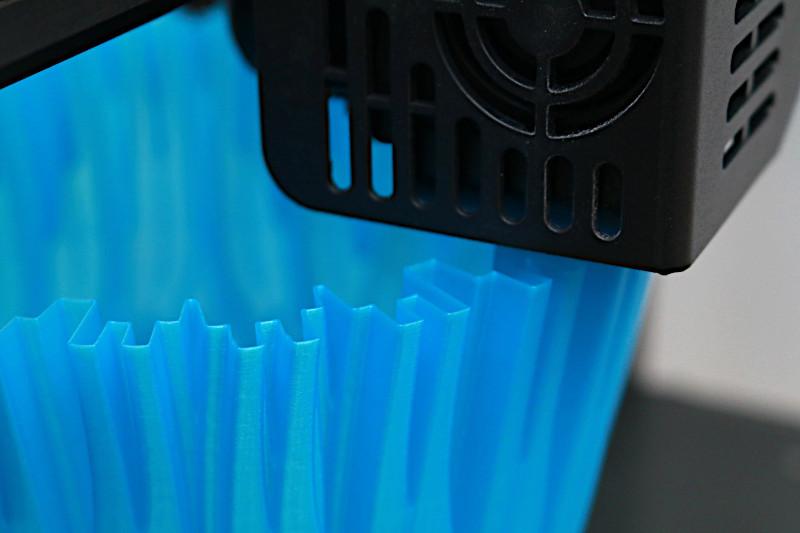
Vase mode (or spiralized contour mode) allows a printer to create a tall part quickly by printing only a single toolpath that runs in a helical contour around the perimeter of the part. The 400mm build height of the Mingda Magician Pro and reinforced gantry show that the printer has been designed to print tall parts, but the included .4mm nozzle means that tall parts will take longer to print if printed with multiple contours and infill.
Screenshot: Cura
© 3DWithUs – Print & Photo: Andrew Sink
© 3DWithUs – Print & Photo: Andrew Sink
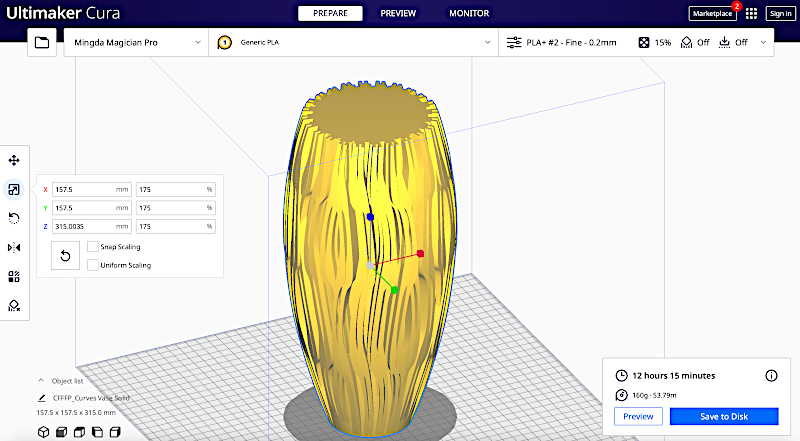
Using Prusament Azure Blue, the Curves Vase by 3DPrintbunny is a perfect test for this style of 3D printing. Sliced in Cura and scaled up to 175%, this model took just over 12 hours to print. During a review, it’s important to test out the ability of the machine to fully utilize the build height, and using vase mode allows printing of tall parts without the long build time typically associated with other taller prints.

© 3DWithUs – Photo: Andrew Sink
Compare to Other 3D Printers
Compare to the similar volume FDM 3D printers in the same price range:
Compare to the Mingda Magician series 3D printers:
Conclusion
The Mingda Magician Pro is clearly aimed at the prosumer market, with auto-leveling, direct-drive extrusion, and a large build volume all being features that you would expect on a $2,000+ 3D printer. The Magician Pro performed well during this review, and the relatively low cost makes it an even more impressive machine. The large footprint of the machine means that it won’t fit easily on most standard 2’x4’ desks, and it is likely more suited for an industrial space or a large workshop. I was impressed with the Magician Pro, but still found myself wishing the machine included a large nozzle for printing large parts in less time.
The Mingda Magician Pro is currently available starting at $639 on Amazon as well as direct from Mingda starting at $599.
Price: $599-639
Amazon
Official Website
Mingda Magician Pro Star Rating
Review Summary
The Mingda Magician Pro is a large format FDM 3D printer that contains features typically only seen in more expensive machines but has a consumer-friendly price tag. The 400 x 400 x 400mm build volume is large enough to handle most oversized pieces, and the Carborundum glass build platform offers excellent adhesion without delamination or warping. The Magician Pro includes only a single print profile for PLA+, and this means additional profiles for larger prints will require manual editing.
The Magician Pro is similar in appearance to other large-format machines like the Longer LK5, but the automatic bed leveling and direct drive extruder give it an edge in performance and capabilities.
PROS:
– Fast and easy assembly
– Large build volume and sturdy frame
– Silent stepper drivers and quiet fans allow for quiet printing
– Live adjust Z (baby-stepping) enabled for easy adjustment during printing
CONS:
– Stock .4mm nozzle makes large prints a slow process
– Lack of included print profiles will frustrate beginners and advanced users