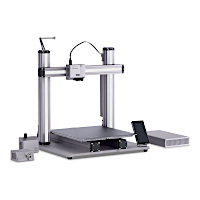
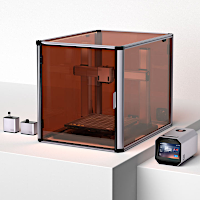
A few years after the initial launch, Snapmaker 2.0 and then Snapmaker Artisan 3D Printer, Laser Cutter, and CNC Machine remain the best 3-in-1 solution on the market. Snapmaker 2.0 A350T is a large-volume machine from the Snapmaker team. This record-breaking and award-winning company won hearts with their quality products. In this detailed product review, we will test three modules from different disciplines, plus an enclosure with the air purifier. In past years, we have also reviewed a few add-ons separately; now, you can find them in this updated article. Let’s see what the whole 3-in-1 combination is capable of and outline the Pros and Cons.
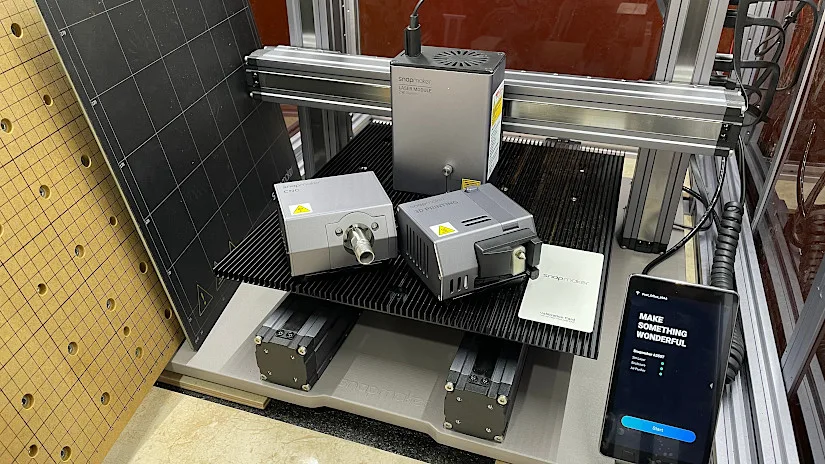
Recent upgrade. While visiting a trade show, I saw and liked the quick swap system so much that I wanted to have it installed on my A350T as well. Now, switching between three disciplines — 3D printing, laser engraving and cutting, and CNC — has become very easy and time-efficient. Namely, it changed from 20-30 minutes and a lot of screwing to less than a minute for module and build platform swaps.
Table Of Contents
- Specifications
- Unboxing and Assembly
- Quick Swap Upgrade
- Luban Software Review
- 3D Printing Module Review
- Laser Engraving & Cutting Module Review
- CNC Module Review
- Enclosure and Air Purifier
- Compare to Other 3D Printers
- Conclusion and Pros & Cons
Snapmaker 2.0 A350T
Price: $999 – 1,799
Product affiliate links: 3DWithUs is supported by its audience. Purchases via some links may earn us a small commission at no extra cost to you. This helps us to continue bringing you high-quality content. Our guides and reviews remain unbiased and independent.
Snapmaker Artisan
Price: $2,999
Snapmaker 2.0 A350T Specifications:
Machine Dimensions 495 × 506 × 580 mm
Modular 3-in-1 System
Print Build Volume 320 × 350 × 330 mm
Magnetic Sheet Heated Bed
Laser Work Area 320 × 350 mm
Laser Power 1600mW, 10W optional
CNC Work Area 320 × 350 × 275 mm
Carving Module with ER11 Collet
Custom 3-in-1 Software
Wi-Fi Connectivity
Optional:
Enclosure Dimensions 626 × 820 × 603 mm
Enclosure Weight 19.3 kg
“A350T/A250T has several upgrades based on Snapmaker A350 and A250, offering a faster and quieter printing experience.”
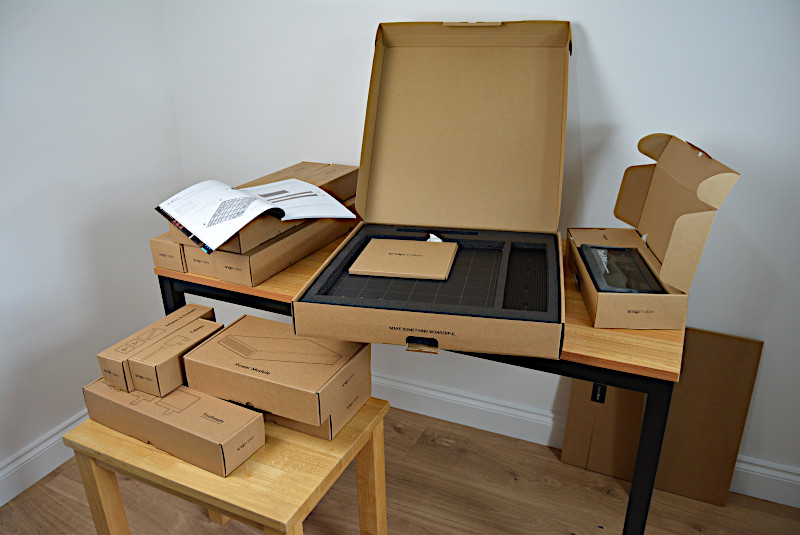
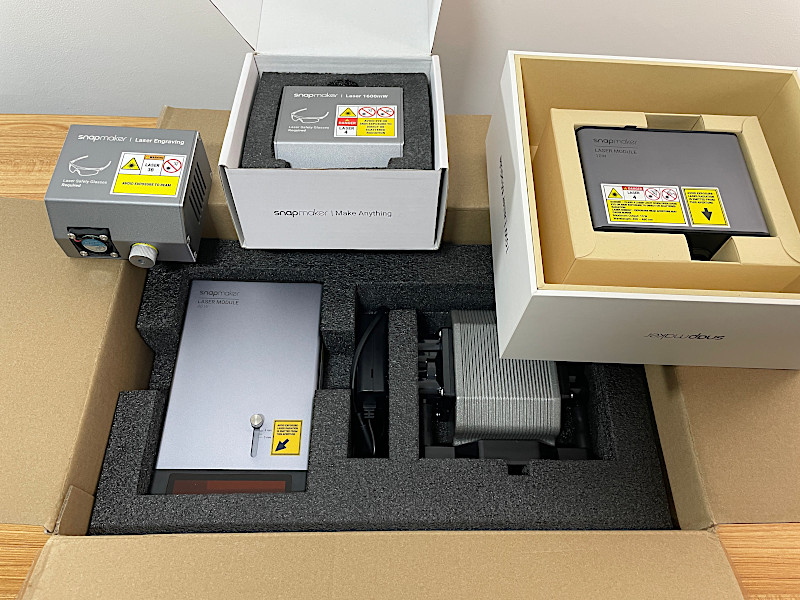
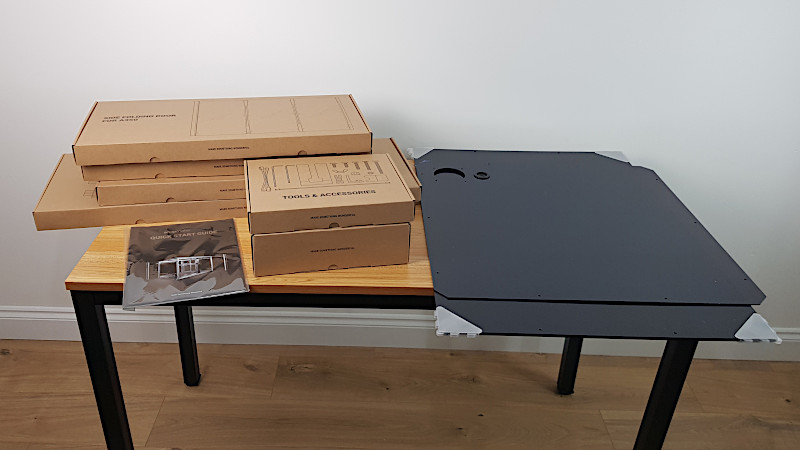
A350T Unboxing and Assembly
Both the machine and enclosure boxes are big and heavy. They were all packaged well, so no damage was done during transportation. To unpack this beast, I needed some extra space, as one table is not enough.

©3DWithUs – Photo: Max Funkner
©3DWithUs – Photo: Max Funkner
– Toolbox. A handy plastic toolbox is provided to keep nuts and screws, etc. It is quite helpful as there are many parts needed for such disciplines as CNC carving, such as clamps and router bits. It is good to keep all product-related items together. In the toolbox, there is everything we need for the assembly and operation. A familiar and very handy hex-key driver is one of the items. To assemble a machine with a regular hex key would be laborious.
– Module Box. I would strongly recommend keeping this neat peace of packaging to store the modules safely.

©3DWithUs – Photo: Max Funkner
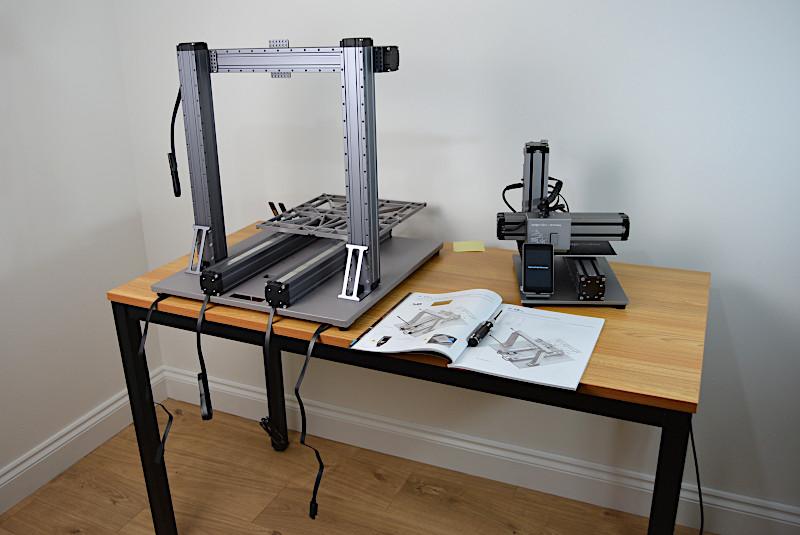
Basic Structure Assembly
The instructions provided are well thought through and straightforward. I found it easy to follow them. The whole procedure took me around 2 hours, and as I kept taking pictures throughout the process, it took longer than it otherwise would. Size-wise, I could not resist comparing the A350T with the Snapmaker Original.
©3DWithUs – Photo: Max Funkner
– Linear modules. These are the updated units. I’m not sure if the previous version had any issues. I saw some reviewers shaking the print bed to check for robustness. I can say that my assembled bed felt very stable.
©3DWithUs – Photo: Max Funkner
©3DWithUs – Photo: Max Funkner
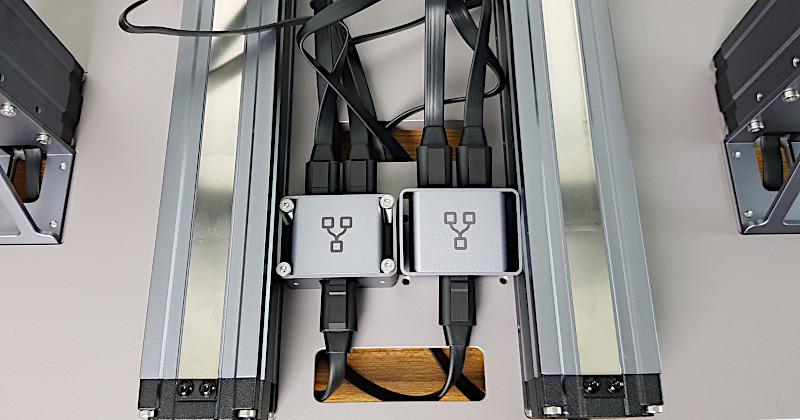
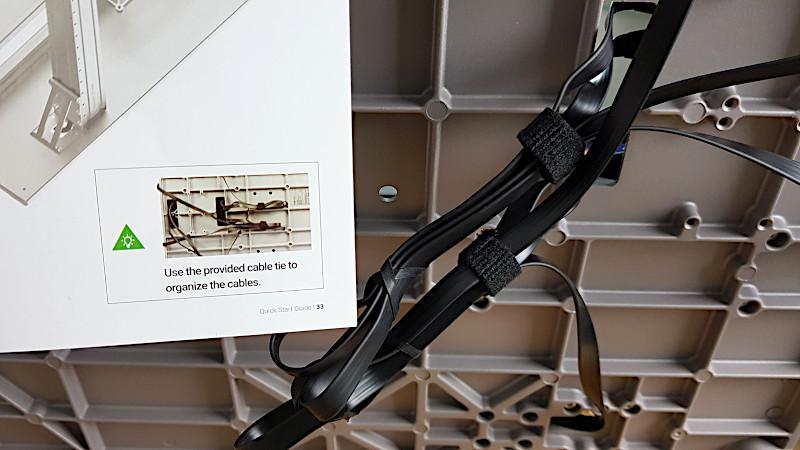
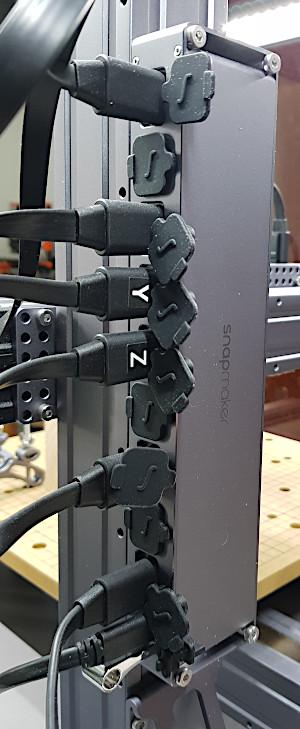
– Cables. I wish I could secure these cables to the base. I guess this is a DIY “to-do” task, or maybe it’s OK to leave them as they are. The machine is pretty heavy, and it presses on the cables hard, so there is no chance that these cables can get loose.
Note: The DC power cable (to power a module) looks similar to others, but the socket is different. It is easy to confuse and try to put the wrong cable into the wrong socket.
– Dust protection. I have never seen such cables and sockets before. Together with the Controller’s dust plugs, it shows that this machine should be strong against CNC dust and smoke excessive residues.
The same as in the instructions, once the basic structure assembly is completed, there are 3 functions to pick from to continue. I would say switching between a 3D printer, Laser, and CNC mode is about a 10-20 min job. A lot of screwing and unscrewing is involved, mainly because of securing the work area/build plates.
– Touch Screen. It’s very straightforward and easy to use. I wish there were more “Tuning Live” functions, like “Filament Flow Rate” or “Fan Speed” settings. Apparently, the Snapmaker team aims to simplify things for regular users. Extra advanced/expert settings could be intimidating for casual users. Nevertheless, I wouldn’t mind if these features were added sometime in the future.
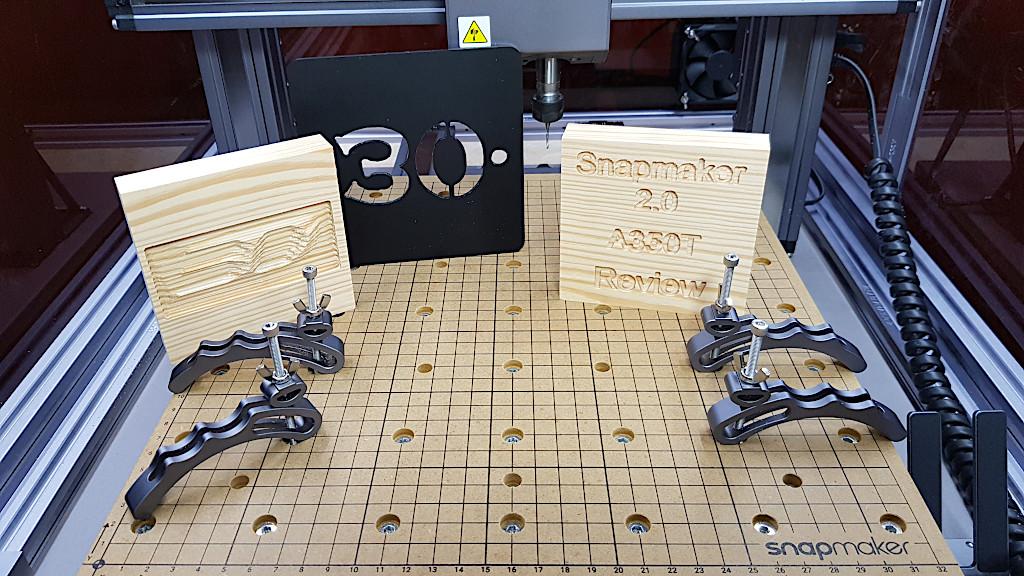
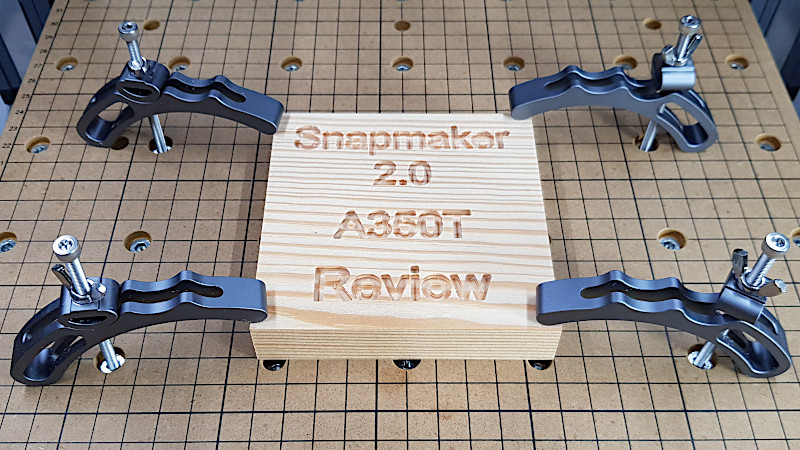
Quick Swap Upgrade
While visiting a trade show, I saw and liked the quick swap system so much that I wanted to have it installed on my A350T as well. Now, switching between three disciplines — 3D printing, laser engraving and cutting, and CNC — has become very easy and time-efficient. Namely, it changed from 20-30 minutes and a lot of screwing to less than a minute for module and build platform swaps.
©3DWithUs – Photo: Max Funkner
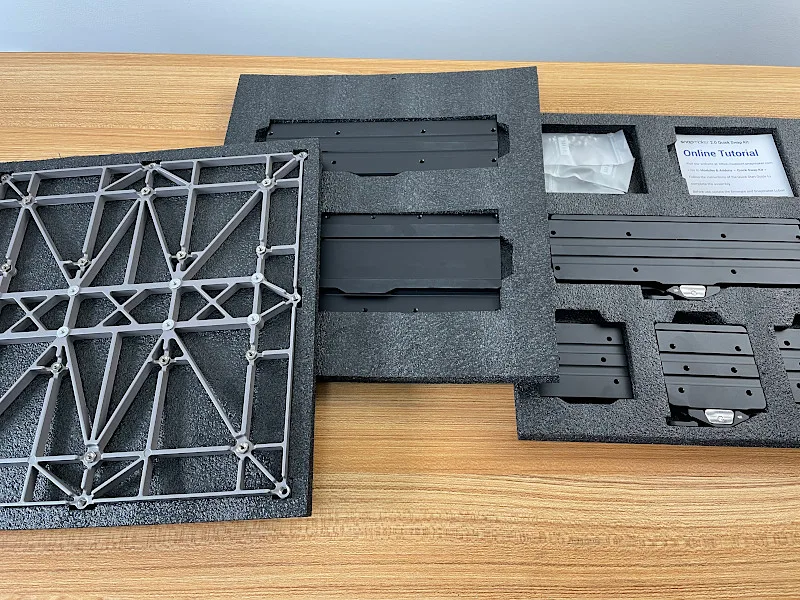
The Snapmaker Quick Swap Kit can be purchased on the Official Website and on Amazon. When unboxed, three sheets of parts were inside.
It took quite an effort to install it, as I had to take the printer out of the enclosure and keep it tilted while installing the main build plate holding bracket. Then, I installed all other brackets on all three build plates, namely 3D printing, CNC, and laser cutting platforms. It took me approximately 1-2 hours to install all the needed parts. The Quick Swap Kit installation guide provided by Snapmaker teams came in very handy.
WiFi – Say “Bye” to a USB Stick
It is possible to use the machine without WiFi if none is available or if there are other concerns, for example. Initially, I started using USB, the old way, but when I switched to WiFi for the updates, I couldn’t see myself going back to USB. Especially with an enclosure. Leaning or opening the side door in order to reach a USB socket felt like some unnecessary and easily avoidable effort. Also, Wi-Fi automatically updates to the latest firmware for all three modules (3D printer, Laser, and CNC). This is not done in one go, but every time, I install a different module on the machine.
– Firmware Update. After a couple of years, I struggled to update the firmware via Wi-Fi, so I used a USB stick. Here are all Snapmaker’s latest drivers, software, and firmware updates.
If needed, G-codes generated on other sophisticated slicers, like Simplify3D (3D printing) or LightBurn (Laser Engraving/Cutting) software, can be transferred via the Luban interface.
Luban Software Review
The first time I used Snapmaker’s Luban was a few years ago. Since then, the software has become much more stable, faster, and easier to use. Of course, it won’t replace such sophisticated and constantly developed slicers as Cura, PrusaSlicer for 3D printing, and LightBurn for laser jobs, but Luban is more than enough for beginners. I would say its simplicity is even beneficial and generally less intimidating for the less experienced.
As I mentioned above, with the Wi-Fi function, the Luban software is actively used as a hub to transfer the G-code files to the machine.
When reviewing Snapmaker 2.0 A350T, I tested all three functionalities in at least three tests per each, and here are my thoughts.
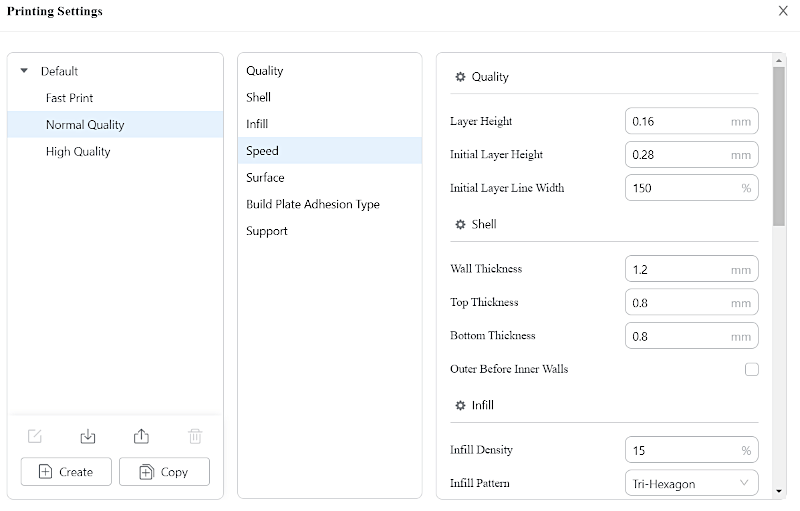
Luban 3D Printing Settings
I was pleased to find a Z-HOP setting in the Luban software. It is a very important setting for articulated dragon models, for example. The filament FLOW rate also has to be tuned for other brands, non-standard filaments, or experimental filaments.

Screenshot: Luban
Screenshot: Luban
More tests and settings in the 3D Printer Module review.
Luban Laser Cutting and Engraving Settings
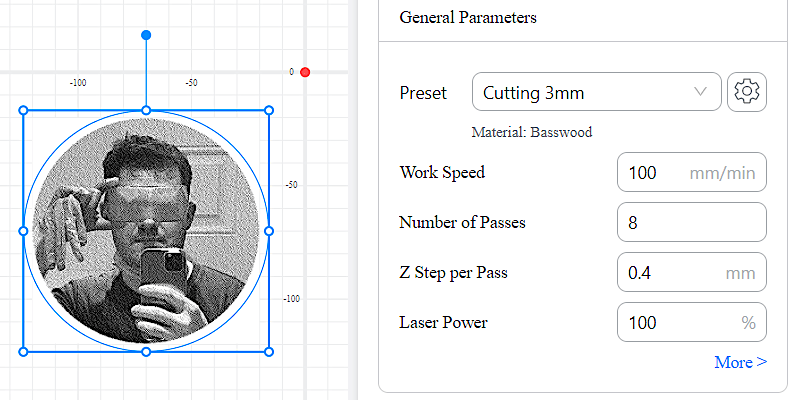
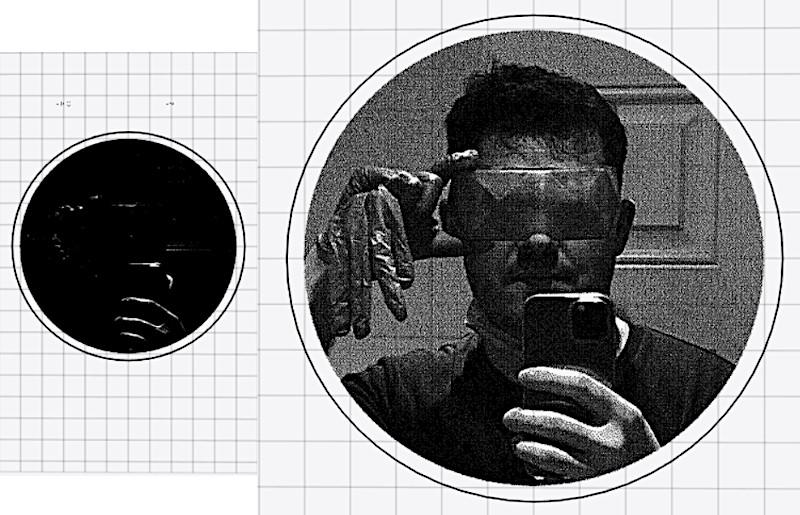
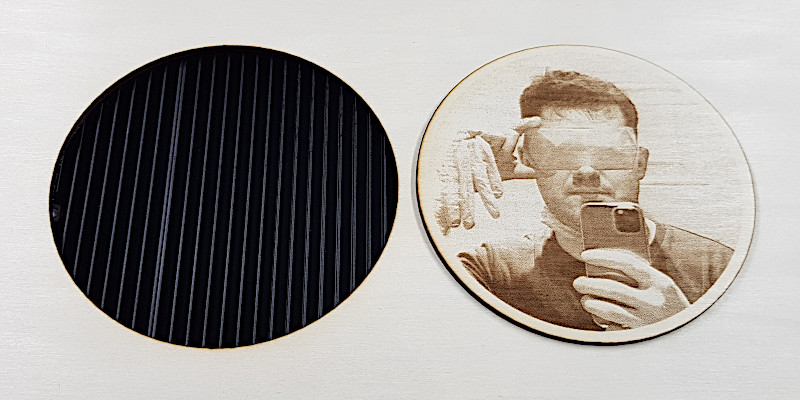
For me, as a casual user, the Laser section in Luban for setting up cutting and engraving was enough for my product testing projects. The default options are good for engraving, and I turned my profile picture into a coaster with no problem. The settings windows in the Process section are straightforward. A cogwheel brings up an additional Preset window for finer tuning. There is an extra explanation for each setting when the mouse hovers over it. Also, there are the recommended settings on Snapmaker’s page.
Screenshot: Luban
– Preview. Initially, it is confusing to see a completely blacked preview. When zoomed, there is a clearer picture. But it is still confusing, and it doesn’t give clarity on what the end result will look like. So I would recommend practising on the smaller, short engraving jobs to get the feel of the brightness, contrast, and material as well.
Screenshot: Luban
– Timer. If the 3D printing timer was OK, then it was inaccurate for the laser jobs, but overall, it gives an idea of whether the job will take 2 hours or 20 hours.
– Materials. There is a wide range of materials for laser cutting and engraving on the official website
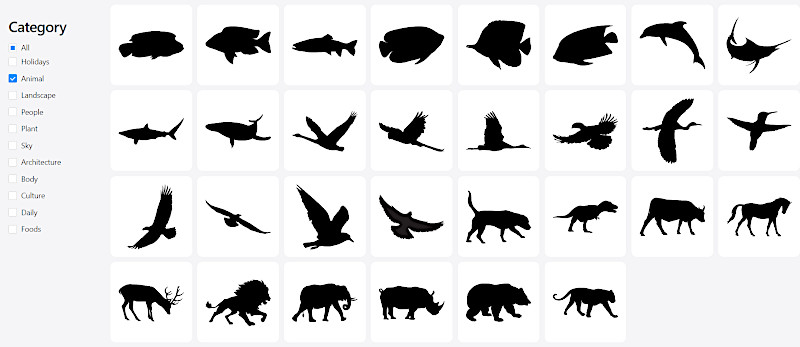
In my latest Snapmaker 40W Laser Module review, I featured a massive collection of quick templates and designs ideal for creating logos and banners. The full collection is readily accessible via ‘Insert Shape—Online Library,’ allowing you to add designs to your workspace effortlessly.
Screenshot: Luban
And of course, I quickly created a file by placing two templates together and applying the right size to the hexagon. Then, it took me less than a minute to laser cut it. Here is the result:
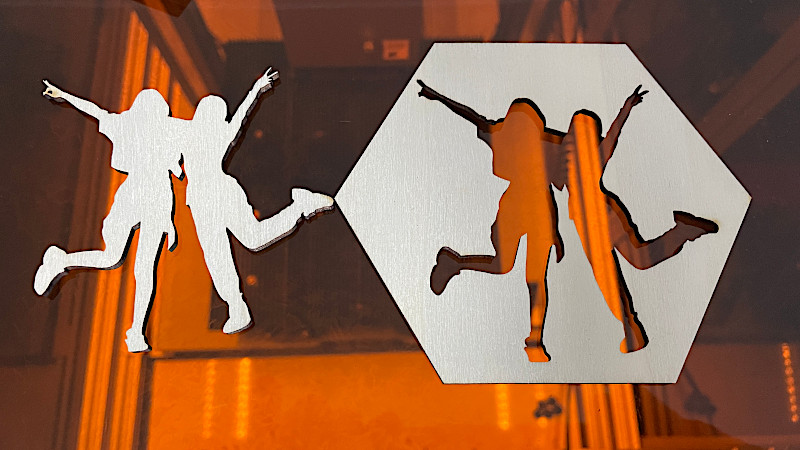
©3DWithUs – Photo: Max Funkner
More tests and settings in the Laser Module review.
Luban CNC Settings
Luban CNC area also saw a few improvements. The Toolpath and Simulation previews give a clear idea of what will happen. I would recommend watching the timer when working on the test objects.
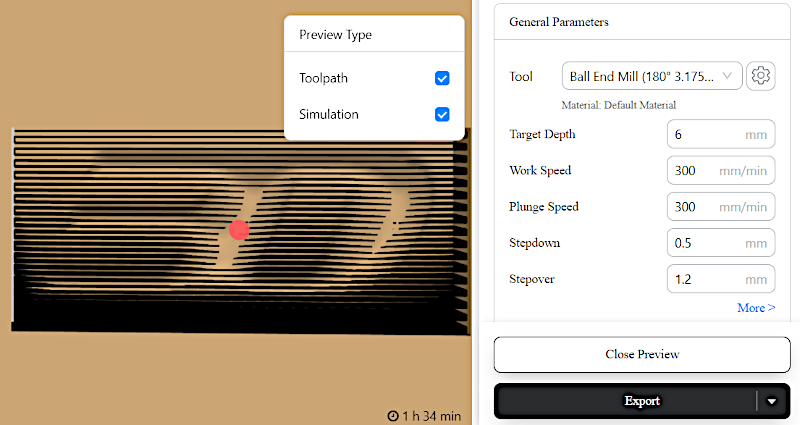
Screenshot: Luban
More tests and settings in the CNC Module review
3D Printer Mode and Module Review
If you are eager to try all three functionalities on any Snapmaker 3D Printer, then the 3D printing mode should be tried first, as it is the cleanest compared to Laser and CNC. I managed to print 20+ hours of the dragon models, along with some quick test files. In order to test the full (320 × 350 × 330 mm) print volume, I would love to have a hot end with a larger diameter nozzle.
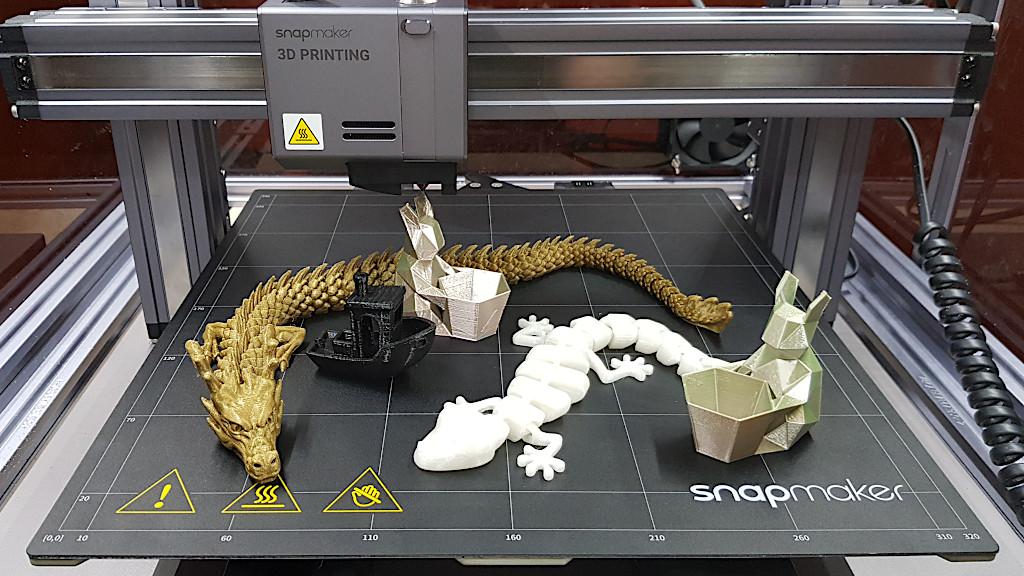
©3DWithUs – Photo & Prints: Max Funkner
– Extruder. Snapmaker extruders became more sophisticated. Now, there is access to filament-pushing gear. The feature is highly welcome as it makes it easier to load the filament. Previously, with the button system, it was slightly complicated. The button was hard to push, and the filament had to be straightened even with the slightest curve. A new Dual Extrusion 3D printing module is available for purchase via the official website.
Snapmaker Extruders: Before – After
©3DWithUs – MP4: Max Funkner
To our slight disappointment, we cannot use a new extruder on our previous small machine as the wires and sockets are different.
– Spool Holder. Looks neat and works well in its original position (attached to the printer). But I am really concerned about leaving it on the side of the enclosure. When we were printing overnight and had to leave a 1 kg spool rotating on the spool holder, I was afraid that either the filament would snap at some point while going through the hole in the side of the enclosure or the extruder gear would fail to pull it through. It worked fine, but it is possible to look up the alternative DIY spool options, including with PFTE tube, if you dig through the official forum.
– 3D Print Bed. The automatic bed levelling, a heated bed, and a flexible sheet are all welcome features for comfortable printing. It takes longer to heat up this big volume (320 × 350 × 330 mm), though. I had no bed adhesion issues so far. Removing the print from the cooled-down sheets was also easy.
Vibration and Noise Test – Solutions
In its original state, there is no way I can leave this beast printing overnight. The noise and vibration levels are tolerable for small jobs only. So, the enclosure and the noise dampers are important to have here.
Measuring the noise levels of printing on Snapmaker A350T
©3DWithUs – MP4: Max Funkner
For every FDM printer I have I get some sort of the noise and vibration-cancelling system. Usually, it is in the form of 3D printed in PLA/PETG noise-cancelling dampers. It was super easy to set up such for Snapmaker Original, because it was small, but dealing with A350T is a different matter. Together with the enclosure for A350T, to reduce the noise further, I used the packaging material and 4 rectangular tiles as a noise damper system at the base.
©3DWithUs – Photo: Max Funkner
With the setup above, the app displayed the reduction of decibels by 10-ish to 50. The external DC power box was still noisy, but due to the reduced vibration on the floor, A350T’s presence was not felt as much anymore. As I tested further, I left Snapmaker printing an articulated dragon overnight without much of the noise or vibration issues. And again, there are more advanced DIY ideas circulating on Snapmaker’s official forum.
Read more about the Enclosure below.
3D Printing Test
– Benchy. Filament: Snapmaker PLA, Settings: Luban Normal Preset. I am happy with the result.
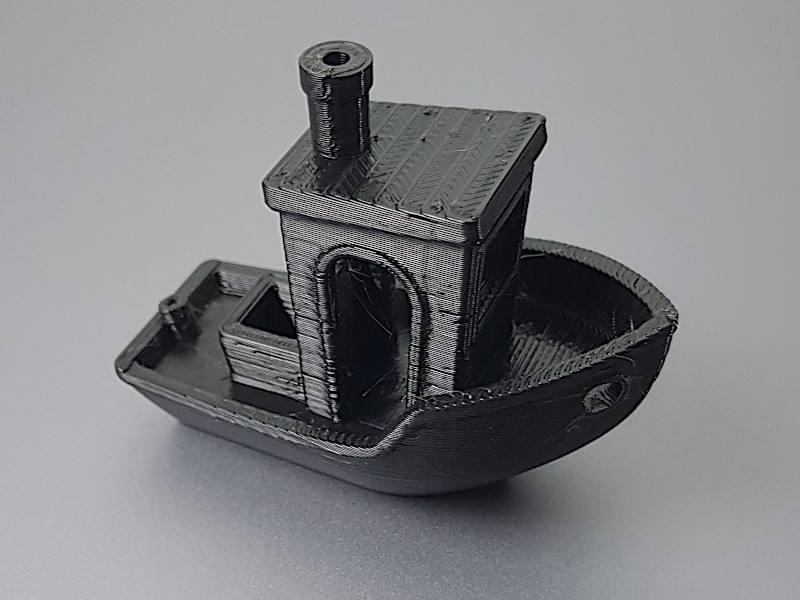
©3DWithUs – Photo & Print: Max Funkner
– Low Poly Bunny. SUNLU Silk PLA, Settings: Luban Normal Preset vs Prusa Slicer profile by William Bosacker. I wasn’t happy with the initial result and tried again with the Prusa Slicer profile tunned for Snapmaker A250 and A350 that I found on the Snapmaker forum. I think I could get better results with the Luban software, but more time for tuning and testing was required, and this would make this 3-part review even longer.
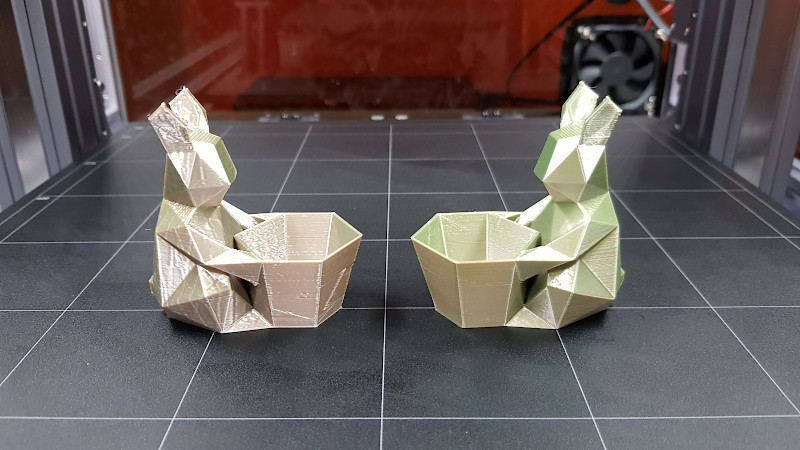
©3DWithUs – Photo: Max Funkner
– Articulated Dragon. Caution: these models are the torture tests for any 3D printer. I managed to print McGyBeers Articulated Dragon, and the print came out gorgeous. We featured the dragon in the dedicated article. All print-in-place flexible dragons need careful tuning. Failed cooling, bed adhesion, and warping may jeopardize a nearly completed print after 20+ hours of printing.
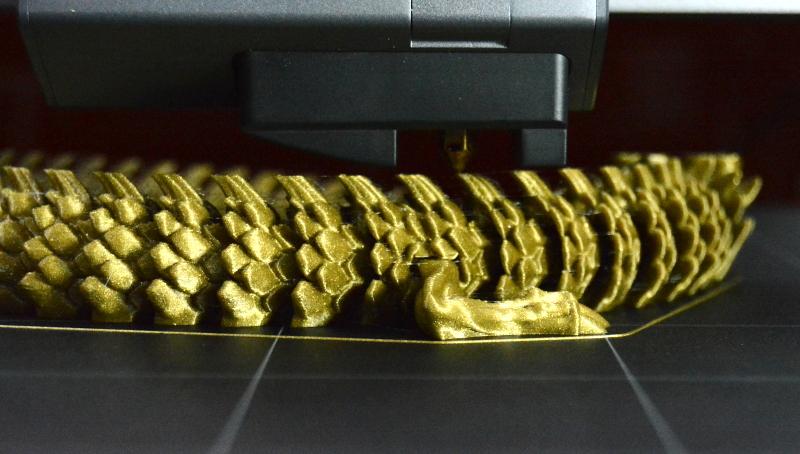
©3DWithUs – Print & Photo: Max Funkner
3D Printer Module – Conclusion
It is beginner-friendly and good for various projects. However, there is definitely room for improvement. I would like to see some more tuning live options, like Fan Speed and Filament Flow Rate.
– Cooling. I need more time to get the feel of the cooling system to prevent the warping issues.
– Pause and Print Later Option. For the big and long projects, I need a functional pause and print in the morning option. The thing is, if extra cooling is necessary, I cannot keep the enclosure doors shut. I tested the Unplug and Resume printing option – and it worked well. But we have to keep in mind the bed adhesion issue as the bed will get cold and may pop up the print. The solution may lie in a raft or glue.
– Higher Speeds. In the era of fast printing, we would love to see advanced Klipper features implemented for the Snapmaker machines as well.
– Bed Heating. Also, would love to see the bed heated faster.
Laser Engraving & Cutting Mode and Module Review
Laser cutting and engraving performance is definitely one of Snapmaker 2.0 A350T’s strongest points. The Luban software gets it right without the need for sophisticated software, at least in my experience so far. The work area is 320 mm wide and 350 mm long.
©3DWithUs – Photo: Max Funkner
Disclaimer: Operating a laser should be taken very seriously, as irreparable damage may be done to the eyes. Always use the provided goggles and/or do all work with the enclosure doors shut.
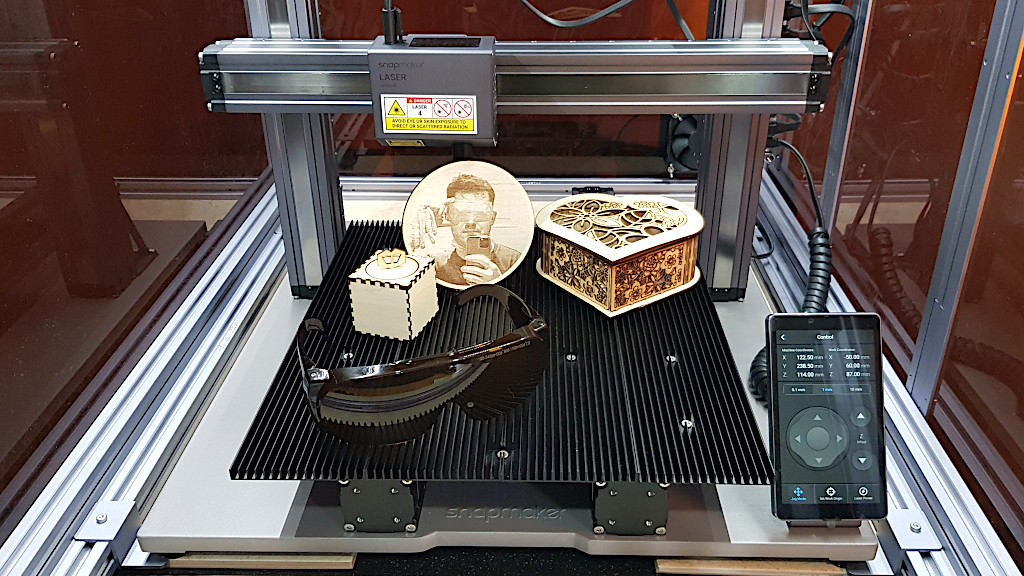
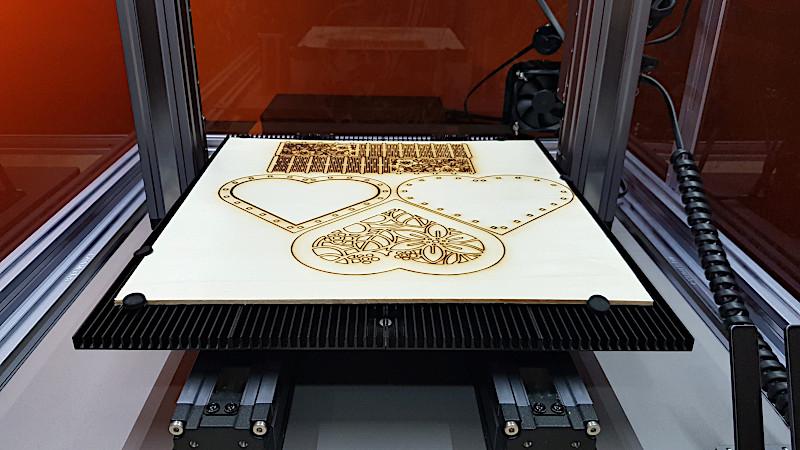
My first test object was a demo Gift Box from the Luban software. It was a laser cutting job using a 1.5mm plywood sheet provided. It’s a very quick, 35-minute job. Assembling the box was a great experience. This is a very nice Demo model; we would definitely recommend trying it out.
©3DWithUs – Photo: Max Funkner
Materials
There is an official page with a list of the recommended materials, together with the laser cutting and engraving settings for them. These settings are for the 1600mW Laser Module.
You can find the settings for materials such as Cork, Bamboo, EVA, Rubber, Acrylic, Corrugated Cardboard, Plywood, MDF, Leather, Stickers, and Colored Cards.
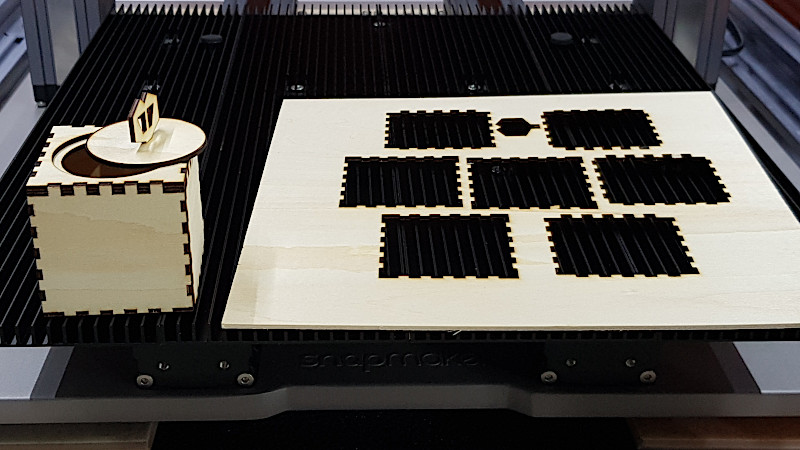
Engraving and Cutting 3mm Plywood
There are many awesome plywood laser-cut creations on Etsy. There is even a physical shop near me that has a lot of awesome creations on display for sale. And all these models are made with mostly 3mm plus plywood material. While testing the 1600mW laser module, I came to the conclusion that it is not feasible for such a task as it takes a lot of time to cut through to create a decorative box with fine detail, for example.
Screenshot: Luban
©3DWithUs – Photo: Max Funkner
In comparison, an easier laser engraving and cutting job, like a coaster, took just 4 hours to complete. Cutting through 3mm-thick plywood for the project below, a decorative box with fine detail would take 12 hours. Again, my level in this discipline is beginner/intermediate, and maybe some tweaking can be done to achieve quicker results.
©3DWithUs – Photo: Max Funkner
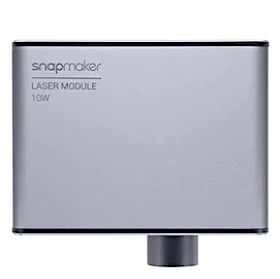
10W Laser Module Review
If you want to create plywood cut models, I recommend purchasing a 10W Laser Module. These are available from the official store and on Amazon as add-on products. I had an opportunity to test the 10W module thoroughly, and here is my 10W Laser Module review.
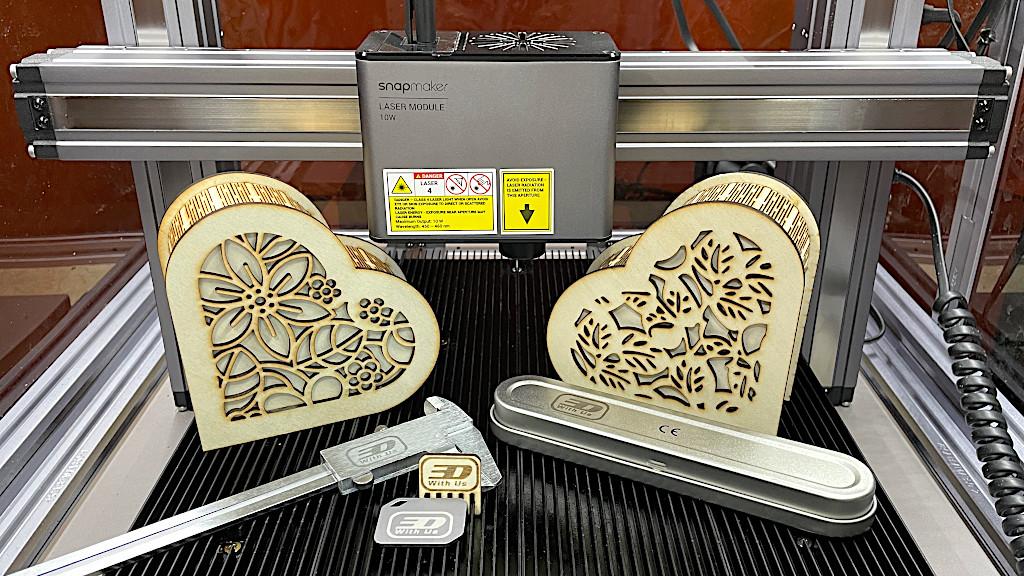
©3DWithUs – Photo: Max Funkner
Snapmaker 10W High Power Laser Module
Amazon
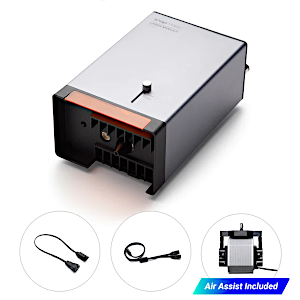
40W Laser Module Review
The installation and operation of the Snapmaker 40W laser engraving and cutting module on my two-year-old Snapmaker 2.0 A350T was remarkably straightforward. I am glad that Snapmaker continues to bring new updates for the owners of the previous machines. The 40W module is as powerful as promised, and I managed to laser cut 20mm wood with only one pass. This marks the technology as getting quicker and better and allows consumers to achieve new targets.
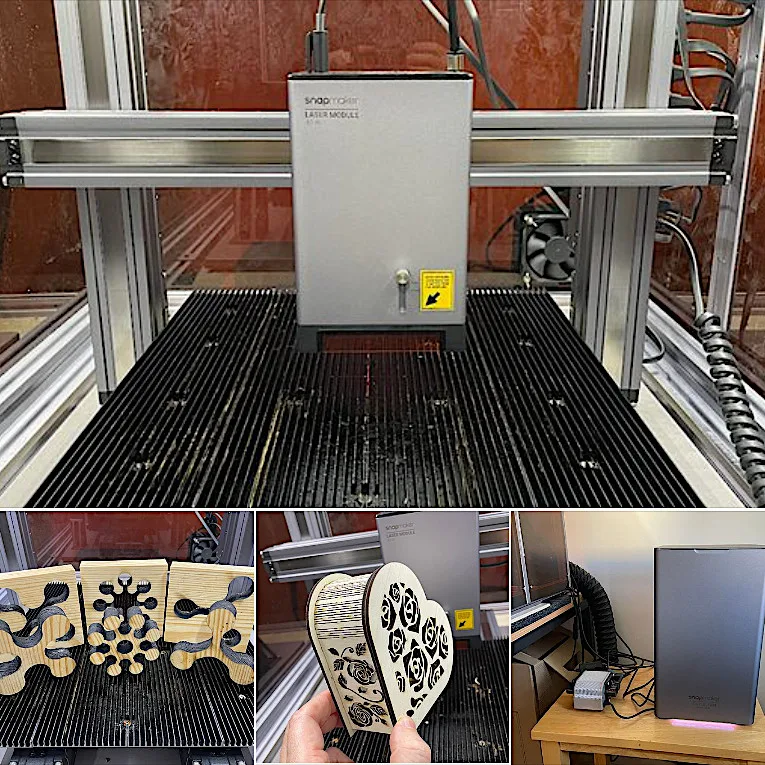
©3DWithUs – Photo: Max Funkner
Regarding safety, the Snapmaker 40W module incorporates comprehensive precautions, including sophisticated chambers and additional laser safety shields. When used in conjunction with the optional Air Purifier, the setup becomes particularly appealing for designers and innovators who create and test prototypes. This combination of power, ease of use, and safety measures makes the Snapmaker 40W laser module a valuable tool for a wide range of creative and technical applications.
Snapmaker 40W Laser Modure Review and Product Link:
Disclaimer: Laser cutting and engraving may be hazardous if improperly operated. Please make sure to follow the safety guidelines such as wearing eye-protective goggles and using the machine enclosure while operating.
Open in the next tab for better resolution
Image: Snapmaker
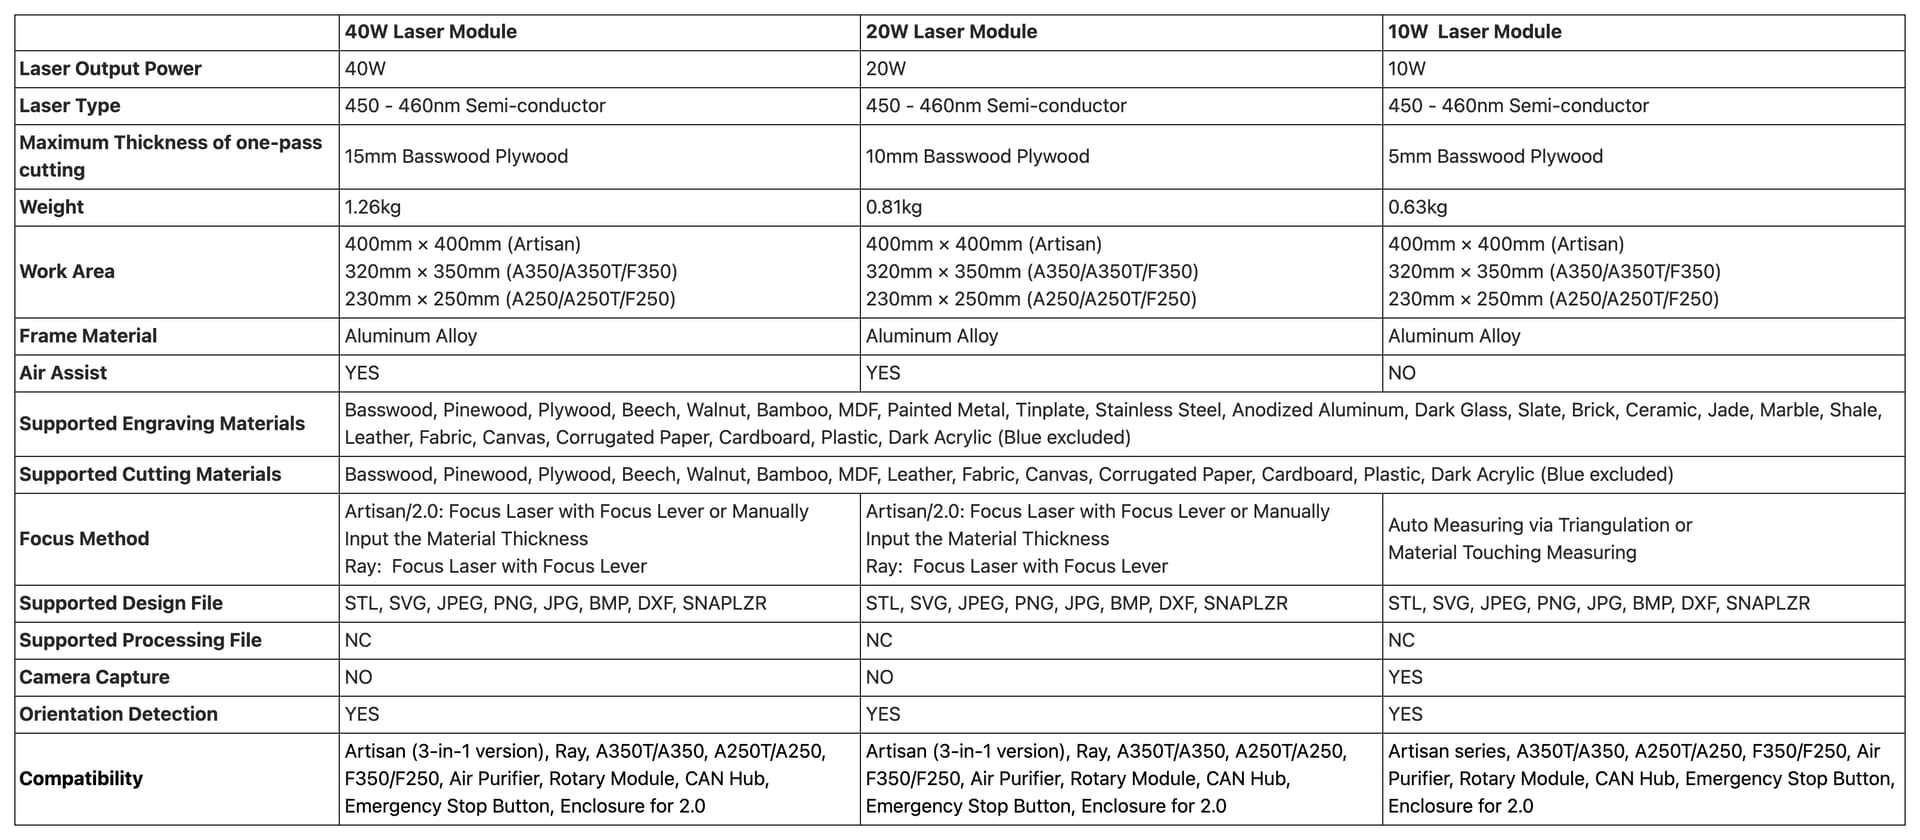
The table above shows the main differences, namely supported materials, air assist, and focus method.
©3DWithUs – Photo: Max Funkner
Just for comparison, I took a picture of the four Snapmaker laser modules I have, including those from the previous machine, such as the Snapmaker Original (yes, I still have it). In the image, you can find the 200mW to 1600mW, 10W, and 40W modules.
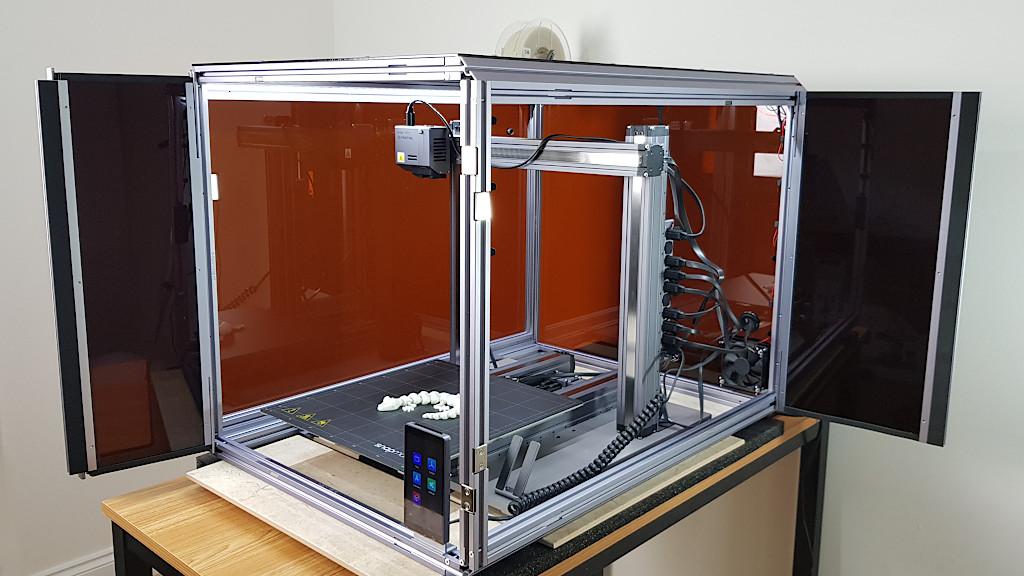
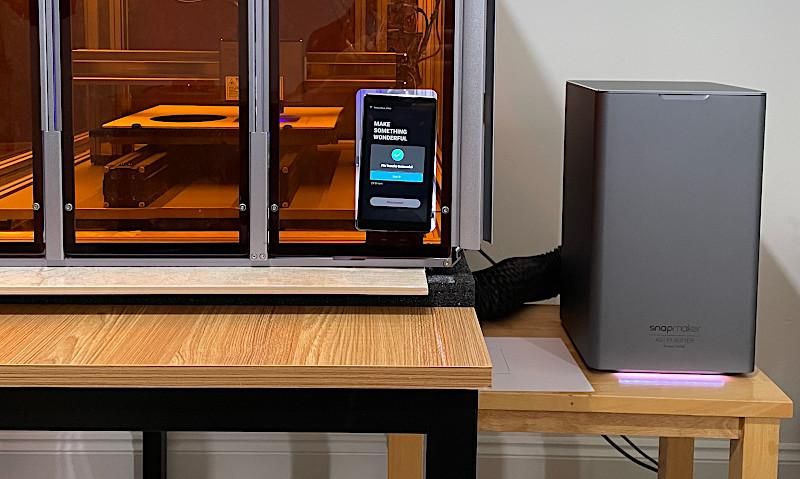
Enclosure and Air Purifier
If the Enclosure is a MUST for eye protection and noise reduction, then the Air Purifier is another MUST for laser cutting jobs in case, for some reason, you cannot use the connecting Hose. Laser cutting jobs produce a lot of smoke and fumes – I would say the most compared to laser engraving, 3D printing, or CNC. If the room is not ventilated enough, such smoke can even set off a fire alarm in the vicinity.

Read more about the Enclosure below.
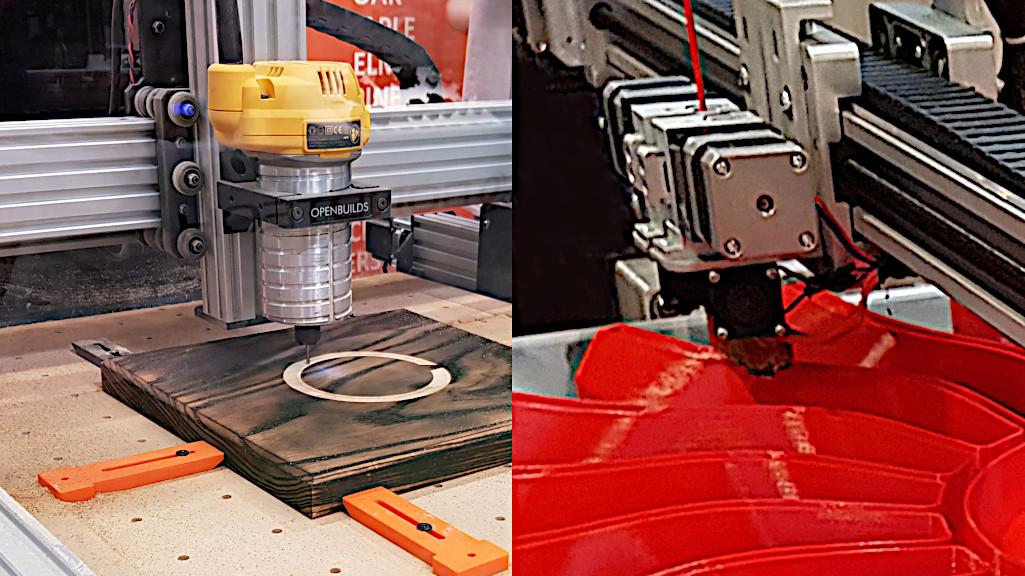
CNC Mode & Module Review
To be honest, this is the module I least used as I am not only an absolute beginner in this area but also am reluctant to use this method of manufacturing in my home environment. Dusty and loud. But while testing, I could see the potential. It was amazing to recreate an item, a house number plaque, that we bought on Amazon for our place just recently. The original was laser-cut.
©3DWithUs – Photo: Max Funkner
– CNC Noise Levels. The enclosure and my DIY base noise damper system do a good job, but the pitch of some noise is so high that it gets through. Here is an app record. Even if my noise measuring app didn’t show it, I found that the ball end milling part was much noisier.
CNC Noise Level Measured
©3DWithUs – MP4: Max Funkner
Read more about the enclosure below.
CNC Module Testing – Cutting
The first thing I want to mention is that the MDF Wasteboard was so good that I did not want to scratch it with the random test-cutting jobs. So, I found a way to elevate the material by placing something between the work bed and the material. As a result, the Wasteboard remained unscratched.
Instead of cutting a demo model, I tried to recreate our house door number, and here is the result.

©3DWithUs – Photo: Max Funkner

©3DWithUs – Photo: Max Funkner
To recreate such a vector, I scanned the original number plaque (created by laser cutting) because it was tricky to find exactly the same font, and then used Inscape’s “Trace Bitmap” option to get my vector and saved it as an SVG file. Of course, my vector had a lot of imperfections. Also, I forgot to add the gaps in the vector that would leave a couple of places uncut and keep an object attached to the surrounding material. Nevertheless, I am happy with the result.
Relief Carving
As I mentioned before, I am generally happy with the Luban CNC slicing software. I didn’t try any other one to compare, but the results I achieved were great. One of the first things I did was to carve our logo from wood.
Screenshot: Luban
©3DWithUs – Photo: Max Funkner
The result was impressive, with a lot of potential, as this job took me only 1.5 hours to complete. I used a Ball End Mill with a shank diameter of 3.175mm. If only I had known how to replace the shank with the finest V curve afterwards, then I could have achieved very smooth details relatively quickly. Please mind that if you install a V shank in the very beginning for such a job, it would be a 15.5-hour job instead.
There are many awesome relief-cutting models. I may return to this topic if I find the right settings for a quick carve or the quiet cut options so that I can leave the machine on overnight.
CNC Carved Text
The Luban software carving text options are straightforward, and if the Text is big enough, it will work well. I had a small area to work on and slightly struggled to get the small letters. In the end, I am happy with the result.
©3DWithUs – Photo: Max Funkner
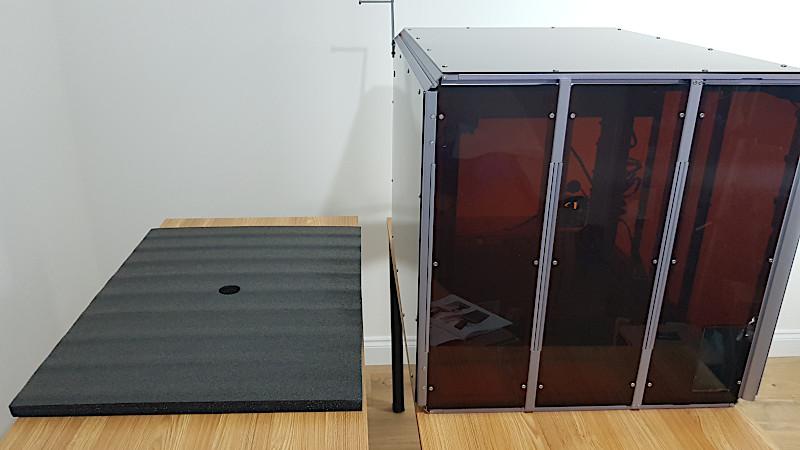
Enclosure for A350 – Unboxing & Review
Another product worth mentioning is the Enclosure. Together with the machine, I received the Enclosure for Snapmaker A350. As a product, it is yet another masterpiece by Snapmaker, which aim for quality no matter the cost. The box that arrived was enormous and had all the needed parts neatly packaged in separate boxes. The dimensions of the enclosure are 626 × 820 × 603 mm and took up the whole of my desk.

©3DWithUs – Photo: Max Funkner
©3DWithUs – Photo: Max Funkner
The enclosure beams are numbered and instructions are provided. I would recommend installing the numbered beams correctly, even if they look the same at the beginning. I managed to fail here and had to reassemble the base as a result.
The whole structure is heavy but the only time I needed the help of another person was when I had to lift the enclosure to fit on top of the noise dampening base.
©3DWithUs – Photo: Max Funkner
So basically, between the desk and the enclosure, there are packaging foam and a hard surface. In my case, I used leftover floor tiles.
If the enclosure reduces the noise by approx. 10 DB, then the DIY noise damper system reduced vibration through the desk and the working machine presence is less noticeable in other rooms.
©3DWithUs – Photo: Max Funkner
The extraction pipe is short – one meter.
Air Purifier Quick Look
Another accessory product important to mention is the Air Purifier. I had no chance to review the purifier myself but I feel I miss this product. Everything must be done in order to keep the family happy and safe, right? Also, it is tricky to get a completely detached house, and therefore neighbors may be very unhappy with the factory-like noises and smells. When the enclosure partially fixes the noise issues, then the purifier should help with the smell, especially when operating Laser Engraver and Cutter.
©3DWithUs – Photo: Max Funkner
The cost of such a purifier is close to the enclosure and may feel pricey. Another drawback is that replacing the cartridge filter will cost extra.
Compare Snapmaker 2.0 A350T to Other Products on the Market
As I mentioned before, Snapmaker 2.0 A350T and Snapmaker Artisan are the best 3-in-1 products on the market. In fact, they are the only products that offer all their disciplines in one system.
For a comparison with other FDM 3D printers, please refer to the
detailed budget FDM 3D printers guide.
For a comparison with other laser cutters and engravers, please refer to the
detailed budget laser cutter and engravers guide.
For a comparison with other CNC machines, please refer to the
detailed CNC Machines guide. (coming soon).
If laser cutting and engraving are Snapmaker 2.0 / Artisan’s strongest side, their response to the growing demand for higher 3D printing speeds is yet to come. While independent CNC machines equipped with more powerful routers are available, Snapmaker’s Quick Swap ecosystem shines in specific situations – particularly when all three disciplines (laser cutting, engraving, and 3D printing) are used interchangeably.
Conclusion and Pros & Cons
Snapmaker Artisan
Amazon
Snapmaker 2.0 A350T
Review Summary
Snapmaker 2.0 A350T is for those who haven’t decided which discipline to master for perfection and want to start their DIY journey with the blast. Separately, there are better and cheaper machines available for all three disciplines but not as 3-in-1. Nevertheless, I absolutely love where Snapmaker is heading with the continuous improvement of its products and software and adding new add-ons to the ecosystem.
If laser cutting and engraving are Snapmaker 2.0 A350T’s strongest side, their response to the growing demand for higher 3D printing speeds is yet to come. While independent CNC machines equipped with more powerful routers are available, Snapmaker’s Quick Swap ecosystem shines in specific situations – particularly when all three disciplines (laser cutting, engraving, and 3D printing) are used interchangeably.
Update: After a few years, my A350T received a quick swap upgrade, which reduced the time to switch between disciplines from approximately 20 minutes to seconds. Again, this showcased that Snapmaker does its best to upgrade existing technology where applicable.
PROS:
Quality of the product
Big volume
Wi-Fi connectivity
The best educational opportunity to learn 3 disciplines on one machine
A big community that shares DIY modes and slicer profiles
CONS:
Noise – many projects cannot be left overnight
The “pause and continue later” option should be available via touchscreen
Good to have more tuning-live options via touch screen, like fan speed and filament flow rate