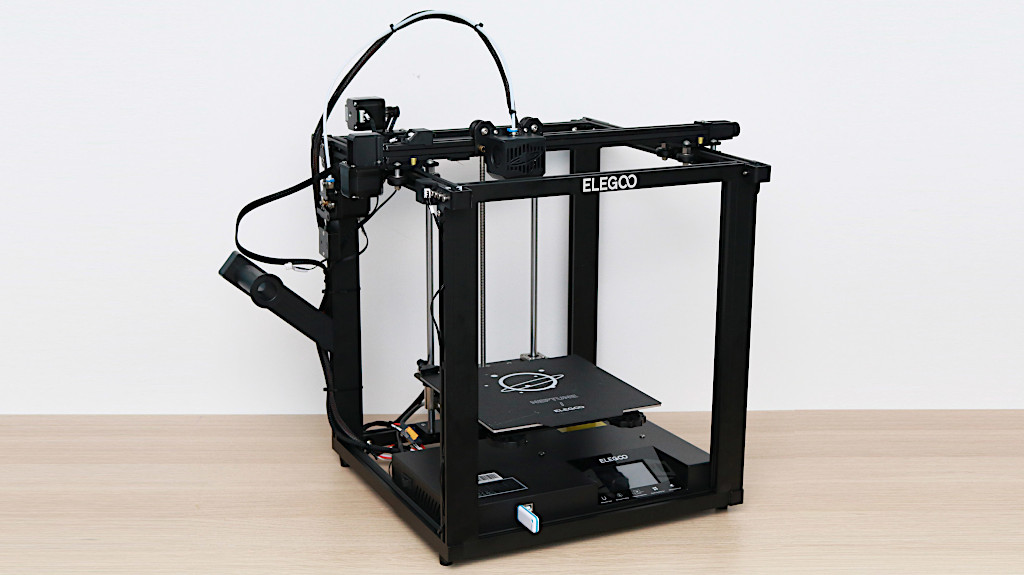
The Elegoo Neptune X is a 3D printer that stands out from the competition with a fixed platen that allows the entire platform to descend in the Z axis while remaining stationary in the X and Y axes. The overall appearance of the Neptune X is more industrial than the typical i3 clone (Creality Ender 3, Anycubic Kobra, etc.), and the weight of the assembled printer gives it a sturdier feel as well.
Elegoo Neptune X Specifications:
Build Volume: 220 x 220 x 300 mm (8.7” x 8.7” x 11.8”)
Nozzle Size: 0.4mm
Max Temperature: 260°C
Bed Leveling: Manual / 4 Point leveling
Material: PLA, PLA+, TPU, ABS
Build Platform: Removable Flexible Magnetic Build Platform
Connectivity: Removable USB Drive / USB Connection
Interface: 3.5” Color Touchscreen LCD
Price: $295-330
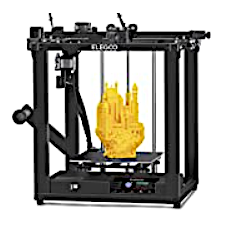
The stationary heated build platform and Bowden style extruder are a powerful combination; allowing for fast travel moves without rocking the platform back and forth. If you’re interested in a printer that doesn’t follow the crowd, the Neptune X is a printer worth reviewing.
©3DWithUs – Photo: Andrew Sink
Assembly and Hardware Features
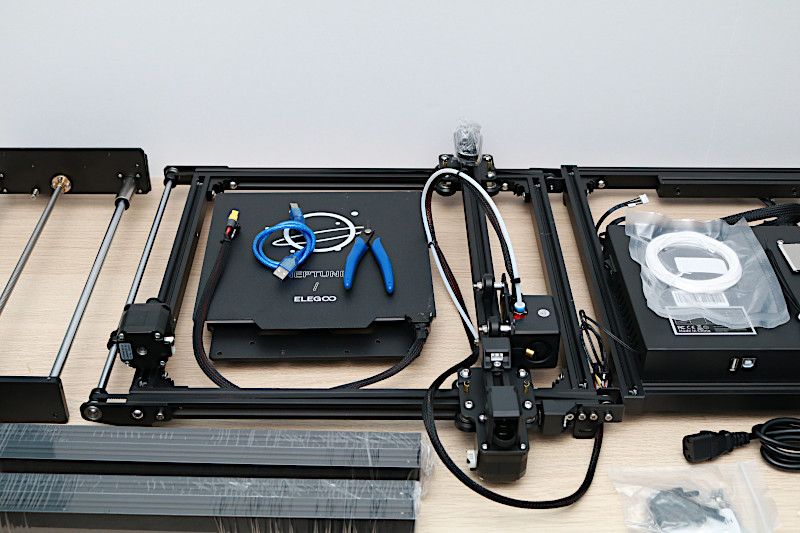
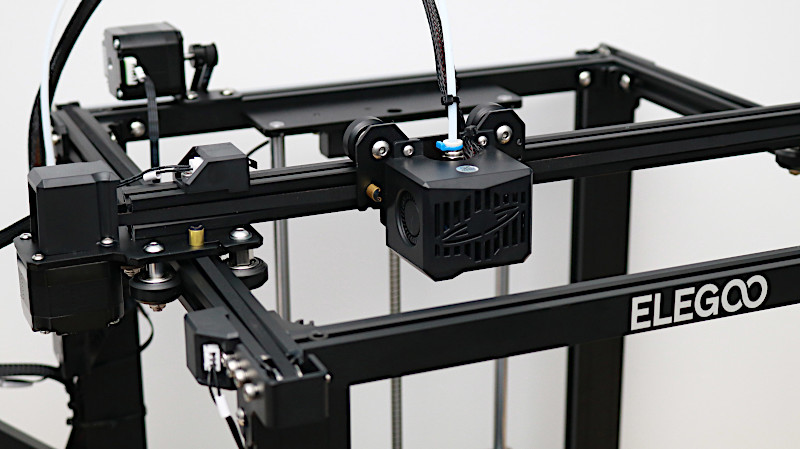
The Elegoo Neptune X ships as a partially-assembled kit, and will require some assembly before printing. I found the assembly process to be straight-forward, and it took a total of about an hour and a half to build. Unlike i3-style printers that typically resemble an upside-down “T” shape and can be assembled with only a few bolts (like the Anycubic Kobra Plus), the Neptune X requires a more extensive assembly process and probably wouldn’t be a great fit for a beginner. Assembling the frame is fairly straight-forward, but the motion system requires careful attention to detail and a higher level of precision. The remote-drive Bowden extruder clips to the frame, and is very easy to install and use.
©3DWithUs – Photo: Andrew Sink
Stationary Build Platform – Pros and Cons
Unlike the other prints in the Elegoo Neptune line, the Neptune X utilizes a stationary build platform. Typically, moving the part during printing can make printing tall and thin parts (or large and heavy parts) difficult, as the entire part has to be accelerated and decelerated while the print head remains stationary in the Y axis. By moving the gantry instead, the part remains stationary and higher print speeds can be achieved. The motion system used by the Neptune X is reminiscent of the CoreXY system used on the Voron printers, but it’s closer to the system used on the Creality Ender 5 Pro 3D printer.
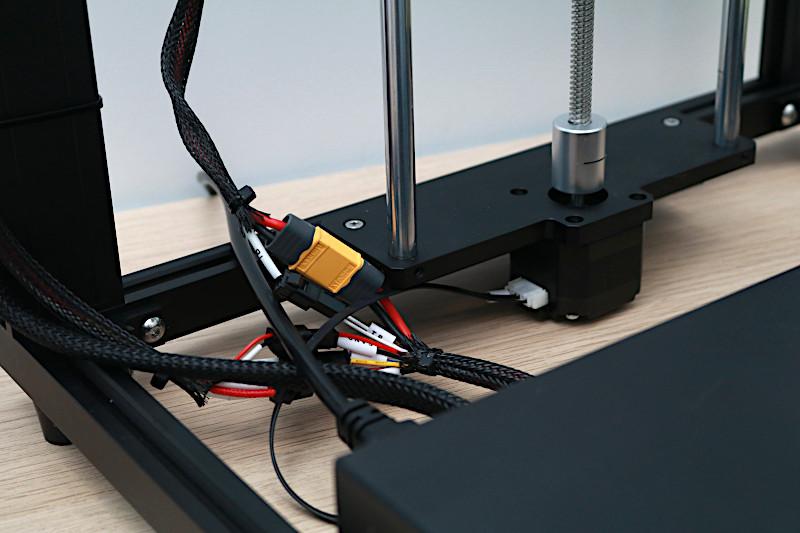
This system means that there are many connections on the top of the printer, and the wiring harness is a bit of a mess under the printer. Even after making all the connections, the harness looks a little sloppy and the connectors are exposed. A cover, wire loom, or other enclosure would go a long way towards giving this printer a more professional appearance, and also make the Neptune X easier to service.

©3DWithUs – Photo: Andrew Sink
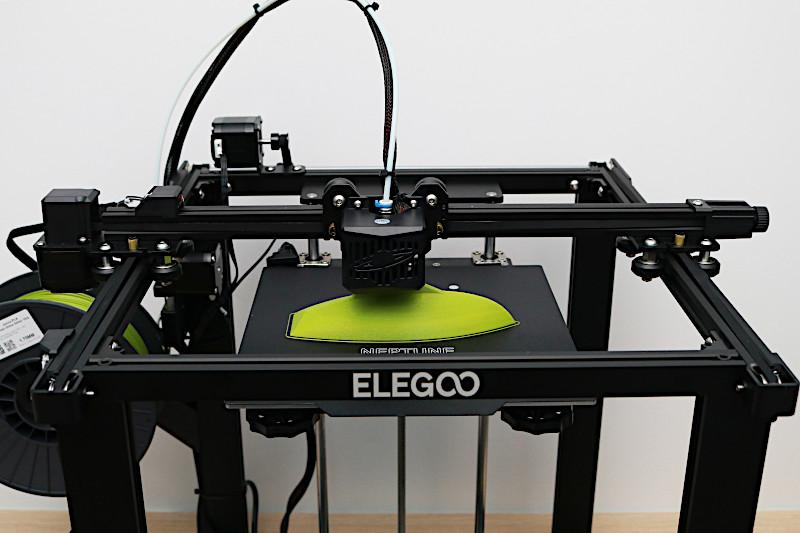
250 Watt High-Temperature Build Platform
The build platform on the Elegoo Neptune X is heated via an actively powered heat plate that Elegoo has advertised as being able to reach 100C. In testing, I found the bed was capable of reaching 100C from room temperature in about 5 minutes. This high-wattage build platform means that reaching (and sustaining) high temperatures for printing PETG, ABS, etc. is something that the Neptune X is easily able to achieve. The build platform is leveled with an oversized thumbscrew at each corner of the bed, which is a fully manual process.
©3DWithUs – Photo: Andrew Sink
The build platform itself is a removable magnetic flexible mat, which is easily removed and allows even large parts to be peeled off effortlessly after cooling.
Filament Run-Out Detection and Power Resume
Filament run-out detection and power resume are both features that have become increasingly common in the sub-$500 market, and are close to becoming standard for most printers. The Neptune X includes both features, and I found that the filament run-out worked fine during the review, but I had issues with the power resume. Cutting the filament during a print automatically paused the print until I fed in fresh filament, and the print resumed without an issue.
©3DWithUs – Print & Photo: Andrew Sink

Unfortunately, unplugging the power cord caused the print to pause automatically, and the printer did not extrude material after restarting. You can see both the filament change as well as the layer where the power was cut in the images above. After multiple attempts, I wasn’t able to successfully print the CaliCat 3D model after cutting the power to the printer. Since power outages in my area tend to be short in duration, I use a battery backup to allow the printer to operate while the power is out, which works much better than the power resume function.

©3DWithUs – Print & Photo: Andrew Sink
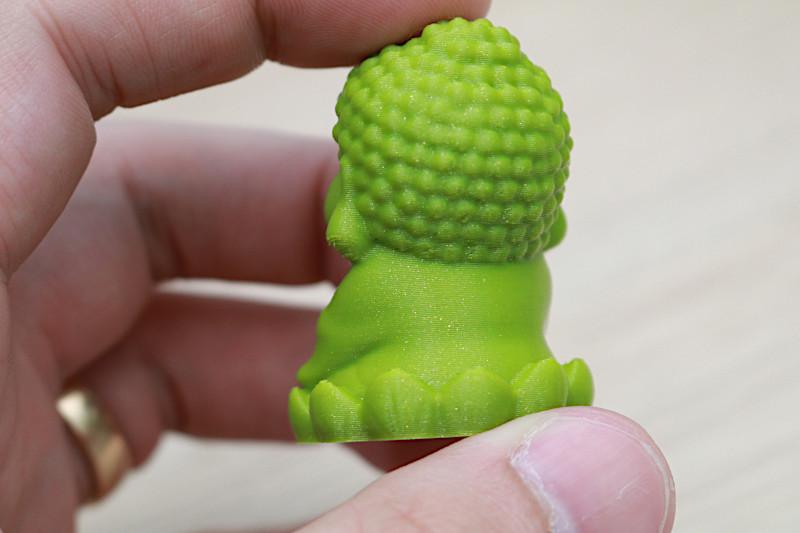
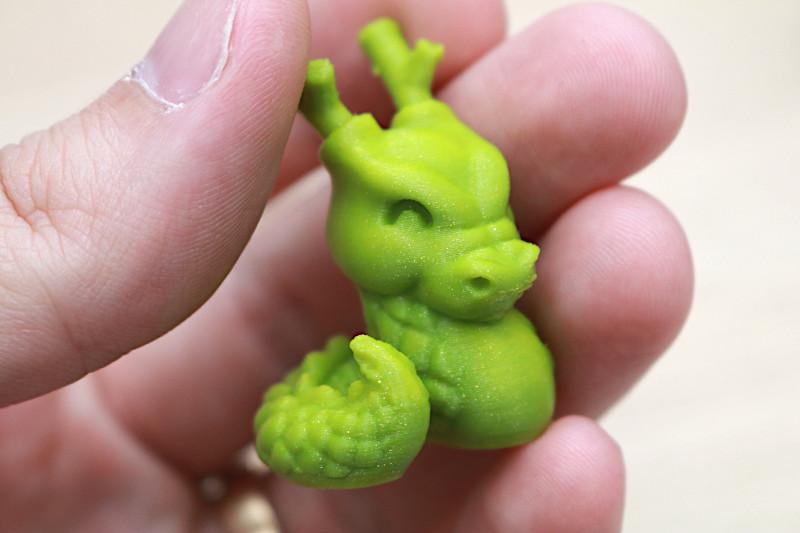
Printing Included Test Print
The Neptune X ships with a single test print on the included USB drive called “ENX_The Buddah.gcode”. This file prints without any issues, and the overall quality of the model was very high when printed with Printed Solid Green Slime Glitter PLA. For a general test part, I like this model and think it works very well in the context of a review. It shows organic curves, steep overhangs, and other features that are ideal for testing a 3D printer.
©3DWithUs – Print & Photo: Andrew Sink
3D Printing Settings with Elegoo Cura
The Neptune X includes a copy of Elegoo Cura on the included USB thumb drive, which is a Ultimaker Cura 4.8 with an Elegoo logo at the top left of the screen. This version of Cura contains the same quirks as other versions (printing infill before perimeters always sticks out as a strange choice), and Elegoo has included a printer profile for the Neptune X.
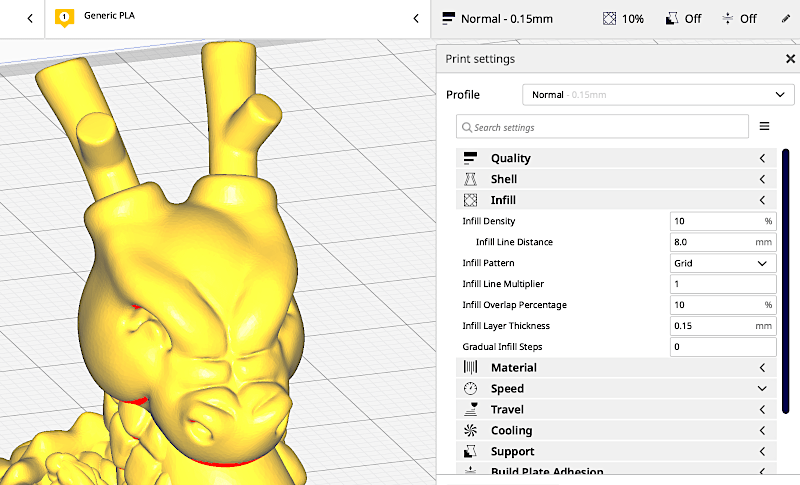
Screenshot: Elegoo Cura Profile
©3DWithUs – Print & Photo: Andrew Sink
Sliced using Elegoo Cura, the Cali-Dragon by McGyBeer printed in just under an hour and came out with only a few small defects. While the Cura profile works for general printing, I’ve found that using PrusaSlicer with a custom profile allows for much higher-quality prints even when using the same model and machine.
©3DWithUs – Print & Photo: Andrew Sink
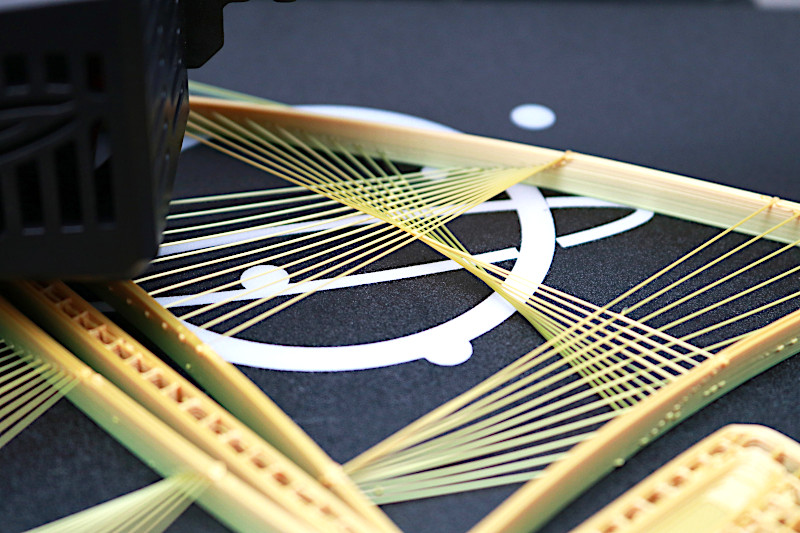
Testing Neptune X – Extreme Bridges
Using Anycubic Rainbow Silk PLA+, Printed Solid Green Slime Glitter PLA, and iSanmate UV reactive White PLA, I printed the Sailboat model by 3DPrintBunny; a perfect test to see how a printer handles a complicated model. Printed at a .3mm layer height, the sail printed flawlessly, with the individual strands of filament appearing clear and well-resolved in the model. The base of the sailboat (as well as the stand) were printed at a .2mm layer height, and show an impressive consistency across the model.
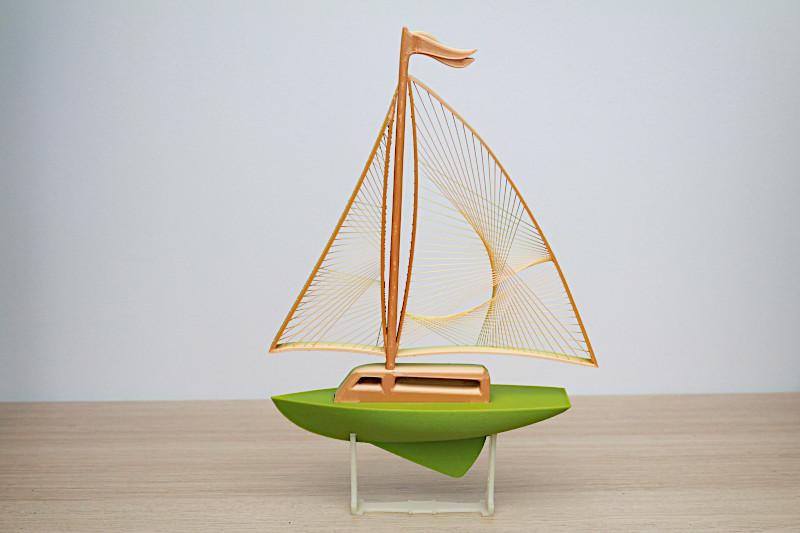
©3DWithUs – Print & Photo & MP4: Andrew Sink
This model was sliced entirely in PrusaSlicer, using a custom profile for the Elegoo Neptune X based on the Creality Ender 5; a 3D printer that shares a similar design. I was very satisfied with the performance of this profile, and believe that it requires less adjustment than the Elegoo Cura profile to achieve a high-quality result.
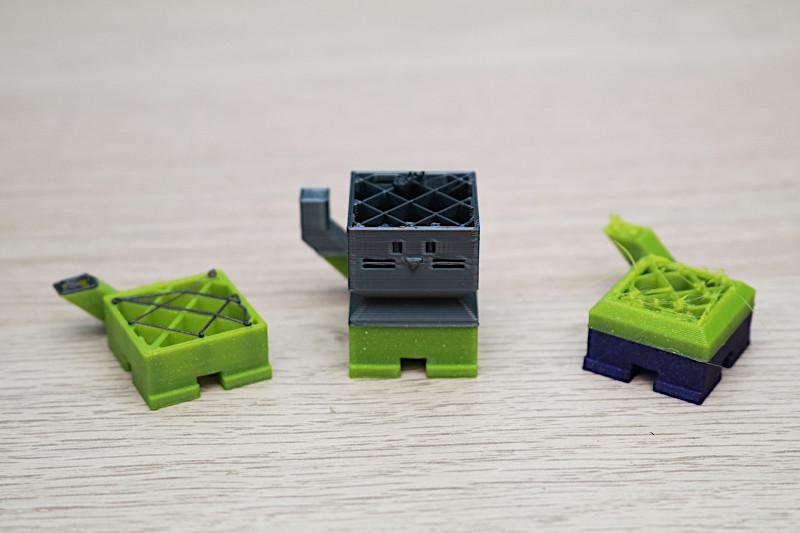
Printing TPU on the Elegoo Neptune X
The stationary build platform lends itself to printing objects that may be difficult to print on a standard “bed slinger” style i3 printer, such as elastomeric materials like TPU. TPU tends to stick to itself very well during printing, so printing tall parts is a challenge as the material will “tug” on the printed part, even as it is leaving the nozzle.
©3DWithUs – Print & Photo: Andrew Sink

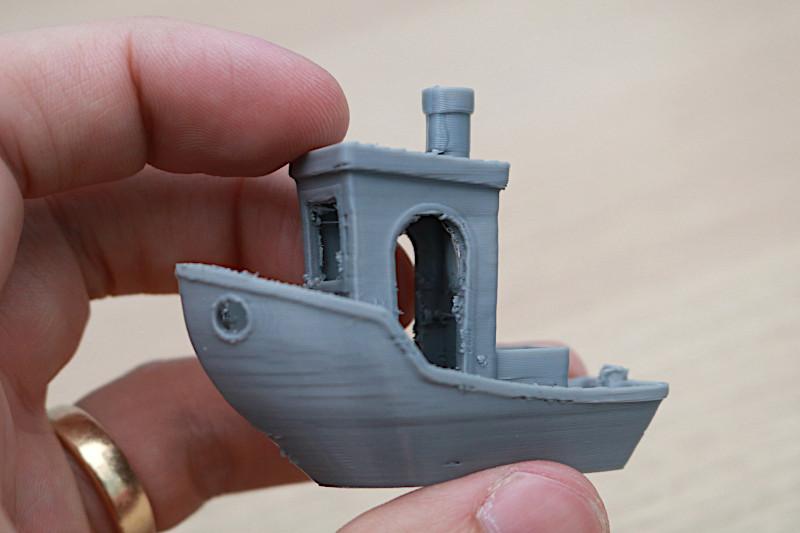
By keeping the platform stationary, the Neptune X is able to print tall parts made from TPU without knocking them over or causing irregularities in the printed layers. Printing the Benchy model with Overture TPU proved to be an easy task for the Neptune X, with some light stringing present in the model, which is typical of this material. The model above had some light clean-up, mostly removing stringing around the hull.

©3DWithUs – Print & Photo: Andrew Sink
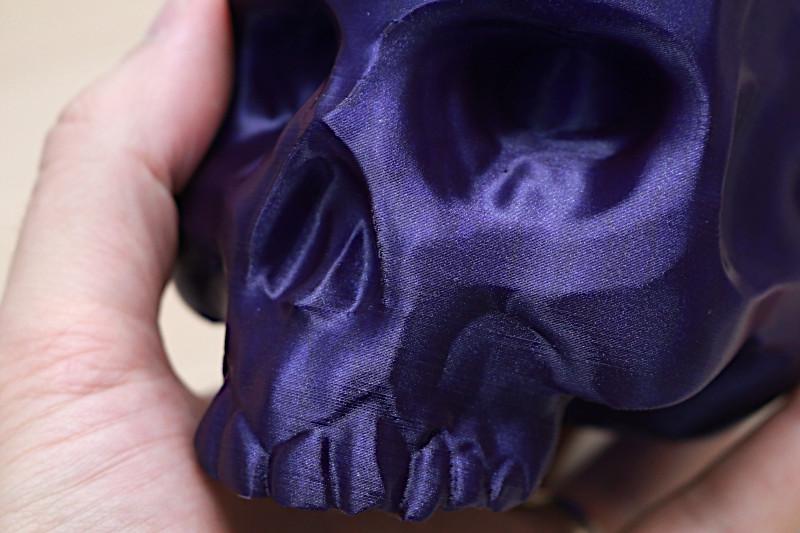
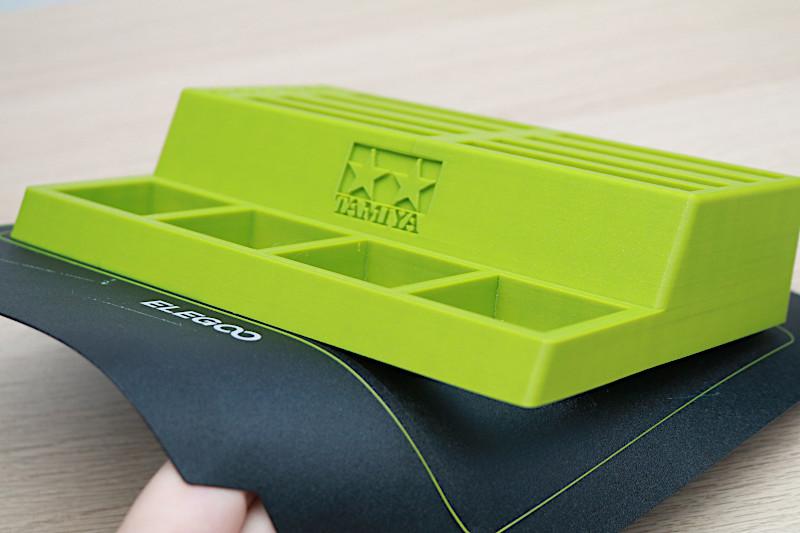
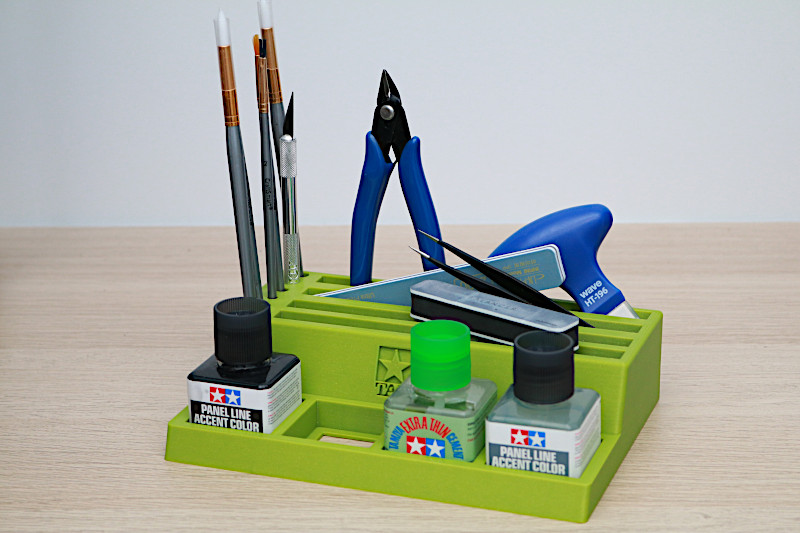
Printing Large Parts on the Elegoo Neptune X
Larger parts, like the Hanging Skull Vase by Uncle Jessy and the Tamiya Paint Holder by ricardocab print effortlessly, with the four-point leveling system on the bed making it easy to get a consistent first layer across the build platform.
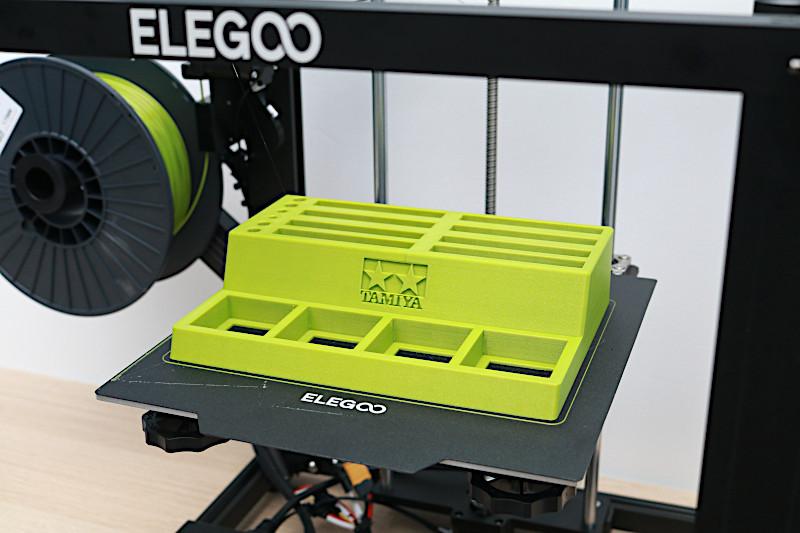
©3DWithUs – Print & Photo: Andrew Sink
Large prints are easily removed from the build platform
I like this build platform leveling method, but do wish that there were a built-in strain gauge or other automatic bed leveling probe, to reduce the amount of time spent dialing in the first layer. The lack of live adjustment on the Z axis (sometimes called baby stepping) means that adjusting the first layer takes a bit of patience, and it would be a great addition for future firmware updates.
©3DWithUs – Photo: Andrew Sink
Conclusion
The Elegoo Neptune X is a unique 3D printer, and it stands out amongst the ocean of i3-style competitors by virtue of using a stationary platform. A few small quirks aside, I believe the Neptune X is a fantastic value for the money and would make a great printer for anyone interested in using it for printing TPU or other difficult materials. Interestingly enough, the Neptune X motherboard has an empty connection for “Laser Signal”, “Laser Fan”, and “BL-TOUCH”, hinting that this machine may soon have upgrades available from Elegoo.
The Elegoo Neptune X is currently available for sale on the Elegoo site for $295, and is also available on Amazon for $329. While the Neptune X was announced on the Elegoo site back in May, 2021, there still aren’t many videos or reviews of this printer published, possibly due to the unique kinematic system or lack of proven aftermarket parts for this style of printer. Whatever the case may be, the Neptune X is a solid 3D printer, and with a few upgrades from Elegoo (automatic bed leveling, better power outage handling, updated UI with live-adjust Z, etc.), it would be a solid contender for the best FDM 3D printer under $350 based on my experience in this review.
Compare to the Elegoo Neptune series 3D printers:
- Elegoo Neptune 3 Plus (Review)
- Elegoo Neptune 4 (Review)
- Elegoo Neptune 4 Pro (Review)
- Elegoo Neptune 4 Plus (Shop)
- Elegoo Neptune 4 Max (Shop)
Together, the Elegoo Neptune 4, Neptune 4 Pro, Neptune 4 Plus, and Neptune 4 Max constitute the latest products in the Neptune FDM 3D printer series. If some of the machines haven’t been reviewed on our website yet, you can refer to their primary comparison table in the image below to get a general overview.
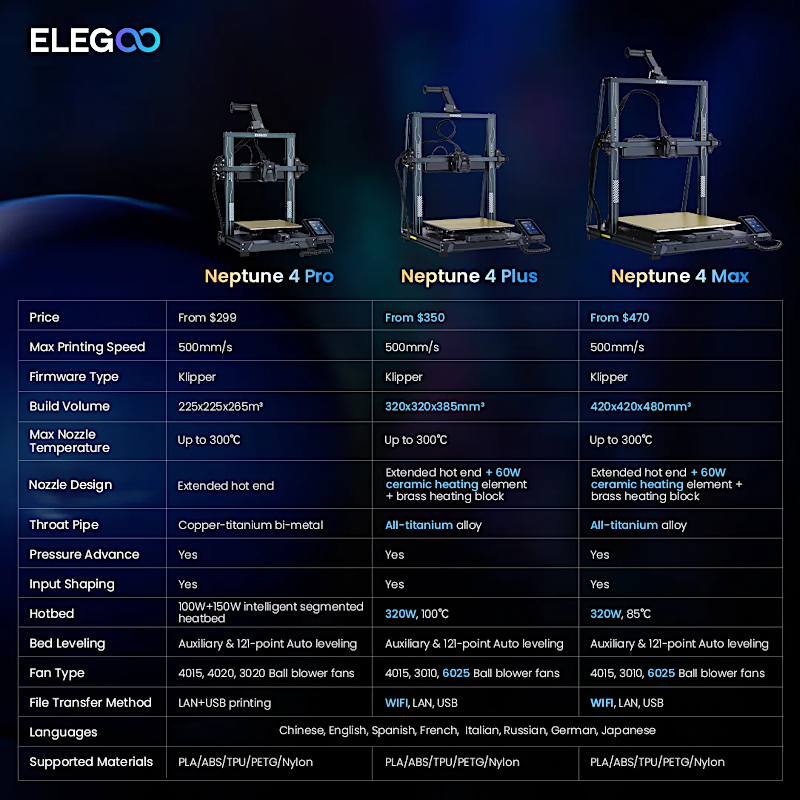
Image: Elegoo
Price: $295-330
Amazon
Official Website
Elegoo Neptune X Star Rating
Review Summary
The Elegoo Neptune X is a 3D printer that stands out from the competition with a fixed platen that allows the entire platform to descend in the Z axis while remaining stationary in the X and Y axes. The overall appearance of the Neptune X is more industrial than the typical i3 clone (Creality Ender 3, Anycubic Kobra, etc.), and the weight of the assembled printer gives it a more sturdy feel as well. The stationary heated build platform and Bowden style extruder are a powerful combination; allowing for fast travel moves without rocking the platform back and forth.
PROS:
– Stationary build platform allows for fast and precise prints
– Silent stepper drivers and quiet motion system
– Removable flexible magnetic mat makes removing parts quick and easy
CONS:
– Power resume function didn’t work correctly during testing
– Elegoo Cura profile needs tweaking to get best results