Elegoo Neptune 4 Pro is the next 3D printer in the series. As the consumer desktop FDM 3D printer market goes through the ‘print speed race’, Elegoo offered its own alternative. Klipper firmware-enabled technology, a higher-temperature dual gear extruder, and an extra cooling feature pushed the Neptune 4 Pro to come with the default high printing speed. Let’s review the machine, print some awesome and challenging models, check some slicer settings, and outline the Pros and Cons.
Table of Contents
- Specifications
- Unboxing and Assembly
- If Screen Keeps Loading Endlessly
- 11×11 Automatic Bed Leveling
- New 300°C Nozzles and How to Change
- Printing Included Demo and Other Test Models
- Elegoo Cura Slicer – Tips and Settings
- Ethernet Connectivity and Klipper
- Other Test Prints
- Compare to Other 3D Printers
- Conclusion and Pros & Cons
Elegoo Neptune 3 Pro Specifications:
Firmware: Klipper
Build Volume: 225 x 225 x 265mm / 8.85” x 8.85” x 10.4”
Extruder: Dual-Gear Direct Drive Extruder
Bed Leveling: Automatic/Manual
Print Speed: Max – 500 mm/s, Recommended – 250 mm/s printing speeds
Max Temperature: 300°C
Extra 4-fan Cooling
Material: PLA, ABS, PETG, TPU, Nylon
Build Platform: Flexible Textured PEI Build Platform
Connectivity: USB, Micro SD Card, Cable, Ethernet
Interface: Removable 4.3inch Color Touchscreen LCD
Price: $299-330
Product affiliate links:
Compare the Prices & Bundles:
Official Store | Amazon
Unboxing and Assembly
As usual with Elegoo products, the machine arrived semi-assembled in a well-protected box. Assembly took approximately 20 minutes.

©3DWithUs – Photo: Max Funkner
– User guide. My Neptune 4 Pro arrived without a paper manual. I found the user guide and other manufacturer files on the included USB stick. For me, it wasn’t an issue, and I enjoyed the paperless printer assembly. However, I think at least some paper with instructions on how to find the user guide should be included. First-time 3D printer users may get lost. Here is the link to the official assembly video.
– Accessories. A standard set of accessories was included: PLA sample, tool set, necessary cables, etc. A spare PTFE tube and 2 nozzles were also included.
©3DWithUs – Photo: Max Funkner
– Extruder. The extruder wasn’t pre-assembled on the gantry but had to be assembled manually. It takes just a few screws to assemble it.
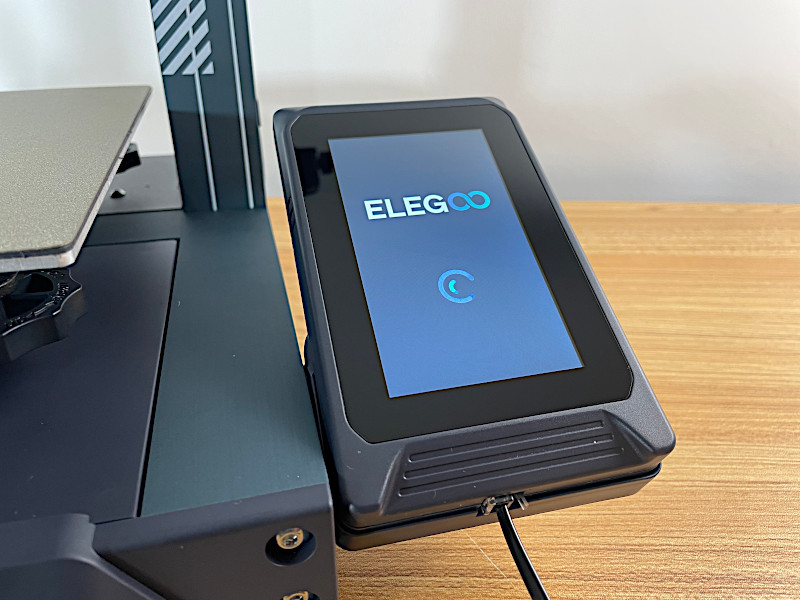
If Elegoo Neptune 4 Pro Screen Keeps Loading Endlessly
Apparently, with the Klipper firmware, it is important to switch OFF the machine properly. Namely, instead of unplugging the machine from the socket, it’s important to use the machine’s native switch and patiently wait until the machine is OFF.
©3DWithUs – Photo: Max Funkner
I tend to switch off most of my equipment in my workshop using wall plug switches. As a result, my Neptune 4 Pro could not start as the screen kept loading. Switching the machine off properly fixed the issue.
Manual and 11×11 Auto-leveling
As I didn’t receive a paper user guide, I had to open a digital PDF that was included on the USB. The instructions worked well for me, and I think it’s important to follow them step by step: namely, complete the manual (auxiliary) leveling first, then proceed to automatic calibration. Here is the screenshot taken from the PDF.
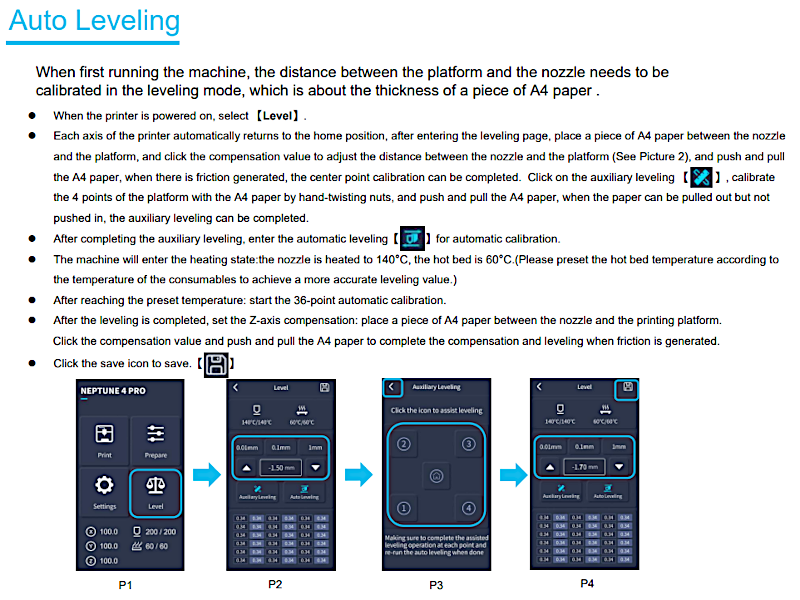
Image: Elegoo
Once I completed manual leveling I didn’t have to come back to it after 20 and counting prints. All four hand-twisting nuts are standing in place.
When I changed the nozzle, I performed automatic leveling and recalibrated the Z-axis in the middle again.
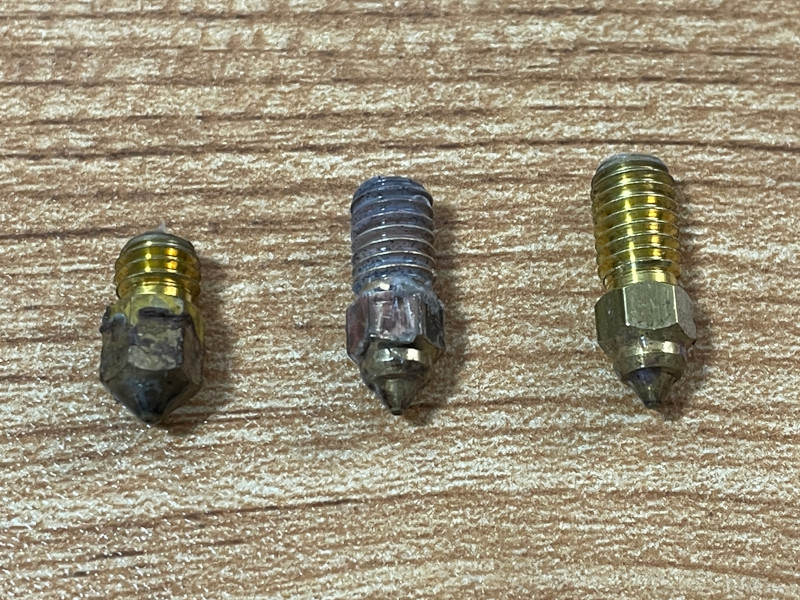
New 300°C Nozzles for Neptune 4 Series 3D Printers
To print well at high speeds, all Neptune 4 hotends are now equipped with the new design nozzles. That means previous nozzles are not compatible anymore. This felt frustrating, as I had stocked up on previous versions of small and large nozzles. For example, larger nozzles are safer to use with exotic filaments such as wood filament. Even though Elegoo includes 2 spare nozzles, these are 0.4mm brass nozzles.
It doesn’t help the fact that neither the Elegoo official store nor 3rd party shops on Amazon or AliExpress have compatible nozzles of different sizes available just yet. I searched and found that it is possible to buy Neptune 4 compatible 0.4mm nozzles on Amazon and AliExpress. As there aren’t many producers, the prices of such nozzles are higher, and delivery times range from 2 weeks to two months. It is a temporary occurrence as the Neptune 4 series 3D printers are very new products. Spare parts production is expected to catch up with the demand sooner or later.
©3DWithUs – Photo: Max Funkner
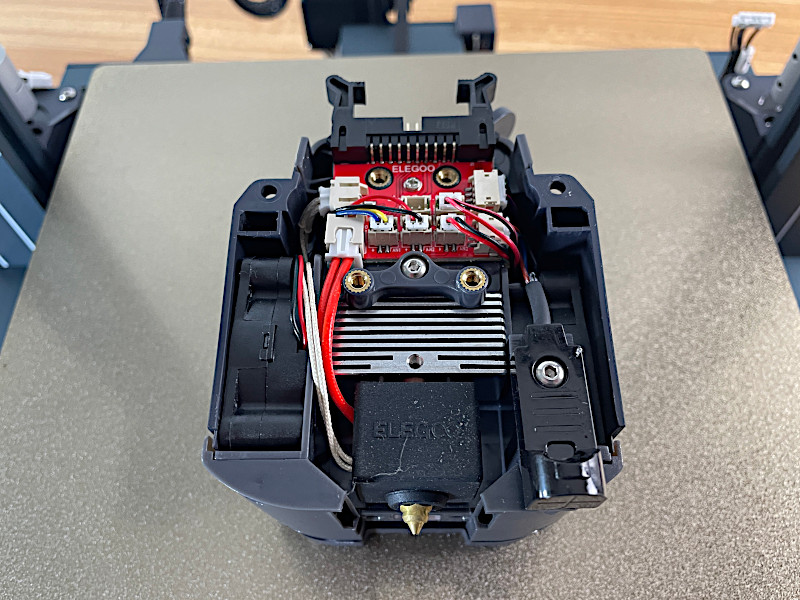
– Not Compatible! Unfortunately, even with only a 2mm difference in thread, such a nozzle appeared not compatible. As a quick test, I tried to print one model with the Creality High-Speed nozzle I got from Ender 5 S1, and there was trouble straight away. Filament leaked onto the heating block (on the image below) and the print during my 3-hour print, causing a print failure at 95% completion.
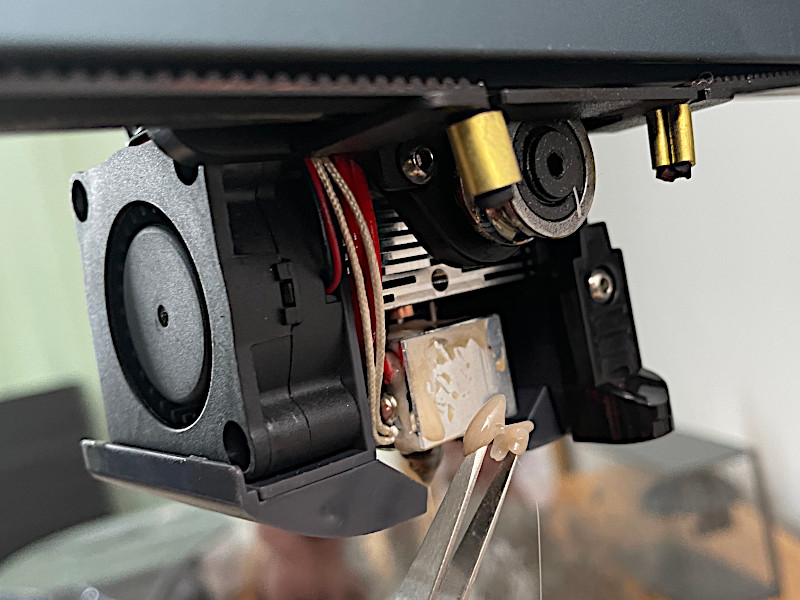
©3DWithUs – Photo: Max Funkner
Luckily, this mess was easy to clean, but I wouldn’t recommend trying it to anyone.
How to Change the Nozzle on Neptune 4 Series 3D Printers
In order to change the nozzle, the heat block-protecting ‘sock’ needs to be removed. To remove the ‘sock’, I had to take off the 4-fans panel first. So, the procedure is slightly longer than usual. For users who change nozzles often, permanently removing the ‘sock’ can be a good solution.
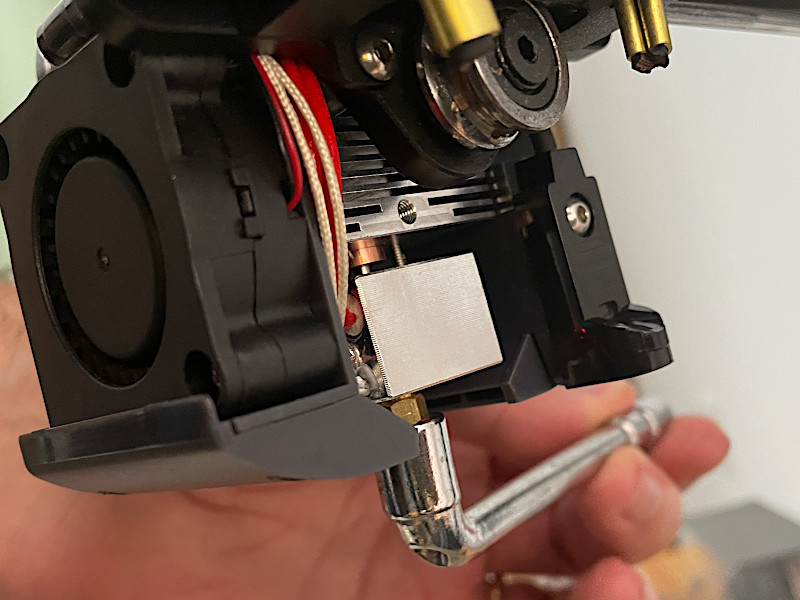
After the nozzle change, Z-offset, Auto-leveling, and Z-offset again, calibrations are required.
Printing Included Demo and Other Test Models
Initially, I couldn’t start included Benchy Rapid PLA Test file. The file in the dedicated folder was blank. After successfully printing three other models, I realized that the Rapid Benchy G-code got corrupted. It was easy to fix. I opened the existing Rapid Benchy G-code in Elegoo Cura and saved it again. That’s it. It worked well, and Benchy got printed as promised in 18 minutes.
©3DWithUs – Print and Photo: Max Funkner
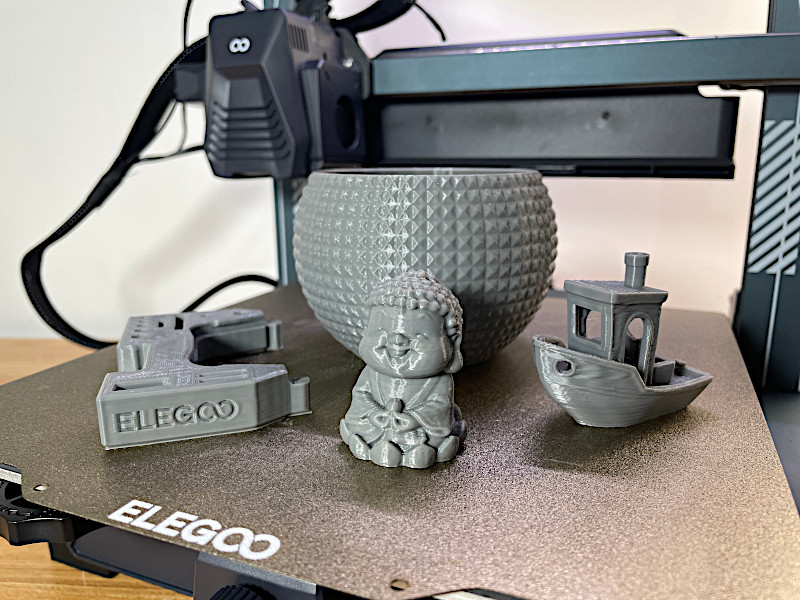
The Elegoo team keeps adding new test files to their ‘Models’ folder. Altogether, I printed four of them in SUNLU Grey Metal PLA from Amazon.
3D Model on Printables
©3DWithUs – Print and Photo: Max Funkner
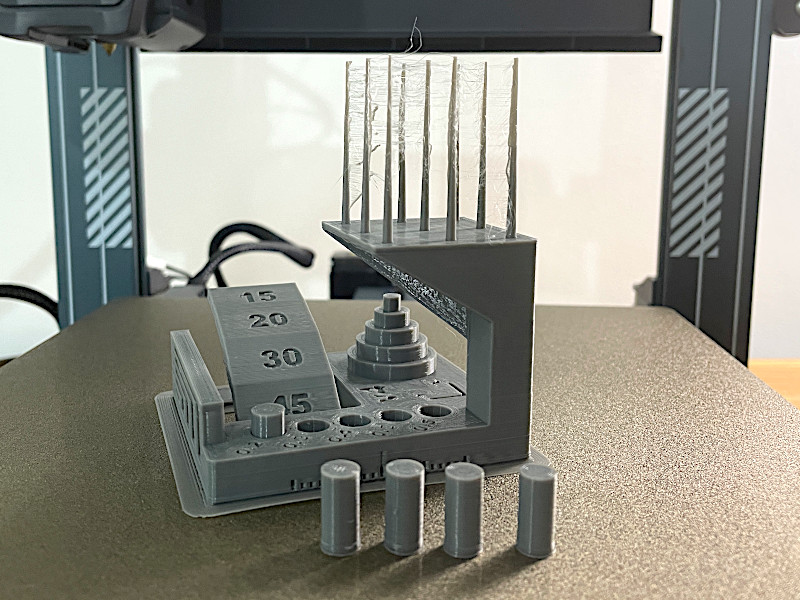
I decided to torture test the Neptune 4 Pro with the Kickstarter & Autodesk Collab 3D Printer Test model. I installed the Elegoo Cura slicer software included on the USB and sliced the model with default 200mm/s settings. Why is this print challenging? It tests bridges, overhangs, tolerances, and more, all at a high speed. It came out well, apart from some stringing at the end, which I believe can be eliminated with further fine-tuning of filament settings. It’s good, considering the print was completed in just two hours on such an inexpensive machine.
Elegoo Cura Slicer – Tips and Settings
While Neptune 4 Pro and other machines of this series are new, not many fine-tuned printer profiles are available on major slicer software. After briefly looking at a few software options apart from Elegoo Cura, the Neptune 4 Pro printer profile was available on Simplify3D, but even there, the default speed was very low at 50mm/s. For this review, I tested models using Elegoo Cura’s default settings with some minor adjustments.
– Default Settings. I am very happy with the speeds it offers at ‘Normal’ default settings. The majority of prints took me 1-5 hours to complete. The print quality was good. In some cases, I would fine-tune the filament settings further, but I am happy with the results nevertheless.
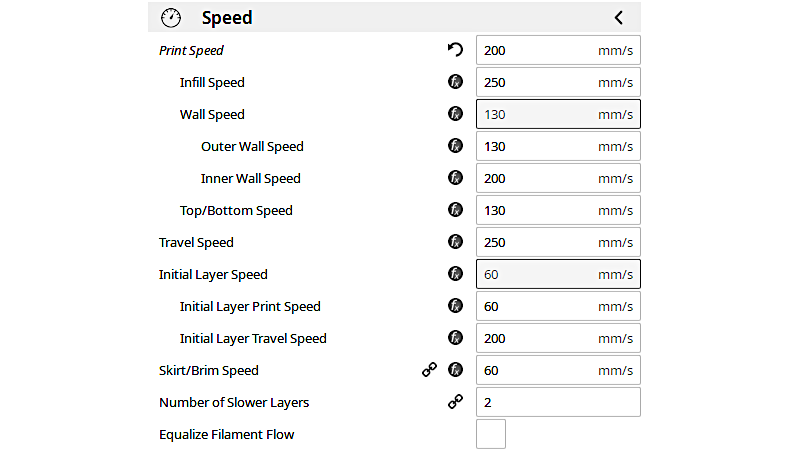
Screenshot – Elegoo Cura
– Brim. I kept toggling the ‘Adhesion’ option as needed. A brim of 5 layers around the model helps with extra adhesion and secures sharp corners against warping. However, such a brim can be tricky to clean on a model with a busy, multiple-aisle base. The new version of Cura has better-tuned brims that are much easier to remove. So, it can be an option to copy the speed, temperature, and flow settings and create a custom profile in the new Cura, as it gets updated more often, bringing new features.
Screenshot – Elegoo Cura
3D Model on Cults
©3DWithUs – Print and Photo: Max Funkner
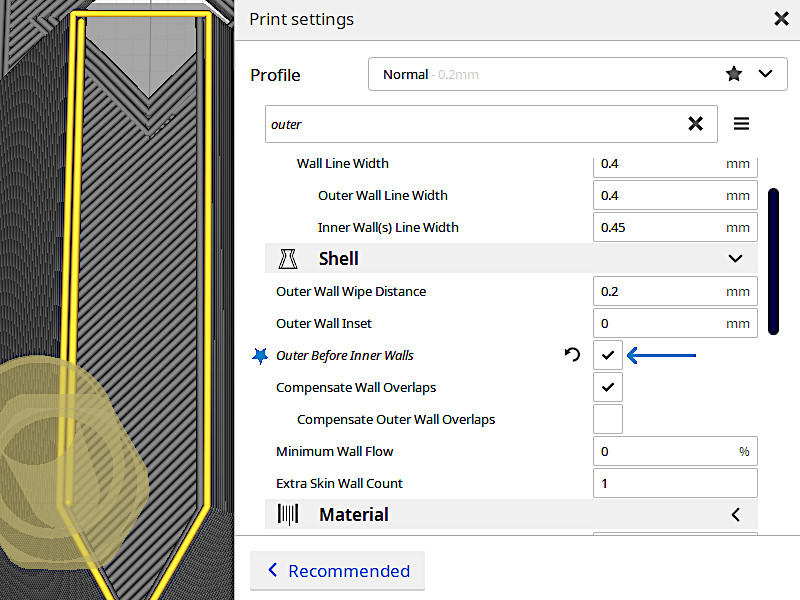
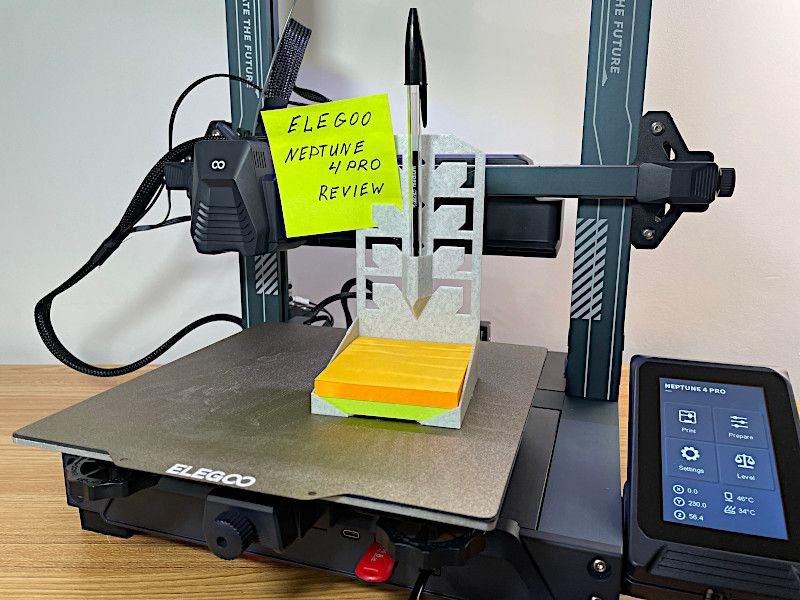
– Outer Before Inner Walls. This is another setting I had to play with when printing my own Post-It Note Holder. If PrusaSlicer, in this case, is more intuitive and slices the top layers of my model correctly, then Elegoo Cura, without ticking this option, sliced the top layer of the pen holder area in the air. I’m glad that one member of Cults pointed this out, and I found the right setting quickly.
Ethernet Connectivity and Klipper
Earlier, Richard Hirst, in his Neptune 4 review, highly praised the Klipper firmware, briefly explaining how Pressure Advance and Input Shaping work. In a few words, Klipper is the main culprit behind the recent ‘print speed race’ by many consumer FDM printer manufacturers, by effectively reducing errors and improving print accuracy at high print speeds.
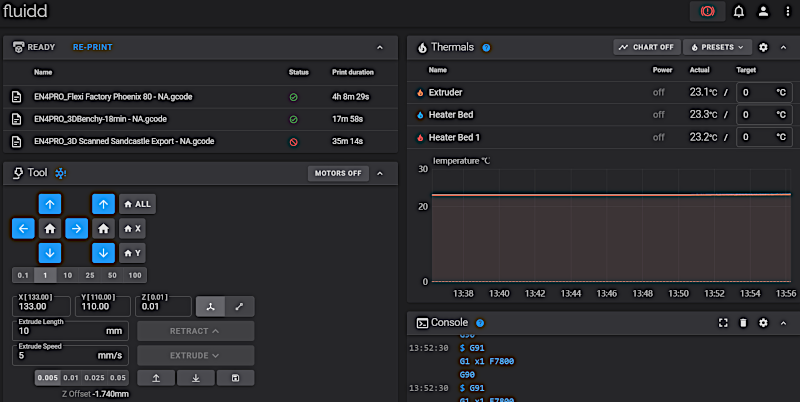
To access the Klipper interface from your computer, connect the Neptune 4 to a network using the included LAN cable. To access the Klipper browser window, enter the printer’s IP address into your web browser. To find the 3D printer’s IP address on the screen, go to Settings -> About Machine -> IP (at the end).
If needed, Klipper-enabled extruders can also be calibrated similarly to Marlin. Here is the Extruder Calibration Guide for Klipper Firmware by Will Zoobkoff.
Other Test Prints
To conduct a torture test on the machine for this review, I focused on speed, so most of the prints are made using various types of PLA. I started with simpler models that require minimum retractions and finished with complicated ones with strings/bridges, print-in-place, and many independent parts involving models.
©3DWithUs – Print and Photo: Max Funkner
Bed adhesion failed me once. The model was tall, but the base was too small, and I couldn’t use a brim due to excessive cleaning. When Magigoo from Amazon was applied, the print was completed successfully.
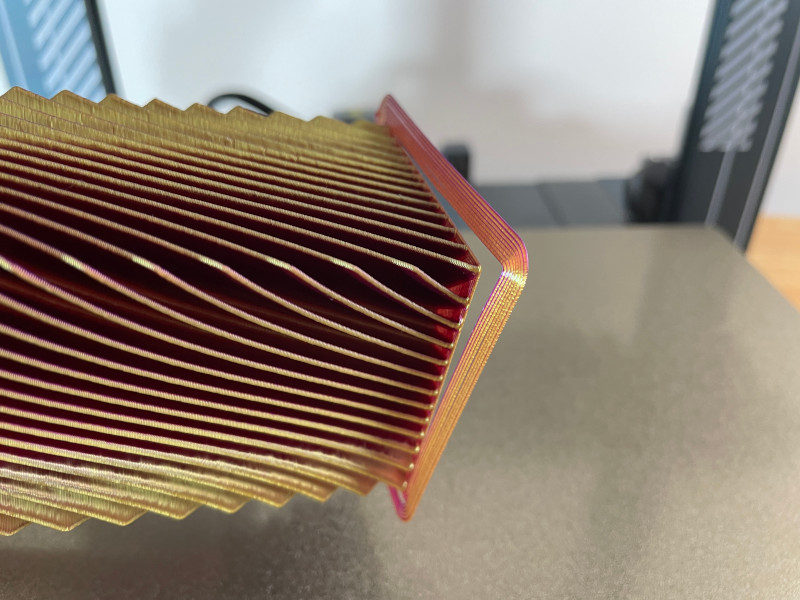
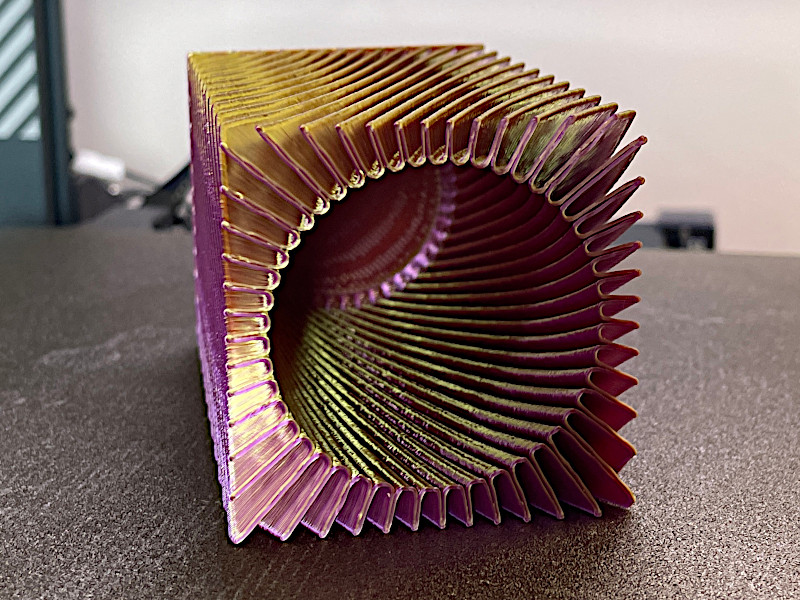
3D Printing In Dual Color PLA
Dual-color PLA landed well on the Fin Square Vase by DaveMakesStuff. This print was also printed using Elegoo Cura’s default normal settings but with Spiralize Outer Contour ON. An interesting shape.
3D Model by DaveMakesStuff on Thangs
©3DWithUs – Print and Photo: Max Funkner
This was the rare case when the Elegoo Cura Adhesion Brim was cleared easily. As I mentioned before, the new version of Cura has better-tuned brims that are much easier to remove.
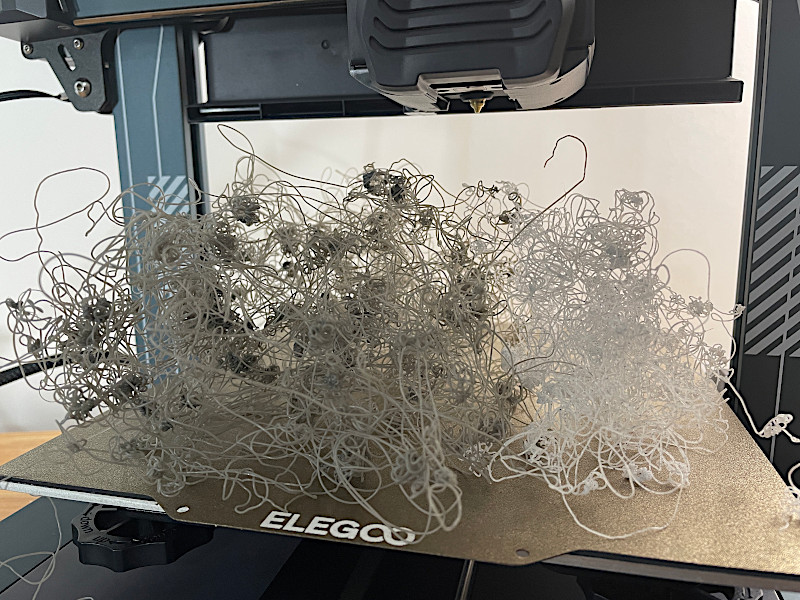
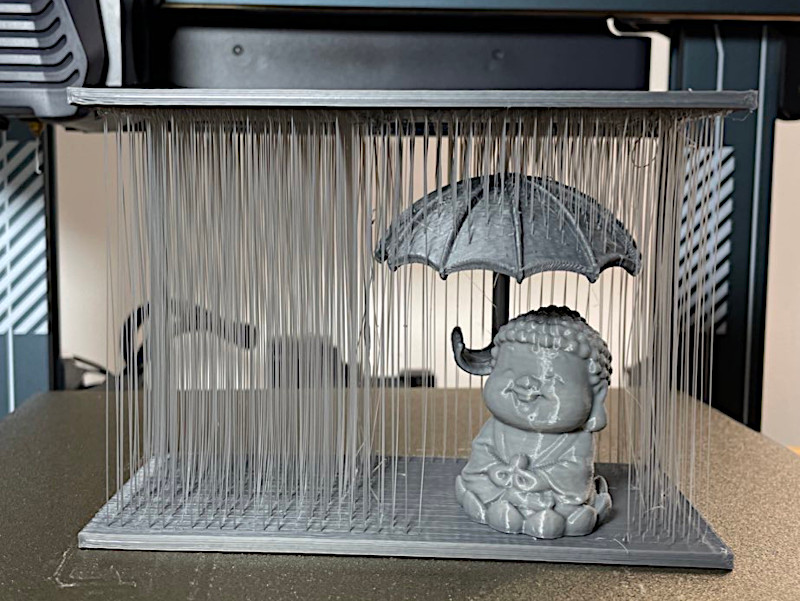
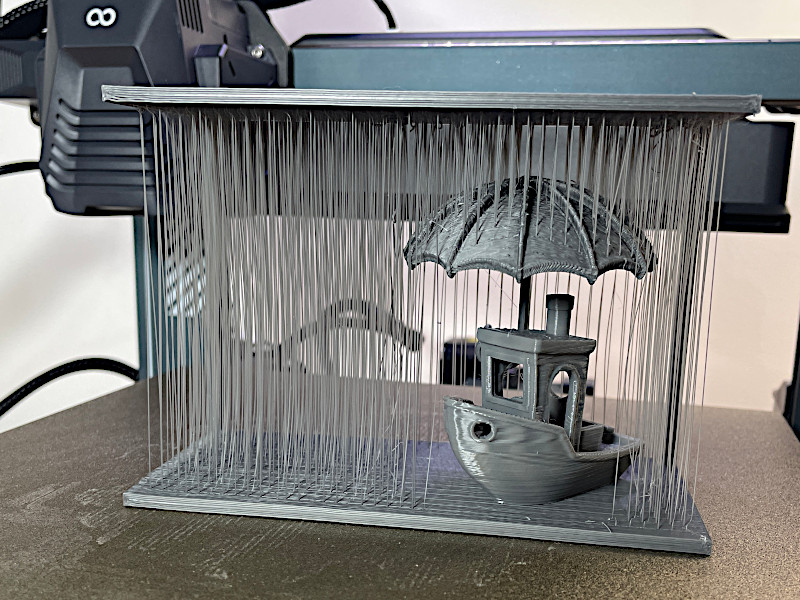
3D Printing Long Bridges
OK, here is the case where I feel that slicer default settings are not enough, but the results are astonishing nonetheless. The thing is, a large amount of such strings/bridges were barely connecting to the sides, leaving them very fragile. Even in the slicer preview, a couple of strings started mid-air. But again, achieving such an impressive model in 3 hours is a remarkable result. I bet it can be fine-tuned for a better result or we can try another slicing software if needed.
3D Model by 3DPrintBunny on Thangs
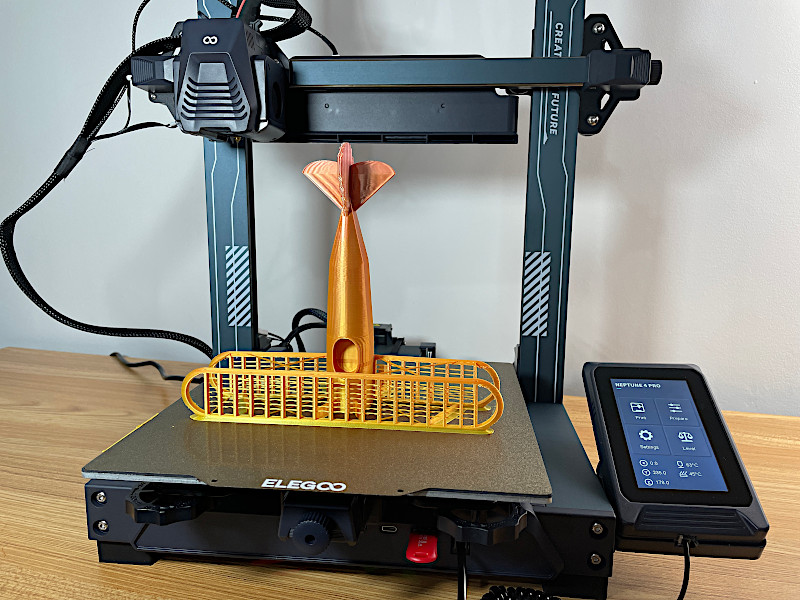
©3DWithUs – Print and Photo: Max Funkner
©3DWithUs – Print and Photo: Max Funkner
String Biplane is another model by 3DPrintBunny I would print with slightly different settings than using the default ones. I would remove the brim, as its removal was time-consuming, and instead use Magigoo. Additionally, the biplane’s wings and wheels are quite curvy, so extra cooling is needed in these areas. Also, leaving the default 220 °C temperature was too high.

3D Model by 3DPrintBunny on Thangs
©3DWithUs – Print and Photo: Max Funkner
©3DWithUs – Print and Photo: Max Funkner
3DPrintBunny keeps surprising her followers by implementing often challenging printing techniques in an artistic way. Please check the 3DPrintBunny Art files on Thangs or Printables, follow her on social media, and explore her guides on 3DWithUs.
3D Printing Print-in-Place Articulated Models
As usual, when testing a new printer with a challenging model, I pick something print-in-place, such as articulated dragons, for example. These models are a great test for bed adhesion. This time, I decided to play it safe as I love my marble filament and wanted to be sure. Using a raft greatly eliminates adhesion issues by printing a few layers as a wide base for the models, which can be easily removed from the object when the print is completed. I like Cura’s rafts. They’ve always worked well for me.
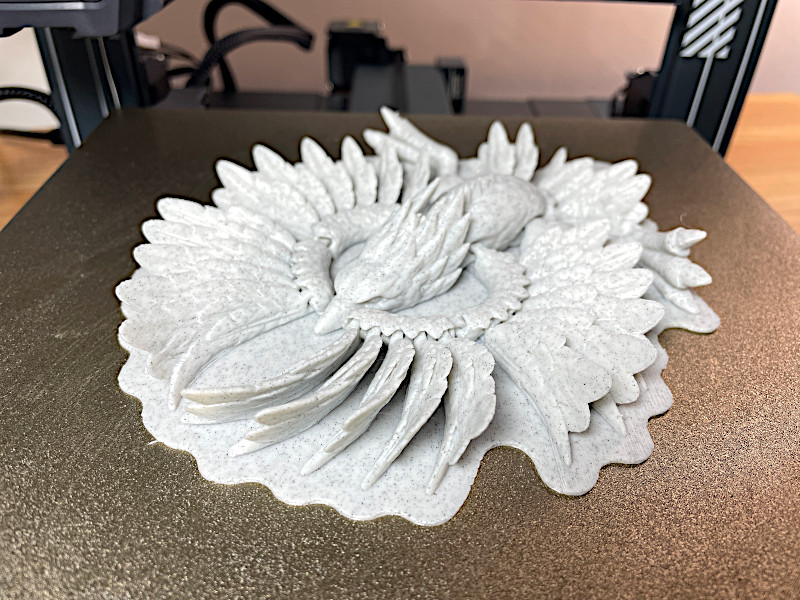
3D Model by FlexiFactory on Cults
©3DWithUs – Print and Photo: Max Funkner
I printed two birds in different filaments. It took me 5 and 4 hours with the default speed settings.
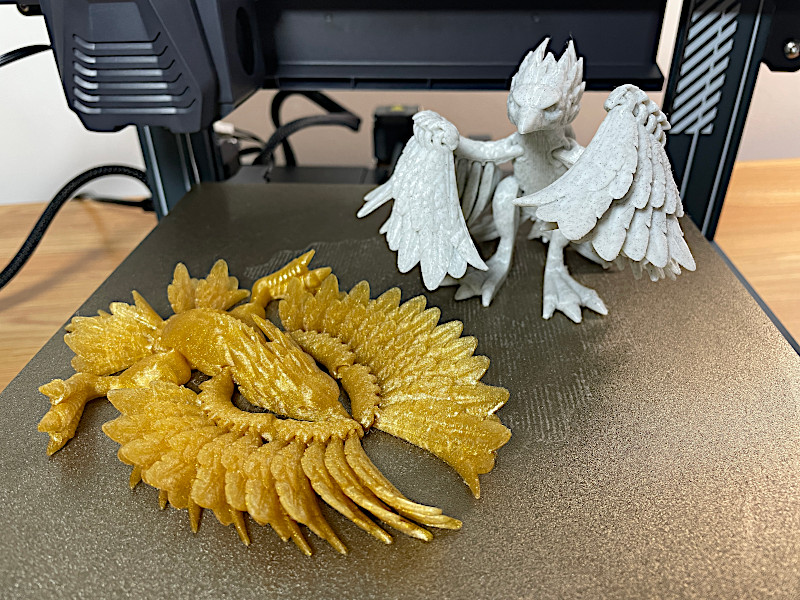
Flexi Posable Phoenix is one of the masterpieces by Dan Sopala from FlexiFactory, one of the most successful 3D print designers on Cults.
Compare to Other 3D Printers
Nice-to-have features, a strong community, and a low price keep the Elegoo Neptune series 3D printers high on our budget 3D printer buyers’ guide for the second year in a row. Read more about what to consider when buying a budget 3D printer and compare with other brands.
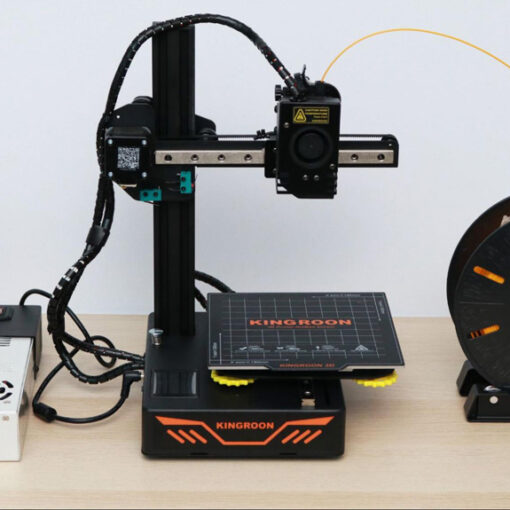
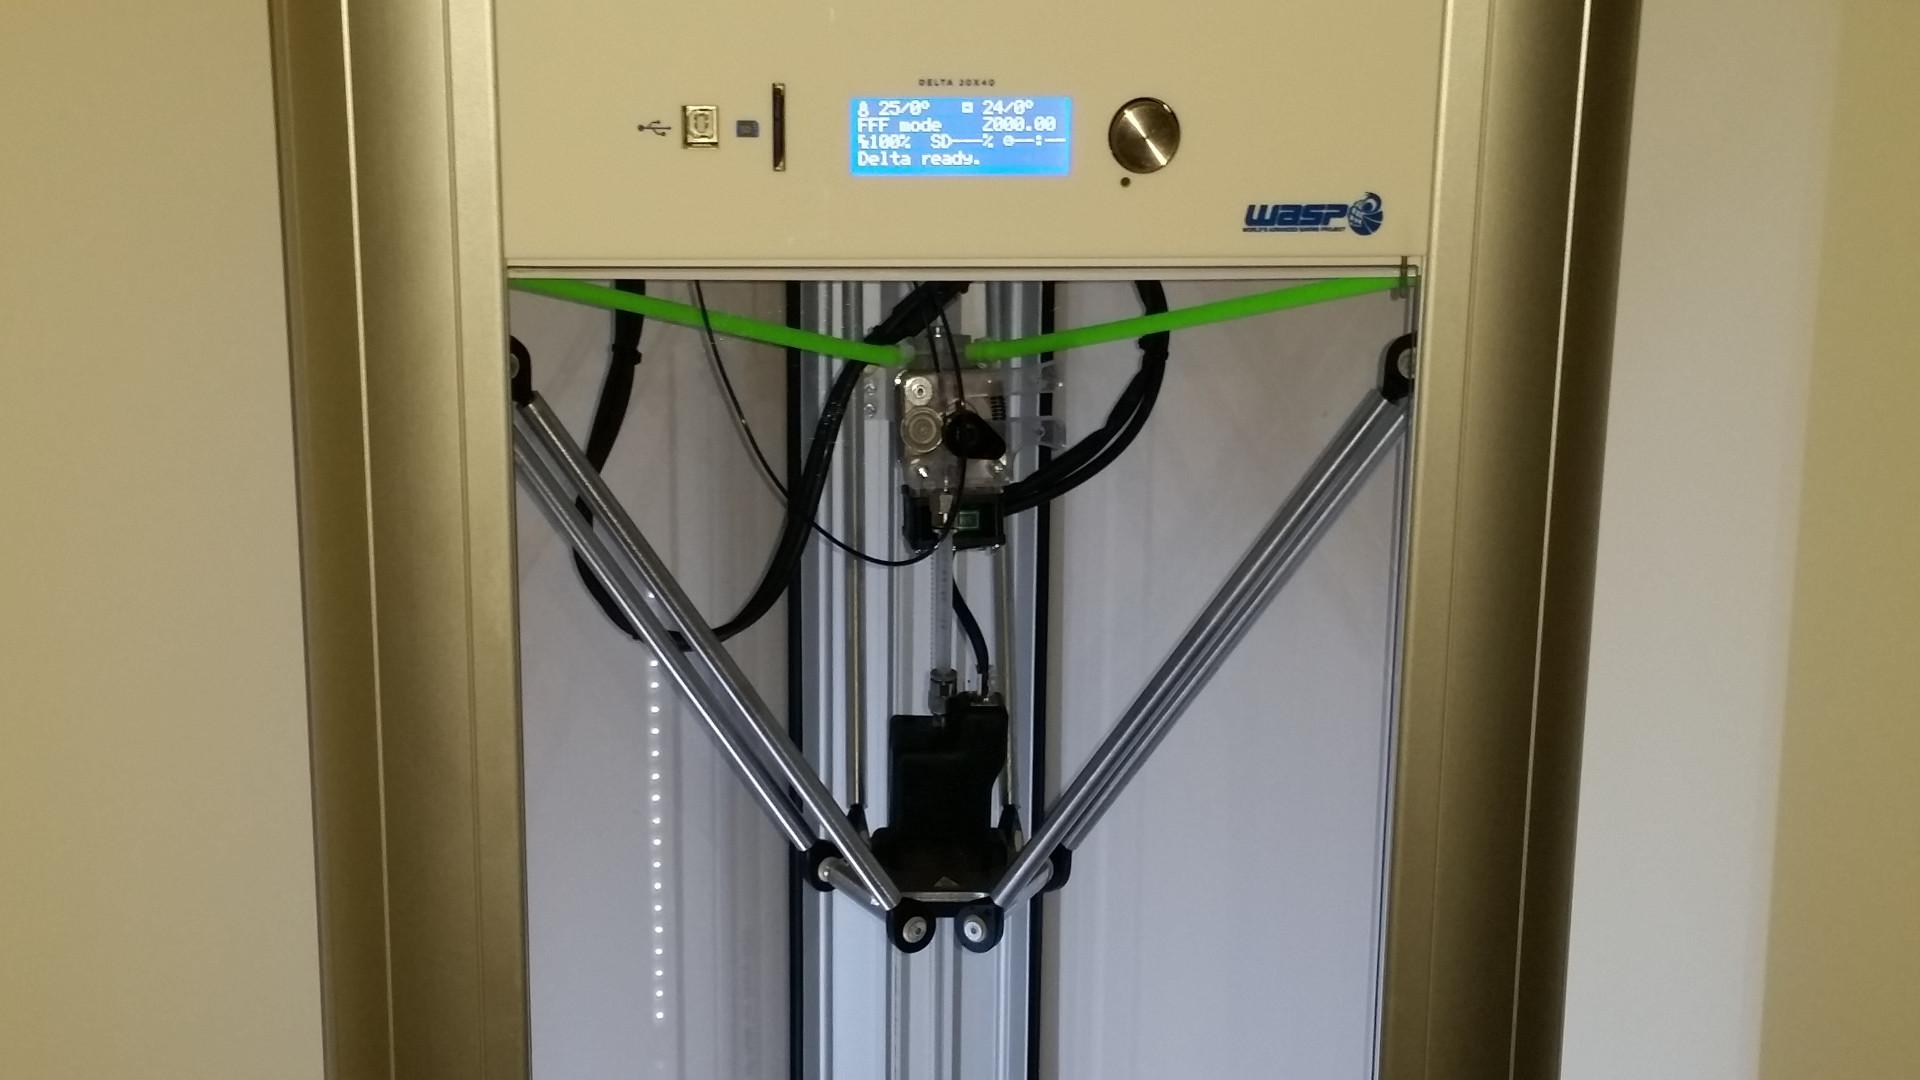
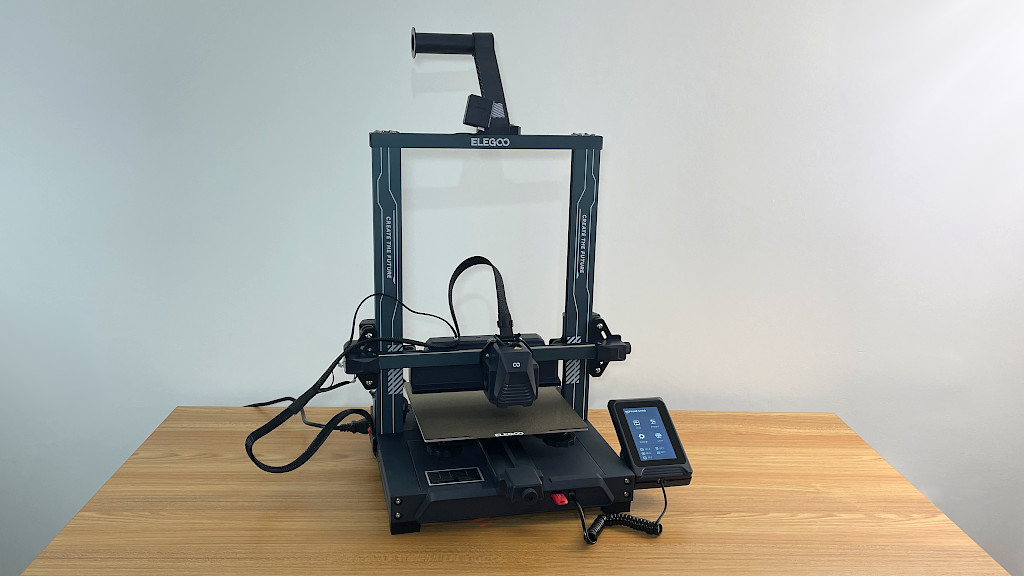
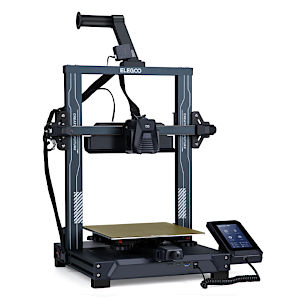
Compare to the similar volume FDM 3D printers in the same $300 price range:
This year, the main competitors for the Elegoo Neptune 4 Pro could be the Creality Ender 3 V2 Neo and the AnkerMake M5C. The Neptune 4 Pro stands on strong ground with its competitive pricing and the benefits of being Klipper-enabled.
Compare to the Elegoo Neptune series 3D printers:
Together, the Elegoo Neptune 4, Neptune 4 Pro, Neptune 4 Plus, and Neptune 4 Max constitute the latest products in the Neptune FDM 3D printer series. If some of the machines haven’t been reviewed on our website yet, you can refer to their primary comparison table in the image below to get a general overview.
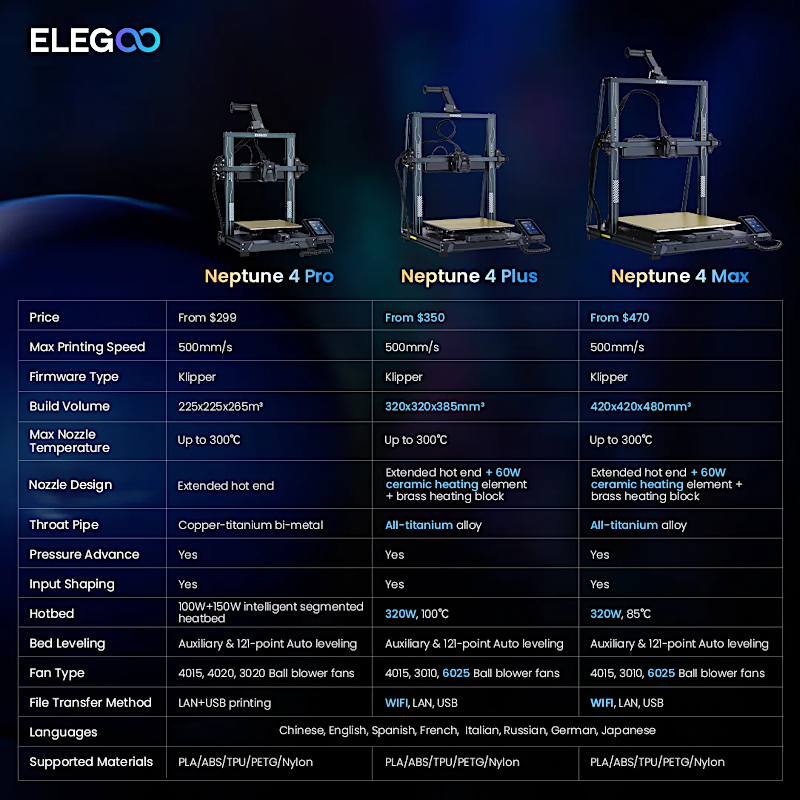
Image: Elegoo
Review Conclusion and Pros & Cons
Compare the Prices & Bundles:
Official Store | Amazon
Elegoo Neptune 4 Pro Review
Review Summary
Elegoo Neptune 4 Pro has all the nice-to-have features, such as a flexible bed, auto-leveling, powerful extruder, and still remains a budget 3D printer. On top of that, thanks to the ‘print speed race’, the machine now incorporates the well-performing Klipper technology. I was pleased that with the default slicer settings, printing times were greatly reduced. If a year ago such high printing speeds were possible only on more expensive and often custom builds, now speedy printing comes with much cheaper machines. We, as consumers, greatly benefit from such competitive, innovation-rich times.
PROS:
Price
Quick Assembly
Klipper Firmware
Powerfull Extruder
Extra Cooling
CONS:
Custom Nozzles
Noisy on High Speeds