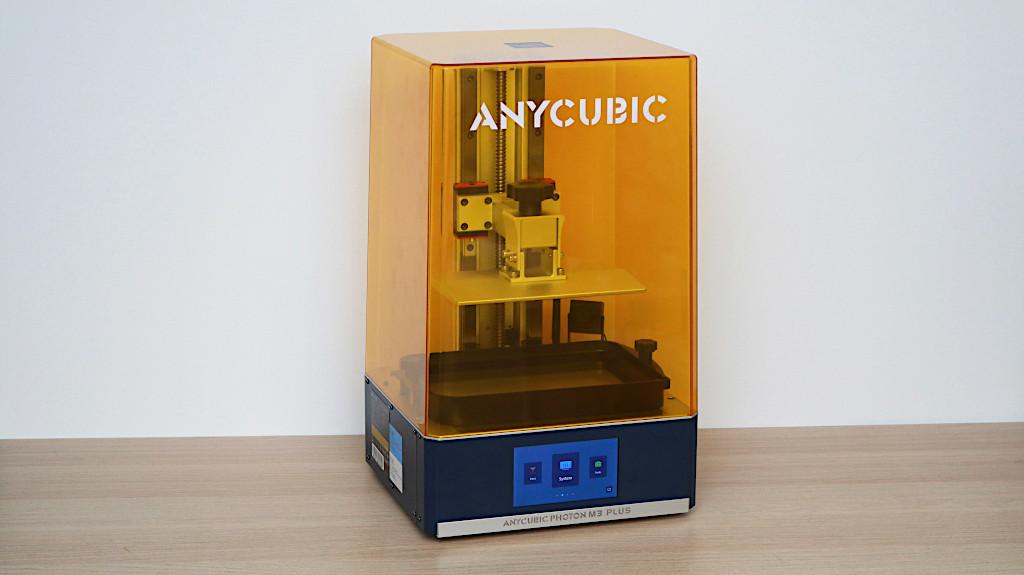
The Anycubic Photon M3 Plus is the middle child of the new M3 line from Anycubic, but don’t let that designation fool you into thinking it lacks distinguishing features. The Photon M3 Plus is a large format resin 3D printer with a 6K Mono LCD that offers large parts, high resolution, and a blazing fast per-layer cure time of 1.5 seconds. In addition, the M3 Plus features a unique automatic resin vat filling system, an optional camera for monitoring prints, and Wi-Fi connectivity through the newly released Anycubic Cloud ecosystem. Coming in at $699, the M3 Plus packs a lot of functionality into its ~26 lb. frame, and will no doubt be a common sight in the prosumer market.
Anycubic Photon M3 Plus Specifications
Layer Height: .010mm to .15mm
X/Y Resolution: 34 micron
Print Speed: 1.5 sec / layer
Build Volume: 197 x 122 x 245 mm / 7.8” x 4.8” x 9.6”
Material: 405nm wavelength UV resin
Masking LCD Resolution: 5760 x 3600 px
Masking LCD Size: 9.25” Mono LCD
Connectivity: USB Thumb Drive, LAN, Wi-Fi
Interface: 5” Color Touchscreen LCD
Comparison Table
Price: $573-639
Affiliate links:
Amazon
AliExpress
Official Website
Hardware Features and Review
Weighing in at just over 26 pounds, the Anycubic Photon M3 Plus is a sturdy machine that feels significantly more robust than lower-cost resin printers, which tend to have plastic frames. The primary interface of the M3 Plus is the 5-inch color LCD touchscreen on the front of the printer which is bright, responsive, and gives the printer a professional appearance.

© 3DWithUs – Photo: Andrew Sink
The Photon M3 Plus uses a 9.25-inch 6K masking LCD with an X/Y resolution of 34 microns, which gives it a higher resolution than the similarly sized Anycubic Photon Mono X, which features an X/Y resolution of 50 microns.

© 3DWithUs – Photo: Andrew Sink
Photon M3 Plus 3D Printing Volume
The large volume (7.8 x 4.8 x 9.6 inches) of the M3 Plus is impressive for a resin 3D printer, and it has been designed to allow the user to maximize the usage of this volume. The Photon M3 Plus uses a pair of linear rails on the ball screw-driven Z-axis for smooth and precise movement of the gantry. The gantry is a solid block of machined metal which feels sturdy and robust with no play or wiggle during printing.
© 3DWithUs – Photo: Andrew Sink
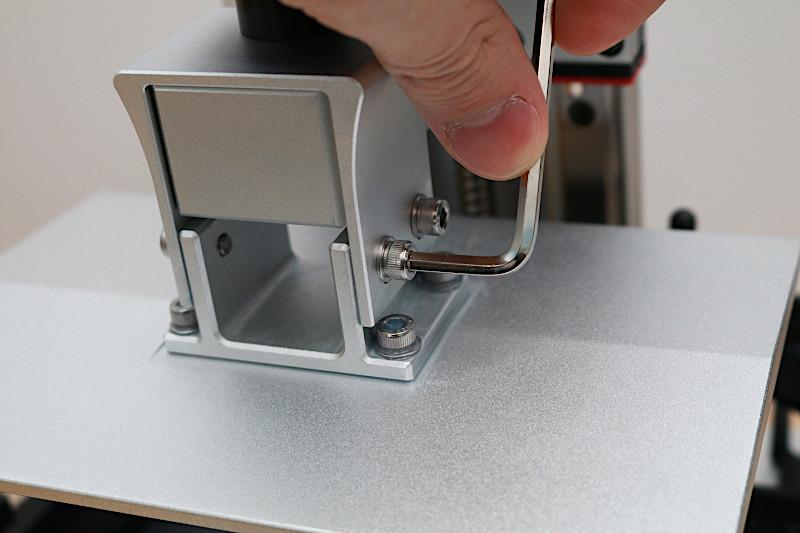
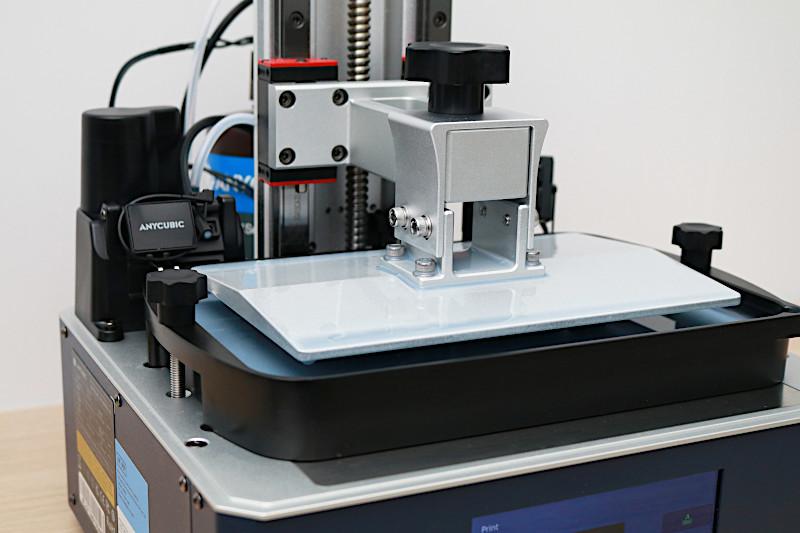
Build Platform Leveling
Just like the Anycubic Photon Mono X, the Photon M3 Plus uses a four bolt leveling system to align the build platform with the masking LCD. This system is easy to use, and Anycubic includes a special sheet of paper that can act as a feeler gauge during leveling. I simply placed the sheet of paper on top of the masking LCD, homed the Z axis, and tightened the four bolts on the Z gantry. Once this process is complete, the bed is leveled and the printer is ready to print. I leveled the printer once after receiving it, and did not need to make any adjustments throughout the rest of this review.
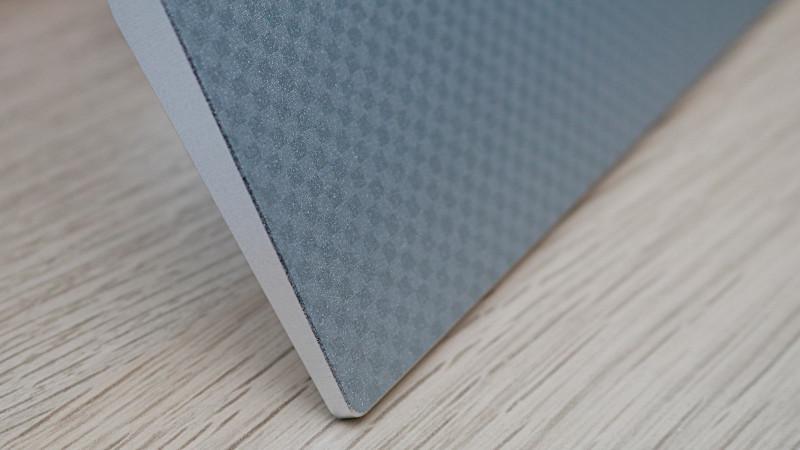
The build platform on the Anycubic Photon M3 Plus features an innovative laser-etched pattern which helps to increase the bond between the first layer and the platform. Models with a large footprint or wide cross-section on the first layer tend to delaminate at the edges, which can lead to the part peeling from the platform during printing. This etched pattern worked well during testing, and I didn’t have any issues with models not adhering to the platform.

© 3DWithUs – Photo: Andrew Sink
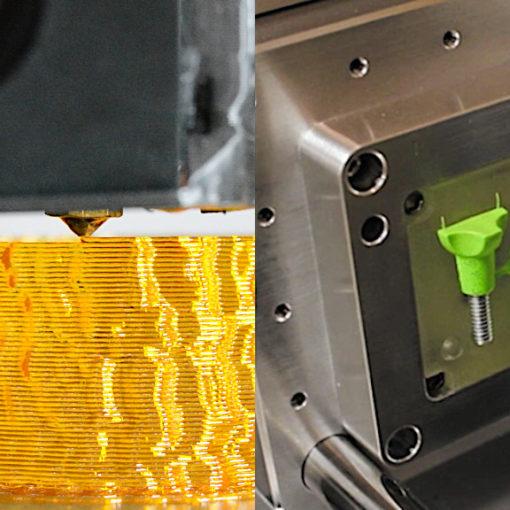
Anycubic Automatic Resin Pump System
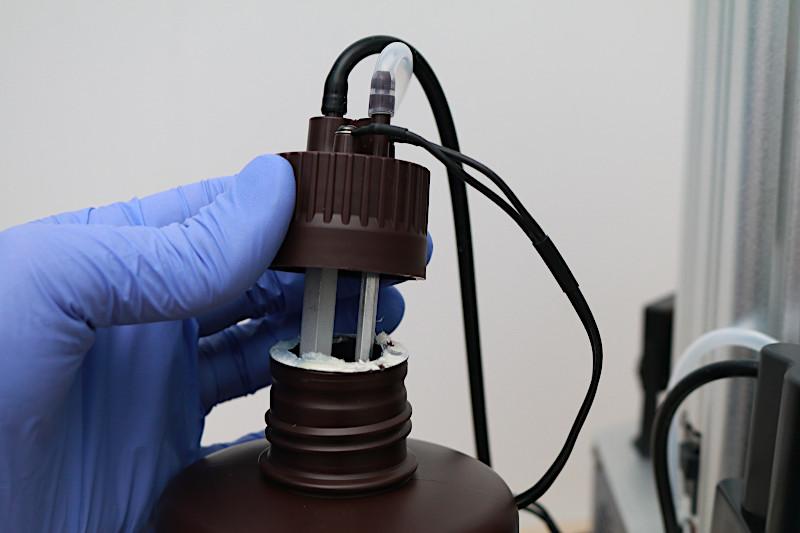
The Photon M3 Plus features an automatic resin vat pump, a new feature which is designed to automatically detect when the resin vat is running low and automatically add material without pausing the print. “How do I add resin during printing?” is a common question among new users, and this automatic pump seeks to solve this problem before it even occurs. The pump uses two metal pins to detect resin in the vat and when the circuit is opened, air is pumped into the resin bottle (mounted behind the printer), which causes resin to pour from the tube.
© 3DWithUs – Photo: Andrew Sink
While the automatic pump works well, the amount of tubes, wires, and probes make this system look a little less professional, and a little more like a science project. In addition, the black tube which delivers the resin will need to be flushed whenever resin is changed to fully change colors and to prevent it from potentially hardening and blocking the stream.
While I liked the system overall, it does raise a few questions regarding maintenance and long-term storage. If you primarily print with a single type/color of resin and simply want to make large parts without worrying about the vat running out, this is a feature you will enjoy using.
© 3DWithUs – Photo: Andrew Sink

© 3DWithUs – Photo: Andrew Sink
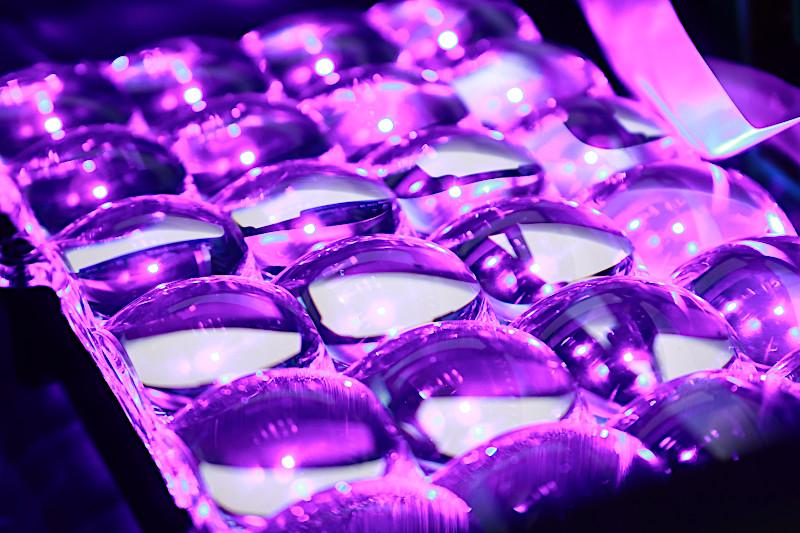
Anycubic LighTurbo Light Source
Anycubic’s LighTurbo Light Source is the name given to the combination of masking LCD, optical lens, lens bracket, and LED light source that is used in the new Photon M3 series of printers: the Photon M3, the Photon M3 Plus, and the Photon M3 Max. This light source is designed with speed and consistency in mind, and allows the Photon M3 Plus printer to ship with a native 1.4 second per-layer cure time.
©3DWithUs – Photo: Andrew Sink
The LighTurbo Matrix Light Source is a UV LED array that is designed specifically to project light evenly across the build surface. Here’s an explanation from Anycubic: “The LED beads project light to the optical lens during printing, which will refract all the diffuse rays and turn them into parallel light.”
Photon M3 Plus Testing – Anycubic Test and Other Prints
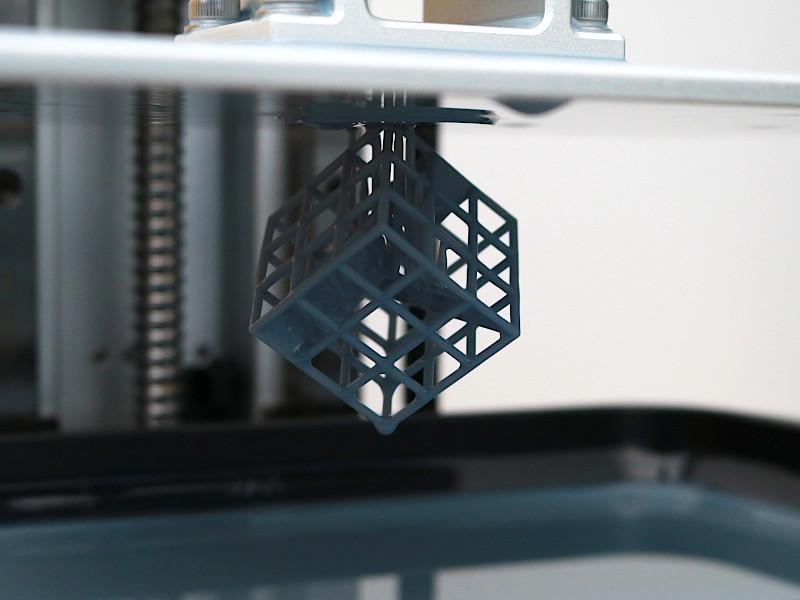
The Anycubic Photon M3 Plus only included a single demo model: a latticed cube with the Anycubic logo suspended inside of it. The pre-sliced model is loaded in a print-ready format on the included USB drive, and it printed without any issues.
© 3DWithUs – Photo: Andrew Sink
An interesting note: the lattice is capable of printing without support material, but this model included supports on the underside of one of the Anycubic logos, and not the other. Anycubic may be attempting to demonstrate the ability of the machine to print without support material on certain geometries, but that could have been made clearer with additional text or graphics on the part.

© 3DWithUs – Photo: Andrew Sink
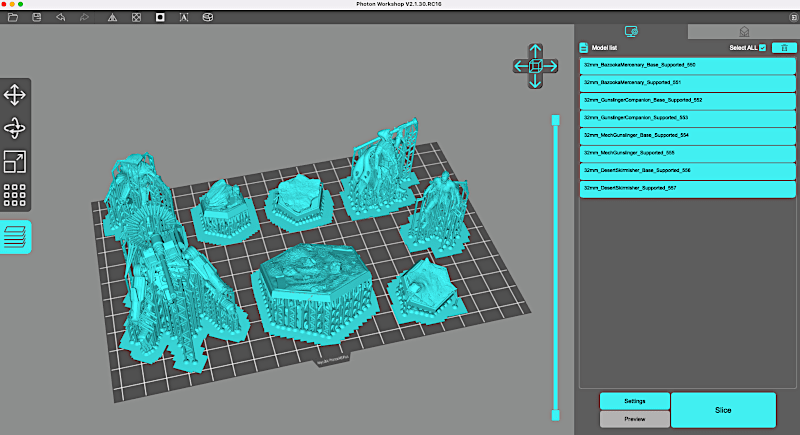
Settings – Printing with Photon Workshop
The Anycubic Photon M3 Plus uses Photon Workshop to prepare 3D models for printing, and a version of this software comes loaded on the USB stick included with the printer. I used a pre-supported model from Loot Studios to test out the slicer and focus on the resin settings. Using the default 50 micron settings, I sliced the model and saved the print-ready file to a USB drive for printing.

Screenshot: Photon Workshop

© 3DWithUs – Print & Photo: Andrew Sink

© 3DWithUs – Print & Photo: Andrew Sink

© 3DWithUs – Print & Photo: Andrew Sink
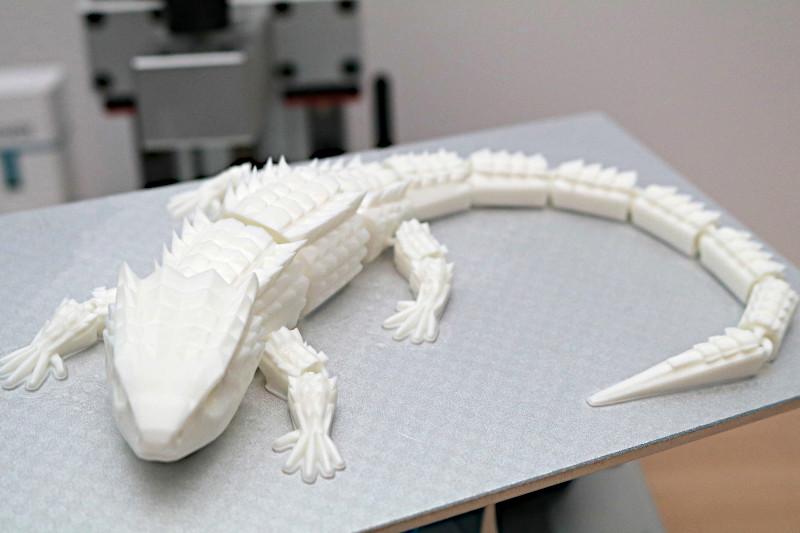
Using Anycubic Basic resin, the Power Loader model printed without any issues and was easily removed from the build platform. The support material was easy to remove, and the detail on the model was superb. Small details like bolts and fasteners were easy to identify, and the overall quality of the print was readily apparent. The benefit of the 34 micron X/Y resolution from the 6K masking LCD is clear; small details are sharp and in-focus without compromising on print speed.

© 3DWithUs – Scan, Print & Photo: Andrew Sink
Photon Workshop can also generate supports automatically, which I used to print a 3D scan of the Statuette of Salus, a marble sculpture that is over 1900 years old. This 3D scan was made using Polycam, a 3D scanning app which only requires a smartphone. You can learn more about Polycam in our guided tutorial if you’re interested in making 3D scans of your own. The support material detached easily from the print, and the organic curves of the marble were captured perfectly by the Photon M3 Plus.
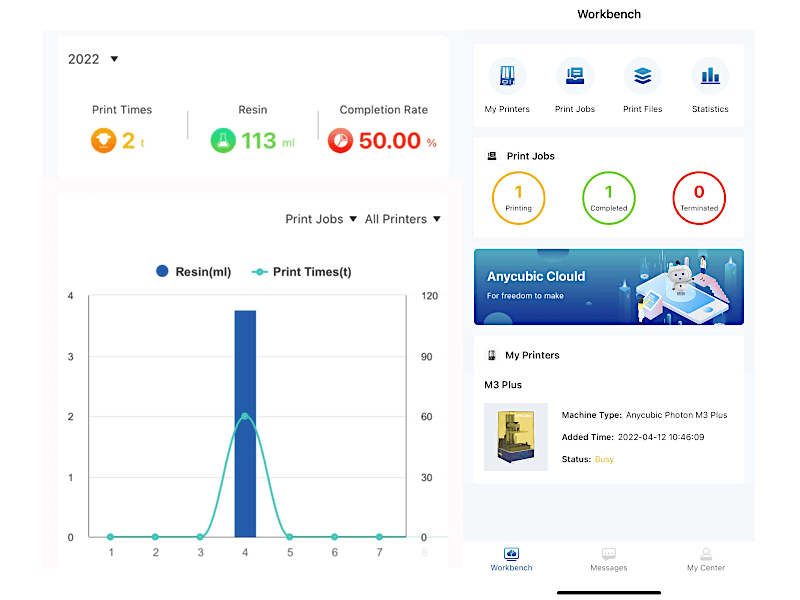
Anycubic Cloud – Testing the App
The Anycubic Photon M3 Plus is designed to work with the newly released Anycubic Cloud; a cloud-based file transfer system that allows users to start the M3 Plus remotely. Anycubic Cloud requires an iOS or Android app as part of the workflow, so you’ll need to use a mobile phone for printing. The general workflow starts in Photon Workshop with a model that is prepared for printing and sliced. From there, it is uploaded to the Anycubic Cloud account of the user, where it can then be accessed through the Anycubic Cloud phone app. This workflow requires the printer, cell phone, and computer running Anycubic Cloud all be connected to the internet.
The app itself is useful (I used it to start a few prints and was impressed with the upload/download speed) and it worked perfectly during testing. However, I did find myself wishing for a way to start prints directly from Photon Workshop without using a phone, which felt a bit like an extra step. There is also an optional camera that allows for wireless monitoring of prints, but the firmware version at the time of this review did not support this accessory. This section will be updated when the firmware is updated. The statistics on Anycubic Cloud are a nice touch, and the ability to see resin consumption and number of successful prints is a great way to track the productivity of a machine.
Optional Camera
The optional camera on the Anycubic Photon M3 Plus attaches on the rear of the base, and features two points of articulation to help you capture the perfect shot. The camera works by streaming live video to Anycubic Cloud, so you can monitor the status of your print from the app.
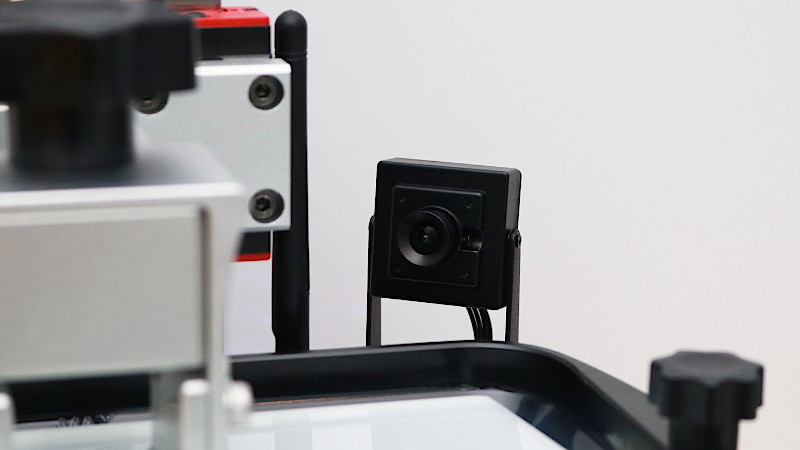
Photo: Andrew Sink
In addition to showing statistics related to the print, the live video feed allows users to see their print in real time. The camera doesn’t output a particularly high resolution image, but it is perfectly suitable for monitoring the status of a print in real time. At the time of this article, Anycubic cloud doesn’t offer any additional features such as capturing or storing images, but I found it was easy to screenshot the app to capture frames during printing.

Screenshot: Anycubic Cloud Interface
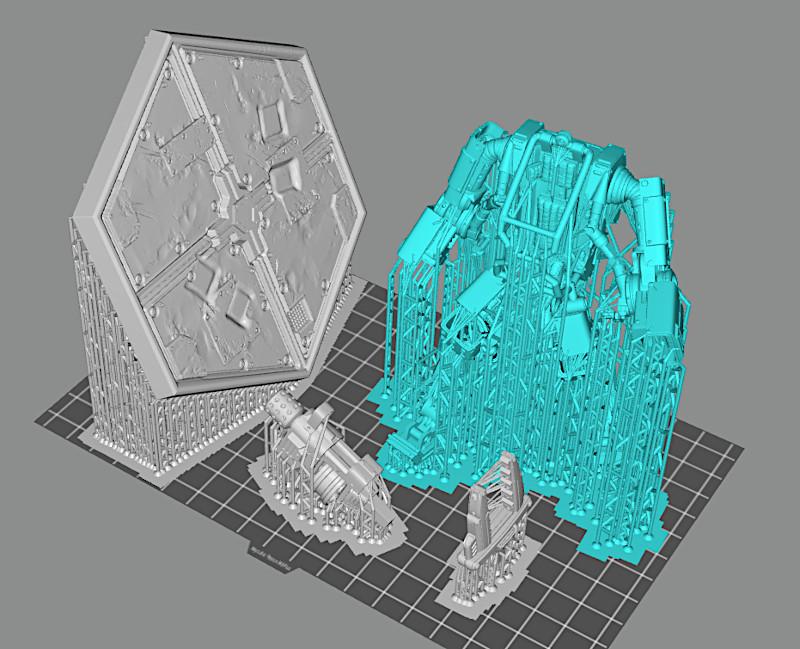
Large Volume Printing on the Anycubic Photon M3 Plus
One of the biggest draws of a large format resin 3D printer is the ability to produce multiple parts simultaneously while reducing the overall cycle time per part. The large build platform of the M3 Plus is perfect for printing large objects; split up or in a single piece. To test this out, I printed the Laser Cannon from Loot Studios on a single platform by laying out all five pieces at once. This is a large terrain piece that would typically require multiple prints, but the large build volume of the Photon M3 Plus allows the entire model to be printed at once.

© 3DWithUs – Print & Photo: Andrew Sink

© 3DWithUs – Print & Photo: Andrew Sink
This model has alignment pins to aid assembly, and the overall accuracy of the model made this process simple. I was impressed with the level of detail captured, and the Photon M3 Plus printed out the initial wide cross-section with no difficulty. Despite the weight of this model (printed completely solid), it adhered to the build platform and didn’t peel or delaminate during printing.

© 3DWithUs – Photo: Andrew Sink
Tough Resin Test and Settings
Here is the print with the RESIONE M68 Tough White resin. I downloaded the profile bundle for Photon Workshop and uploaded the M68 profile. Please find the screenshot below.
Print and Photo: Andrew Sink
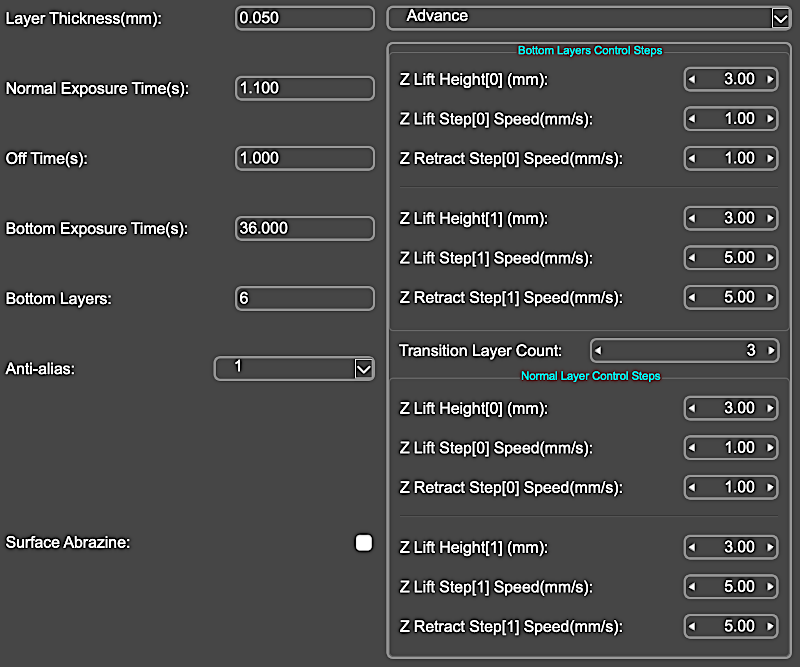
Screenshot: Photon Workshop
Conclusion
For this review, I tested the printer for a few weeks. The large volume, sturdy construction, and high resolution of the Anycubic M3 Plus make it a very strong contender for anyone interested in a reliable resin 3D printer. In addition, the Anycubic Cloud software, automatic resin vat filing, optional camera, and other features make the M3 stand out amongst the competition. The fast per-layer cure time of 1.5 seconds, 34 micron XY resolution, and sturdy Z-axis gantry have made this printer a personal favorite, and I have no doubt that it will soon have a growing user base.
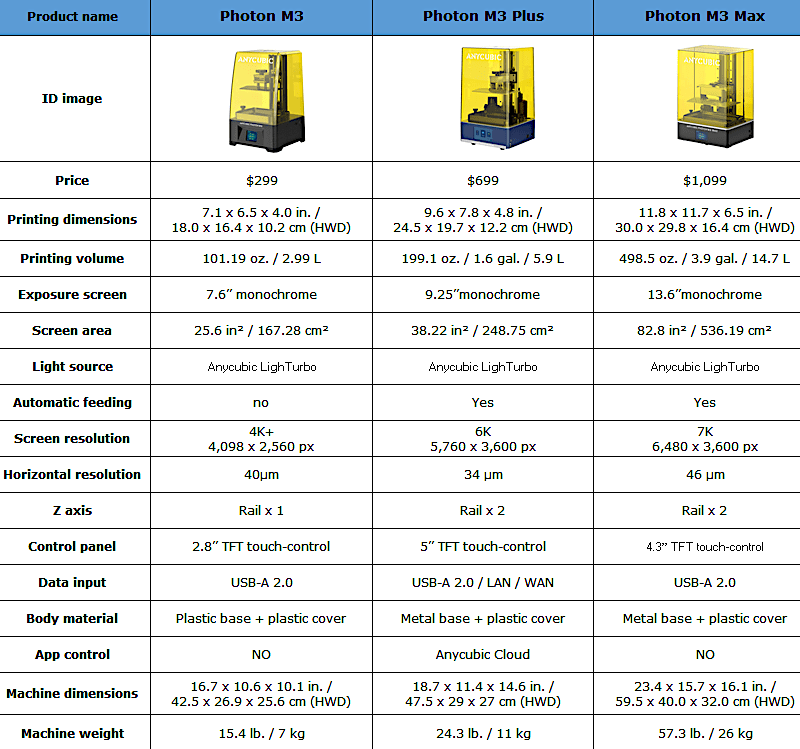
Anycubic Photon M3, Photon M3 Plus, and Photon M3 Max Comparison
Anycubic has released three printers in the Photon M3 line: the Photon M3, the Photon M3 Plus, and the Photon M3 Max. Please find the differences in the table below.
- Read more: Photon M3 Review
- Read more: Photon M3 Max Review
Compare to Other 3D Printers
Compare to the similar volume Resin 3D printers in the same price range:
The Anycubic M3 Plus volume vise falls somewhere in between the plus-sized 3D printers like the Elegoo Saturn 2 and UniFormation KGtwo, and high-volume machines like the Anycubic M3 Max. In terms of resolution, 8K screens are becoming more advanced and common in the newest SLA printers. For a more in-depth comparison, please visit our resin 3D printers comparison guide and table.
Amazon
AliExpress
Official Website
The Photon M3 Plus is available from $699 directly from the Anycubic site, with optional packages available that bundle Wash and Cure stations as well as resin.
Review Summary
The Anycubic Photon M3 Plus is the middle-child of the new M3 line from Anycubic, but don’t let that designation fool you into thinking it lacks distinguishing features. The M3 Plus is a large format resin 3D printer with a 6K Mono LCD that offers large parts, high resolution, and a blazing fast per-layer cure time of 1.5 seconds. In addition, the Photon M3 Plus features a unique automatic resin vat filling system, an optional camera for monitoring prints, and Wi-Fi connectivity through the newly released Anycubic Cloud ecosystem. Coming in at $699, the M3 Plus packs a lot of functionality into its ~26 lb. frame, and will no doubt be a common sight in the prosumer market.
PROS
– Innovative automatic resin vat filling system
– Laser-etched build platform
– Metal base feels robust and sturdy
– Large volume and fast build speeds
CONS
– Resin filling system may not be compatible with all resin bottles
– Anycubic cloud requires a mobile device to send prints

Could you please point me in the right direction. I have the M3 Plus and use the tough resin. The printer works well but leaves vertical lines in the print. Is this because of the new led matrix design or is there a setting to change this.