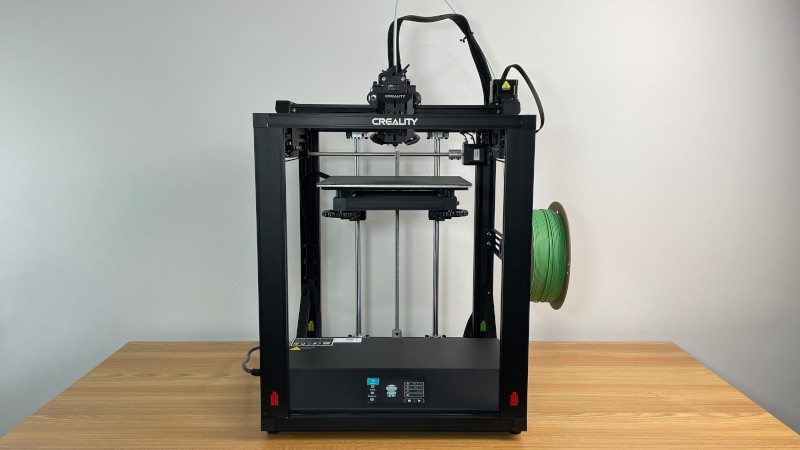
The Creality Ender 5 S1 stands out with its unique build when compared to typical i3-type desktop FDM 3D printers. Its all-metal cube-like frame is designed to provide stability when printing at high speeds. Equipped with a “Sprite” dual gear direct drive extruder, it can print at speeds of up to 250mm/s and can withstand nozzle temperatures of up to 300℃. Shipped as a DIY kit it is priced higher than the usual i3-type desktop machine and targets a specific consumer base. Let’s review Ender 5 S1, tune some slicer software settings, print a few awesome models, and outline the Pros and Cons.
Table Of Contents
- Specifications
- Unboxing and Assembly
- CR Touch Auto-leveling and Bed Adhesion Tips
- Included Test Prints
- Test Printing in Creality CR-PLA Matte
- Slicer Software – Cura, PrusaSlicer Simplify3D
- Automated Filament Change for Color/Material Switching
- Other Test Prints
- Compare to Other 3D Printers
- Conclusion and Pros & Cons
Creality Ender 5 S1 Specifications
Build Volume: 220 x 220 x 280mm / 8.66” x 8.66” x 11”
Extruder: Sprite – All Metal Dual-Gear Direct Drive
Max Speed: 250mm/s
Max Nozzle Temperature: 300℃
Max Bed Temperature: 110℃
Bed Leveling: CR Touch Auto-leveling
Material: PLA, PETG, ABS, TPU, PC, ASA, HIPS
Build Platform: PC Spring Steel Magnetic Build Plate
Filament Runout Sensor: Yes
Connectivity: SD Card, Cable
Interface: 4.1” Color Touch Screen
Price: $479-$579
Affiliate Links:
Amazon
AliExpress
Official Website
Creality Certified Store
Spare High Speed Nozzles:
Amazon
Official Website
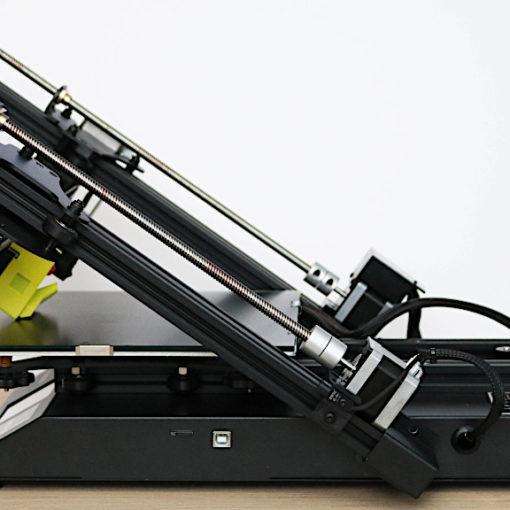
– The all-metal cube-like frame. The main feature that sets this machine apart from other i3-type FDM desktop 3D printers is its all-metal box frame. This build provides greater stability, particularly when printing at higher speeds. Despite the increased weight, I found it very easy to operate and move around the house.
– Price. The use of all-metal construction and a powerful extruder has raised the price of the Ender 5 S1 to around $500. As my most recent printer test was the Ender 3 V2 Neo, which is half the price and an example of an i3-type machine, I can compare and draw conclusions. Keep reading, and we will get there.
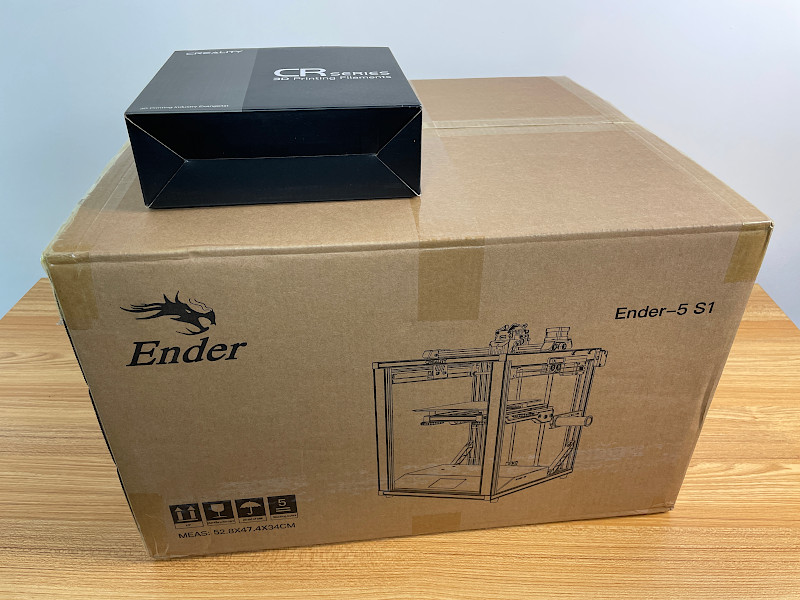
Unboxing and Assembly
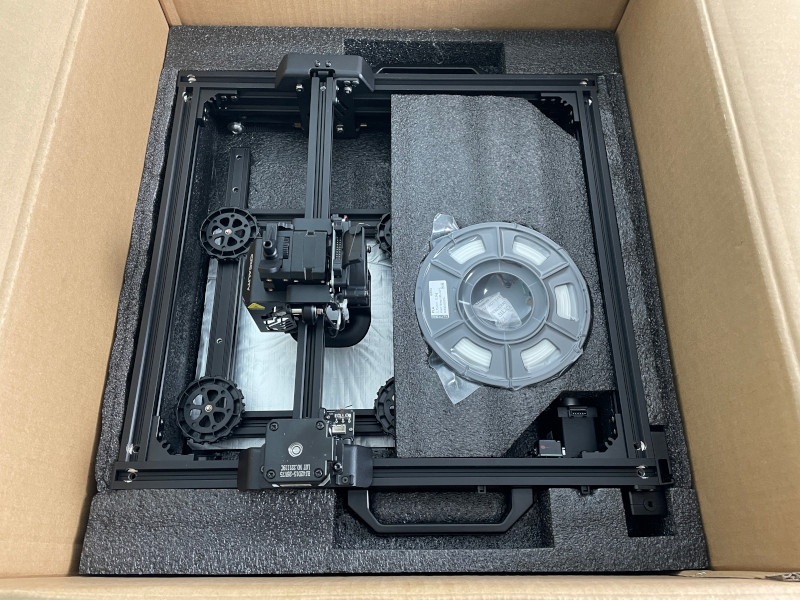
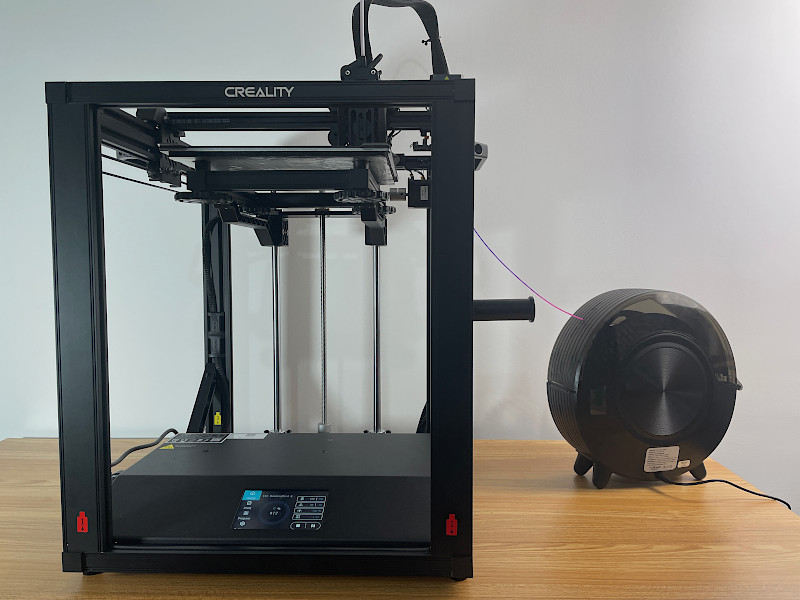
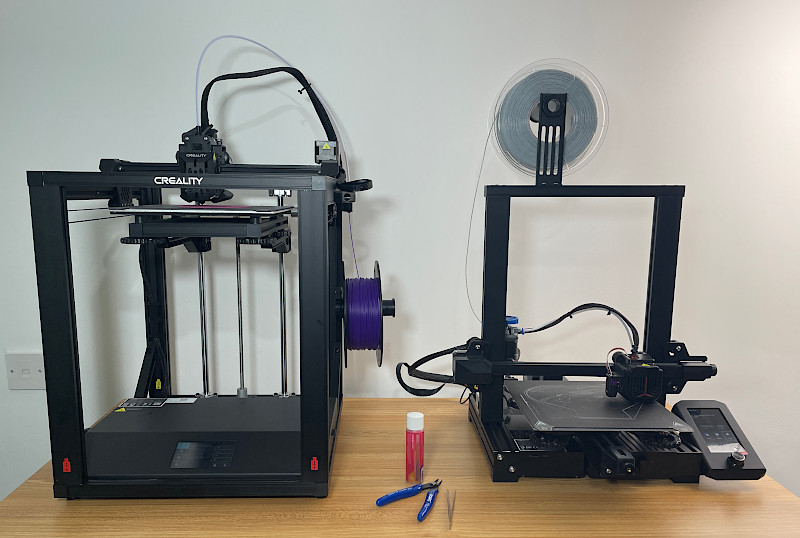
The Creality Ender 5 S1 arrived in a 15kg box, approximately 5 kg heavier than the previous Creality machine. The filament spool in the image is not included; I added it just for comparison. Nevertheless, a small spool of white PLA is included inside for test prints, which I found to be sufficient to finish a decent-sized print.
©3DWithUs – Photo: Max Funkner
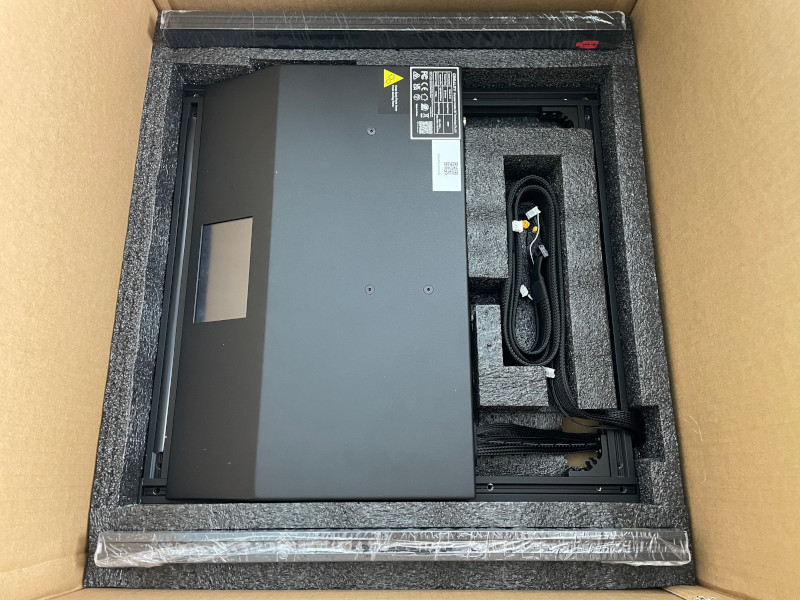
To fully unbox the machine, I had to remove parts from three layers of protective foam. All parts appeared to be in good condition, with no signs of damage.
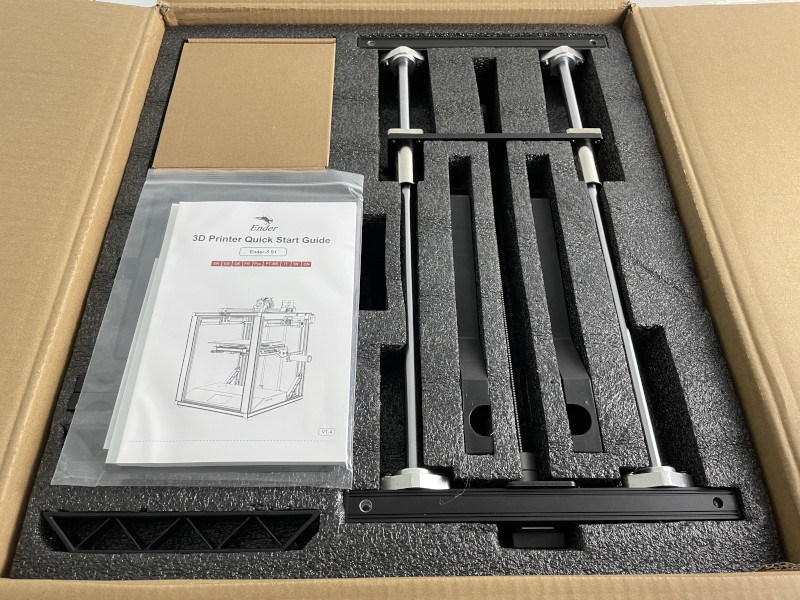
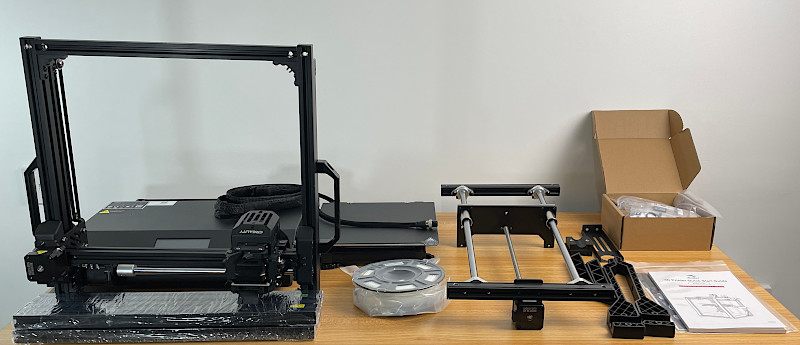
– DIY Kit. The Ender 5 S1 comes as a DIY kit that requires assembly, and seeing so many parts may feel a bit intimidating. However, I can say that nowadays, DIY kit assembly is much easier compared to kits from the last decade. As most of the wiring and electronics come preassembled, no soldering is required. It took me approximately one hour to fully assemble the machine.
©3DWithUs – Photo: Max Funkner
– SD Card. As I have mentioned in my previous reviews, I often struggle with Micro SD cards. After approximately 20 prints, I had no issues with the Ender 5 S1’s normal SD card, and no files were lost. But just in case, I would recommend saving all manufacturer’s files somewhere else to avoid losing them due to potential card malfunctions.
– Assembly Instructions. Elegoo and Creality have started making good-quality assembly guides. If I get stuck with their printed manual, I turn to their video assembly tutorial, which is available on YouTube and on an SD card. Some assembly tricks are good to know before beginning the assembly process, as then such a machine can be assembled by one person without assistance.
– Handles. When the assembly was completed, I instantly started liking the handles that were preassembled on the sides of the printer. This feature helps to move the printer around the house without any issues, despite its heavier-than-usual weight.
CR Touch Auto-leveling and Bed Adhesion Tips
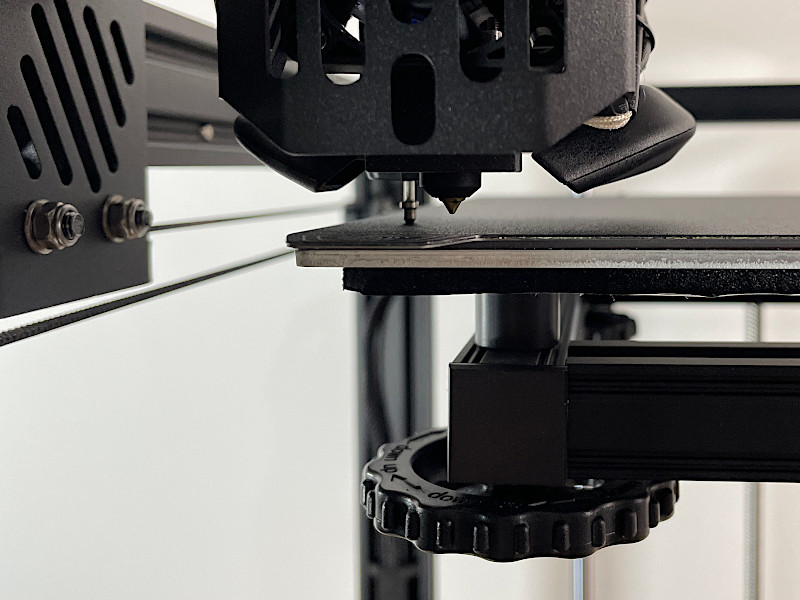
As I mentioned in my Ender 3 V2 Neo review, I like the combination of manual and automatic bed leveling, especially for large-build plates and big-build volume 3D printers, like the Neptune 3 Plus. After printing about 20 models and counting, my bed is still level and I haven’t had to adjust the knobs again. So, it’s crucial to get it right from the beginning. I would recommend paying attention when watching the assembly tutorial, especially after the 15th minute.
©3DWithUs – Photo: Max Funkner
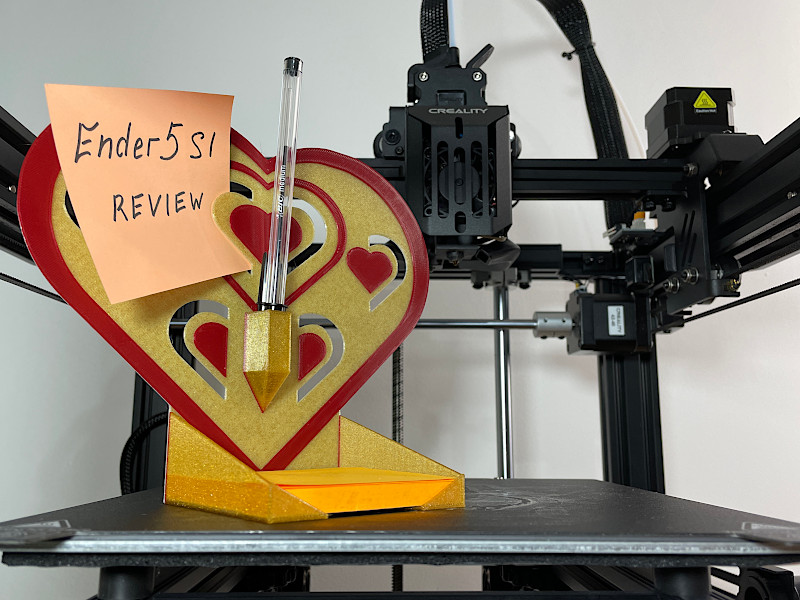
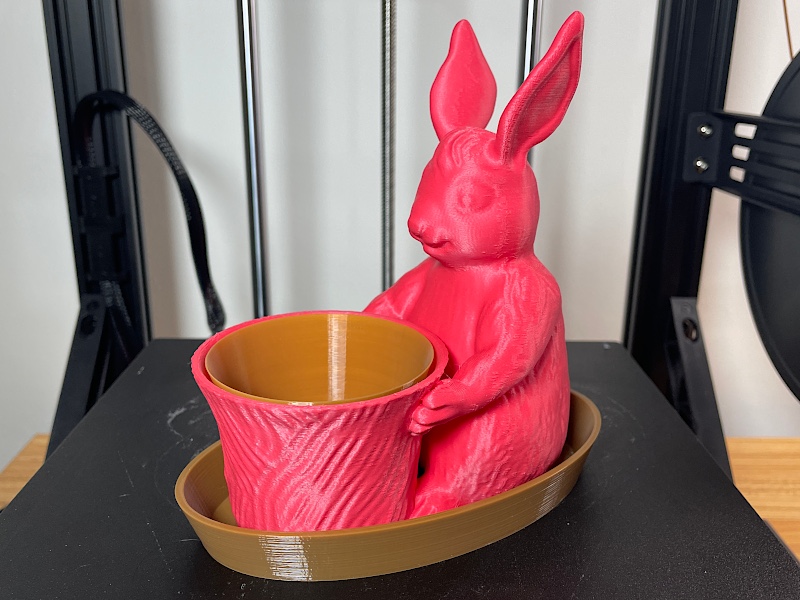
– Bed Adhesion Glue. With this print bed type, I got hooked on Magigoo from Amazon. For big rounded base models like test prints or my Bunny and Dog, no adhesion is required. However, for models that start with many separate pieces like the Post-it Notes Holder in the image below, a little bit of extra glue saves me a lot of worry and time.
©3DWithUs – Photo: Max Funkner
– Raft. For such small independent parts as articulated dragons, I use the raft. I am sure it is possible to print such dragons without the rafts but it is always a risk that one of the independent pieces will either lose the adhesion or get knocked down by the traveling nozzle.

©3DWithUs – Photo: Max Funkner
– Heated bed. I like that the new generation of 3D printers come with powerful and quickly heating beds. My infrared thermometer showed a slightly higher temperature on the build plate than the applied 50°C.
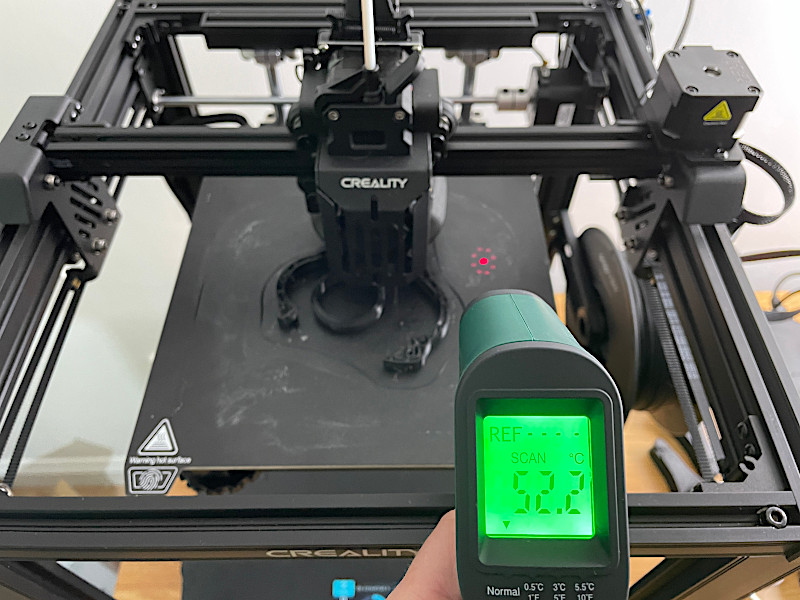
©3DWithUs – Photo: Max Funkner
Filament Run-Out Sensor
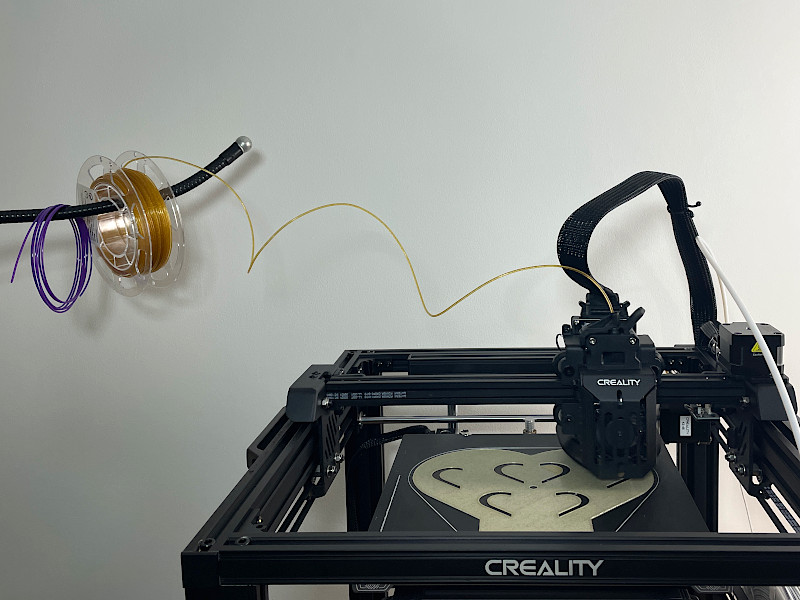
The filament spool attached on the side and the vertically positioned filament run-out sensor give an overall compact feel, and they work well without issues.

©3DWithUs – Photo: Max Funkner
It was slightly tricky to put the filament dryer on the side. I like such devices and use them quite often to restore my old, and sometimes neglected, filament spools. When I tested a small project, it worked OK, but we have to be careful with brittle materials such as wood filament, for example, as extra tension occurs that may snap the filament.
©3DWithUs – Photo: Max Funkner
Such a filament run-out sensor positioning didn’t stop me from experimenting with multicolor 3D prints. I could put small filament bits directly into the extruder while the main filament stayed in the PTFE tube and waited for further changes when needed. This successfully fooled the sensor and the 3D printer worked as usual. If needed, the filament sensor could be disabled via the touchscreen in the Printer Settings.
©3DWithUs – Photo: Max Funkner
Test Prints – Speed Test
The test print boat, 3DBenchy, was preloaded as GCode onto the manufacturer’s SD card. It started printing at high speeds from the first layer and finished quickly, demonstrating the printer’s 250mm/s capabilities.
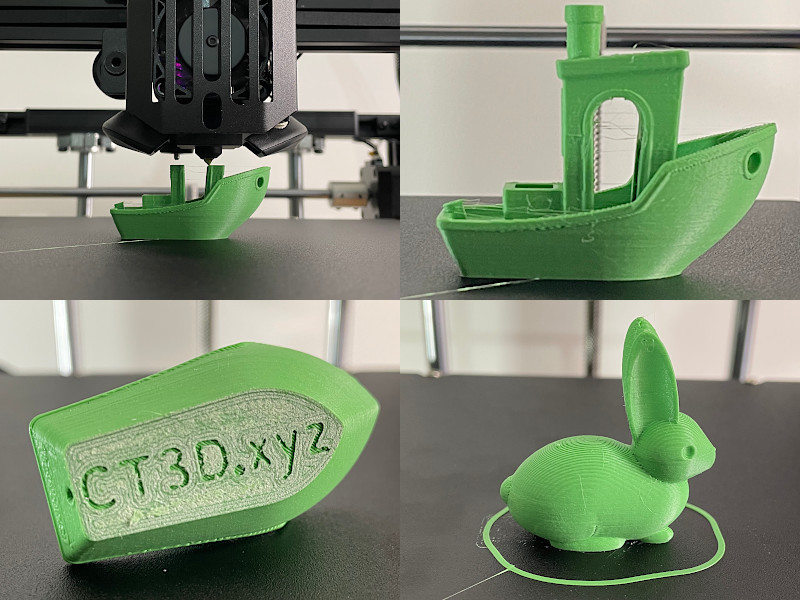
©3DWithUs – Print and Photo: Max Funkner
– Noise. When 3DBenchy was printed at such a high speed, the printer was noticeably noisy. This is partially due to the print being optimized for speed, but also because this printer is generally noisier compared to the Ender 3 V2 Neo, for example. At such high speeds, I even noticed my table vibrating more, and for the long term, I would recommend positioning the machine on a sturdier, workshop-like table. As soon as the speed was decreased, the 3D printer became less noisy, but it still wasn’t as quiet as the Ender 3 V2 Neo.
Creality CR-PLA Matte
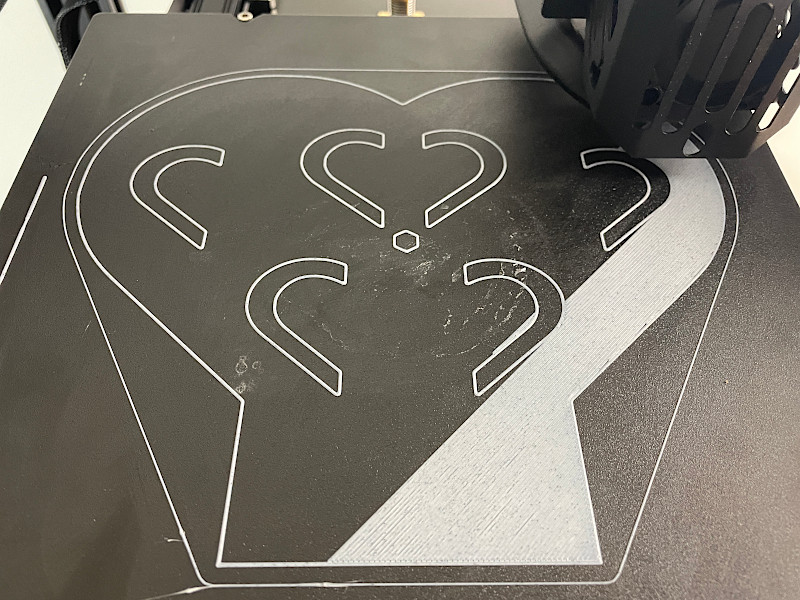
A quick note about CR-PLA: I have tested two spools of this filament and I would say it produces nice-looking prints but requires some attention. I would recommend an initial layer temperature of 220°C to ensure proper layer fusion. Additionally, this filament can adhere very strongly to the print bed. If the bed is not properly leveled and the Z-offset is too low, the material may dig into the bed surface. If your print gets stuck, I would recommend heating the bed again to remove the model and any filament bits, such as the skirt, for example.
©3DWithUs – Photo: Max Funkner
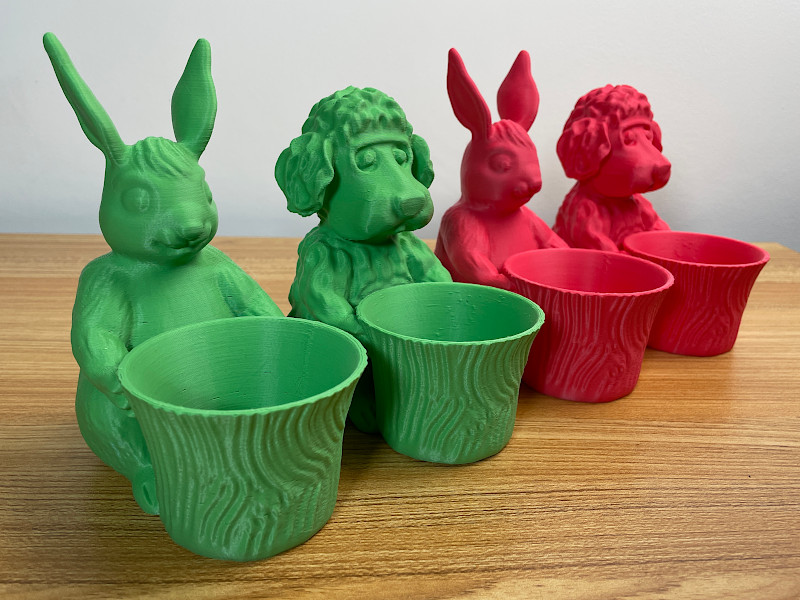
The pastel filament color is lovely. I printed my Bunny and Dog models, and they turned out awesome. You can find the filament on the manufacturer’s official website. However, if you are new to 3D printing, I would recommend starting with the included filament first.
3D Models on Printables
©3DWithUs – Photo: Max Funkner
As for the rest of the quality, both models came out similarly well in comparison to the ones printed on Ender 3 V2 Neo (in red PLA).
Slicer Software Settings – Cura, PrusaSlicer, Simplify3D
For this review, I used Cura 5, Simplify3D, and PrusaSlicer for different tasks. Luckily, all of them have Creality Ender 5 or Ender 5 S1 profiles, which saved me a lot of time in tuning the slicer settings. Speaking of slicers, I want to stress that we live in exciting times as the slicing software is getting more and more sophisticated with new features being released monthly.
Simplify3D Custom Support Placement
So for my Dog model, I had to use Simplify3D as the model required manual support placement in specific areas only. By doing so, I greatly reduced the post-processing of the model. The tree supports from the build plate in the Cura slicer would have left extra seams or some oozing, at least. In this case, I also saved material on the support itself. Such custom support placement is also possible to do in the free iDeaMaker slicer, but I am not sure if they have an Ender 5 S1 profile available.
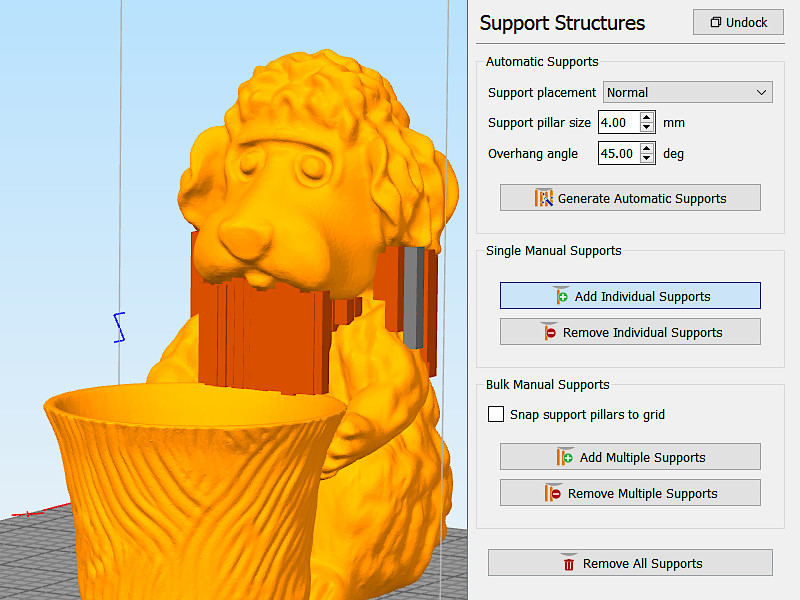
Screenshot: Simplify3D
Cura Z Hop Settings
For the articulated dragons, I used Cura to significantly reduce print time. For such tasks, I had to scale the model and adjust the speed and infill settings. Since the articulated dragon model requires a lot of retractions, I had to enable the Z-Hop setting as the first attempt failed due to this issue.
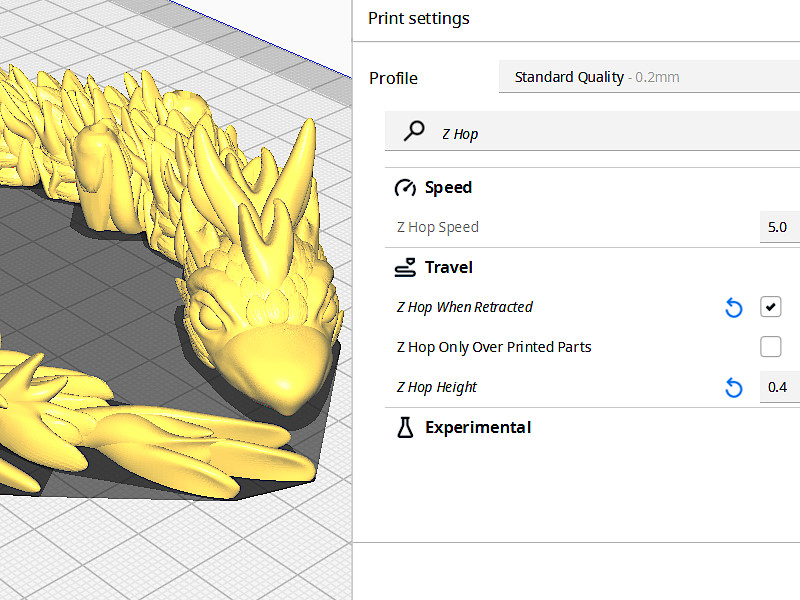
Screenshot: Cura
PrusaSlicer Filament Change Preview
I used PrusaSlicer to experiment with filament color changes. Using PrusaSlicer Preview, it was easy to apply color changes to a specific layer. This allowed me to see how the final model would look without actually having to print it.

Screenshot: PrusaSlicer
Another reason I use PrusaSlicer is that I want the final top layer to look pristine. PrusaSlicer tends to produce better top-layer results even without playing with Ironing settings. However, the automatic bed leveling before printing can make the whole process a little bit too slow. I had to delete a few lines in the Custom GCode section to speed up the process.
Automatic Pause for the Filament Change on a Specific Layer
It is possible to change the filament and color in the middle of the print by pausing the machine, changing the filament, and then continuing the print. The command for this is M600, but not all budget i3-type 3D printers can read and implement it. Fortunately, there are a few ways to do it on the Creality Ender 5 S1, and a direct drive extrusion setup works well for this technique.
As I mentioned earlier, the PrusaSlicer preview is great for visualizing how a model will look with specific color shades. However, for simple and quick projects, I prefer using Cura slicer. To apply the filament change go to the Post Processing menu, select Modify GCode, and then Filament Change. From there, enter the layer number at which you want to pause the print and change the filament.
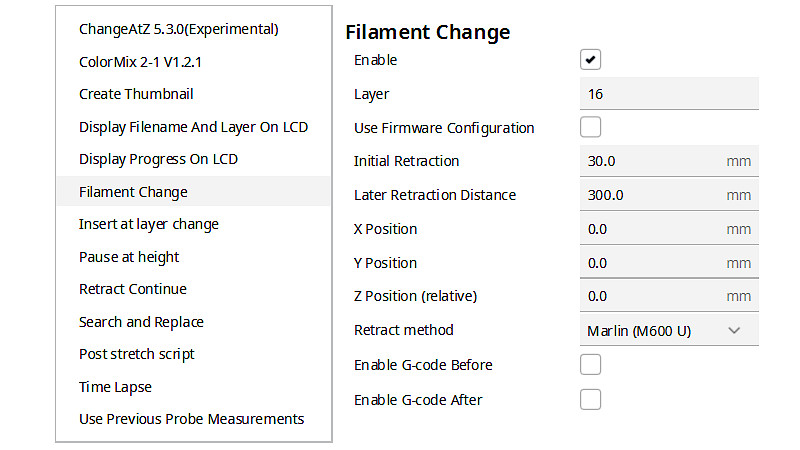
Screenshot: Cura
When the GCode is ready, it is time to print. On the Creality Ender 5 S1, the M600 command will trigger the Filament Run-Out function. The temperature will go down to 170℃, which is not too low. PLA still melts at this temperature, and it is possible to push through enough material to clear the color properly if needed. However, some patience is needed here, and not all PLA melts well at such a low temperature. I would suggest pushing it gently in a few attempts.
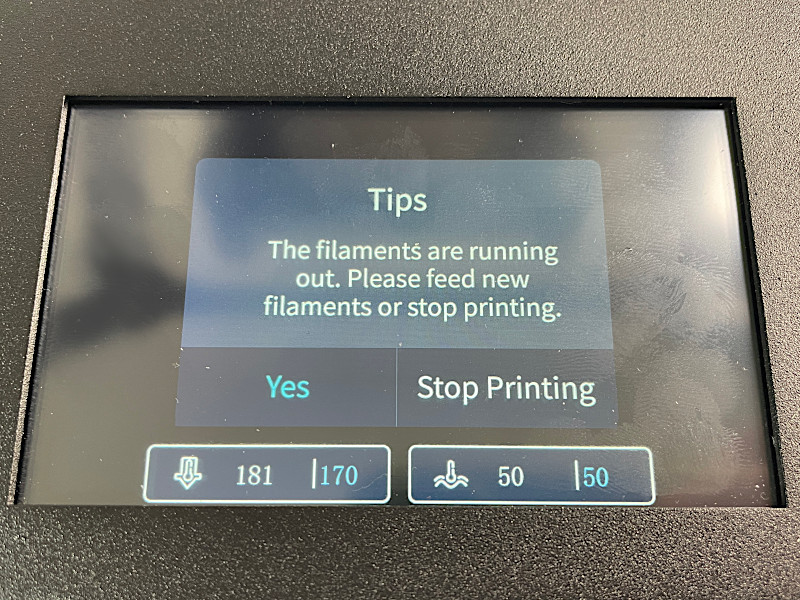
©3DWithUs – Photo: Max Funkner
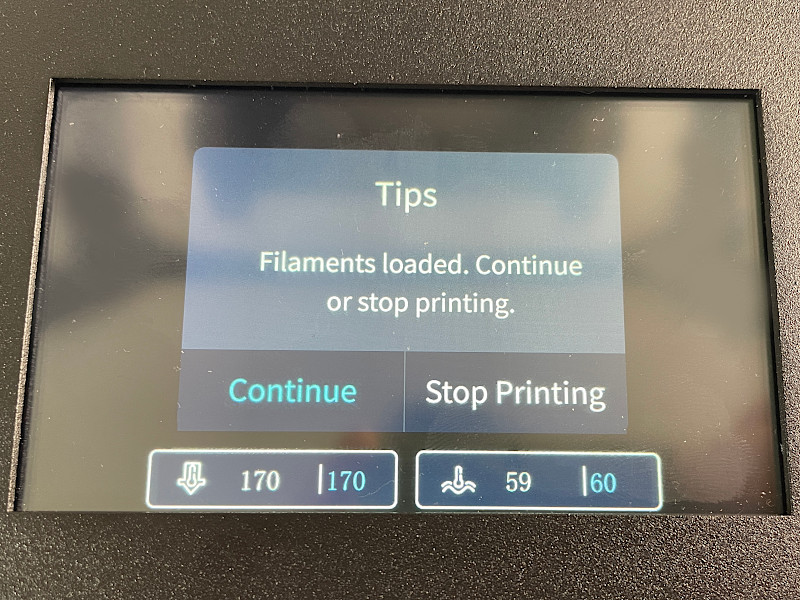
Before clicking “Continue”, it is recommended to pick up any excess extruded filament with tweezers to prevent it from getting fused to the model, which can affect the quality of the end result.
The color 3D printing technique mentioned is highly limited compared to Prusa3D MMU, Palette, or IDEX systems with two independent extruders. However, it is still capable of producing 3D models such as logos, tags, and other custom models. In some cases, this technique can be considered a greener option since there are no purge blocks involved.
3D Model on Cults
©3DWithUs – Print and Photo: Max Funkner
©3DWithUs – Print and Photo: Max Funkner
On a request from Will Zoobkoff, I quickly designed and printed his StudioZombie3D Logo using this technique. The first attempt was done using Cura slicer, then PrusaSlicer. Both prints came out well, but as there is a need to disable auto-leveling on PrusaSlicer, Cura slicer would be my go-to option for such small projects.
Other Test Prints
Printing in TPU
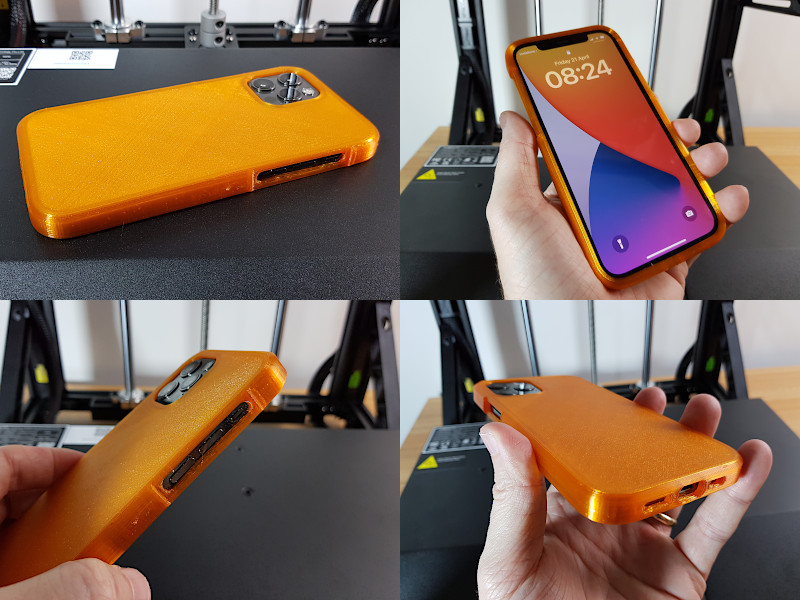
Direct drive extrusion systems work better compared to Bowden systems for flexible materials such as TPU. To test the Ender 5 S1, I used Sainsmart’s orange clear TPU from Amazon. This filament is excellent, and I have used it for various other projects over the years, and it still works very well.
3D Model by rapnit on Thingiverse
©3DWithUs – Print and Photo: Max Funkner
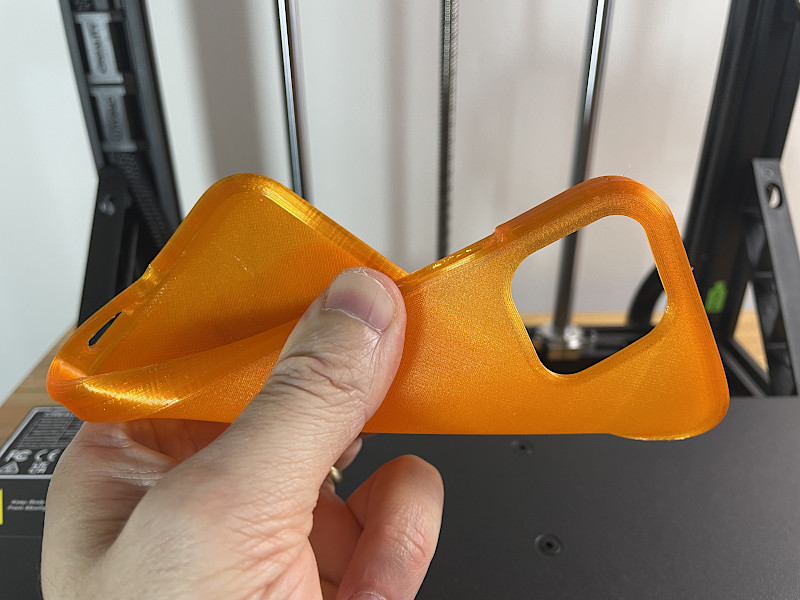
Testing object choice landed on the iPhone 12 Pro case. At first, I thought that the object was not challenging enough, but then I realized that I would be printing long bridges without supports. Printing bridges without sagging is already difficult, but printing them in TPU is even more challenging. This model is usually printed with supports for the button hole areas. However, with a well-tuned profile in Cura, I was able to generate a good GCode.
Printing in Dual Color PLA
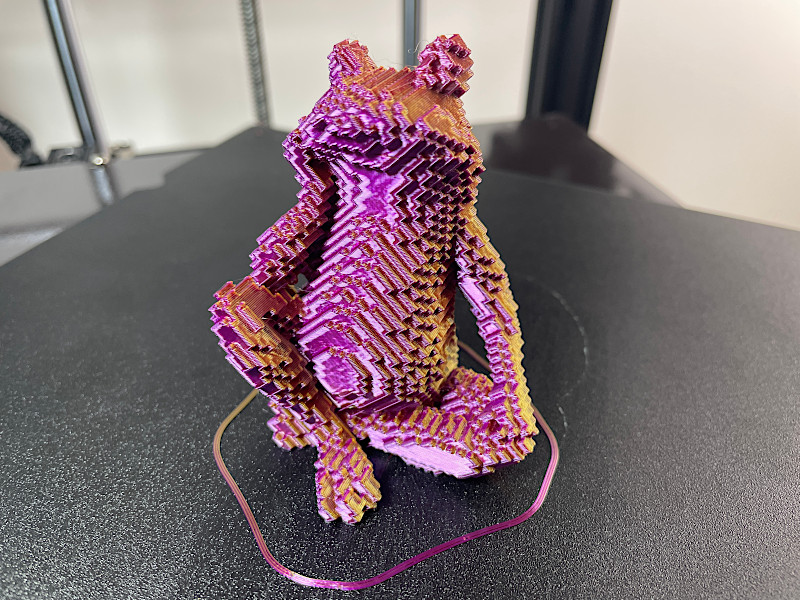
For decorative tasks, dual and tri-color PLA can be an interesting choice. I printed the Bored Frog – Blocky Version by Andrew Sink in dual color Eryone PLA from Amazon, and the model shone like a disco ball on the dance floor. Andrew also created a quick tutorial on how to quickly transform any model into a blocky version in Blender. You can find his file and tutorial on Printables.
3D Model by Andrew Sink on Printables
©3DWithUs – Print & Photo: Max Funkner
Printing in PETG
To test the machine printing PETG I decided to 3D print a water dish and a pot for my Bunny. I designed the water dish to ensure that slicer software slices the model properly without leaving any gaps between the layers. At 3DWithUs, we have a guide about planter pots with detailed instructions. The general idea is to make sure the layers fuse properly. The Ender 5 S1 performed the task perfectly without any issues. I used a nozzle temperature of 240℃ and a bed temperature of 80℃.
3D Model on Printables
©3DWithUs – Print & Photo: Max Funkner
Functional Print-in-Place
I am pretty confident that the Ender 5 S1 will be able to print most functional 3D prints as long as they fit within the bed size limit. Below is a functional print-in-place design.
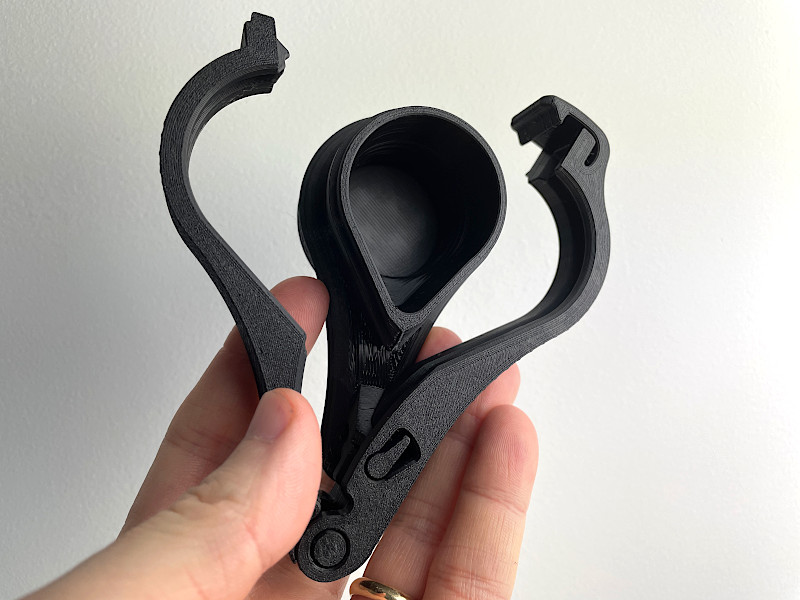
This item can be printed with or without supports. I printed it without supports, and it worked well, with only minor sagging in the middle that didn’t affect the quality or functionality of the item.
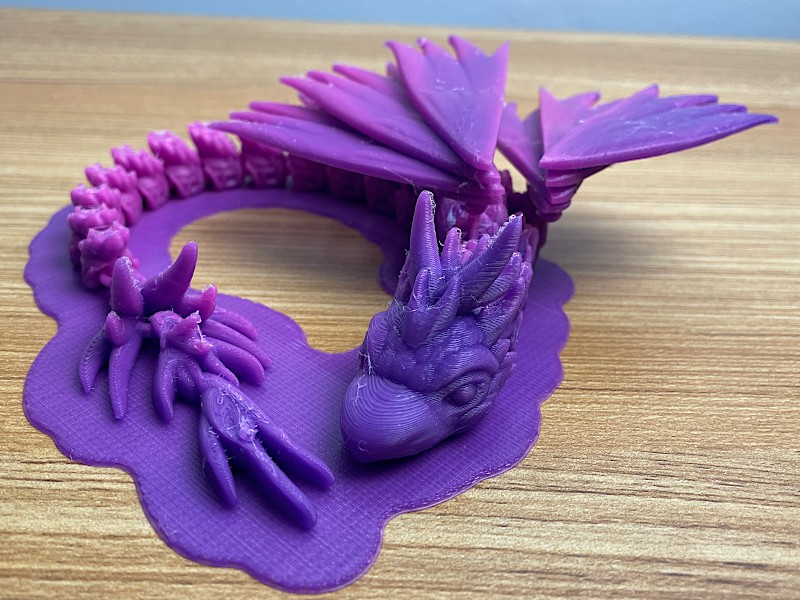
Printing Articulated Dragon
When I test a 3D printer, my usual choice is print-in-place articulated dragons, as such objects torture test any machine. It’s a tough task, as a long print with so many retractions involved. This time, I chose the FireBird by Dragons Den from Creality Cloud, and used purple-to-pink Amolen Color Changing PLA from Amazon. Such filament changes color based on temperature. If you want to read more about the material and color transitions, we have a dedicated guide available here.
3D Model by Dragons Den on CrealityCloud
©3DWithUs – Print and Photo: Max Funkner
– Z Hop. Even with the raft, I failed to print this model twice before realizing that I needed to adjust the Z Hop setting in the slicer. You can check the Cura slicer settings I mentioned above for Z Hop. Since there were so many separate islands, the nozzle kept hitting them while traveling. Even though the raft managed to hold the model in place, there were visible missing layers, or what I would call micro layer shifts.
Compare to Other 3D Printers
Compare to the similar build and volume FDM 3D printers:
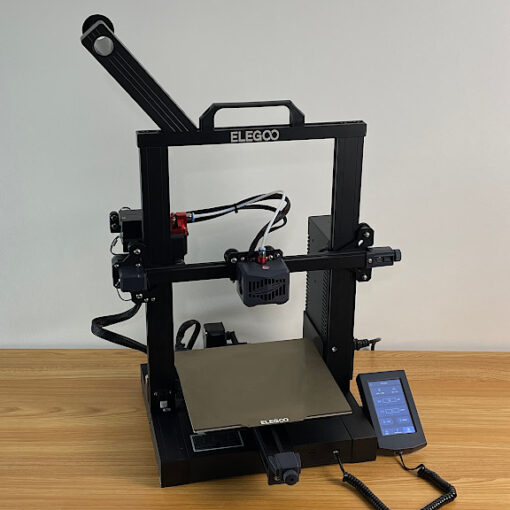
The Elegoo Neptune X is one of the printers that comes to mind when thinking about printers with such a specific build. While the Elegoo Neptune X has an advantage in price, the Ender 5 S1 has an advantage in max temperature, reaching up to 300℃ compared to the Neptune X’s 260℃. The Ender 5 S1 uses a Direct Drive system, while the Neptune X uses a Bowden system. Additionally, there are no mentions of the Neptune X’s max printing speed. In conclusion, apart from their appearance, these machines are designed for different tasks.
Compare to the Creality 3D printers:
©3DWithUs – Photo: Max Funkner
Conclusion and Pros & Cons
I hope my Creality Ender 5 S1 review helped you to make the right decision and gave you a tip or two on how to print better. If there are any questions, please do not hesitate and write in the comment section below.
Amazon
AliExpress
Official Website
Creality Certified Store
Spare Hi Speed Nozzles:
Amazon
Official Website
Creality Ender 5 S1 Review
Review Summary
The all-metal, compact Creality Ender 5 S1 gives a sense of stability. I can see this machine being moved from table to table in a busy workshop or being borrowed by small businesses. The machine is designed to quickly print prototypes or functional items using more sophisticated materials than PLA. I doubt this machine can compete with cheaper i3 version 3D printers for general 3D printing at home. However, for specific tasks that require high temperatures and high speed, it could be a good cost-effective option available.
PROS:
All-metal stable compact machine
High-speed 3D printing
Capable of high-temperature printing
CONS:
Noisy, especially when printing at high speeds
Expensive, compared to other builds


I have several 3D printers and find the Ender-5 S1 great for general purposes. I find it very odd though that there is no compreshensive guide to the display panel. I am particularly curious about the ‘Prepare’ ‘In/out’ pane that simply says ‘In 0.0’ and ‘Out 0.0’ with no explanation as to what these mean. Are they seconds or temperature or distance ? Maybe someone can enlighten me, as I get no logical reply from Creality.