For the beginners and casual desktop 3D printer users, 3D printing multiple objects is highly likely to be a challenging, failure-prone experience. It may take a while to get the right feel of a 3D printer and material in order to apply the best settings in a slicer software. Let’s list the common fails, check what can be done to minimize the risks, and see the other solutions.
This Guide Covers:
- Common Fails
- Material Choice
- Slicer Software Features & Settings
- Sequential 3D Printing Settings
- Slicer Software Profiles
- Automate Multiple Object 3D Printing
- Conclusion
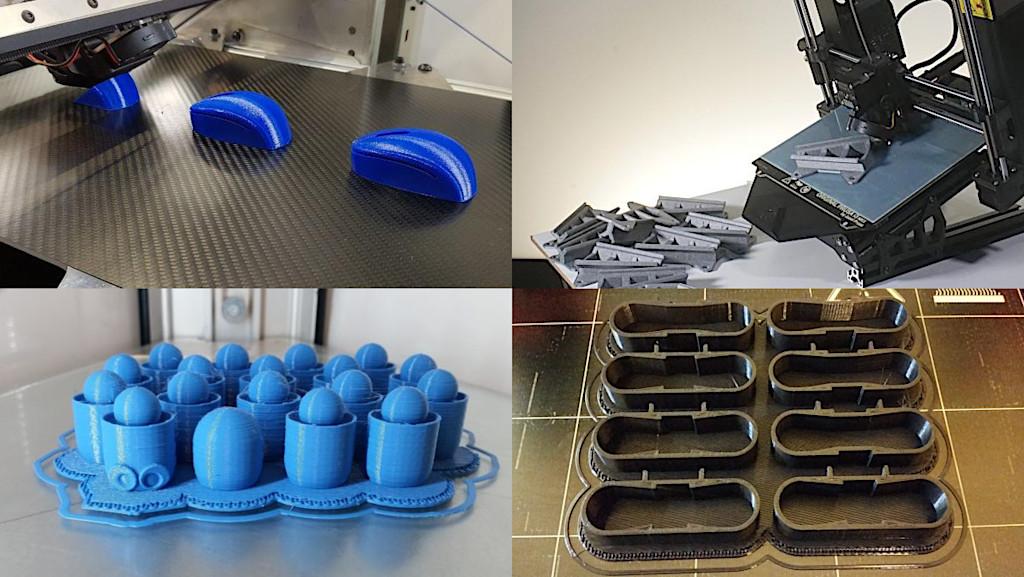
3D Printing Multiple Objects – Common Fails
Any 3D printing failure is frustrating but if some print jobs can be reset quickly with minimal waste of time and material, then other failures may mean a lot of plastic waste. A full build plate of plastic waste! There is nothing wrong to 3D print many parts of the same project one by one, but if repetitive process may feel boring and there is no time for it, here is some guidance.
– Layer shift. One of the worst failures for the lengthy multiple object 3D printing – a lot of time and material waste. Good if the layer shift is small and the models can be sanded and primed. But again, with the multiple parts, sanding process may be time-consuming. Fix: it is more likely that the belts are loose – google how to fix for your particular 3D printer.
– Nozzle clogging. May happen to overused nozzle even with the good quality filament. Fix: change the nozzle more often. Try not to use exotic materials such as wood filament or marble PLA prior to multi-object 3D printing.
– Bed adhesion. A very common issue, and easy to reset the process and adjust some settings if needed. Fix: If PLA is used as a material and the adhesion fails, then reset the bed leveling as it is bound to be causing it. With the material such as ABS some extra heating and gluing is important. With the messy PETG a lot more settings should be tuned, like 3D printing speed, temperature, cooling, retraction, etc.

(Image: 3DWithUs)
Interesting, that if one of the objects may fail due to the poor bed adhesion/warping in the middle of the print, the rest of the objects may still be printed successfully. Then the failed object can be reprinted as a solo item. But if this happens in the beginning of the printing, then there is a big chance that a huge messy build up on the nozzle will knock off all of them.
– Warping. Due to warping, objects with the sharp or pointy bases may lose the bed adhesion and curl up. Then, the traveling nozzle may keep hitting this part and knock the object off completely. Fix: extra gluing, especially on the corners of the objects, skirts/brims, rafts.
– Excessive stringing. 3D printing multiple parts at once may cause a lot of stringing. In most of the cases such stringing is not a big deal. Simple 3D printing tools, like a heat gun or a knife, may remove them without any problem. In such cases, time is the only resource that gets wasted. Fix: tuning of the slicer software settings, such as retraction, temperature and 3D printing speed.
Material Choice
– Filament. We would recommend to 3D print multiple objects with tried and trusted filaments. Generally, for the beginners and casual users we would recommend to use PLA. The less recommended would be ABS or PETG, and we would not recommend to use wood, marble or a very flexible TPU.
– Resin. Comming soon.
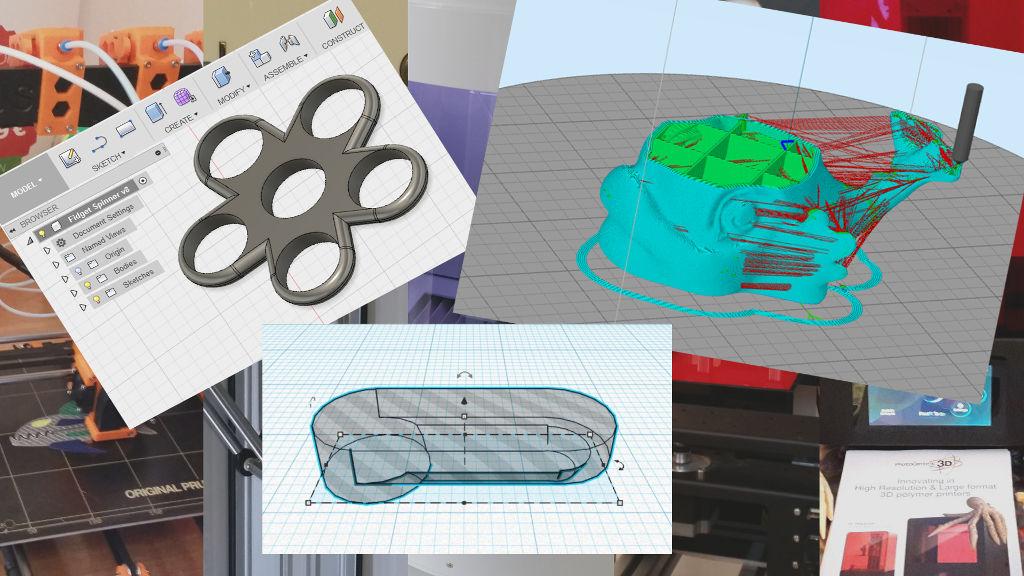
Slicer Software Features & Settings to Watch and Try
Together with the default flow, temperature, etc., settings, various slicer software offer following features that are handy while 3D printing multiple objects at once.
– Brim. Also known as a skirt. Usually, this is a widely used feature to make sure that the extruder system has a consistent flow prior printing the object itself. But if to set the skirt offset from the part to 0 mm, this may significantly help with the adhesion, especially at the pointy corners we mentioned earlier. Some slicer software allow to add the brims for the supports.

(Screenshot: Simplify3D)
– Z-hop Setting. Retraction on the vertical lift, or Lift Z, is usually set at 0.5 mm high. The nozzle, while moving, may knock down the structures, no matter how good the bed adhesion is. In the loop video, a nozzle knocks down the support with a 20-layer wide glued brim.
– Raft. The old trusted way of printing with rafts was used before the appearance of the fancy coated sheets developed specifically for desktop 3D printer build plates. The drawbacks of using the rafts may be in the time-consuming post-processing and some small, if implemented properly, plastic waste.

(Image: 3DWithUs)
Prusa Slicer Sequential 3D Printing Settings
One of the convenient ways to 3D print multiple objects is to use PrusaSlicer’s Sequential 3D printing setting. Then the machine, instead of printing all objects at once, will print them one by one. So, if, let’s say, a nozzle gets clogged in the middle of printing, a half of objects will be completed successfully. Also, this method will eliminate stringing between the objects as there will be no extruder travelling between them. The only drawback of such technique is that the coverage of the 3D print bed is slightly limited, and certain rules have to be applied in order not to touch the already printed objects. Read the detailed instructions in Prusa3D blog.

(Screenshot: PrusaSlicer)
Slicer Software Profiles
If you are using a popular 3D printer such as Creality Ender 3 or Prusa i3 MK3 (affiliate links), it is highly likely that there are well-tuned slicer software profiles available on the internet. Type into the search engine such keyword as “PrusaSlicer profile for Ender 3”, for example. On Thingiverse we found a collection of PrusaSlicer profiles for Creality 3D Printers. As such profiles may be outdated very quickly please use them with caution.
A well-tuned 3DPrintMill is ideal for serial production.
(Video provided by Naomi Wu / Creality)
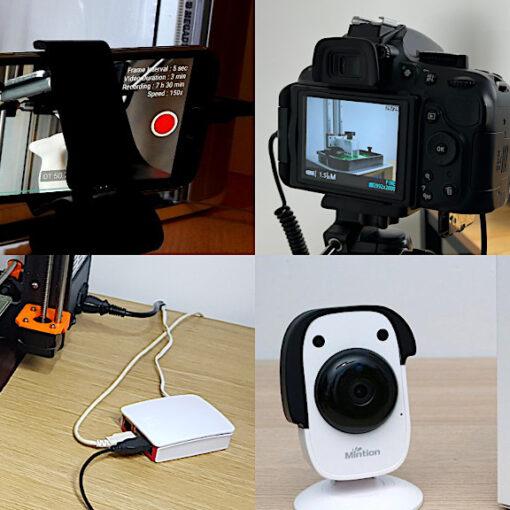
Automate Multiple Object 3D Printing
Another, we would say advanced, way to 3D print multiple objects without the hustle is to use such machines as belt 3D printers, or to install a tilted frame to an existing 3D printer. If tuned well, in both ways operators can leave their machines to print overnight without a problem. The parts can be 3D printed one by one as they get added to the queue in specific software.

(Image: 3DQue)
Automated 3D Print Bed Replacement System
In his video, Thomas Sanladerer shows an innovative custom-made automated 3D print bed replacement system. The system’s “magazine” consists of multiple trays, each tray is a separate 3D printing bed with a magnetic sheet. When one 3D print job is completed the tray with the print on it is pushed off with an empty tray. So basically, such a system can be continuously 3D printing as long as there are enough trays or filament.
Conclusion
Like we mentioned earlier, there is nothing wrong in 3D printing several parts of the same project one by one. And if you don’t feel your 3D printer well, we would see it as the to-go-for option in order to reduce the plastic waste. But if you decided to give multiple objects 3D printing a try, we hope our guide helps you.
Read More: Support Settings in 3D Printing
An object with overhangs over 45 degrees normally requires supports to be added before 3D printing. Choosing the right support settings and structures is a skill that needs to be learned when using desktop SLA and FDM 3D printers. In this post we will look at a few examples for comparison and give you some ideas.