The Elegoo Neptune 3 Pro is an FDM 3D printer with a 225mm x 225mm x 280mm build volume, a dual-gear direct drive extruder, dual Z-axis leadscrews, automatic build platform leveling, and more features than can easily fit in a single sentence. With an intro sale price of $230, it’s easy to see the Neptune 3 Pro becoming a widely-adopted printer in the consumer market. Let’s review this 3D printer, print some awesome models, including in the TPU filament, and list the Pros and Cons of the machine.
Table Of Contents
- Specifications
- Assembly
- Bed Leveling
- Integrated LED Strips
- Test Print
- Elegoo Cura Slicer
- Testing Printing with TPU
- Testing Printing with PLA
- Compare to Other 3D Printers
- Conclusion and Pros & Cons
Elegoo Neptune 3 Pro Specifications:
Build Volume: 235mm x 235mm x 280mm
Extruder: Dual-Gear Direct Drive Extruder
Bed Leveling: Automatic
Material: PLA, PLA+, TPU
Build Platform: Flexible Textured PEI Build Platform
Connectivity: microSD Card
Interface: Removable 4.3-inch Color Touchscreen LCD
Price: $240-$300
Affiliate Links:
The newer version of this machine is available on the Official Website. Read the Elegoo Neptune 4 Pro review on 3DWithUs.
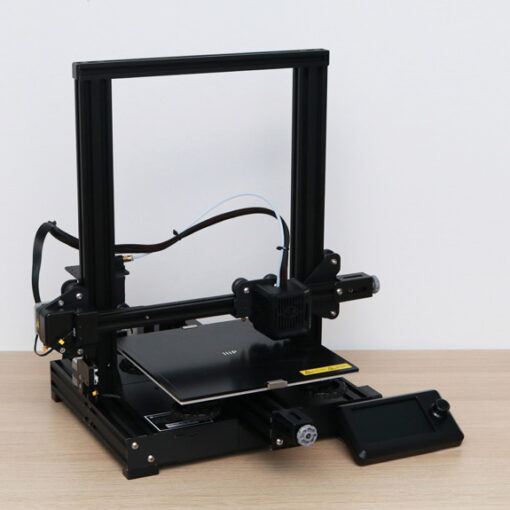
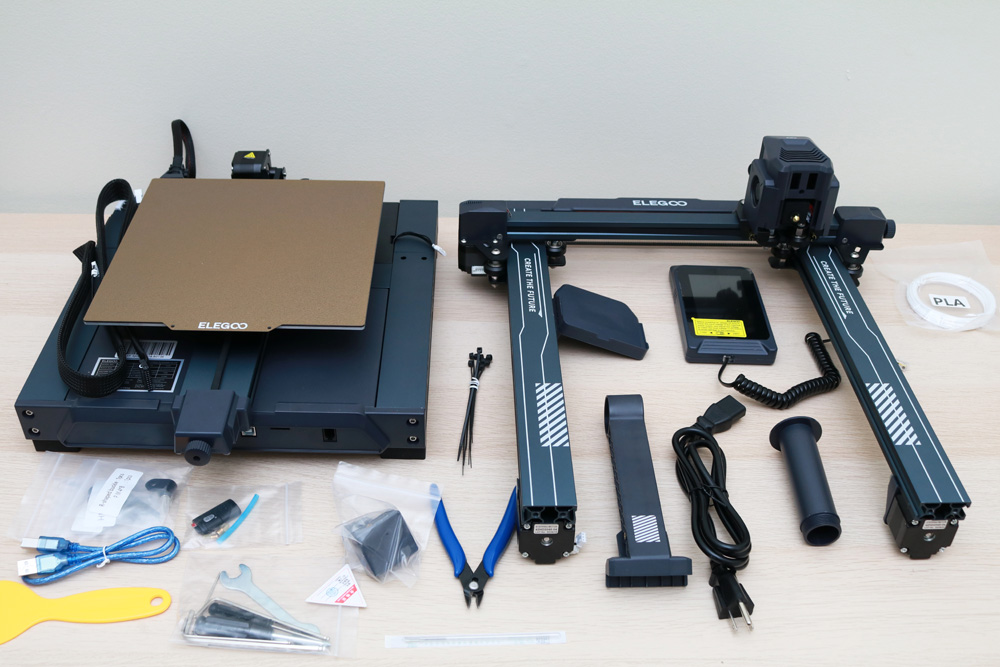
Unboxing and Assembly
The Elegoo Neptune 3 Pro arrives with all of the wiring and belts pre-assembled from the factory, and only a few bolts are needed to attach the Z-axis frame to the base. This assembly takes only a few minutes, and the printed instructions are well-written and helpful. The included microSD card also contains a digital manual, software for MacOS and PC, a well-made video that shows the full assembly process, and a few demo models.
©3DWithUs – Photo: Andrew Sink

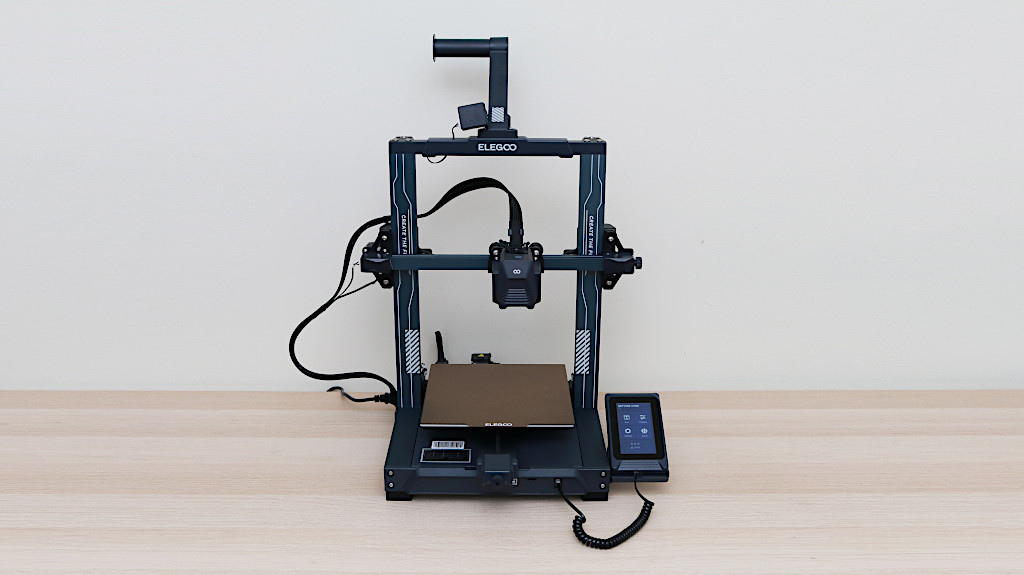
The large “CREATE THE FUTURE” text is printed on both sides of the frame, something that some users (myself included) may find a little cheap looking. The rest of the design has a distinct Cyberpunk aesthetic, but the text detracts a bit from the overall appearance.

©3DWithUs – Photo: Andrew Sink
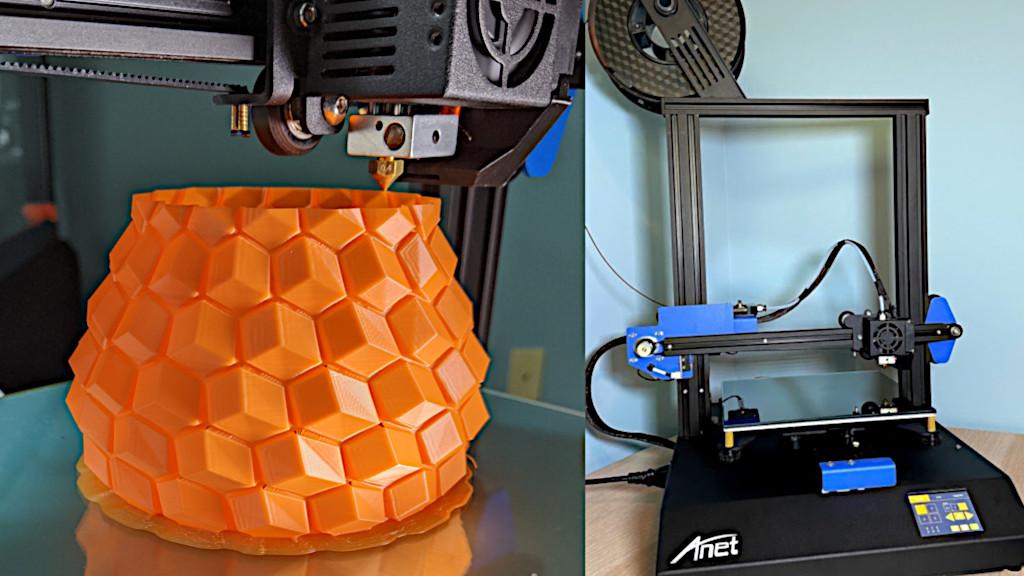
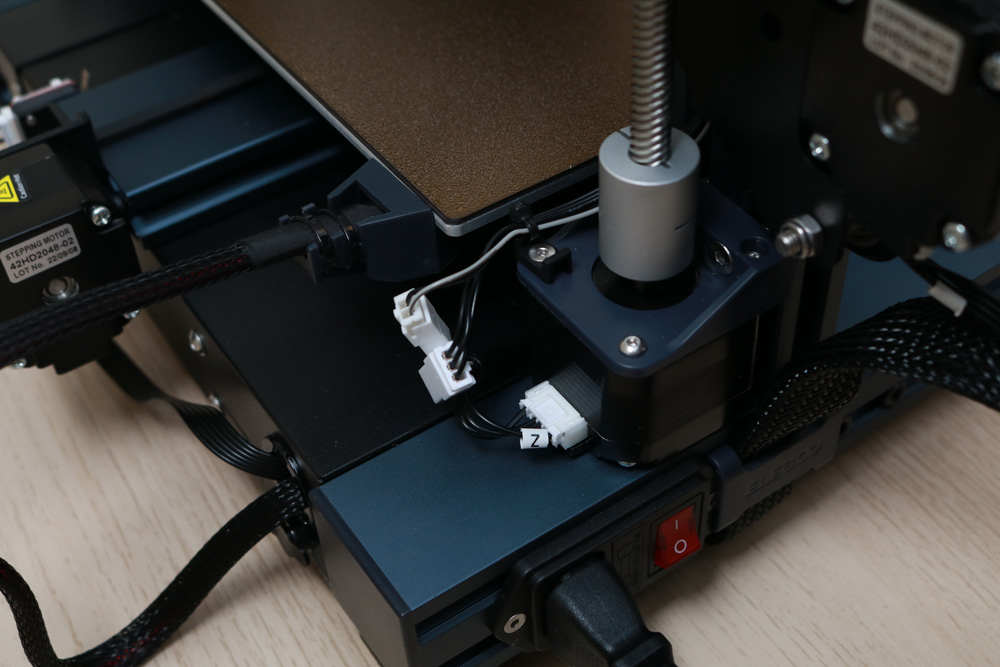
Model: Icicle Vase by 3DPrintBunny
©3DWithUs – Photo: Andrew Sink
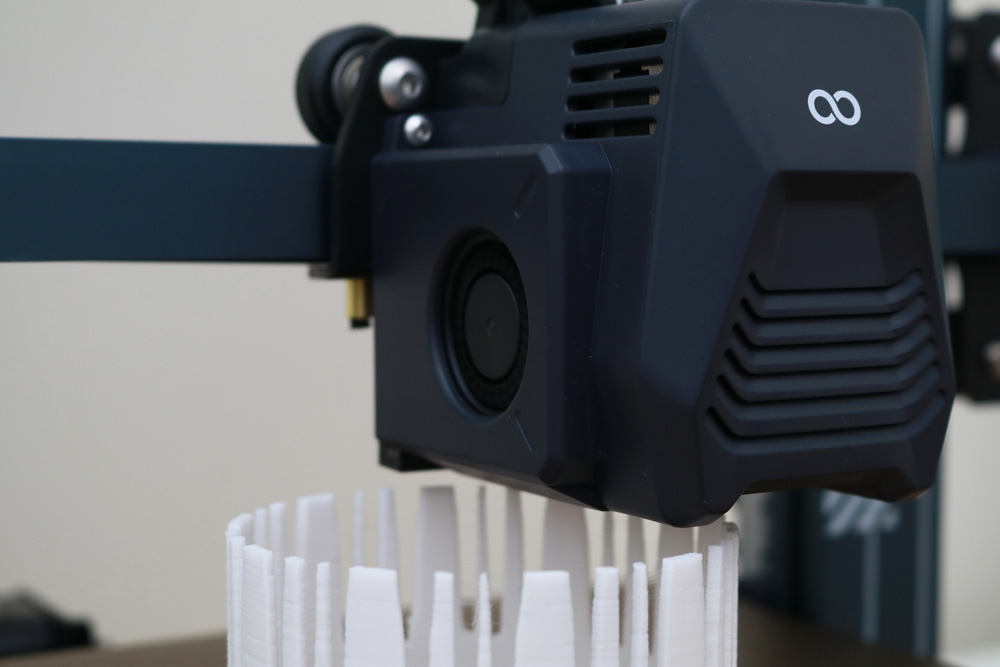
The Neptune 3 Pro uses a dual-gear direct drive extruder that is fed filament from the integrated spool holder located on the top of the printer. This extruder module also contains two cooling fans which provide airflow across the part as it is cooling, which helps when printing fine details or very small parts, such as the upwards-facing fine points on the Icicle Vase by 3DPrintBunny.
Automatic Build Platform Leveling
The Neptune 3 Pro is advertised as having a “non-contact high precision sensor” which is used during the build platform leveling process. Printers in the sub-$300 price range will sometimes include sensors that can be a little less than perfect, but the Neptune 3 Pro worked perfectly on the first try and did not require any further calibrations throughout the reviewing process.
©3DWithUs – Photo: Andrew Sink
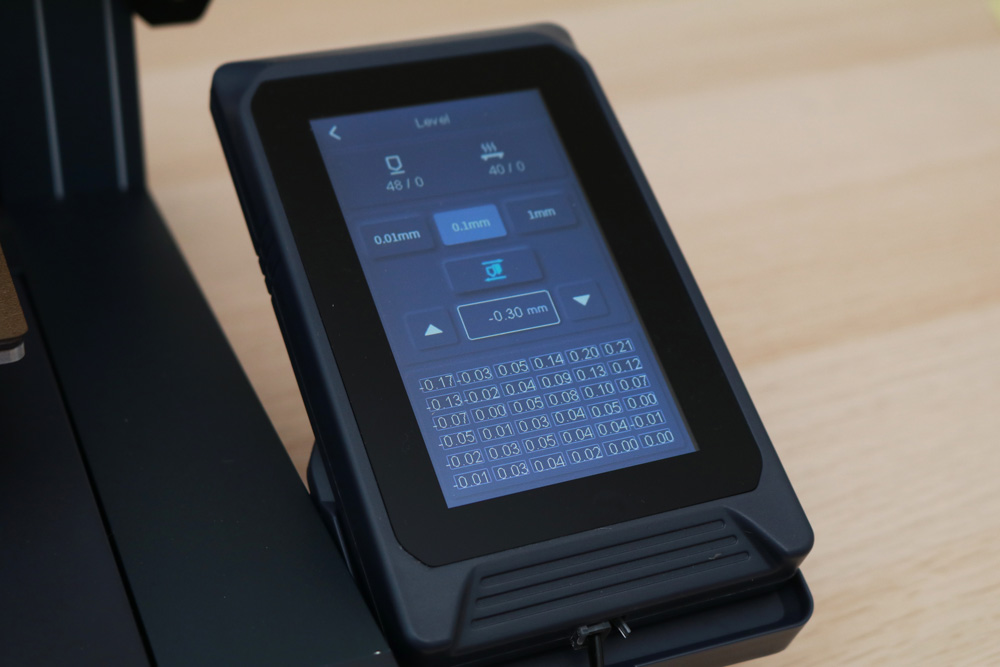
The sensor detects the offset at 36 points across the build platform and stores them into memory, creating a mesh that allows the print head to compensate for any non-planarity present in the platform. I was impressed with how easy the leveling process was, requiring only a few button presses on the UI and a single manual Z-offset to set the print height.
Flexible Build Platform
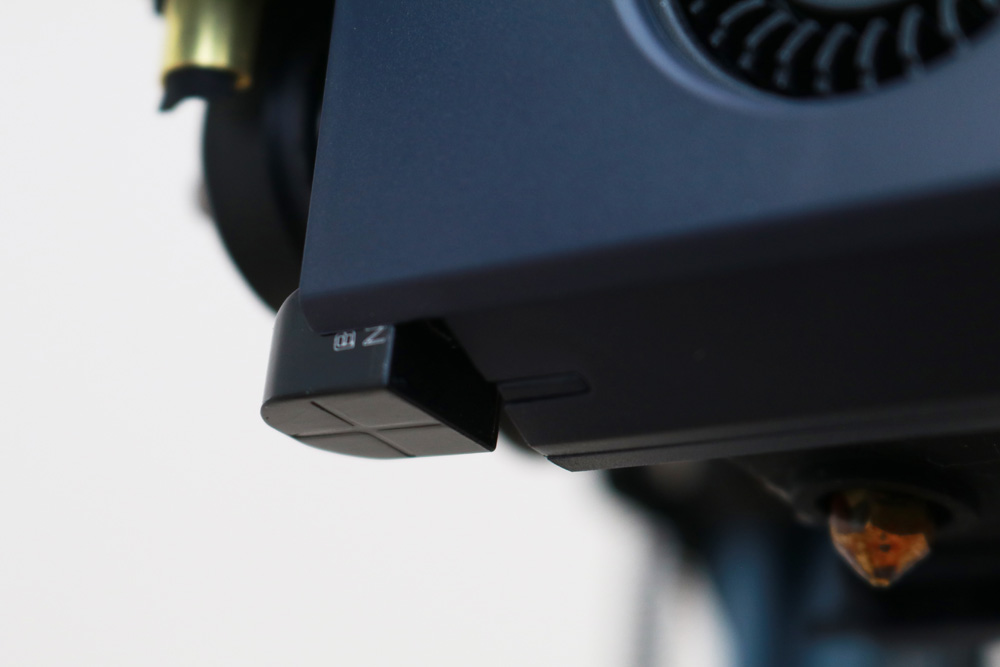
The magnetic PEI build platform included with the Elegoo Neptune 3 Pro is designed to allow parts to easily detach after printing and cooling, and it performed flawlessly during testing. The build platform has a gritty texture that works well for adhesion and also gives parts a slightly textured and matte appearance on platform-facing surfaces.
©3DWithUs – Photo: Andrew Sink
The magnetic grip is exceptional, and the build platform feels secure and stable during printing, with no wiggling or curling. Removing the platform from the base of the printer is easy and only requires a small amount of force on the front-facing protruding tab.
Integrated LED Strips
The Elegoo Neptune 3 Pro features an integrated strip of LED lights that is built into the top of the Z-axis frame. This feature may not seem like an important one, but it’s a surprisingly helpful addition for monitoring prints that are in progress. Some printers, like the Mingda Rock 3 Pro, have an LED integrated directly into the extruder assembly which isn’t particularly helpful as the illuminated area is constantly changing and it can be hard to see what’s happening under the extruder.

©3DWithUs – Photo: Andrew Sink
I found myself leaving the LED light bar on the Neptune 3 Pro turned on during printing, and I believe this is a feature that will likely catch on in popularity as opposed to an extruder-mounted LED.
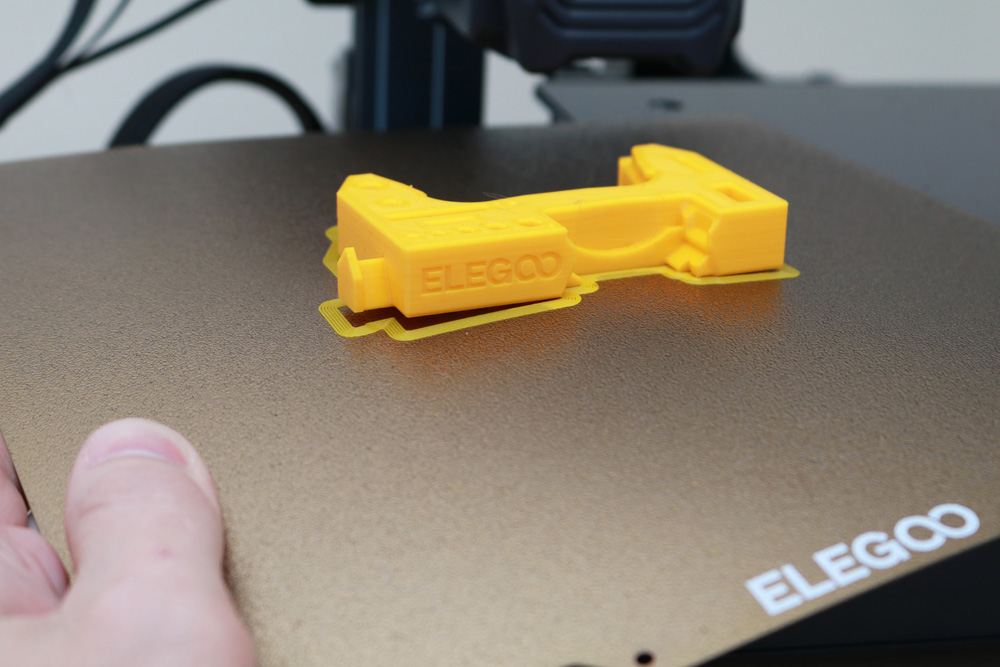
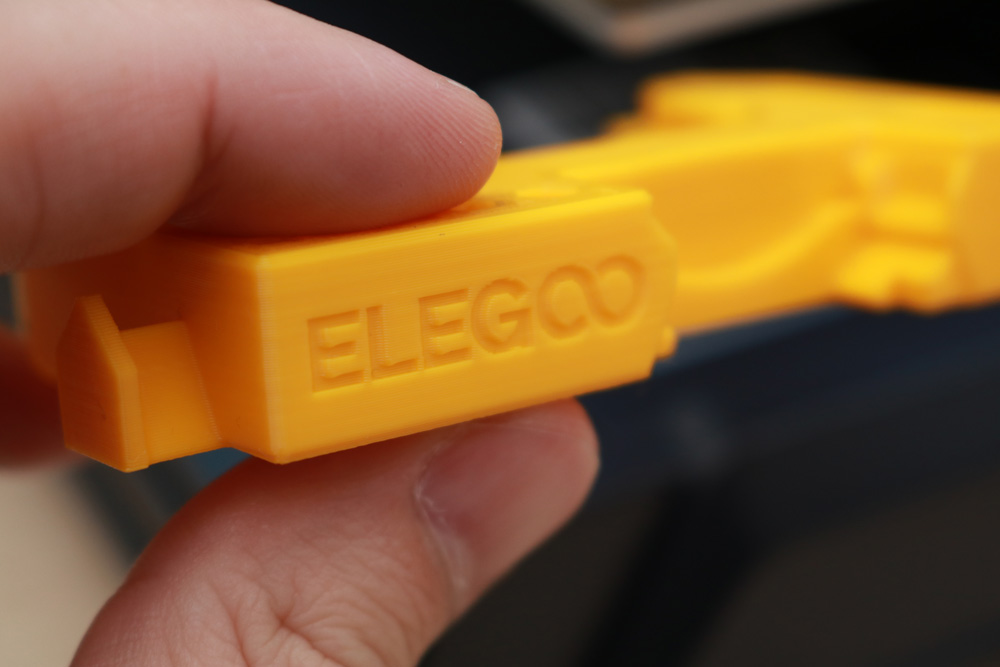
Printing the included test model
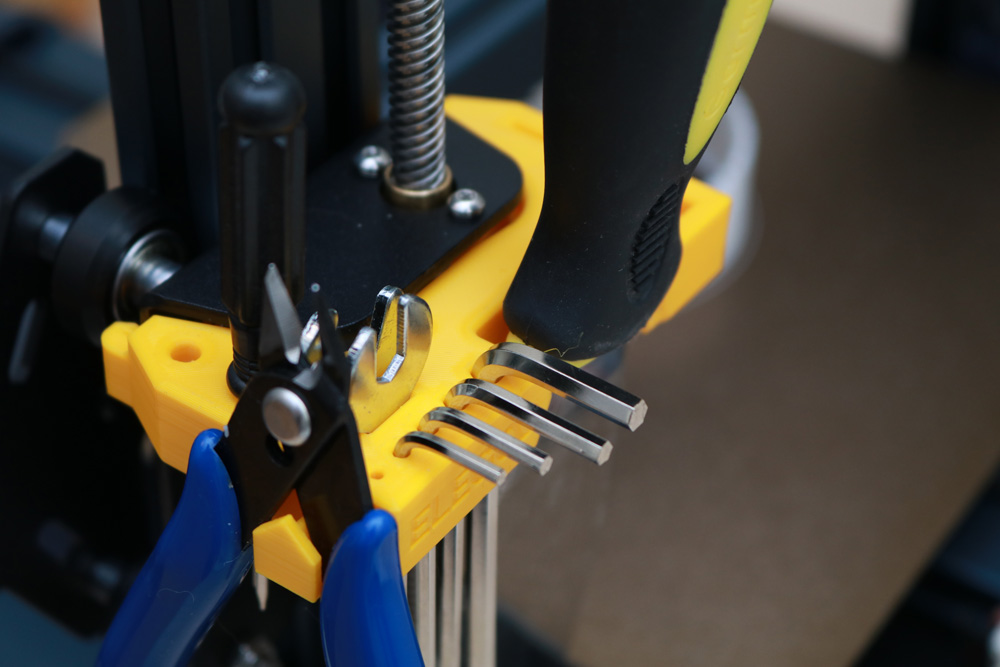
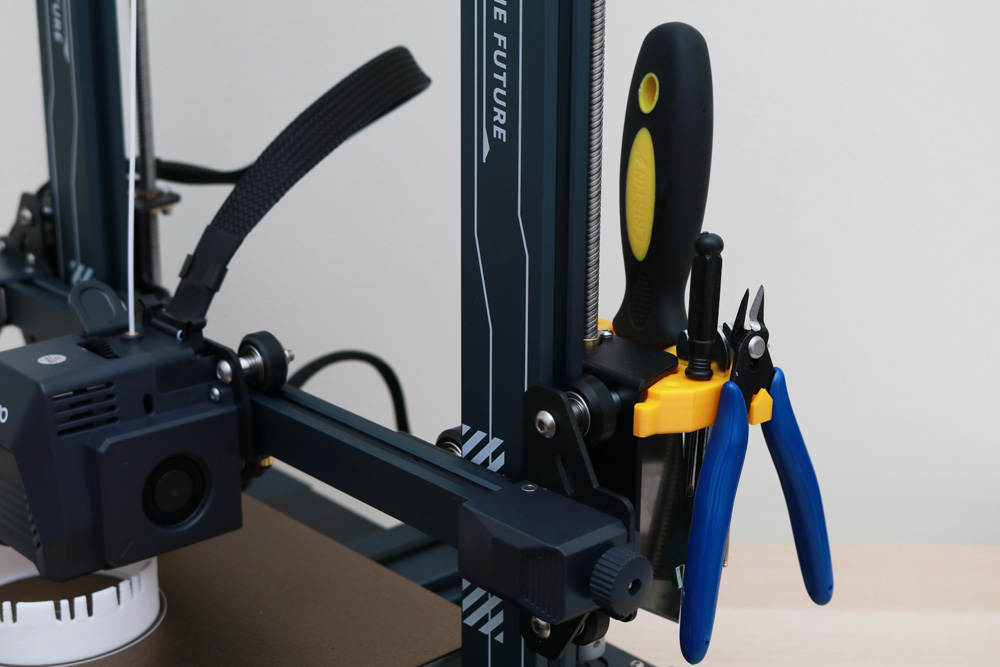
The Elegoo Neptune 3 Pro includes a refreshingly useful test model that demonstrates surface finish, geometric tolerance, and also snap-fit functionality. This tool caddy is included on the microSD card under the name “EN3PRO_Tool-holder-PLA.gcode”, and it printed out perfectly on the first try after using the automatic leveling feature of the Neptune 3 Pro. Check other examples of useful prints that can be made on such 3D printers.
©3DWithUs – Photo: Andrew Sink
©3DWithUs – Photo: Andrew Sink
©3DWithUs – Photo: Andrew Sink
The full set of included Allen keys fit perfectly into the tool holder, and the entire unit attaches snugly to the printer. This printer demo model is a perfect example of what a printer manufacturer should aspire to include with a printer, as opposed to the frustrating and difficult-to-print rook included with the Elegoo Saturn S and other Elegoo resin printers.
Slicer Software Settings and Profiles – Elegoo Cura
Elegoo includes a copy of Elegoo Cura 4.8.0 and a custom profile for the Neptune 3 Pro preloaded on the microSD card. This slicer is missing some of the features present in more current versions of Cura (the current release is 5.2.1 as of the writing of this article), but it works well for new users who just want to get printing without adjusting or tweaking slicer profiles.

Screenhot: Elegoo Cura
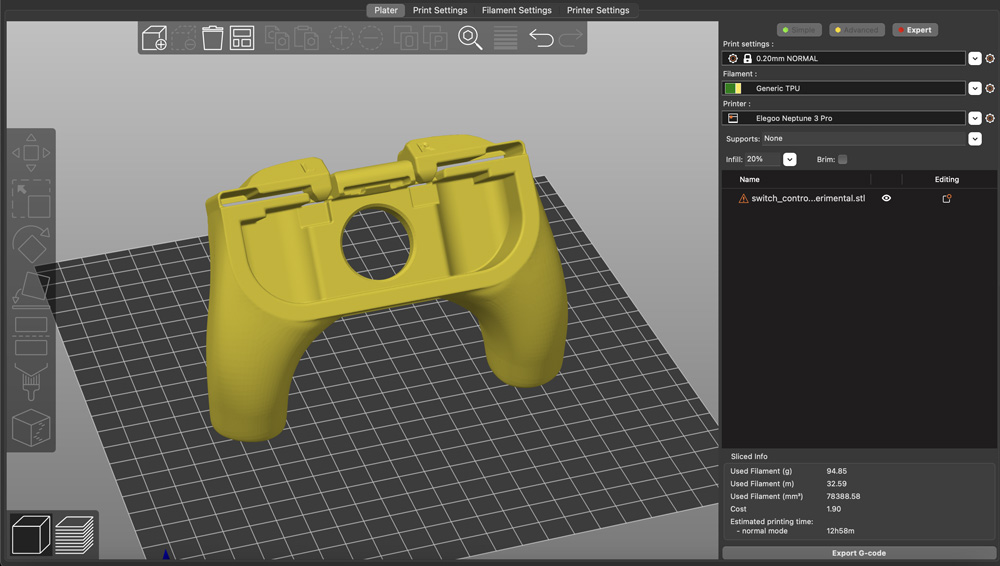
For more advanced users who use PrusaSlicer or other slicer software, it’s easy to create a profile for the Elegoo Neptune 3 Pro based on similarly-featured printers like the Monoprice Joule, Creality Ender 3 Pro, or others. Since features like the live-adjust Z offset, automatic bed leveling, and others are based on the printer firmware, slicing on third-party software doesn’t prevent users from taking advantage of these features.
Model by Semmel
Screenhot: PrusaSlicer
Printing TPU with the Elegoo Neptune 3 Pro
The dual-gear direct drive extruder on the Neptune 3 Pro is perfect for printing TPU, a material that is notoriously difficult to print on Bowden extruders without resulting in stringing, blobs, and other defects. Sliced using the default TPU setting on PrusaSlicer, the Joycon Controller with Trigger buttons by Semmel printed virtually no stringing between the grips, an impressive feat for a sub-$250 printer.

Model: Joycon Controller with Trigger Buttons by Semmel
©3DWithUs – Print & Photo: Andrew Sink
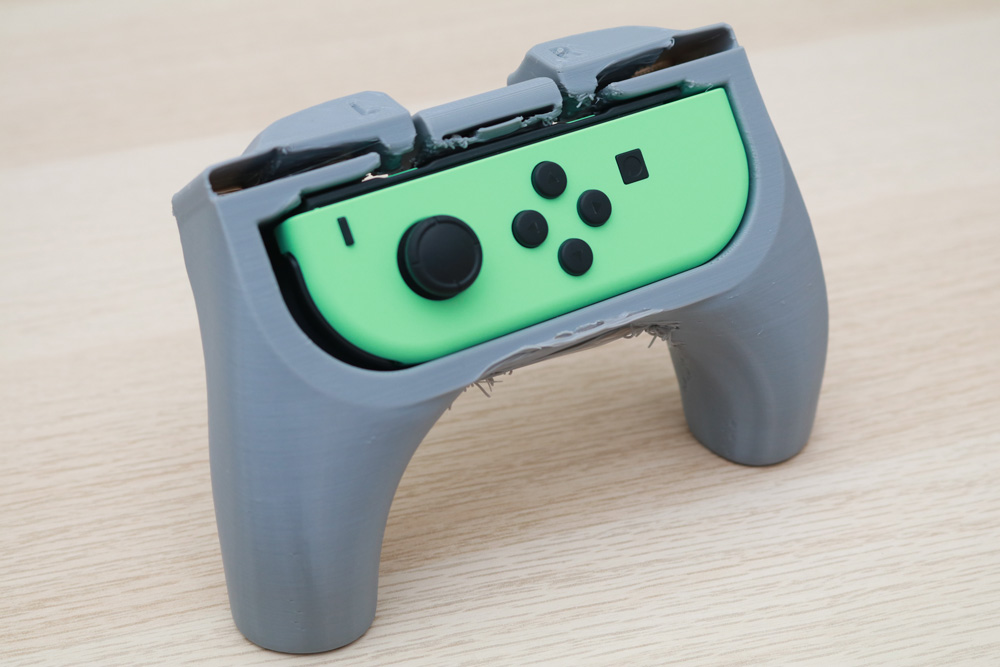
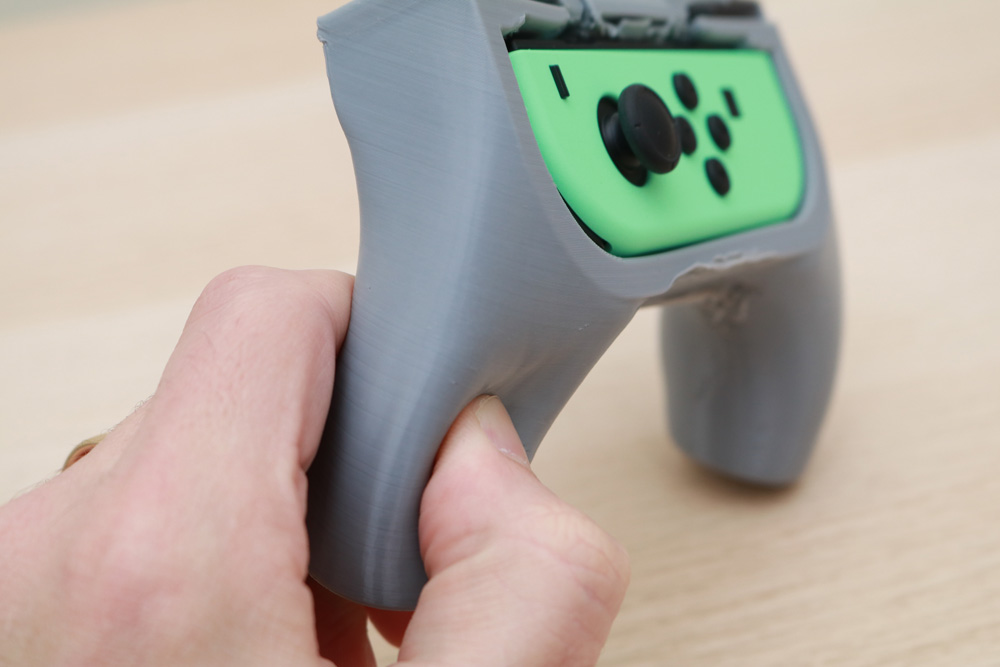
Typically, retracting and extruding TPU material creates strings and blobs between moves, but this isn’t the case with the Neptune 3 Pro. The model printed well and articulated as intended, providing a snug fit for the Joycon controller of the Nintendo Switch. I did note some toolpaths of filament failed to adhere to previous layers on steep overhangs, something that could be addressed by decreasing print speed, increasing print temperature, or other slicer-specific tweaks.
©3DWithUs – Print & Photo: Andrew Sink
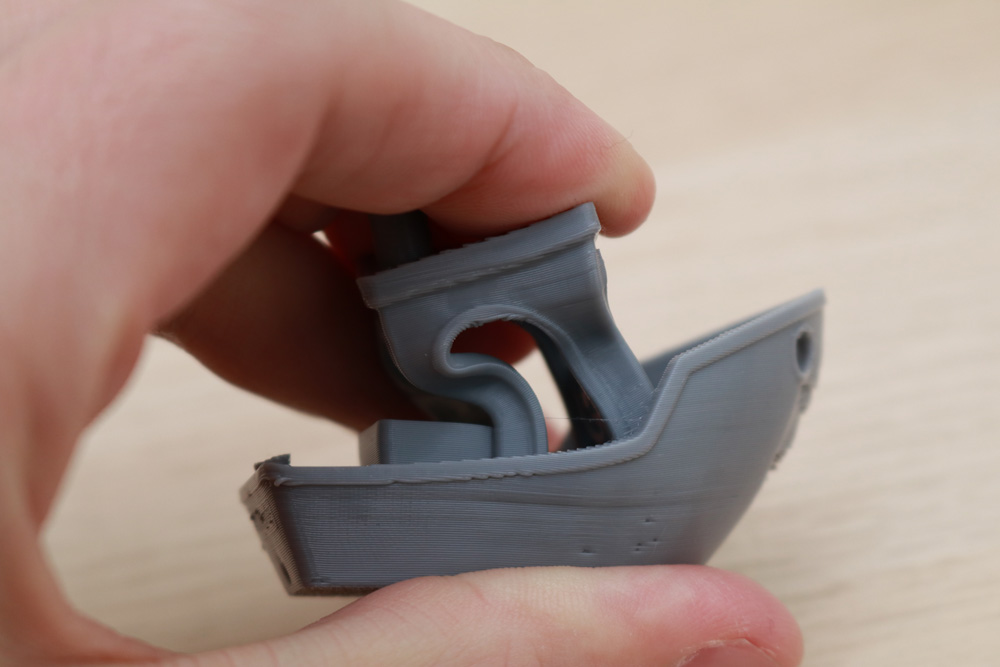
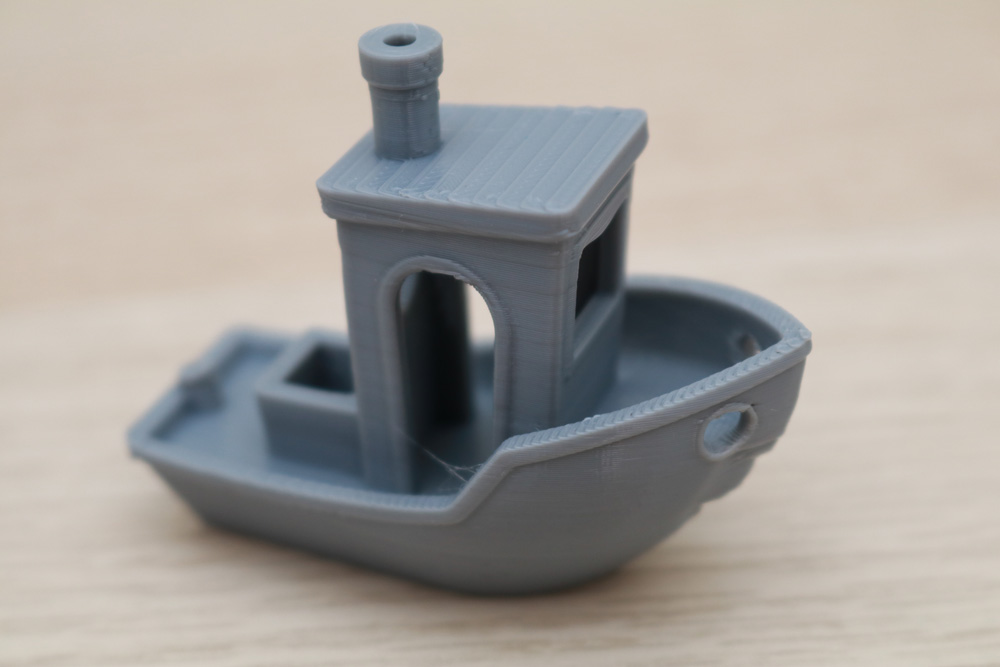
Printing the classic torture test Benchy model showed similar results; with minimal stringing and a clean, even appearance. The TPU filament is tough and flexible, and can be easily deformed without permanently damaging the model.
Testing Printing with PLA
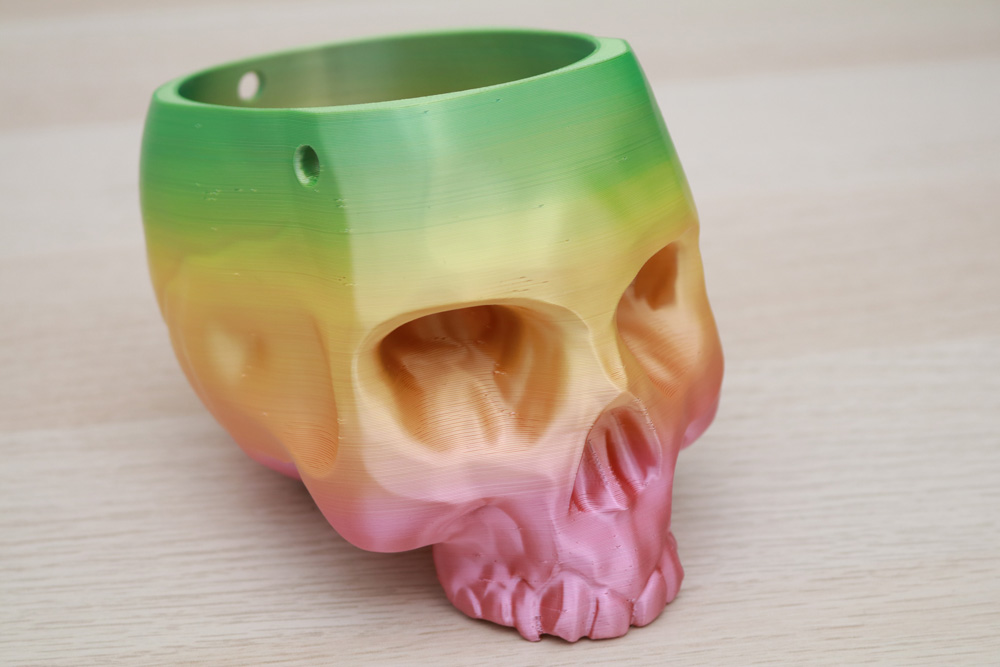
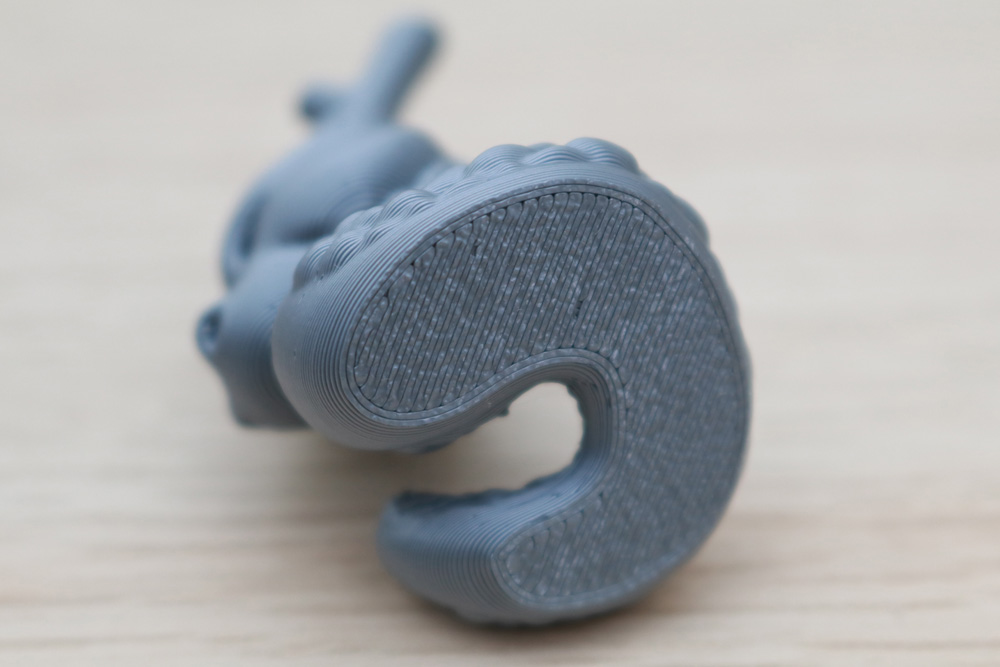
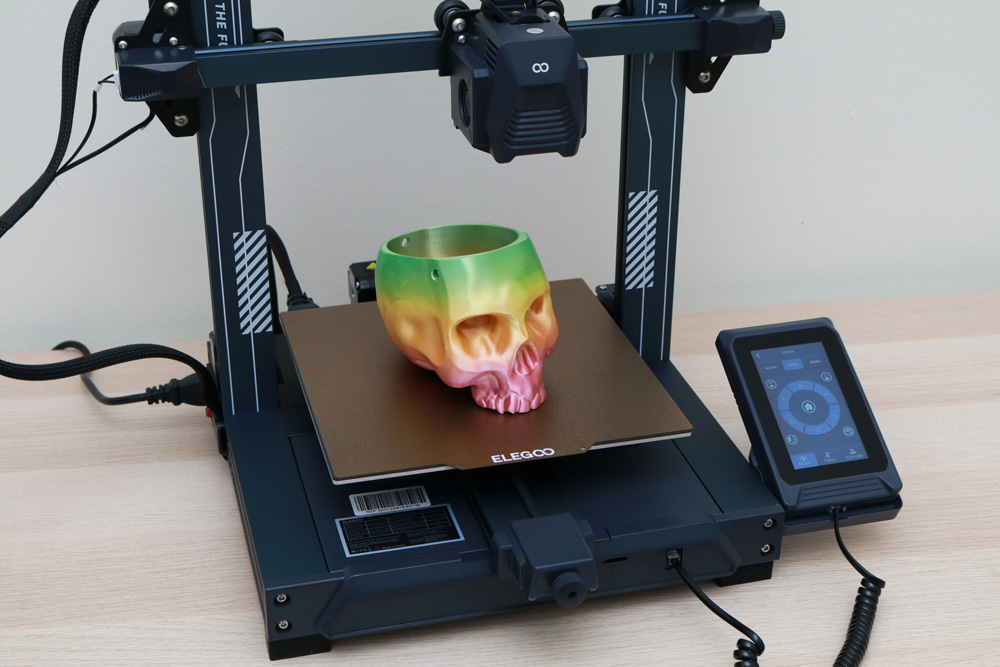
Printed with rainbow PLA, the Hanging Skull Planter by Uncle Jessy shows smooth vertical surfaces and a generally uniform appearance even on steep overhangs. The textured PEI sheet creates a matte textured finish on platform-facing surfaces, and this is evident on the Cali-Dragon by McGybeer. This torture test model looks clean with minimal stringing and a high level of detail, while the bottom surface has a gently textured appearance.
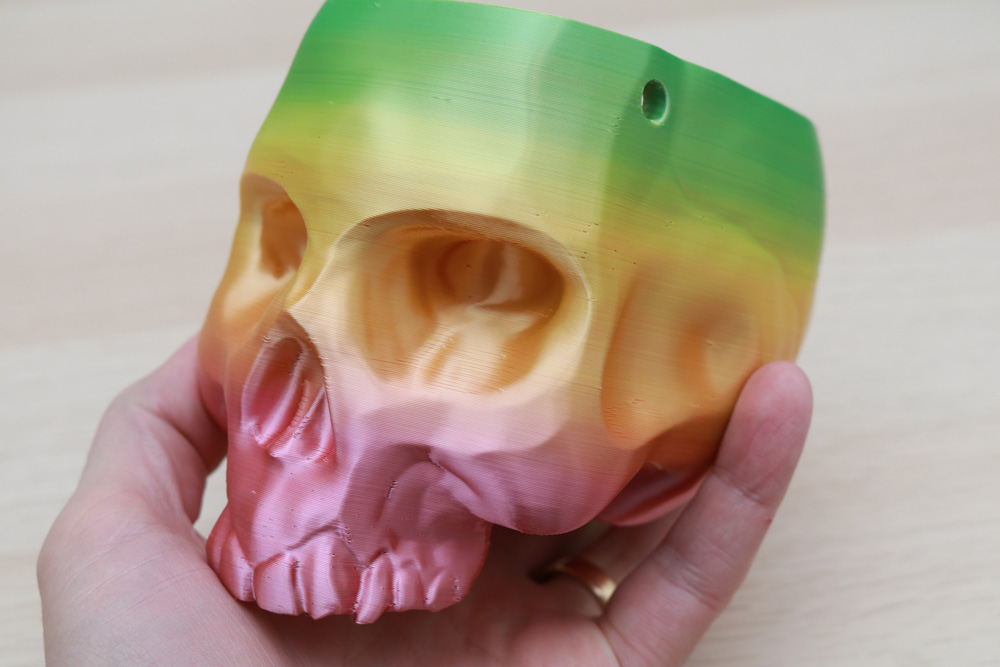
Model by Uncle Jessy
©3DWithUs – Print & Photo: Andrew Sink
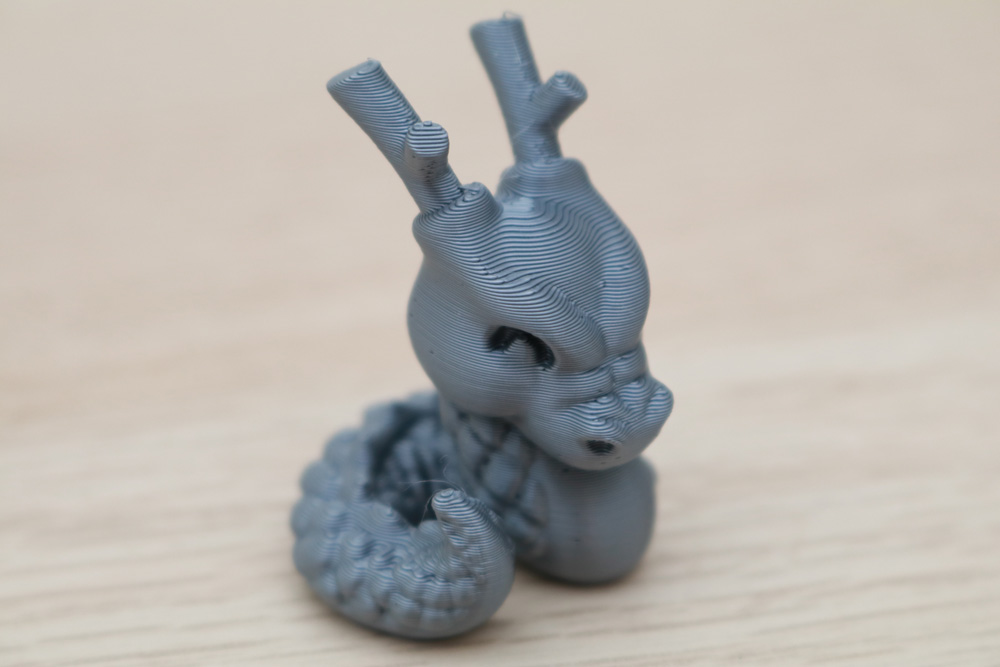
Model by McGyBeer
©3DWithUs – Print & Photo: Andrew Sink
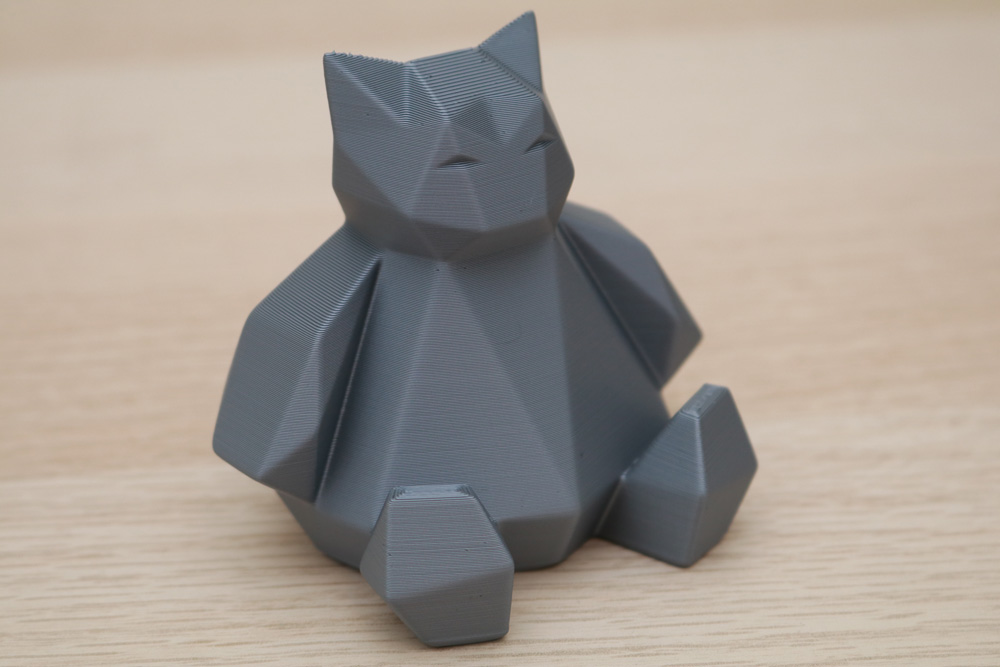
Model by Flowalistik
©3DWithUs – Print & Photo: Andrew Sink
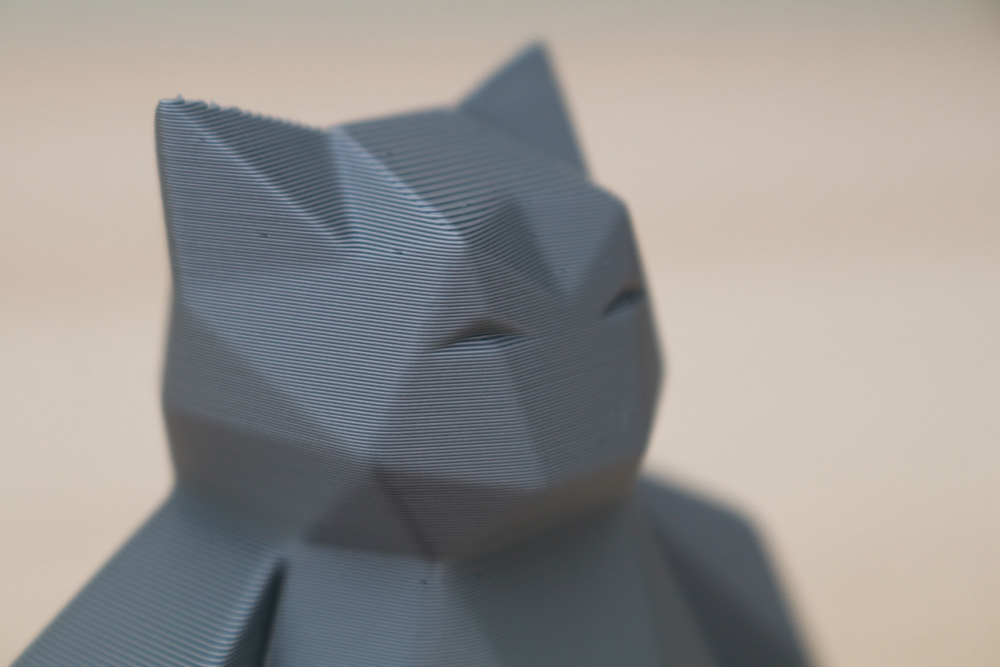
Printed with Prusa Silver PLA, the Low Poly Snorlax by Flowalistik has an impressive surface finish and looks like it was made on a much more expensive printer. The toolpaths are consistent, there is no ringing or other print artifacts visible, and the print just looks good. The textured surface on the PEI build platform locked the print down during printing, and it was easily removed after the surface cooled.
Model by Uncle Jessy
©3DWithUs – Print & Photo: Andrew Sink
Compare to Other 3D Printers
Compare to the similar volume FDM 3D printers in the same $300 price range:
Compare to the Elegoo Neptune series 3D printers:
- Elegoo Neptune 3 Plus (Review)
- Elegoo Neptune 4 (Review)
- Elegoo Neptune 4 Pro (Review)
- Elegoo Neptune 4 Plus (Shop)
- Elegoo Neptune 4 Max (Shop)
Together, the Elegoo Neptune 4, Neptune 4 Pro, Neptune 4 Plus, and Neptune 4 Max constitute the latest products in the Neptune FDM 3D printer series. If some of the machines haven’t been reviewed on our website yet, you can refer to their primary comparison table in the image below to get a general overview.
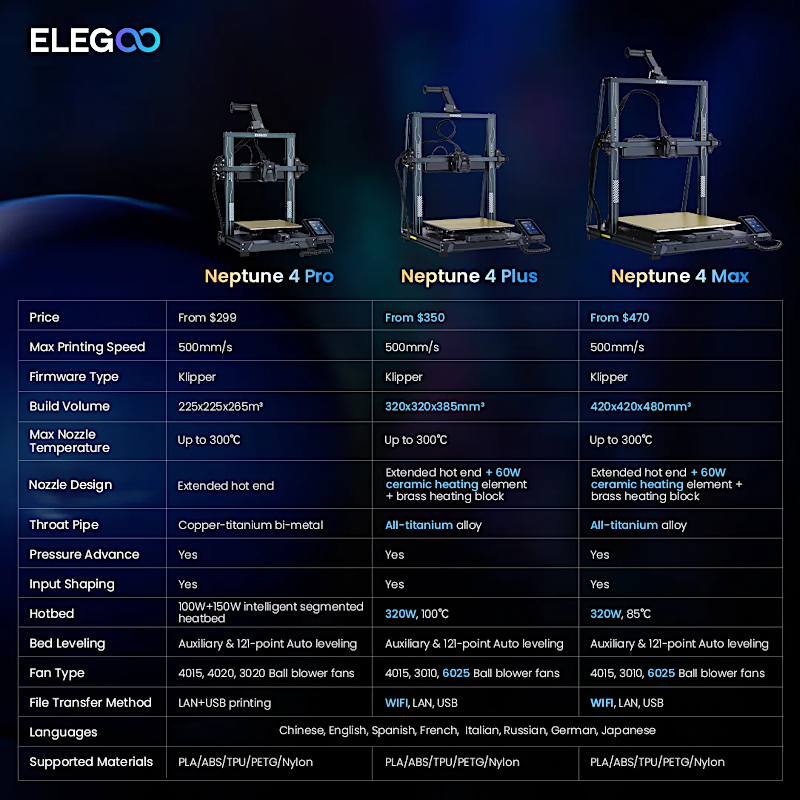
Image: Elegoo
Review Conclusion and Pros & Cons
The Elegoo Neptune 3 Pro feels like the logical conclusion of the i3 style open format 3D printer. It’s quiet, automatically calibrates the build platform, prints TPU with ease, and can be found for under $300. The color touchscreen is bright and intuitive to use, and the bundled software is perfect for novice users who just want to get started printing. In a market saturated with similar machines at a similar price point, it’s hard to see any reason to compete with the Neptune 3 Pro.
Because direct drive extruders are less common at this price range, the Neptune 3 Pro is an excellent choice for users interested in a budget printer capable of printing TPU without sacrificing build quality. While there is a lot of competition at the sub-$300 price point, it’s hard to find a printer that just works as well as the Neptune 3 Pro without making compromises. Printers like the Monoprice Mini Delta V2 are cheaper, but are seriously limited both in volume as well as general capabilities, so it’s easy to justify the jump to the Neptune 3 Pro.
The Elegoo Neptune 3 Pro is available for purchase directly from the Elegoo site with a retail price of $300, but is currently on sale for $230.
Amazon
Official Website
Newer version – Elegoo Neptune 4 Pro
Official Website
Elegoo Neptune 3 Pro Star Rating
Neptune 3 Pro Review Summary
The Elegoo Neptune 3 Pro is an FDM 3D printer with a 225mm x 225mm x 280mm build volume, a dual-gear direct drive extruder, dual Z-axis leadscrews, automatic build platform leveling, and more features than can easily fit in a single sentence. The Neptune 3 Pro is the smallest unit in the new Neptune 3 line-up. With an intro sale price of $230, it’s easy to see the Neptune 3 Pro becoming a widely-adopted printer in the consumer market.
PROS:
– Silent stepper drivers and quiet cooling fans
– Integrated LED light bar
– Automatic build platform leveling
– Dual Z-axis threaded rods and solid motion system
– Direct Drive Extruder
CONS:
– Silk-screened design may be polarizing